If a matching rule in a notification policy is triggered, Application Real-Time Monitoring Service (ARMS) alerts the contacts that you specified, by phone, text message, or email.
Create a contact
Log on to the ARMS console. In the left-side navigation pane, choose .
On the Contacts tab, click Create Contact.
In the Create Contact dialog box, set the following parameters and click OK.
Parameter
Description
Name
The name of the contact.
Phone Number
After you specify the mobile phone number of a contact, alerts are sent by phone or text message.
NoteYou can specify only verified mobile phone numbers. For more information about how to verify a mobile phone number, see the Verify a mobile number section.
Email
After you specify the email address of a contact, the contact is notified by email.
Contact Group
Select the contact group to which you want to add the contact. For more information, see Contact groups.
Method to Resend Notifications If Phone Notifications Fail
Select the method for resending notifications that applies if phone notifications fail.
You can set global default values on the Contacts tab. For more information, see the Default contact settings section.
User ID
The ID of the instant messaging (IM) tool, such as DingTalk, Lark, or WeCom.
A valid user ID can be used to mention a contact within a group.
To mention a contact in a Lark or WeCom group, this field is required. For DingTalk group contacts, it's optional.
ImportantYou must specify either a mobile number or an email address. Each one can be used for a single contact.
A DingTalk chatbot can no longer be configured as a contact. To create a DingTalk chatbot, go to the DingTalk/Lark/WeCom tab. For more information, see DingTalk chatbots. Existing DingTalk chatbots are not affected.
Verify a mobile number
Before specifying a mobile number in a notification policy, you must verify the number.
On the Contacts tab, select one or more contacts whose mobile numbers you want to verify.
For a single contact, find the contact and click Not verified next to the number.
To do multiple numbers at once, select the contacts and click Verify Mobile Numbers.
The system sends text messages to the contacts to verify their numbers.
The contacts use a browser to visit the URL in the text message.
On the verification page that appears, they check the number and click Verify.
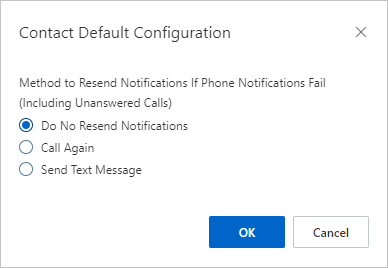
Specify a default method to resend notifications
You can specify a default method for resending notifications when phone notifications fail.
On the Contact tab, choose .
In the dialog box that appears, select a method for resending notifications and click OK.
Manage contacts
After you create contacts, you can search for, edit, and delete them on the Contacts tab.
To edit a contact, click Edit in the Actions column. In the Edit Contact dialog box, change the settings and click OK.
To delete a contact, click Delete in the Actions column. In the dialog box that appears, click OK.
To delete multiple contacts at a time, select them and click Batch Delete. In the dialog box that appears, click OK.