Application Real-Time Monitoring Service (ARMS) can send alert notifications to the O&M engineers on duty based on the specified schedule. You can create a schedule and select the schedule in a notification policy or an escalation policy to remind the O&M engineers on duty to handle unresolved alerts in a timely manner. This topic describes how to create a schedule.
Prerequisites
A DingTalk, Lark, or WeCom group is created to receive shift change notifications. The group contains all relevant O&M engineers.
All relevant O&M engineers are added as contacts in ARMS. For more information, see Contacts.
A chatbot is created for the DingTalk or WeCom group that is used to receive notifications. For more information, see DingTalk chatbots.
Background information
In most cases, enterprises or departments arrange shifts for O&M engineers to ensure that alerts are received and resolved at the earliest opportunity. ARMS allows you to create a schedule to assign shifts to O&M engineers and then select the schedule when you configure a notification policy or an escalation policy. This way, ARMS sends alert notifications only to the O&M engineers who are on duty by phone call, text message, email, or DingTalk message. This improves O&M efficiency.
Create a schedule
- Log on to the ARMS console. In the left-side navigation pane, choose .
Click the Schedule Management tab and then click Create Schedule.
In the text box at the top of the right section, enter a schedule name.
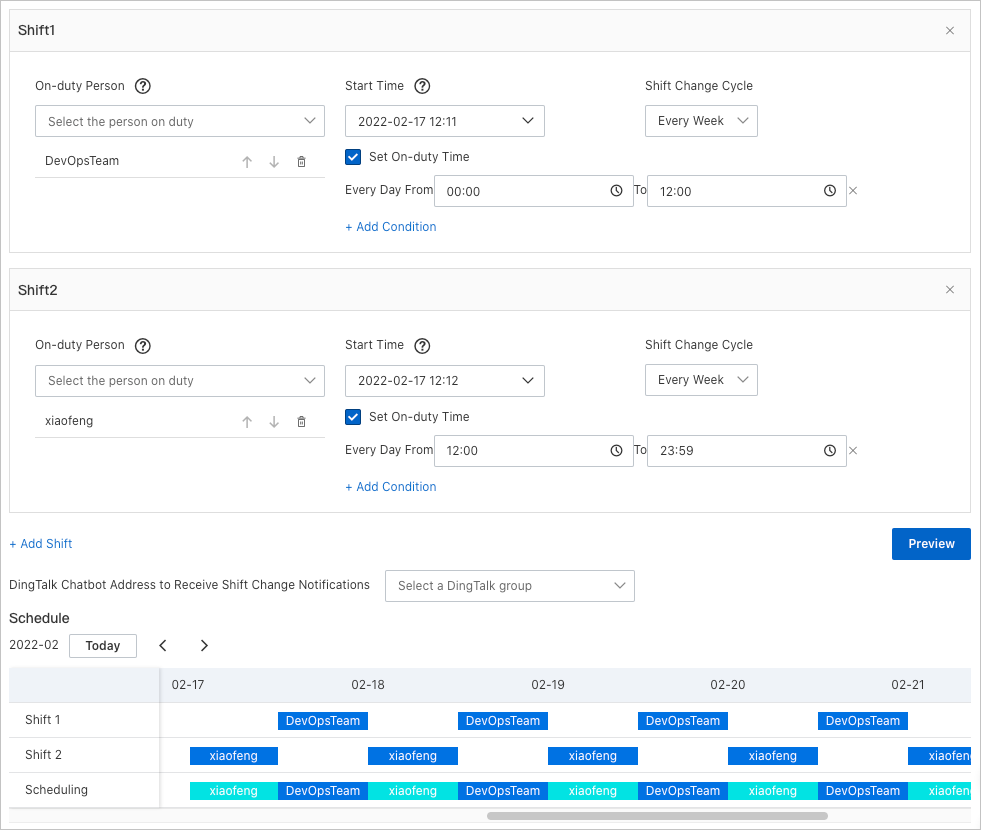
In the Shift 1 section, configure the following parameters.
Parameter
Description
Person on Duty
Specify on-duty contacts of the shift. After you specify contacts, you can adjust the sequence of the contacts. The contacts work the shift based on the sequence that you adjust.
NoteYou can select only O&M engineers who are added as contacts from the Person on Duty drop-down list.
Start Time
Specify the start time of the shift.
Set On-duty Time
Specify the daily time range of the shift.
Shift Change Cycle
Specify the cycle of the shift. Valid values:
Every Day: One contact is on duty for one day during the time range specified by Set On-duty Time. The contacts work the shift for one day based on the sequence that you specify in On-duty Person.
Weekly: One contact is on duty for one week during the time range specified by Set On-duty Time. The contacts work the shift for one week based on the sequence that you specify in On-duty Person.
Custom: One contact is on duty for a specified number of hours during the time range specified by Set On-duty Time. The contacts work the shift for a specified number of hours.
NoteYou can click + Add Shift to create a shift. The values of Set On-duty Time in all shifts cannot overlap.
Click Preview to view the schedule.

Select the chatbot of the chat group created to receive shift change notifications from the Shift Change Notification drop-down list.
Click Save.
After a schedule is created, the schedule is displayed in the left section of the Shift Management tab.
Specify a substitute
If an O&M engineer is unable to work a specific shift in a schedule, you do not have to modify the schedule. You can specify a substitute to cover the shift.
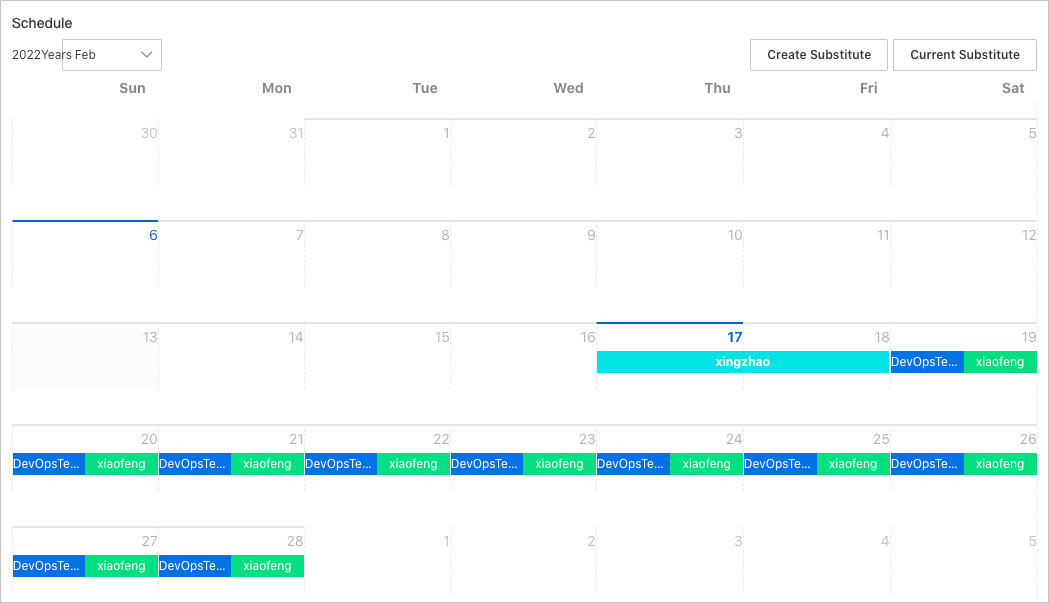
In the left section of the Shift Management tab, click the name of the schedule that you want to manage. On the right section of the tab, click Create Substitute.
In the Create Substitute dialog box, configure the Shift Time and Substitute parameters and then click OK.

You can view the new shift settings in the schedule.

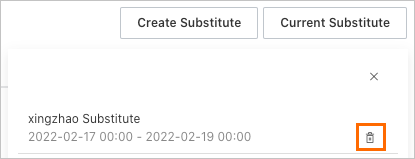
Optional. To change the substitute for the shift, click Current Substitute in the upper-right corner of the tab. In the panel that appears, delete the substitute. Then, specify a new substitute.

Related operations
In the left section of the Shift Management tab, you can perform the following operations:
To view the O&M engineers involved in a schedule, click the
 icon to the left of the schedule name. Then, click the name of an O&M engineer to view the shifts of the O&M engineer.
 To modify or delete a schedule, click the
 icon to the right of the schedule name and then click Edit or Delete.
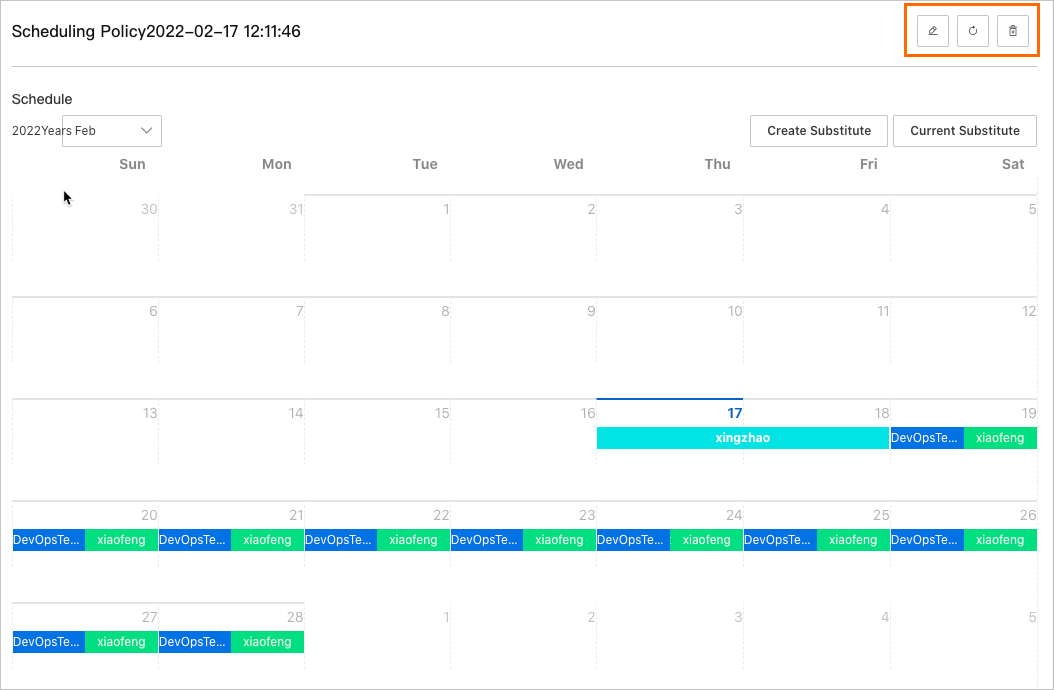
 Click the name of a schedule. In the upper-right corner of the tab, click the corresponding icon to modify, refresh, or delete the schedule.

What to do next
After you create a schedule, you can select the schedule when you configure a notification policy or an escalation policy. This way, alert notifications are sent to the O&M engineers on duty based on the schedule. For more information, see Create and manage a notification policy and Configure an escalation policy.