By Hitesh Jethva, Alibaba Cloud Community Blog author.
Cobbler is a free and open source Linux installation server that can be used to automate the network installation environments from a central location. It allows you to install operating systems automatically on multiple systems simultaneously and also helps you to manage package updates, configuration management, manage DNS, DHCP and much more.
In this tutorial, we will learn how to install and configure Cobbler on an Alibaba Cloud Elastic Compute Service (ECS) CentOS 7 server.
Create a new ECS instance and connect to your instance as the root user.
Once you are logged into your CentOS 7 instance, run the following command to update your base system with the latest available packages.
yum update -yBefore starting, you will need to disable Selinux on the server. You can do this by editing /etc/selinux/config file:
nano /etc/selinux/configMake the following changes:
SELINUX=disabledSave and close the file. Then, restart your server to apply the changes.
By default, Cobbler is not available in the CentOS 7 default repository. So you will need to add EPEL repository to your server. You can add it with the following command:
yum install epel-release -yOnce the repository has been installed, you can install Cobbler with other required packages by running the following command:
yum install cobbler cobbler-web dnsmasq syslinux pykickstart xinetd fence-agents debmirror dhcp bindOnce all the packages are installed, start cobblered tftp rsyncd and httpd services and enable them to start on boot time with the following command:
systemctl start cobblerd
systemctl start tftp
systemctl start rsyncd
systemctl start httpd
systemctl enable cobblerd
systemctl enable tftp
systemctl enable rsyncd
systemctl enable httpd
Check the status of cobblerd service with the following command:
systemctl status cobblerdYou can also check the status of tftp service with the following command:
systemctl status tftpYou will need to edit tftp configuration file and make some changes. You can do this with the following command:
nano /etc/xinetd.d/tftpMake the following changes:
disable = 0Save and close the file, when you are finished.
Cobbler default configuration file located at /etc/cobbler/settings. Before configuring Cobbler, you will need to generate encrypt password. You can do this with the following command:
openssl passwd -1You should see the following output:
Password:
Verifying - Password:
$1$k/LlL8M0$2V8s/Yx6n6lqnHwGPlrPo1
Next, open /etc/cobbler/settings file with the following command:
nano /etc/cobbler/settingsMake the following changes:
default_password_crypted: "$1$k/LlL8M0$2V8s/Yx6n6lqnHwGPlrPo1"
manage_dhcp: 1
manage_dns: 1
pxe_just_once: 1
next_server: 192.168.0.104
server: 192.168.0.104
Save and close the file, when you are finished. Then, open /etc/cobbler/dhcp.template file:
nano /etc/cobbler/dhcp.templateMake the following changes:
subnet 192.168.0.0 netmask 255.255.0.0 {
     option routers             192.168.0.104;
     option domain-name-servers 192.168.0.104;
     option subnet-mask         255.255.0.0;
     range dynamic-bootp        192.168.0.150 192.168.1.254;
     default-lease-time         21600;
     max-lease-time             43200;
     next-server                $next_server;
     class "pxeclients" {
          match if substring (option vendor-class-identifier, 0, 9) = "PXEClient";
          if option pxe-system-type = 00:02 {
                  filename "ia64/elilo.efi";
          } else if option pxe-system-type = 00:06 {
                  filename "grub/grub-x86.efi";
          } else if option pxe-system-type = 00:07 {
                  filename "grub/grub-x86_64.efi";
          } else if option pxe-system-type = 00:09 {
                  filename "grub/grub-x86_64.efi";
          } else {
                  filename "pxelinux.0";
          }
     }

}
Save and close the file. Then, open /etc/cobbler/dnsmasq.template file:
nano /etc/cobbler/dnsmasq.templateMake the following changes:
dhcp-range=192.168.0.150,192.168.0.254Save and close the file. Then, download all the loaders with the following command:
cobbler get-loadersYou should see "TASK COMPLETE" in the output.
Open the debmirror.conf file:
nano /etc/debmirror.confMake the following changes:
#@dists="sid";
#@arches="i386";
Save and close the file. Then, restart Cobblerd and xinetd with the following command:
systemctl restart xinetd
systemctl restart cobblerd
Sync all the changes to Cobbler with the following command:
cobbler check
cobbler sync
You should see "TASK COMPLETE" in the output.
You will need to copy CentOS-7 ISO file to your server and mount it on /mnt/iso directory.
First, create a directory with the following command:
mkdir /mnt/isoNext, mount the ISO file to /mnt/iso with the following command:
mount -o loop CentOS-7-x86_64-Minimal-1503-01.iso /mnt/iso/Import the ISO contents to Cobbler with the following command:
cobbler import --arch=x86_64 --path=/mnt/iso --name=CentOS7Update the signature with the following command:
cobbler signature updateYou should see "TASK COMPLETE" in the output.
You can verify the Cobbler distro list with the following command:
cobbler distro listYou should see your distro in the following output:
CentOS7-x86_64You can also see a detailed report of your distro with the following command:
cobbler distro report --name=CentOS7-x86_64You should see the following output:
Name                           : CentOS7-x86_64
Architecture                   : x86_64
TFTP Boot Files                : {}
Breed                          : redhat
Comment                        :
Fetchable Files                : {}
Initrd                         : /var/www/cobbler/ks_mirror/CentOS7-x86_64/images/pxeboot/initrd.img
Kernel                         : /var/www/cobbler/ks_mirror/CentOS7-x86_64/images/pxeboot/vmlinuz
Kernel Options                 : {}
Kernel Options (Post Install)  : {}
Kickstart Metadata             : {'tree': 'http://@@http_server@@/cblr/links/CentOS7-x86_64'}
Management Classes             : []
OS Version                     : rhel7
Owners                         : ['admin']
Red Hat Management Key         : <<inherit>>
Red Hat Management Server      : <<inherit>>
Template Files                 : {}
Create a kickstart file for CentOS-7. You can do it with the following command:
nano /var/lib/cobbler/kickstarts/CentOS7.ksAdd the following lines:
# Firewall configuration
firewall --disabled
# Install OS instead of upgrade
install
# Use HTTP installation media
url --url="http://192.168.0.104/cblr/links/CentOS7-x86_64/"

# Root password
rootpw --iscrypted $1$k/LlL8M0$2V8s/Yx6n6lqnHwGPlrPo1

# Network information
network --bootproto=dhcp --device=eth0 --onboot=on

# Reboot after installation
reboot

# System authorization information
auth useshadow passalgo=sha512

# Use graphical install
graphical

firstboot disable

# System keyboard
keyboard us

# System language
lang en_US

# SELinux configuration
selinux disabled

# Installation logging level
logging level=info

# System timezone
timezone Europe/Amsterdam

# System bootloader configuration
bootloader location=mbr

clearpart --all --initlabel
part swap --asprimary --fstype="swap" --size=1024
part /boot --fstype xfs --size=500
part pv.01 --size=1 --grow
volgroup root_vg01 pv.01
logvol / --fstype xfs --name=lv_01 --vgname=root_vg01 --size=1 --grow

%packages
@^minimal
@core
%end
%addon com_redhat_kdump --disable --reserve-mb='auto'
%end
Save and close the file. Then, sync the updated profile to the Cobbler with the following command:
cobbler profile edit --name=CentOS7-x86_64 --kickstart=/var/lib/cobbler/kickstarts/CentOS7.ks
cobbler sync
You should see "TASK COMPLETE" in the output.
Cobbler is now installed and configured, it's time to install CentOS-7 on the client machine from Cobbler server.
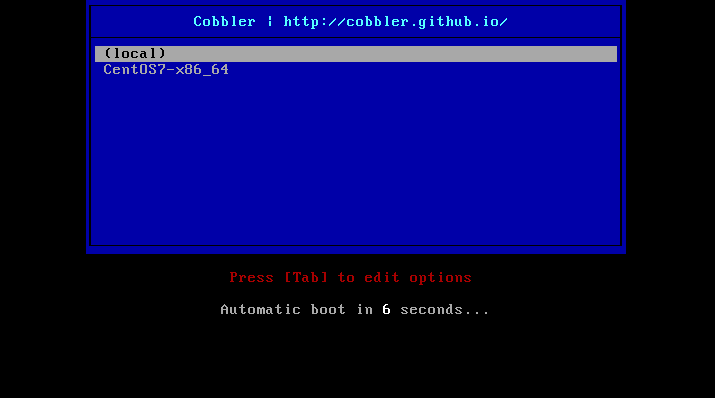
To do so, start Client machine open BIOS and enable boot from network. Then, save the BIOS settings and restart your machine. Your machine is now booting from CentOS-7 ISO located at Cobbler server. You should see the following page:

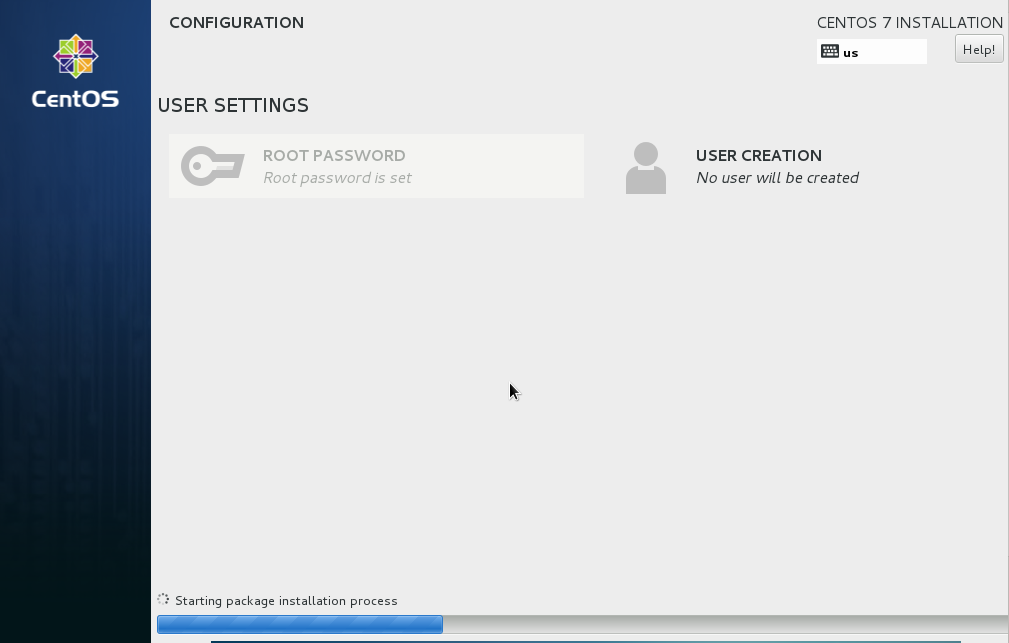
Select CentOS7 and press Enter to start the installation as shown in the following page:


39 posts | 6 followers
FollowAlibaba Clouder - August 16, 2019
Hiteshjethva - December 12, 2019
Hiteshjethva - December 12, 2019
Sajid Qureshi - August 8, 2018
Alibaba Clouder - October 26, 2018
GhulamQadir - January 1, 2020

39 posts | 6 followers
Follow Robotic Process Automation (RPA)
Robotic Process Automation (RPA) allows you to automate repetitive tasks and integrate business rules and decisions into processes.
Learn More Accelerated Global Networking Solution for Distance Learning
Alibaba Cloud offers an accelerated global networking solution that makes distance learning just the same as in-class teaching.
Learn More Networking Overview
Connect your business globally with our stable network anytime anywhere.
Learn More Super App Solution for Telcos
Alibaba Cloud (in partnership with Whale Cloud) helps telcos build an all-in-one telecommunication and digital lifestyle platform based on DingTalk.
Learn MoreMore Posts by Hiteshjethva