By Hitesh Jethva, Alibaba Cloud Community Blog author.
Shinken is a free and open source system and network monitoring framework written in python and based on Nagios core. It works by monitoring hosts and services, gathers performance data and alerts users when error conditions occur. Shinken can be scaled to the LAN, through the DMZs and even across several data centers. It is used to monitor different network services and host resources such as processor load, disk usage, system log, and memory usage.
In this tutorial, we will learn how to install and configure Shinken Monitoring Tool on Ubuntu 18.04 server with an Alibaba Cloud Elastic Compute Service (ECS) instance.
Create a new ECS instance, choosing Ubuntu 16.04 as the operating system with at least 2GB RAM, and connect to your instance as the root user.
Once you are logged into your Ubuntu 18.04 instance, run the following command to update your base system with the latest available packages.
apt-get update šCyBefore starting, you will need to install some required packages to your system. You can install all of them with the following command:
apt-get install python-pip python-pycurl python-cherrypy3 python-setuptools git -yNext, add user for Shinken with the following command;
useradd -m -s /bin/bash shinkenFirst, you will need to download the latest version of Shinken from Git repository. You can download it with the following command:
git clone https://github.com/naparuba/shinken.gitYou should see the following output:
Cloning into 'shinken'...
remote: Enumerating objects: 70916, done.
remote: Total 70916 (delta 0), reused 0 (delta 0), pack-reused 70916
Receiving objects: 100% (70916/70916), 48.88 MiB | 181.00 KiB/s, done.
Resolving deltas: 100% (51043/51043), done.
Change the directory to the shinken and checkout the latest branch with the following command:
cd shinken

git checkout 2.4.3
Install Shinken server by running the following command:
python setup.py installOnce the installation has been completed successfully, you should see the output "Shinken setup done".
Next, start the Shinken service with the following command:
/etc/init.d/shinken startYou can check the status of Shinken service with the following command:
/etc/init.d/shinken statusYou will need to install Webui2 (Shinken Web Interface) using the shinken command.
First, log in with shinken user:
su - shinkenNext, initialize the shinken configuration with the following command:
shinken --initInstall Webui2 with the following command:
shinken install webui2Exit from the shinken user and install MongoDB and other python package with the following command:
apt-get install mongodb
pip install pymongo>=3.0.3 requests arrow bottle==0.12.8
You will need to define webui2 module in broker-master.cfg file. You can do this with the following command:
nano /etc/shinken/brokers/broker-master.cfgMake the following changes:
modules webui2Save and close the file. Then, open admin.cfg file and set your admin password:
nano /etc/shinken/contacts/admin.cfgMake the following changes:
contact_name    admin
password passwordYou will need to install Nagios-plugins to your system. You can do this with the following command:
apt-get install nagios-plugins* cpanminusInstall the required Perl modules with the following command:
cpanm Net::SNMP
cpanm Time::HiRes
cpanm DBI
Create new link for utils.pm file to shinken the directory and create a new directory for Log_File_Health:
chmod u+s /usr/lib/nagios/plugins/check_icmp
ln -s /usr/lib/nagios/plugins/utils.pm /var/lib/shinken/libexec/
mkdir -p /var/log/rhosts/
touch /var/log/rhosts/remote-hosts.log
Log in to shinken user and ssh and linux-snmp for monitoring SSH and SNMP with the following command:
su - shinken
shinken install ssh
shinken install linux-snmpYou will need to configure a new Linux host to monitored from Shinken server.
First, log in to Shinken client instance and Install the snmp and snmpd packages with the following command:
apt-get install snmp snmpd -yNext, open snmpd.conf file and make some changes:
nano /etc/snmp/snmpd.confMake the following changes:
#agentAddress  udp:127.0.0.1:161
agentAddress udp:161,udp6:[::1]:161
#rocommunity mypass  default    -V systemonly
#rocommunity6 mypass  default   -V systemonly
rocommunity password
Save and close the file. Then, start the snmpd service with the following command:
systemctl start snmpdNext, you will need to define the new host on Shinken server instance.
Go to the Shinken server instance and create a new file /etc/shinken/hosts/host-one.cfg:
nano /etc/shinken/hosts/host-one.cfgAdd the following lines:
define host{
        use                 generic-host,linux-snmp,ssh
        contact_groups      admins
        host_name           host-one
        address             192.168.0.249
        _SNMPCOMMUNITY      password        # SNMP Pass Config on snmpd.conf
    }
Save and close the file. Then, open SNMP configuration file:
nano /etc/shinken/resource.d/snmp.cfgMake the following changes:
$SNMPCOMMUNITYREAD$=passwordSave and close the file. Then, restart Shinken service with the following command:
/etc/init.d/shinken restartShinken Server and Client is now configured, it's time to access Shinken Web Interface.
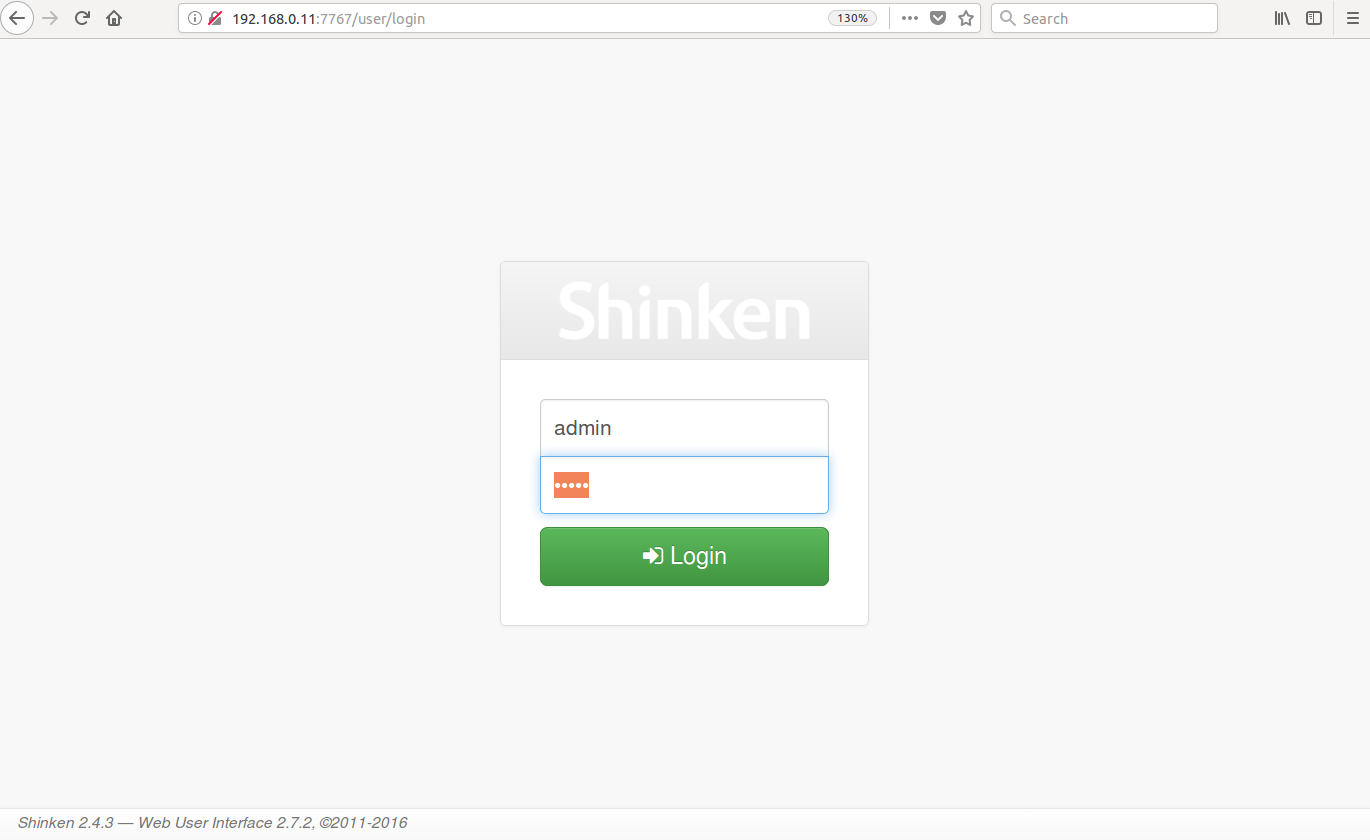
Open your web browser and type the URL http://192.168.0.11:7767. You will be redirected to the following page:

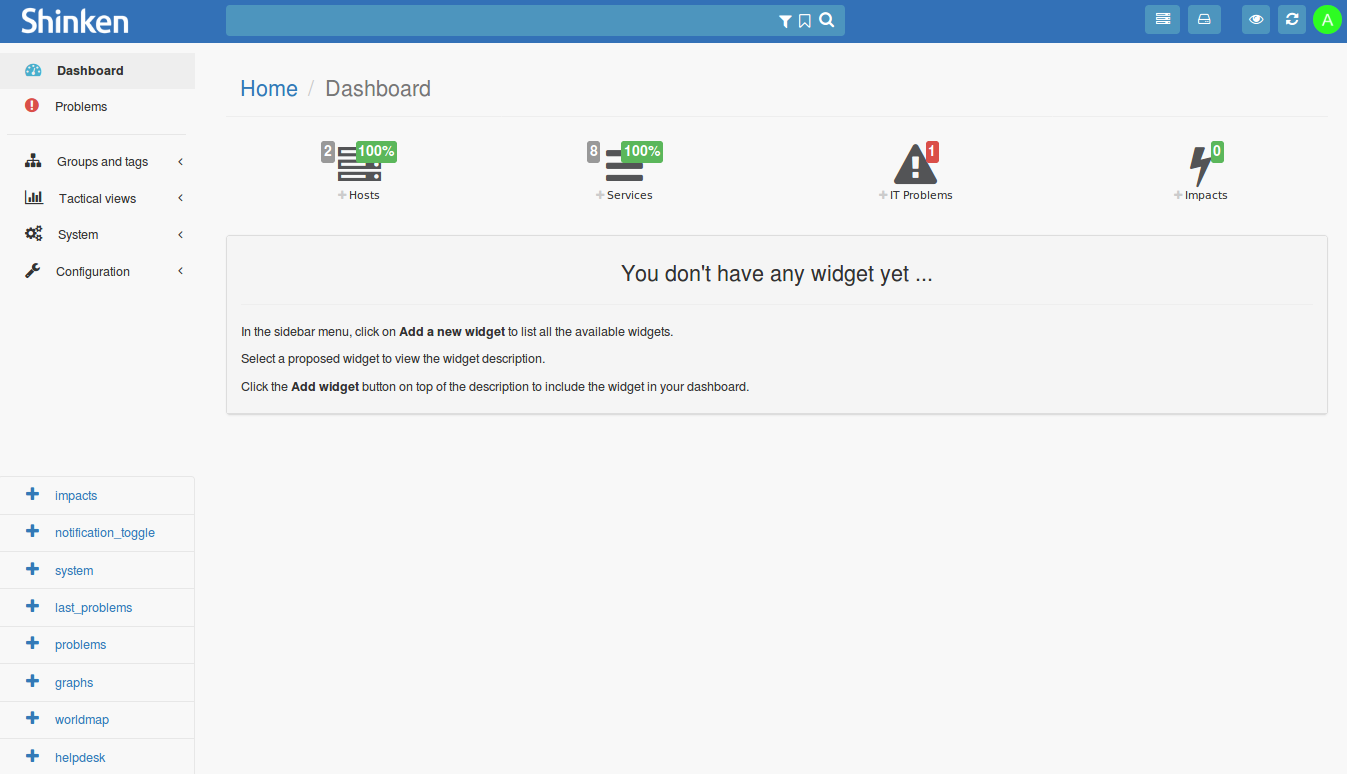
Provide your admin username and password, then click on the Login button. You will be redirected to the Shinken Dashboard as shown below:

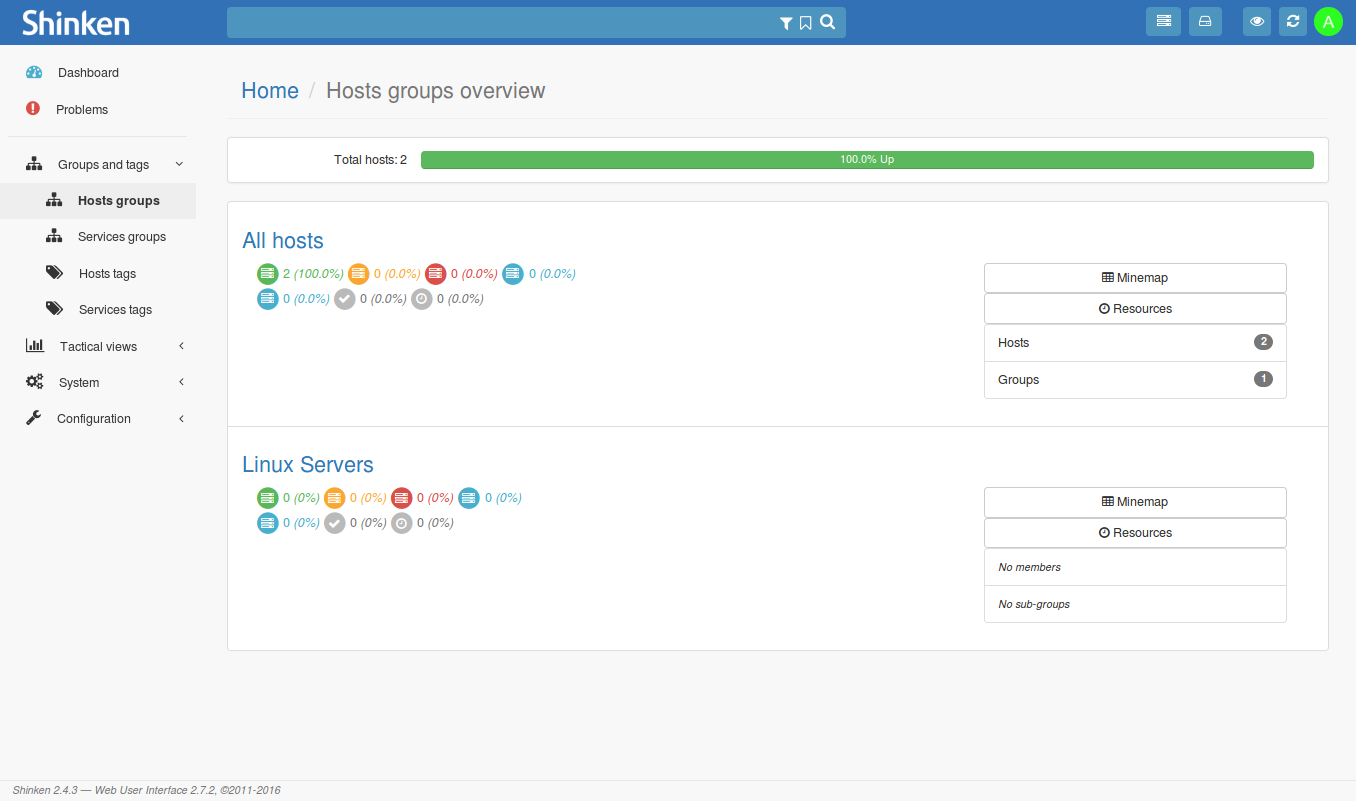
Click on the Groups and tags on the left pane, you should see the following page:

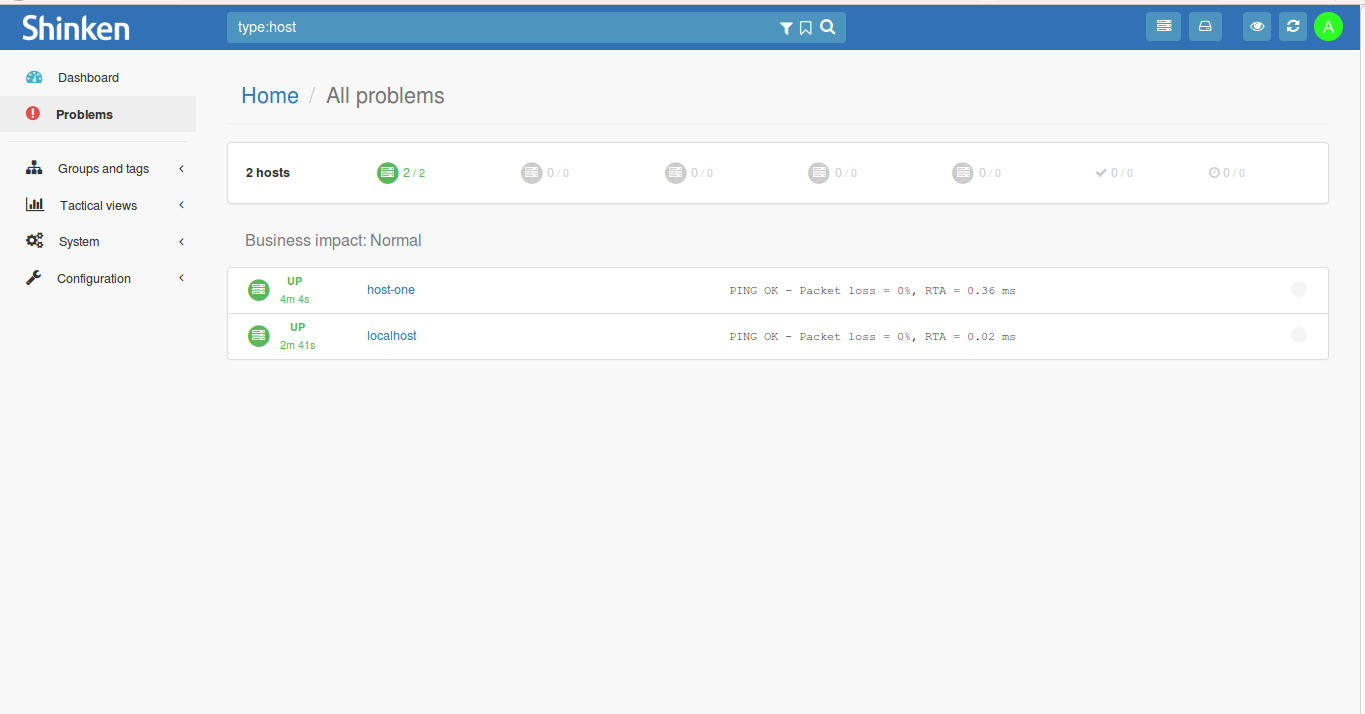
Now, click on the All Hosts button, you should see all the hosts in the following image:


39 posts | 6 followers
FollowHiteshjethva - March 2, 2020
Hiteshjethva - January 8, 2020
Hiteshjethva - March 2, 2020
Alex - June 21, 2019
Hiteshjethva - March 2, 2020
Alibaba Clouder - September 28, 2018

39 posts | 6 followers
Follow Managed Service for Prometheus
Multi-source metrics are aggregated to monitor the status of your business and services in real time.
Learn More Application Real-Time Monitoring Service
Build business monitoring capabilities with real time response based on frontend monitoring, application monitoring, and custom business monitoring capabilities
Learn More Resource Management
Organize and manage your resources in a hierarchical manner by using resource directories, folders, accounts, and resource groups.
Learn More Super App Solution for Telcos
Alibaba Cloud (in partnership with Whale Cloud) helps telcos build an all-in-one telecommunication and digital lifestyle platform based on DingTalk.
Learn MoreMore Posts by Hiteshjethva