This topic describes how to manage test cases, including how to create a test case, import a test case, batch import scripts, and add test case parameters.
Prerequisites
(Optional) A test case library version is created for the specified app. For more information, see Create a test case library version.
Create a test case
Log on to the Mobile Testing console.
In the left-side navigation pane, choose Testing Management > Test Case. The Scripts tab appears.
Select a test case library and a test case library version from the Case Library drop-down list.

Click the Test Case Management tab. If no data is displayed on the right side of the tab, click Create Test Case. You can also click the More icon to the right of Test Case Directory and select Create Test Case. The Create Test Case panel appears.
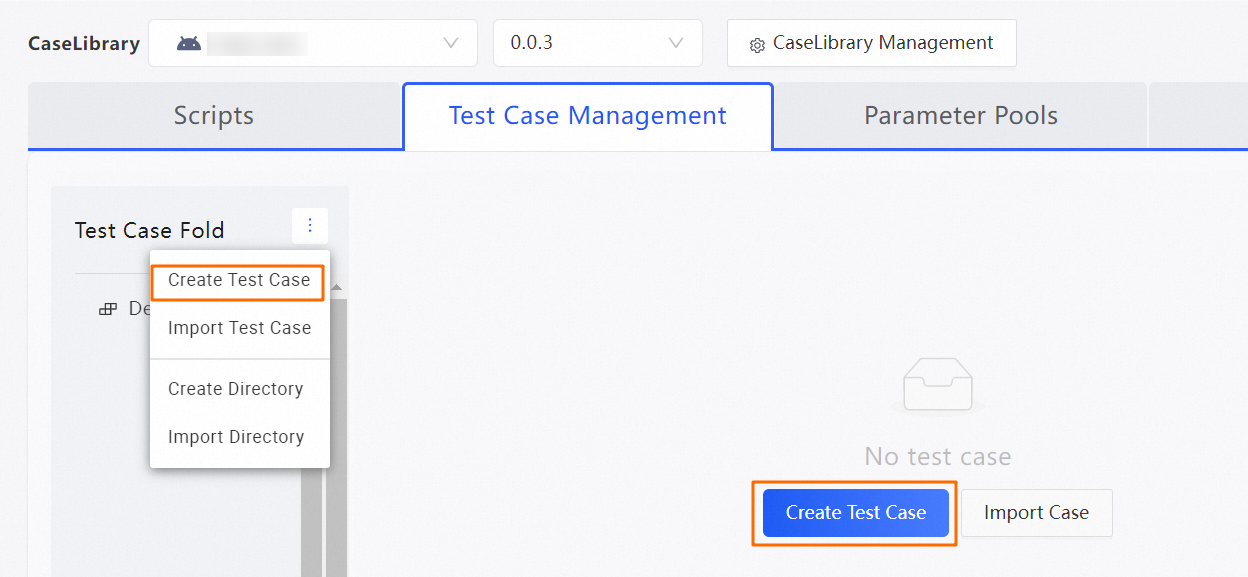
In the Create Test Case panel, configure the parameters.
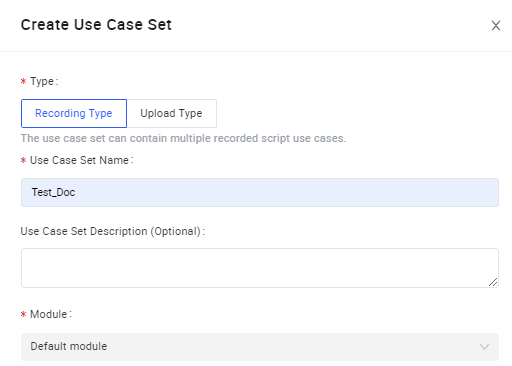 The following table describes the parameters.
Parameter
Description
Type
The type of the test case. Valid values:
Recording Type: A test case of this type can contain one or more scripts generated by online recording.
Upload Type: A test case of this type can contain only a single uploaded script.
Test Case Name
The name of the test case.
The name must be a string.
The name must be 2 to 15 characters in length.
The name can contain letters, digits, and underscores (_).
Test Case Description
The description of the test case. The description facilitates subsequent query and review.
Directory
The directory to which the test case belongs.
NoteYou must set a custom directory in advance or use the default directory. For more information, see Create and import directories.
Click OK.
The created test case is displayed in the left-side hierarchy tree for the current test case library version. After you click the test case, the relevant content is displayed on the right side of the tab.
Import a test case
In the left-side navigation pane, choose Testing Management > Test Case. The Scripts tab appears.
Select an app and a test case library version from the Case Library drop-down list.
Click the Test Case Management tab. If no data is displayed on the right side of the tab, click Import Case. You can also click the More icon to the right of Test Case Directory and select Import Test Case. The Import Test Case panel appears.
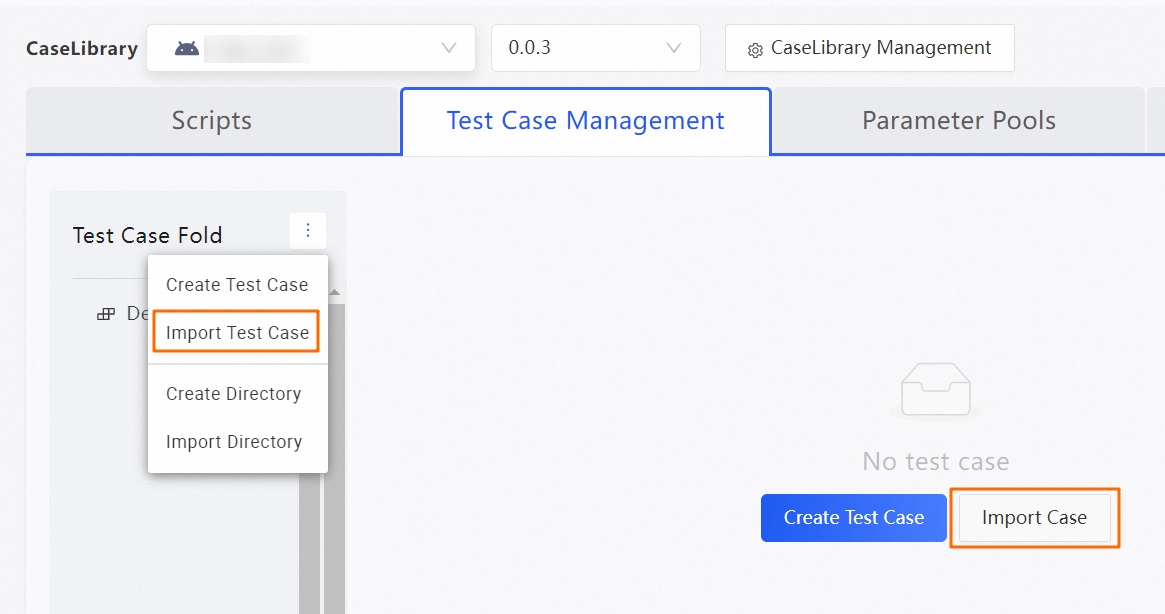
In the Import Test Case panel, configure the parameters.
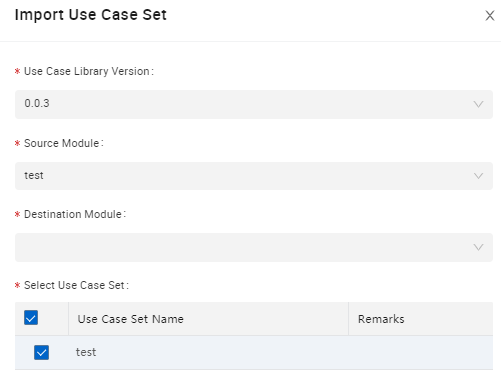
The following table describes the parameters.
Parameter
Description
Test Case Library Version
The version of the test case library to which the source test case belongs.
Source Directory
The directory to which the source test case belongs.
Destination Directory
The destination directory in the current test case library to which to import the source test case.
Select Test Case
The source test case.
Click OK to import the specified test case to the destination directory in the current test case library version.
The imported test case is displayed in the left-side hierarchy tree for the current test case library version. After you click the test case, the relevant content is displayed on the right side of the tab.
Batch import scripts
A Recording Type test case can contain one or more scripts generated by means of online recording. If you require multiple scripts in a test case, you can batch import scripts to the test case.
The Import Script feature applies only to Recording Type test cases.
In the left-side navigation pane, choose Testing Management > Test Case. The Scripts tab appears.
Select an app and a test case library version from the Case Library drop-down list.
Click the Test Case Management tab. In the hierarchy tree for the test case library version, click a test case. The editing page of the test case appears on the right side.
On the editing page of a Recording Type test case, click Import Script. The Batch Import Scripts into Test Case panel appears.
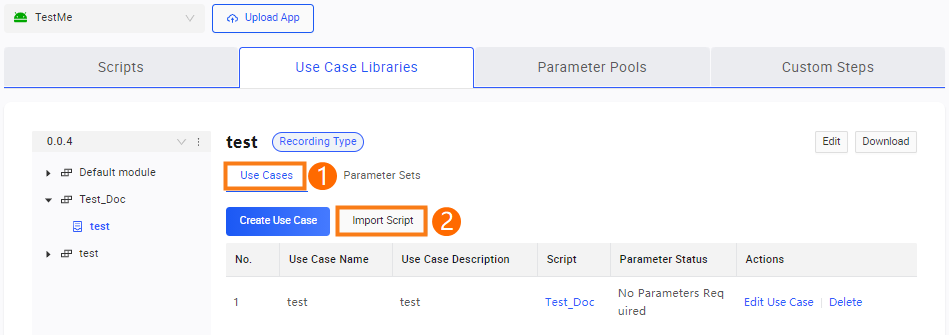
In the Batch Import Scripts into Test Case panel, select one or more recorded scripts.
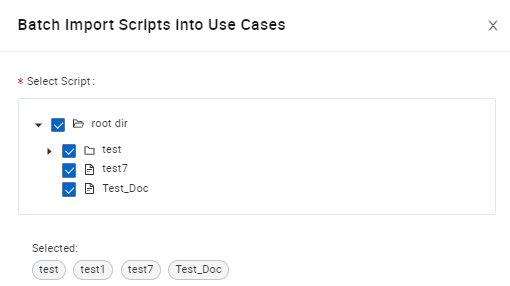
Click OK to add the selected scripts to the test case.
On the Test Case Management tab, view the batch imported scripts of the test case.
Add test case parameters
The Add Parameter feature applies only to Recording Type test cases.
The value of a test case parameter overwrites the value of a common parameter that has the same name as the test case parameter.
On the editing page of a Recording Type test case, click the Parameter tab.
On the Parameter tab, select a created parameter group from the Parameter Group drop-down list or use the default parameter group.
NoteYou must configure parameter groups in advance. For more information, see Create a parameter group.
If the specified parameter group contains added or imported parameters, these parameters are saved as common parameters for the test case.
Configure parameters.
You must configure parameter groups in advance. For more information, see Create a parameter group.
If the specified parameter group contains added or imported parameters, these parameters are saved as common parameters for the test case.

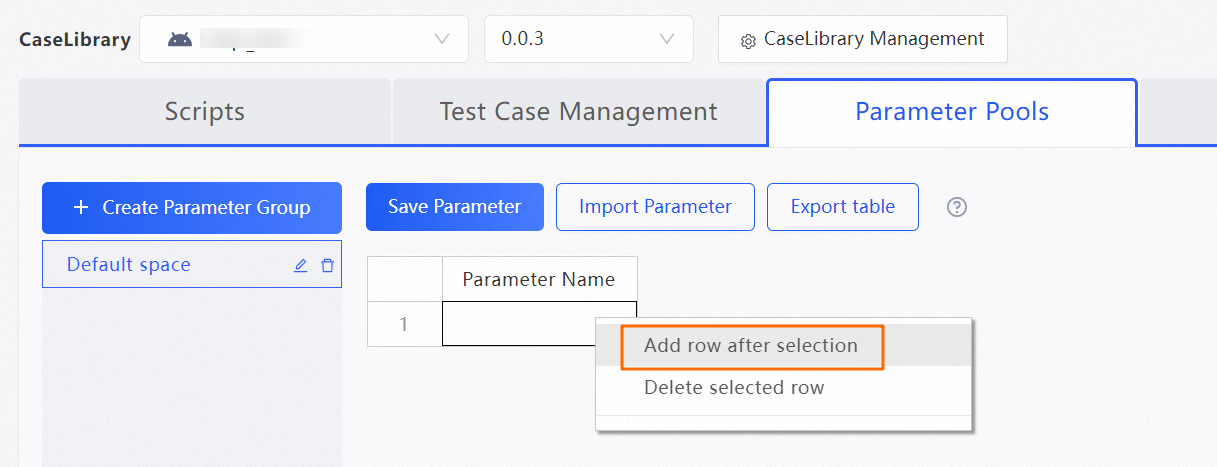
To add multiple parameters, right-click a configured parameter name and select Add row after selection. For more information, see Create a parameter group.
 Note
NoteA parameter name can contain only letters, digits, and underscores (_).
If a parameter is named account and you select the Account Conflict option when you submit a functional test, the same phone cannot run two test cases with the same account parameter at the same time.
After you configure parameters, click Save Parameter.