This topic describes how to create, design, and publish flows in Chat Flow.
Overview
Using Chat Flow involves five main steps:
Create a flow: Create a new flow from scratch or import a JSON file exported from another flow.
Design the flow on the canvas: Drag components onto the canvas and configure their settings to build your flow.
Publish the flow: When your design is complete, publish the flow to make it live.
Update the flow (Optional): After saving or publishing a flow, you can edit its basic information and other settings.
Delete the flow (Optional): You can delete flows that you no longer need.
Before you begin
Chat Flow uses components that connect to different messaging channels, including WhatsApp, Viber, Messenger, and Instagram. Before you begin, complete the following preparations as needed:
Register an Alibaba Cloud account and complete enterprise identity verification.
Activate Chat App Message Service.
To send WhatsApp messages:
Register a WhatsApp Business Account (WABA) and bind the approved account to a channel.
To send Viber business messages:
Apply for a Viber Service ID and get it approved by Viber.
To send Messenger messages:
To send Instagram messages:
Procedure
Step 1: Create a flow
Create a flow using the method that best suits your needs.
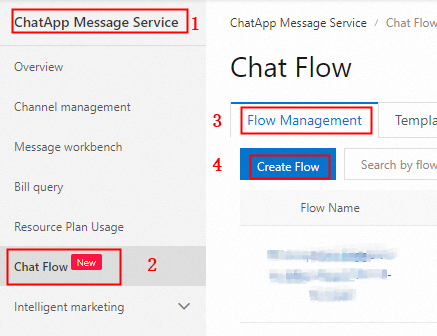
Go to the Create Flow page: In the Chat App Message Service console, choose Chat Flow in the left navigation pane. On the Flow Management page, click Create Flow.
Choose a creation method: Select one of the following methods to create your flow: Create on Blank Canvas, Import Flow, or Create Based on Template.
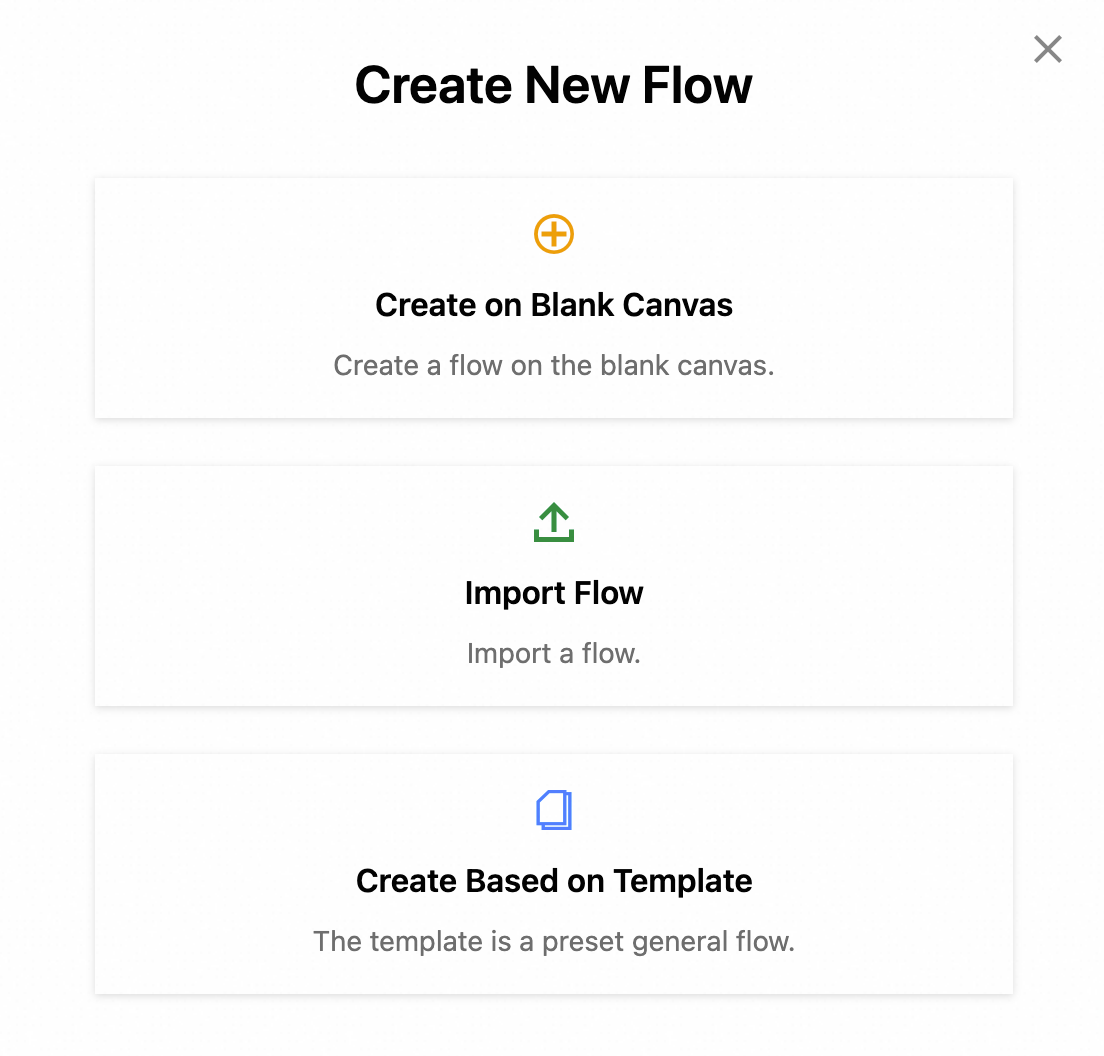
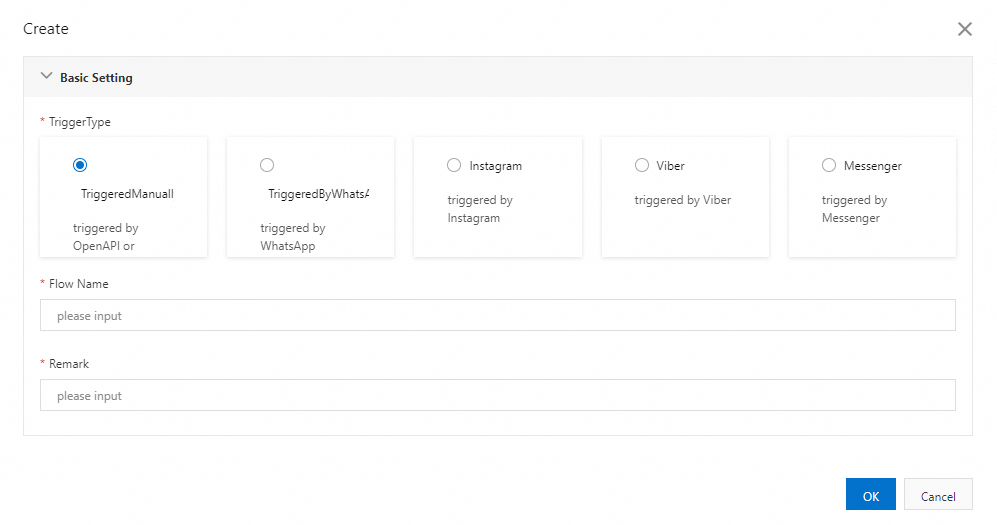
Create on Blank Canvas
Create a flow from scratch on a blank canvas.
Trigger type
Description
Manual
Triggered by API operations or marketing campaigns.
WhatsApp
Triggered by a WhatsApp message.
Instagram
Triggered by an Instagram message.
Viber
Triggered by a Viber message.
Messenger
Triggered by a Messenger message.
Import Flow
Upload a JSON file exported from another flow. This method creates an identical copy of the original flow.
Create Based on Template
In the dialog box, select a template from the View Template drop-down list and click OK.
NoteAlternatively, on the Chat Flow page, click the View Template tab. You can select a template, edit its components as needed, and then click Create Flow.
Configure basic information: Enter a flow name and description, then click OK to create the flow.
 Note
NoteYou need to configure basic information only when you create a flow from a blank canvas or import a flow.
Step 2: Orchestrate the components
Design and orchestrate your flow on the canvas.
Open the canvas: In the Chat App Message Service console, choose Chat Flow in the left navigation pane. On the Flow Management tab, click a flow name.
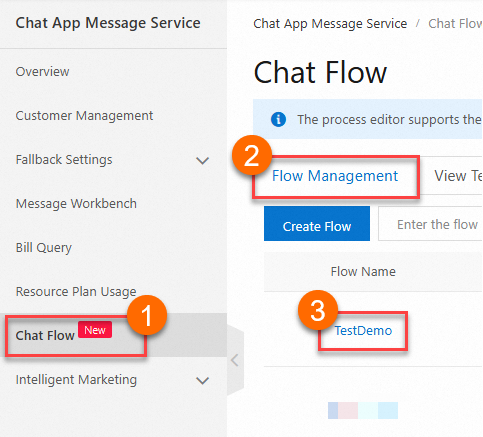
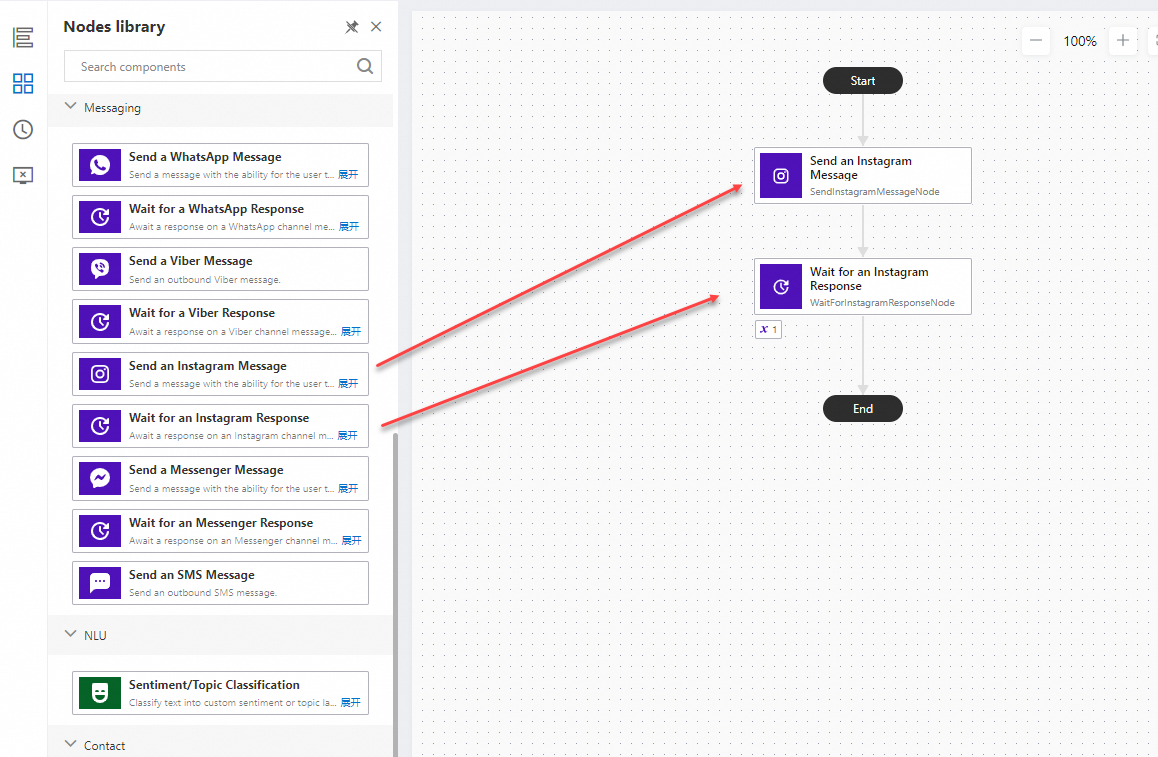
Orchestrate the components: On the canvas, click the Component Library icon. Drag and drop the desired components to the canvas. Place components between the Start and End nodes, or click the
 icon between the Start and End nodes.
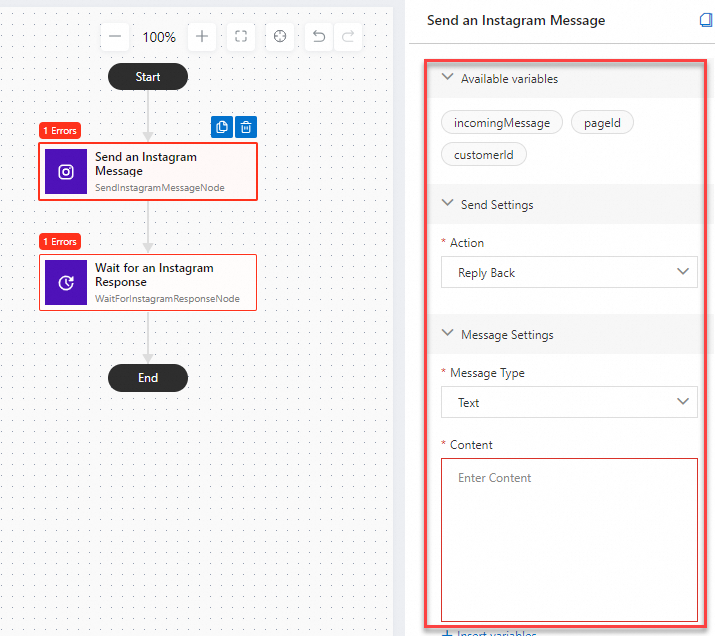
Configure the components: Configure the settings for each component. For more information, see Chat Flow components.
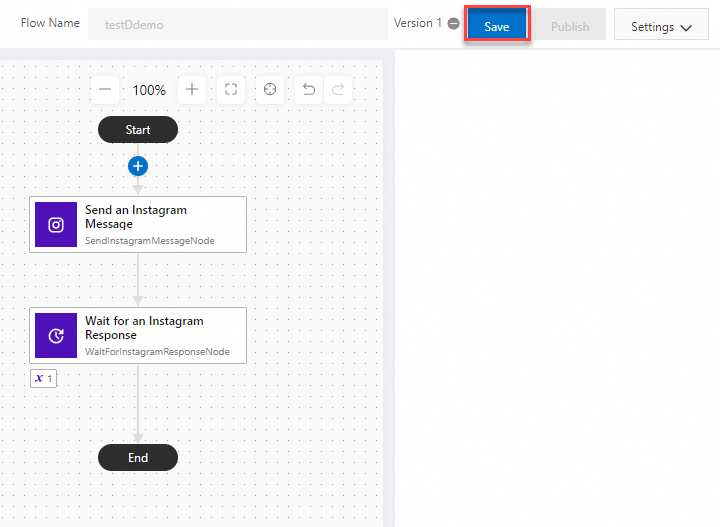
Save the flow: After you finish designing the flow, click Save.
 Note
NoteTo prevent data loss, save your progress frequently while you design the flow.
Step 3: Publish the flow
Publish the flow that you designed on the canvas. For flows that are triggered by user replies, the flow triggers only after it is published and associated with a marketing campaign. For more information, see Manage marketing campaigns.
Open the canvas: In the Chat App Message Service console, choose Chat Flow in the left navigation pane. On the Flow Management tab, click a flow name.

Publish the flow: Click Save and Publish.
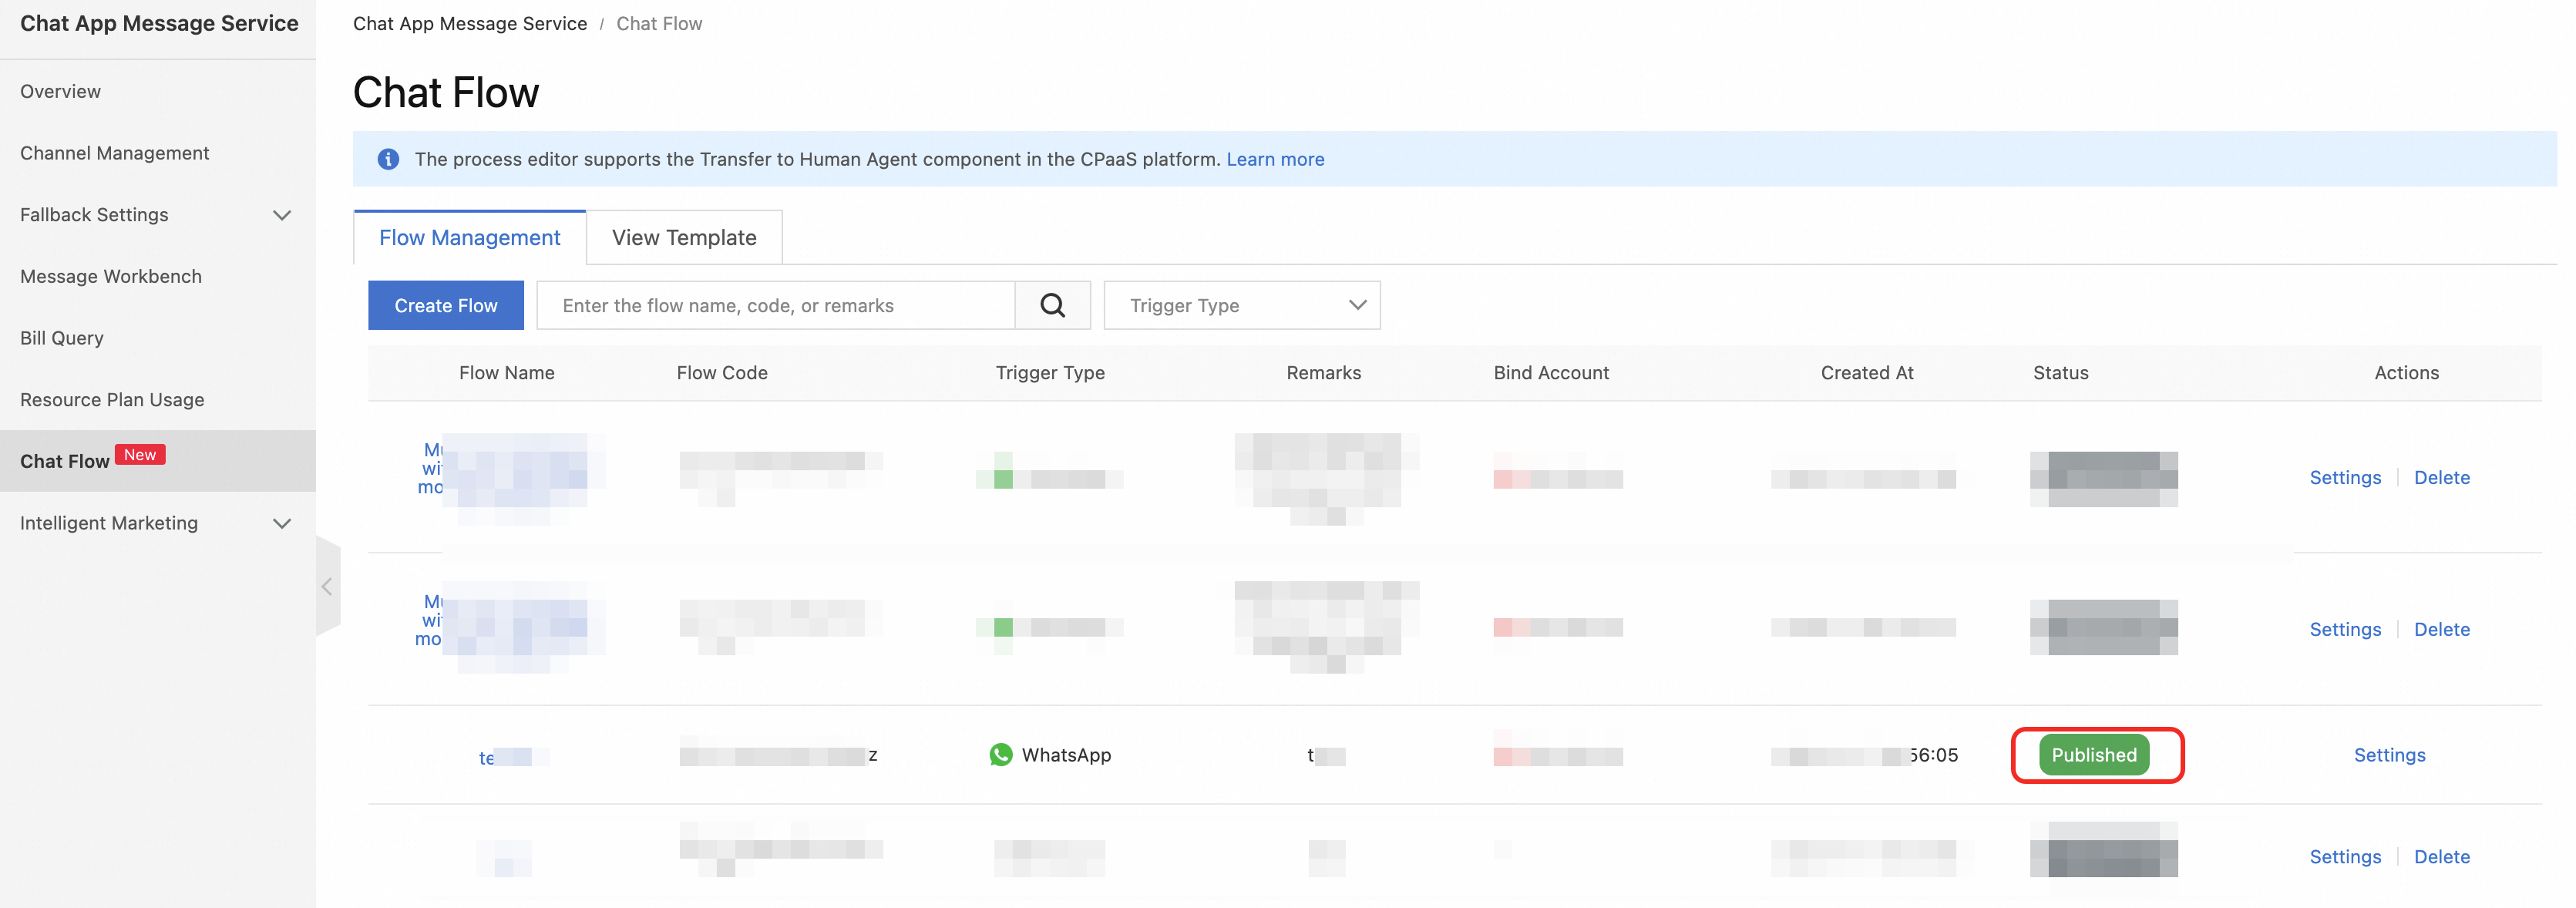
Check the flow status: On the Flow Management tab, verify that the flow status is Published.
Step 4: Update the flow (optional)
After you publish or save a flow, you can edit its basic information, bound account, and log settings.
Open the settings: In the Chat App Message Service console, choose Chat Flow in the left navigation pane. On the Flow Management tab, find the flow that you want to update and click Settings in the Actions column.
Edit basic information: In the Edit Flow dialog box, edit the Basic Information, including the Flow Name and Remarks.
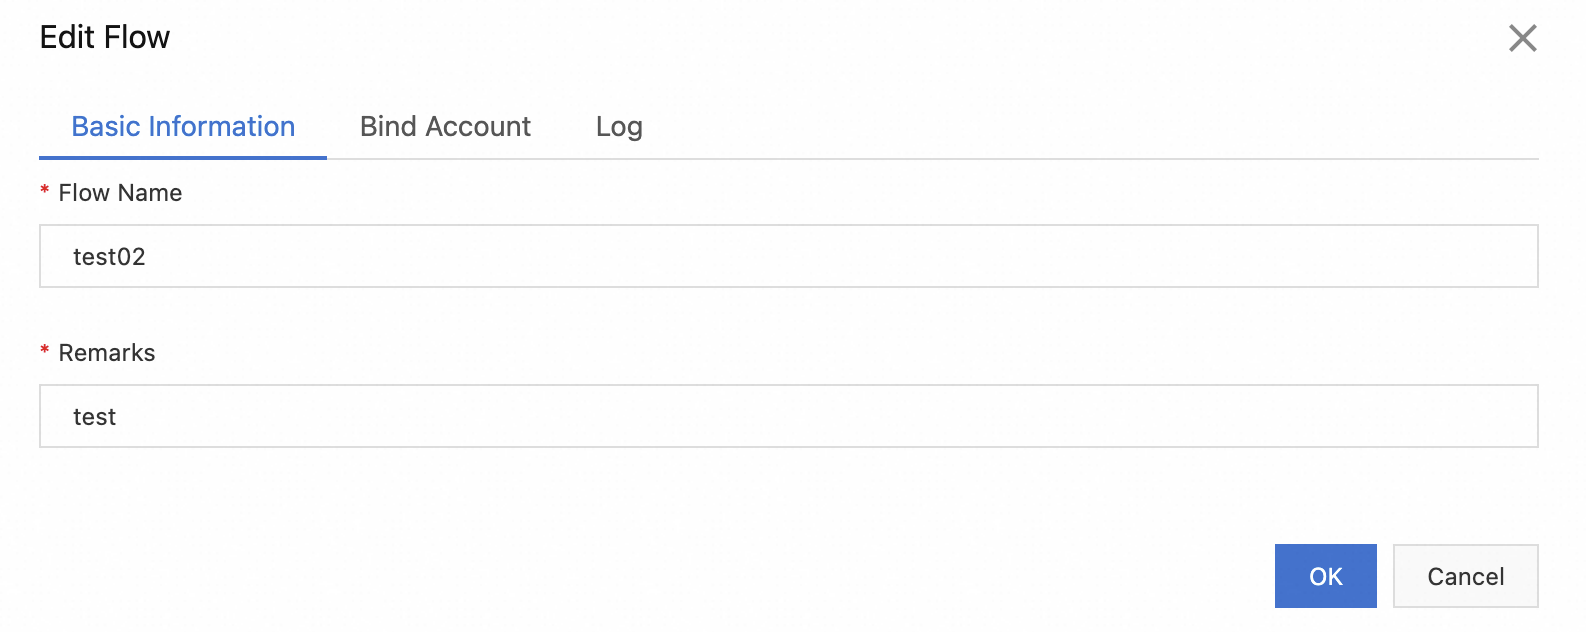
Update the bound account: Click the Bind Account tab. Then, update the Account Name and Mobile Number.
NoteThis operation is only available for WhatsApp, Viber, or Instagram triggers and can only be performed when the flow status is Unpublished.
Update the log settings: On the Log tab, enable or disable logging for the flow. If logging is enabled, Simple Log Service (SLS) collects events from the flow's execution. You can then view logs for debugging, troubleshooting, and data analysis. To use this feature, you must first activate SLS. For more information, see SLS quick start.
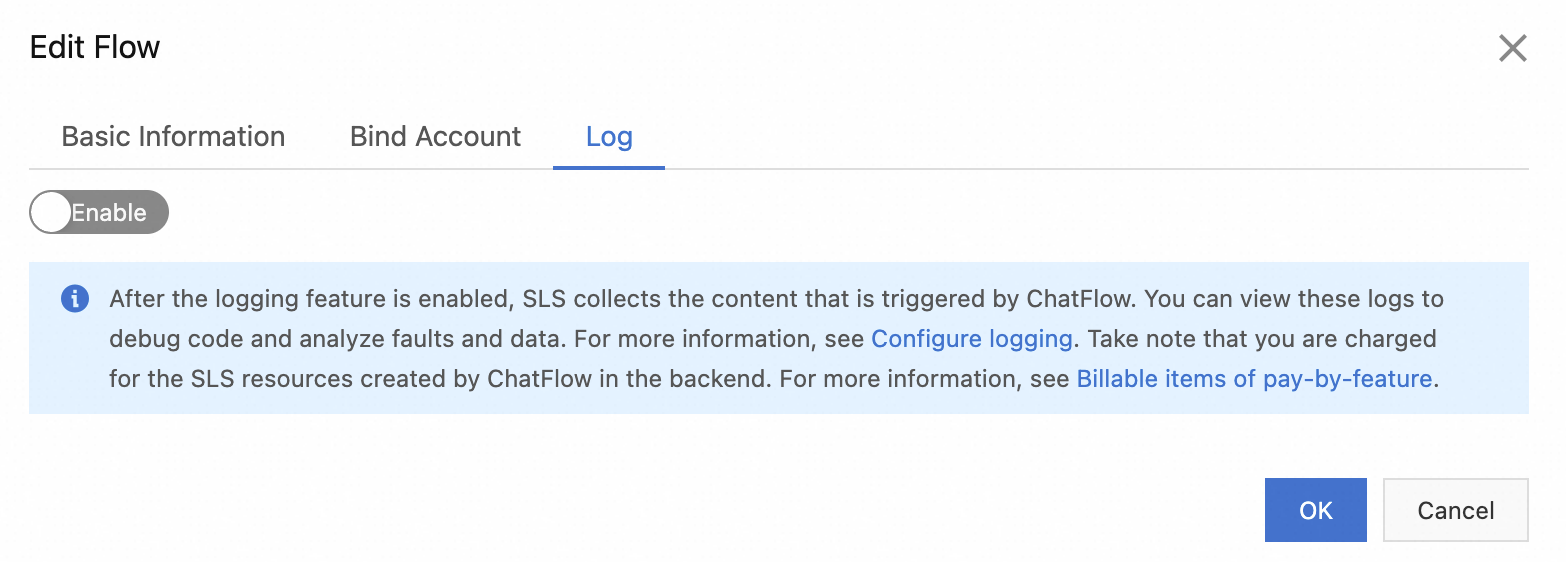
Click OK to save your changes.
Step 5: Delete the flow (optional)
You can delete a flow if it is no longer needed. Only an unpublished flow can be deleted. In the Chat App Message Service console, choose Chat Flow in the left navigation pane. On the Flow Management tab, find the flow that you want to delete and click Delete in the Actions column. In the message that appears, click OK.
A deleted flow cannot be recovered. Proceed with caution.

References
See the following topics for more information about the features of Chat Flow and the details of component configurations.
To learn about the features of each area on the canvas, see Chat Flow canvas.
To learn about the configuration of each component, see Chat Flow components.