This topic describes how to create and manage marketing campaigns. When you create a marketing campaign, you must associate a user group and a chat flow with the marketing campaign. The chat flow is automatically triggered at the specified start time. Messages in the chat flow are sent to all contacts in the user group based on the chat flow configurations and the execution plan of the marketing campaign.
Prerequisites
A chat flow has been created and published. For more information, see Use Chat Flow.
A user group has been created on the Crowd Management page. For more information, see Create a user group.
To use WhatsApp, make sure that the following requirements are met:
A WhatsApp Business Account (WABA) has been created and associated with the channel. The WABA has been approved by WhatsApp. For more information, see Register a WABA and manage phone numbers.
To use Viber, make sure that the following requirements are met:
A Viber service account has been applied for and the application has been approved. For more information, see Manage Viber service accounts.
Create a marketing campaign
To create a marketing campaign, perform the following steps:
Log on to the page, click Create Activity.

In the dialog box that appears, configure the required parameters and click OK.
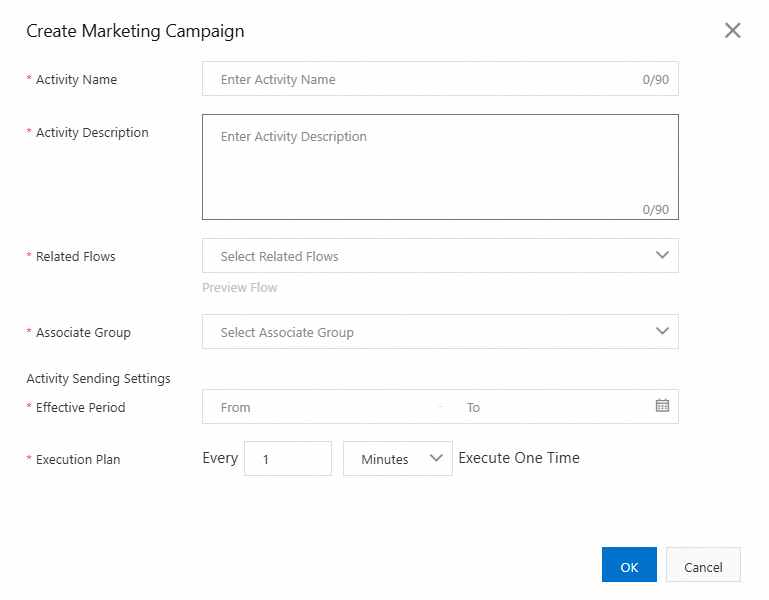
Campaign parameters
Parameter | Description |
Activity Name | The name of the marketing campaign. The name can be up to 60 characters in length. |
Activity Description | The description of the marketing campaign. The description can be up to 90 characters in length. |
Related Flows | Select the chat flow. The chat flow is automatically triggered when the marketing campaign starts. After you select a chat flow, click Preview Flow to preview the chat flow. You can preview only the published chat flows. Before you create a marketing campaign, make sure that a chat flow has been created and published. Note Only manually triggered flows are supported. |
Associated Group | Select the user group to which the marketing campaign messages are sent. Before you create a marketing campaign, make sure that a user group has been created. |
Effective period | Select the start time and end time of the marketing campaign. The marketing campaign automatically starts and ends at the specified time. The start time must be later than the current time and earlier than the end time. |
Execution Plan | The interval at which the marketing campaign is triggered. The marketing campaign can be triggered by minute, hour, or day. |
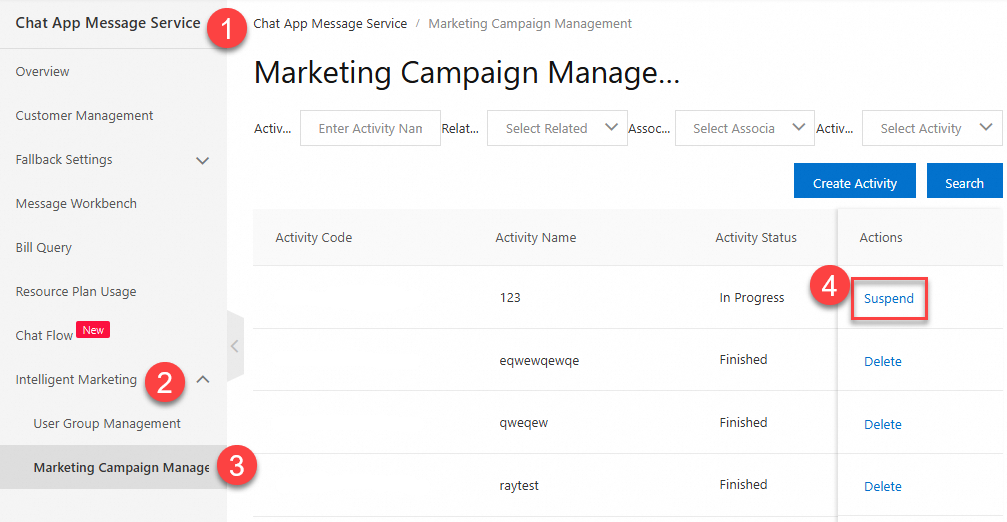
Suspend a marketing campaign
This section describes how to suspend a marketing campaign. Only marketing campaigns in the In Progress state can be suspended. The suspend button is not displayed for marketing campaigns in other states.
Log on to the page, find the marketing campaign and click Suspend.
In the message that appears, click OK.
ImportantAfter a marketing campaign is suspended, subsequent messages in the chat flow associated with the marketing campaign are no longer sent. You need to configure a start time again if you want to resume the marketing campaign later.
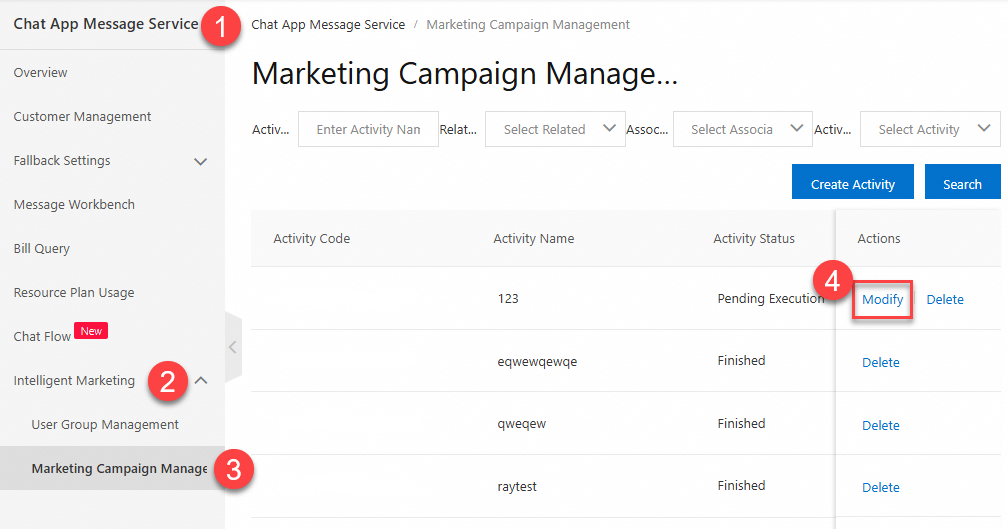
Modify a marketing campaign
This section describes how to modify a marketing campaign. Only marketing campaigns in the Pending Execution and Suspended states can be modified.
Log on to the page, find the marketing campaign and click Modify.
In the dialog box that appears, modify the configurations as needed. For more information about the parameters, see the parameters described in the Campaign parameters section of this topic.
Click OK to complete the modification.
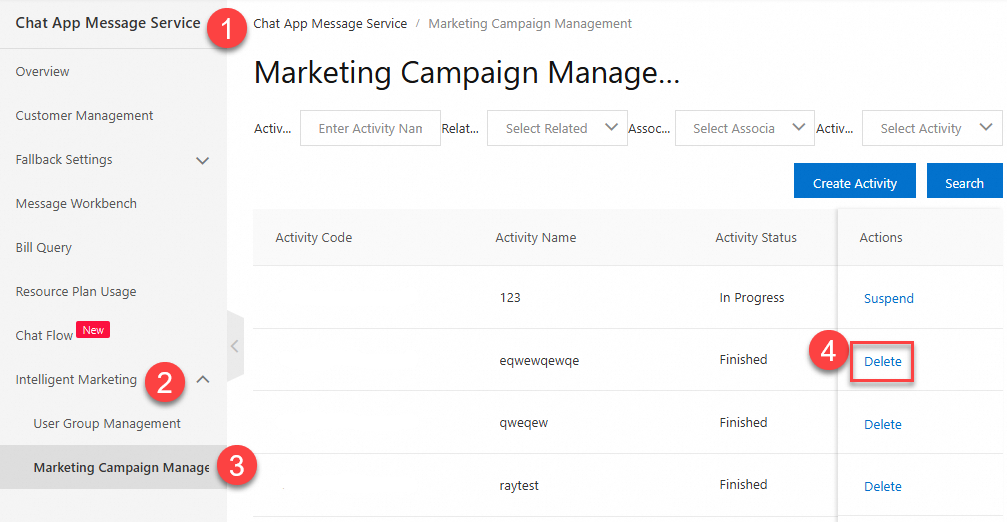
Delete a marketing campaign
This section describes how to delete a marketing campaign. Marketing campaigns in the In Progress state cannot be deleted.
Log on to the page, find the marketing campaign and click Delete.
In the message that appears, click OK.
Query marketing campaigns
Log on to the page, specify filter conditions to query marketing campaigns. The following filter conditions are supported: Activity Name, Related Flows, Associated Group, and Activity Status.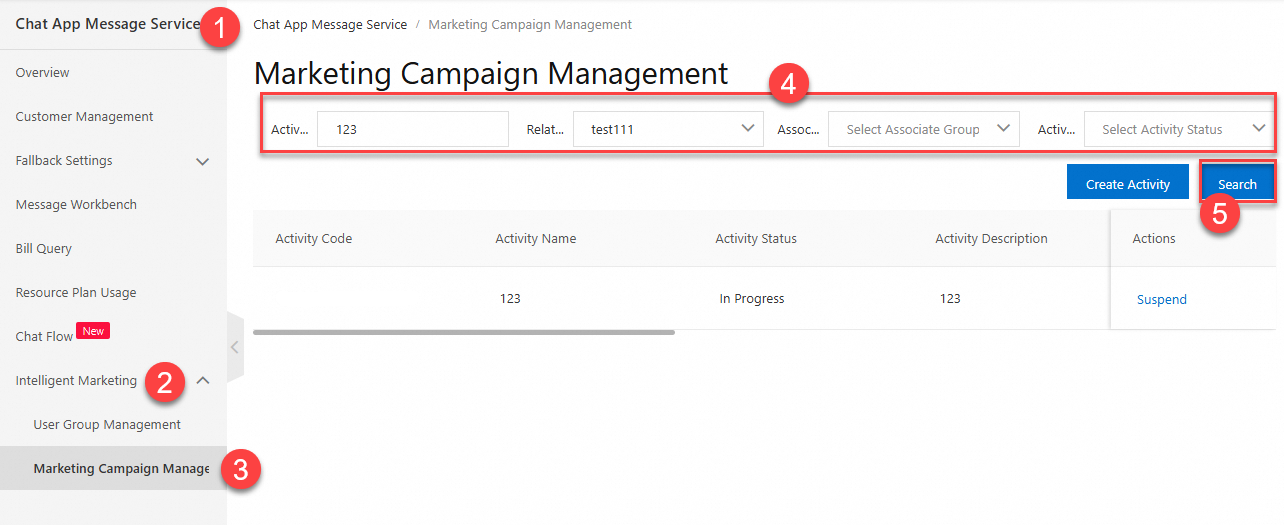
References
For more information about Chat Flow and user group management, see the following topics:
For more information about using the flow editor, see How to use the flow editor.
Manage user groups: describes how to manage user groups.
For more information about contact management, see Contact Management.