Audience management lets you systematically identify, classify, analyze, and manage target audiences for marketing campaigns. You can group your contacts to better organize your marketing efforts and improve user engagement.
Before you begin
Create a group
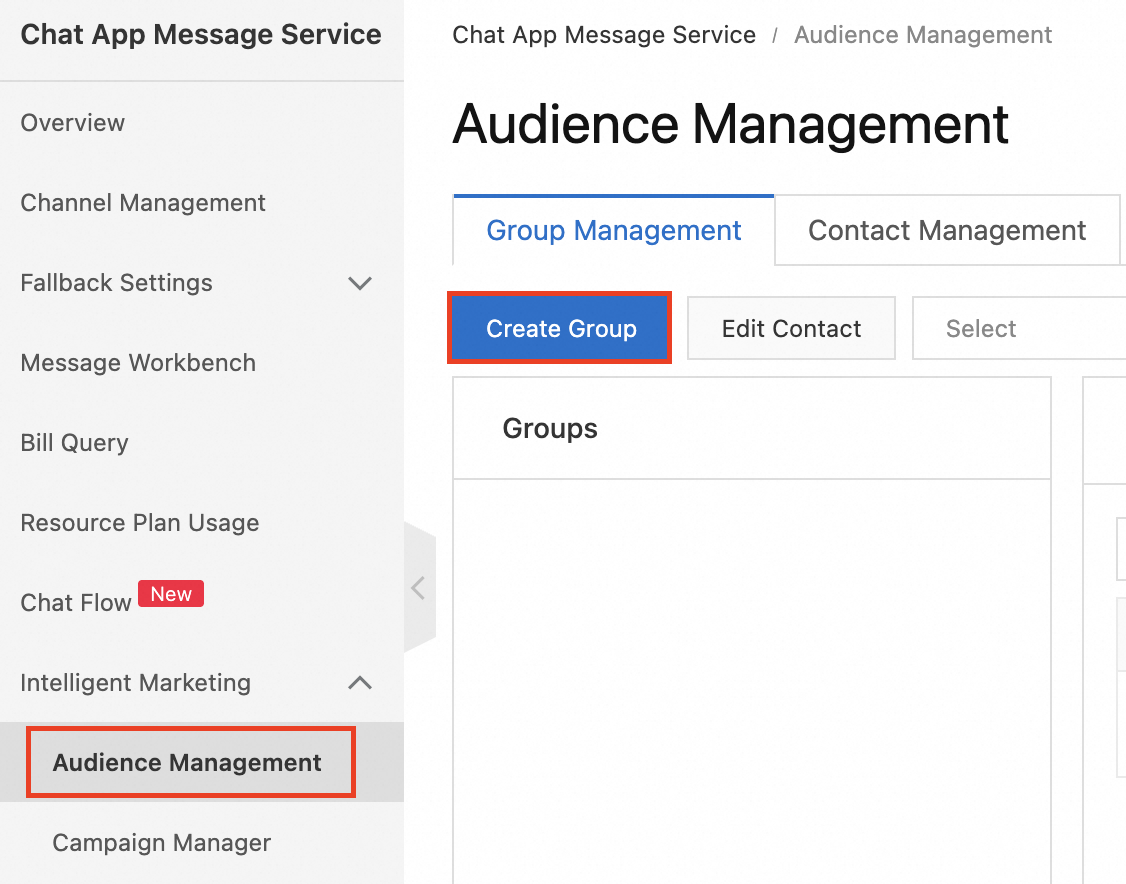
To create an audience group:
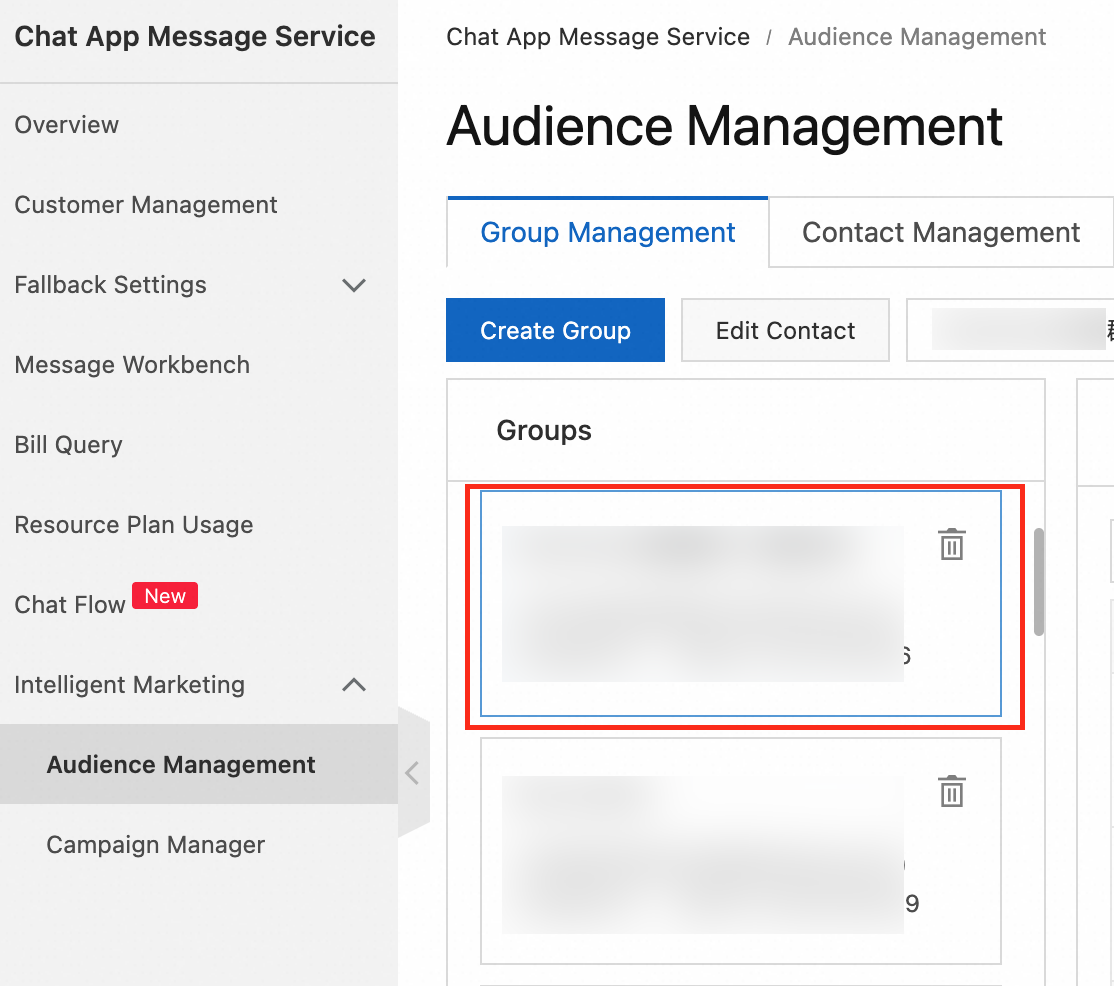
In the Chat App Message Service console, navigate to Intelligent Marketing > Audience Management > Group Management, then click Create Group.
In the dialog box, enter a group name. You can add contacts to the group using one of the following methods:
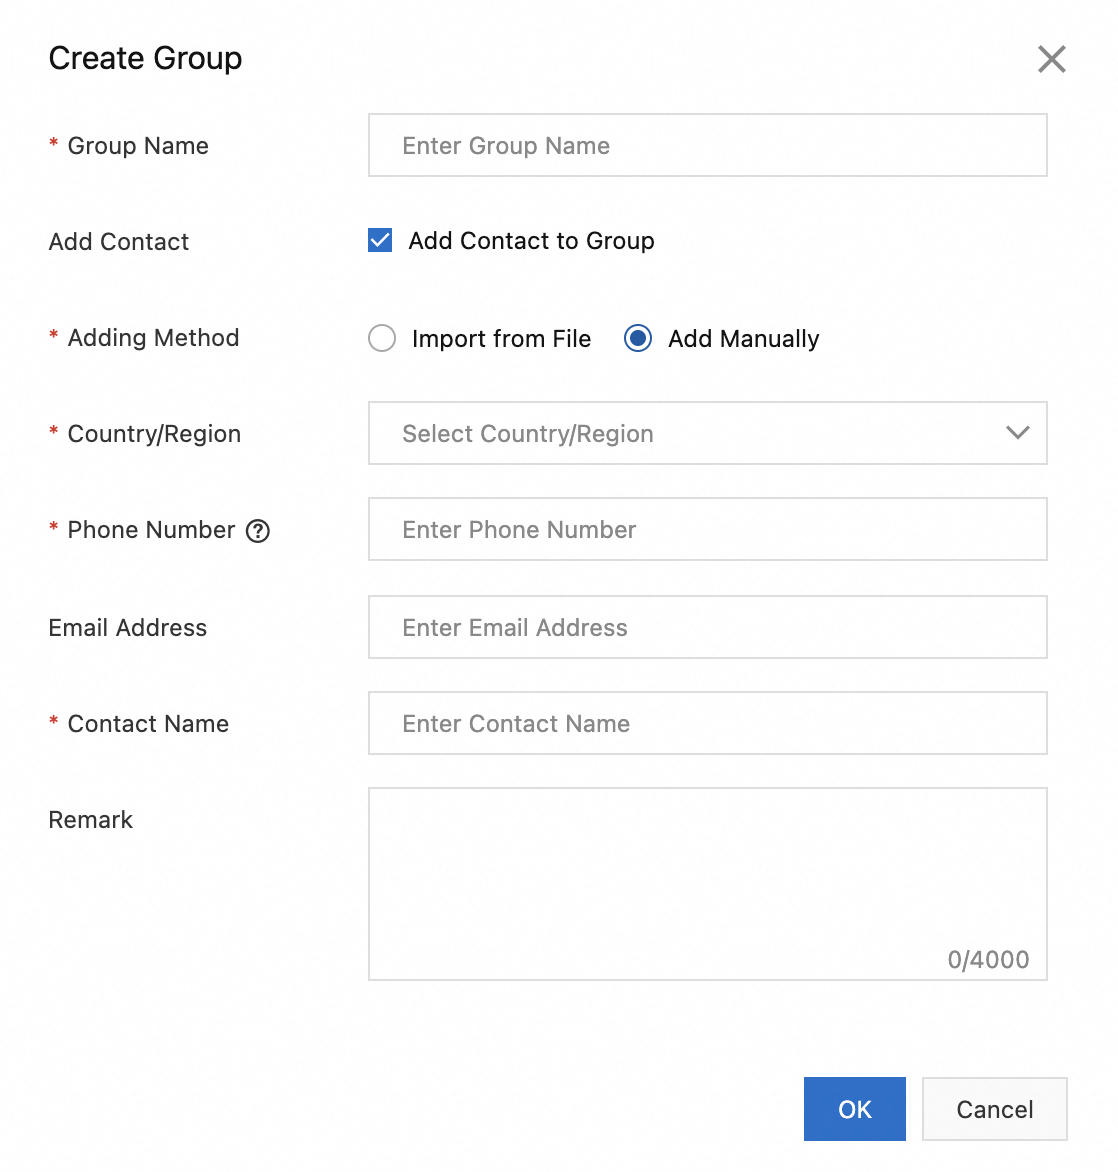
Method
Procedure
Import from File
Click Download Template and fill in the template with contact information.
Click Select File to upload the contacts.
Add Manually
Select the country or region for the contact's phone number.
Enter the contact's phone number. For example: 1301111****.
Enter the contact's name.
Click OK to create the group.
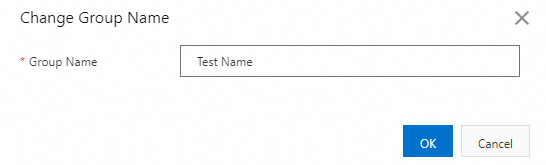
Modify a group name
To modify the name of an audience group:
In the Chat App Message Service console, navigate to Intelligent Marketing > Audience Management > Group Management. Find the group you want to modify and click the
 icon.
icon.
In the dialog box, enter the new group name and click OK.
Delete a group
To delete an audience group:
In the Chat App Message Service console, navigate to Intelligent Marketing > Audience Management > Group Management. Find the group to delete and click the
 icon.
icon.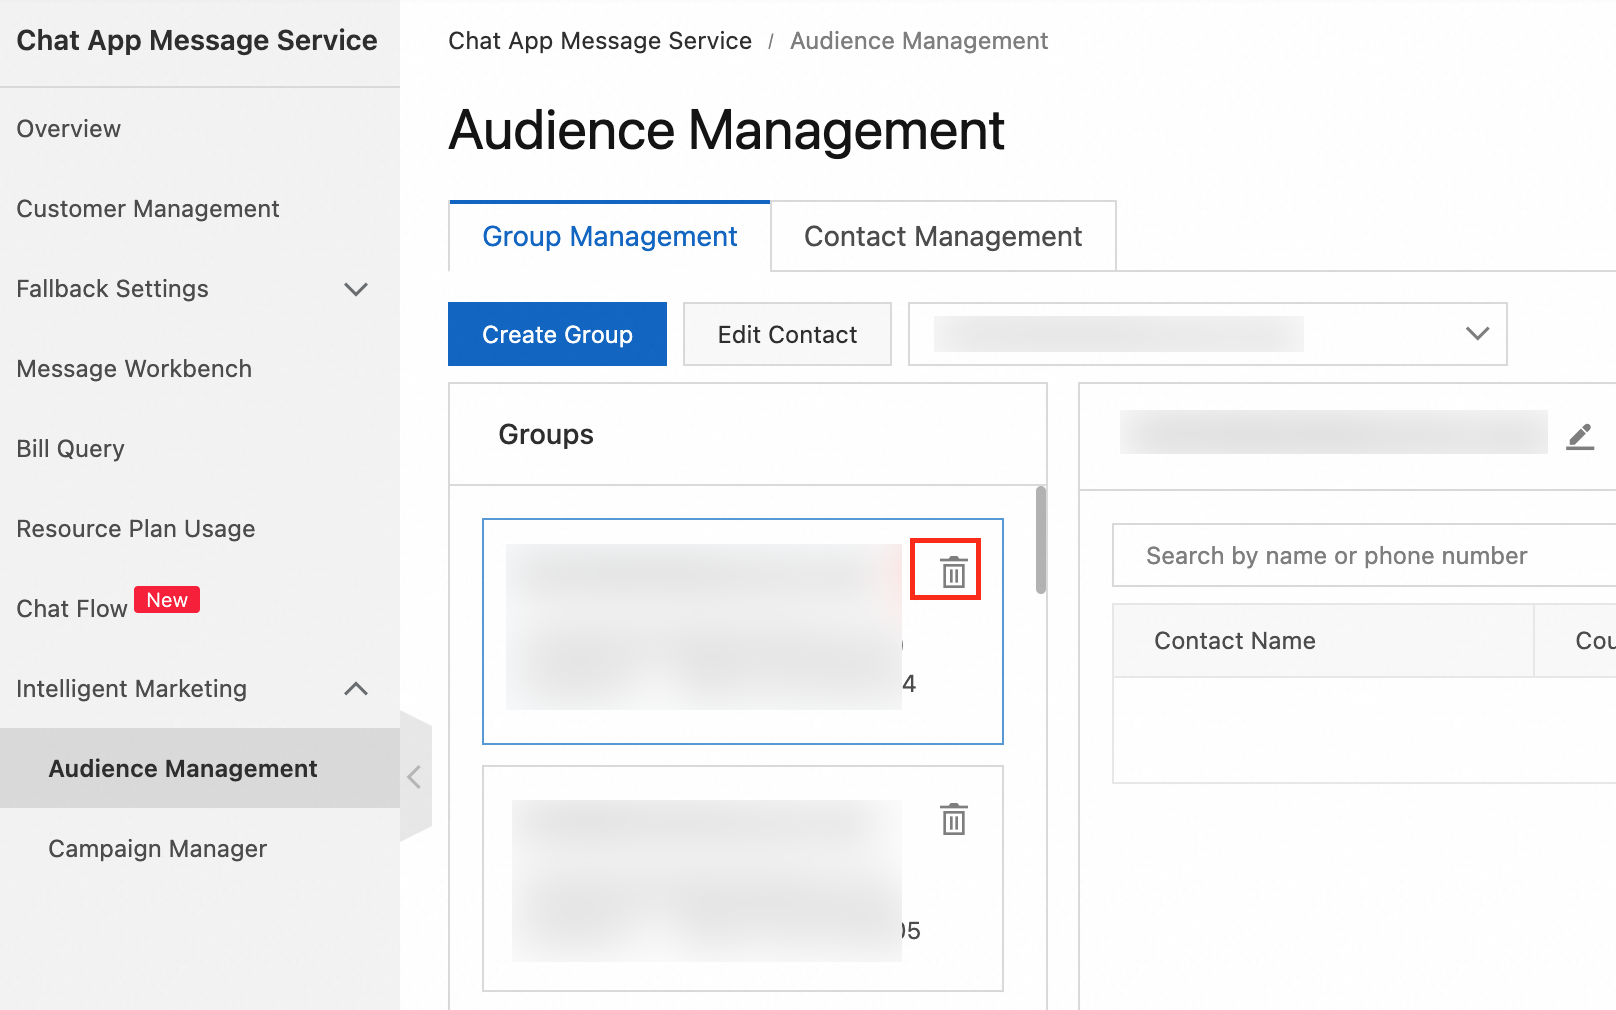
In the confirmation dialog box, click OK to delete the group.
ImportantDeleting an audience group affects its associated marketing campaigns and workflows. Proceed with caution.
Remove contacts from a group
To remove contacts from an audience group:
In the Chat App Message Service console, navigate to Intelligent Marketing > Audience Management > Group Management. Find the target group.
Search for the contact by name or phone number, then click Remove.
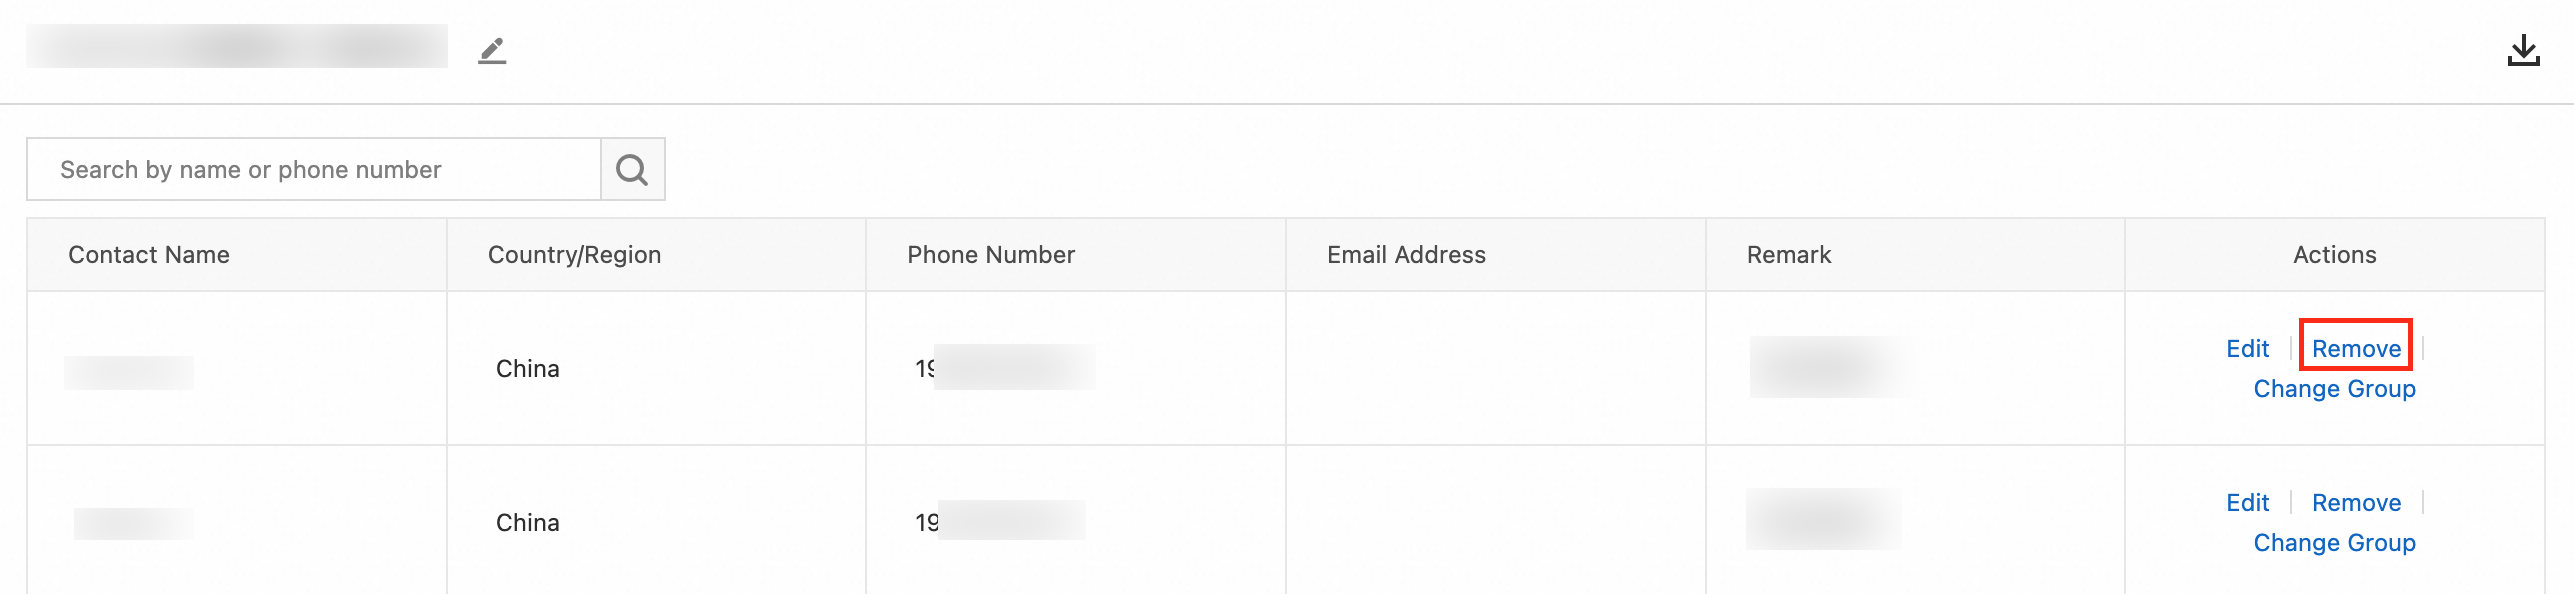
In the confirmation dialog box, click OK to remove the contact.
Reference
To learn how to manage contacts, see Contacts.