By Kenny Lai, Alibaba Cloud Solution Architect
Everybody loves things to go fast. The less time that is spent on loading a website, often the more traction your website will get. There's tons of things you can do to load your website load faster. But, among these, changing your images is one of the best ways to speed up your website.
Can't afford to resize your images? Well, you don't have to. WebP can help. WebP is a modern image format that provides superior lossless and lossy compression for images on the web. With WebP, you can create smaller, richer images to help optimize your website. WebP lossy images are on average 25% to 34% smaller than comparable JPEG images at an equivalent SSIM quality index.
While more modern browsers are starting to offer support for webp, some of them still don't support it. To provide backward compatibility, there is a <picture> html code can be use as fall back, given below:
<picture>
  <source srcset="image.webp" type="image/webp">
  <source srcset="image.jpg" type="image/jpeg">
  <img src="image.jpg" alt="Alt Text!">
</picture>
To provide such backward compatibility, you need to keep two copies of the same image, but this can create several problems
Time and space consumes money. Alibaba Cloud Object Storage Service (OSS) provides a feature called image processing, which can reduce the burden on both storage size and the image conversion process, saving you money.
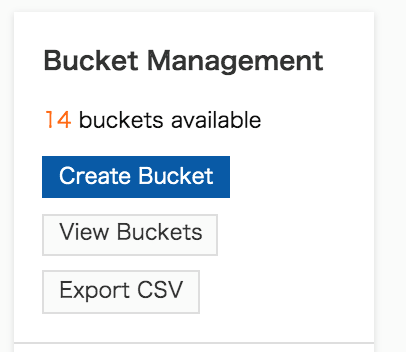
To get start with it, you'll need to first create a new bucket. So navigate yourself to the OSS console. Then when there, in the Bucket Management area, click the Create Bucket button.
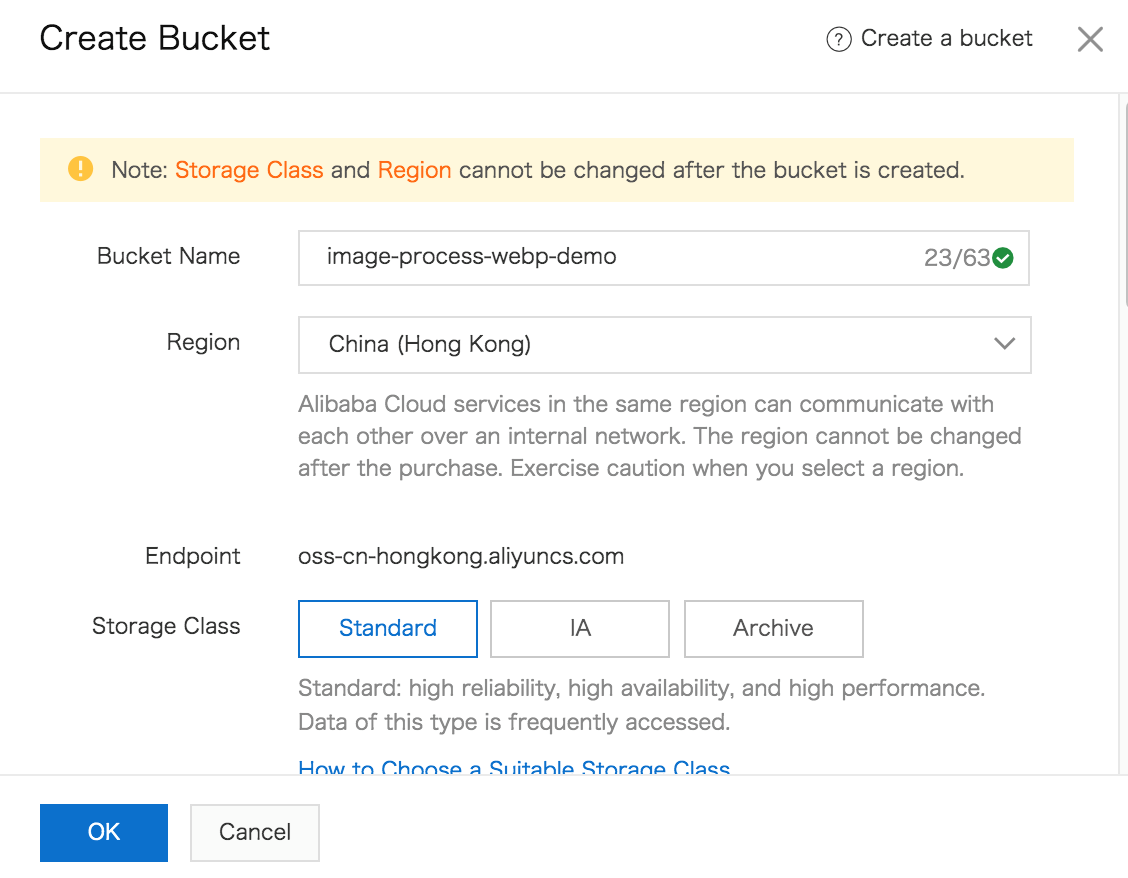
It is worth mentioning that OSS has native integration with Hybrid Backup Recovery (HBR). To take advantage of this, you'll need to enable the backup option (an additional charge will be applied) and your data will be double protected.

Click OK to create the bucket. Then, click Files and Files again to upload your source images.
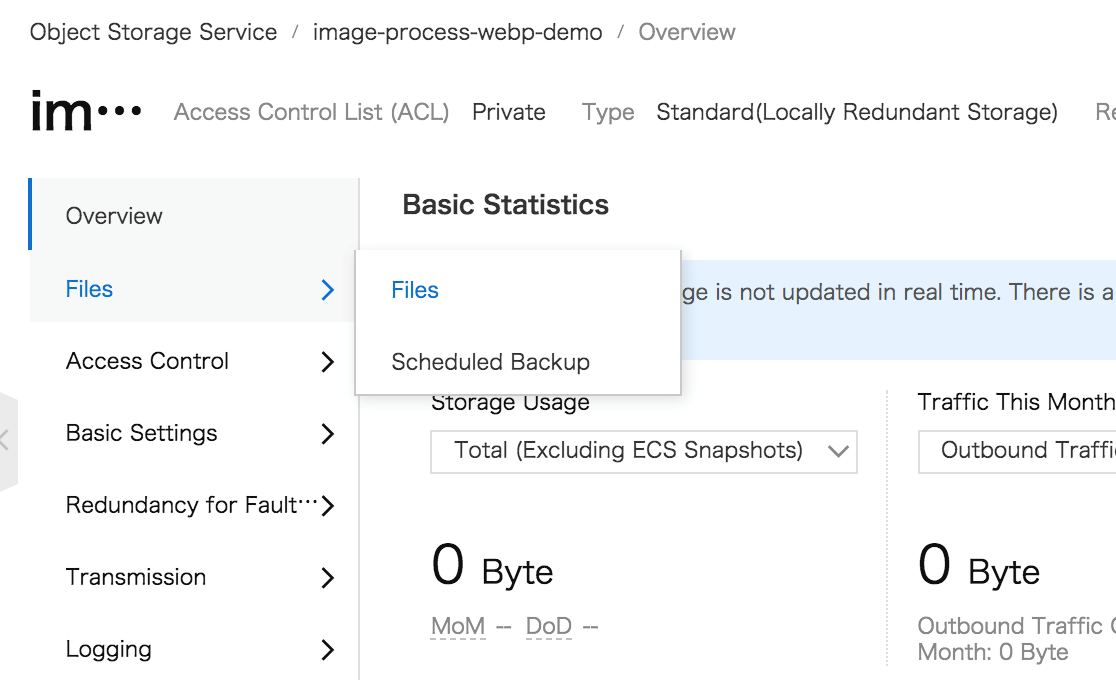
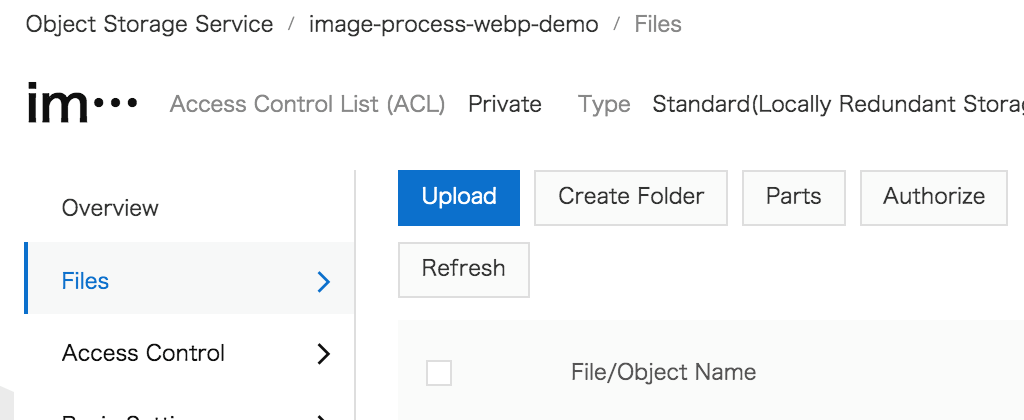
Click the Upload button for the upload dialogue window to appear.
Make sure File ACL is set to Public Read, unless you plan to use CDN to cache the OSS content. To upload your files, just drag your files into the upload area.
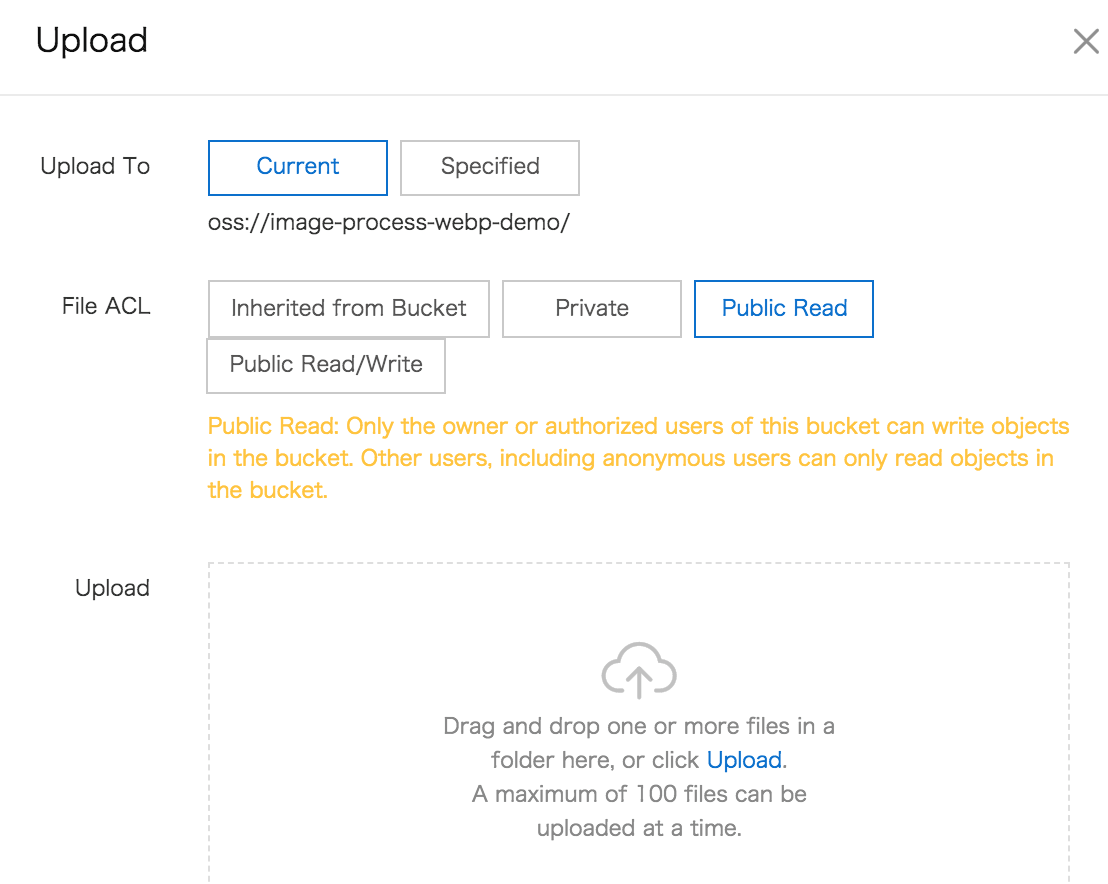
In a flash, your images are uploaded. It is worth uploading the lossless original images and applying different image processing to obtain the jpg and webp format files to use on your website.
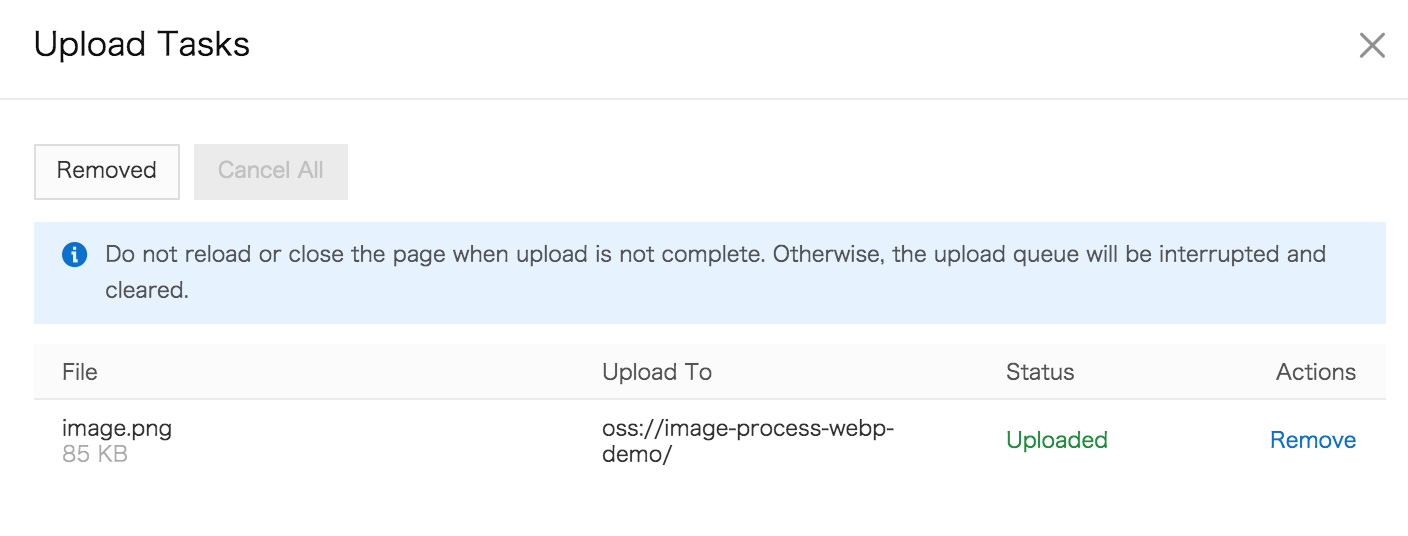
Now you images are uploaded.
Now that your images are uploaded, it's time that you create Image Process Rules. Click Data Processing, then Image Processing (IMG), this will indirect you to the image processing console.
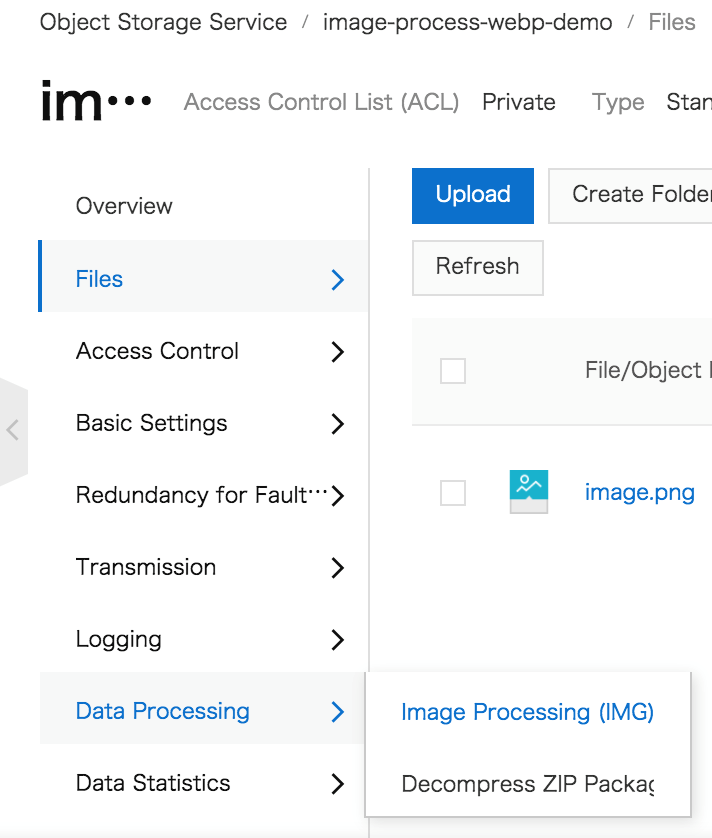
Click Create Rule to create new image processing rule.
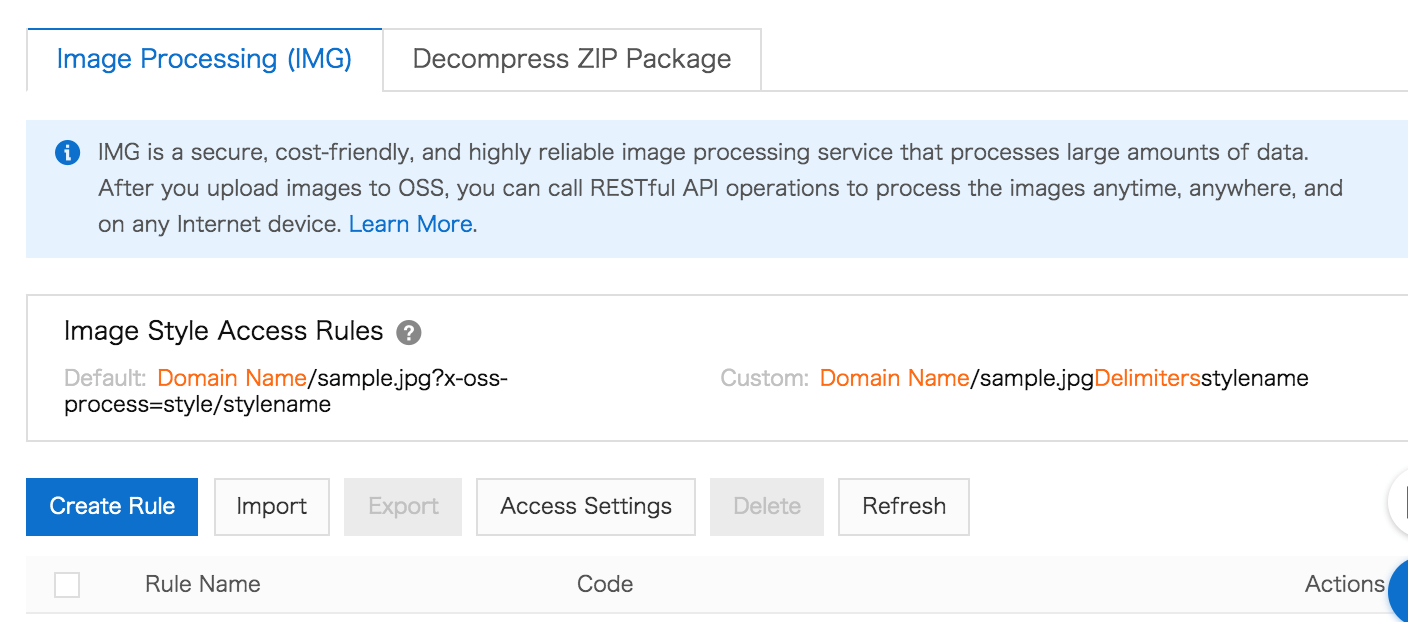
Here, you need to create two rules. The first rule is for creating a scaled down copy in the JPG format, and the second rule for creating a scaled down copy in the WebP format.
Follow the instructions pictured below for the first rule.
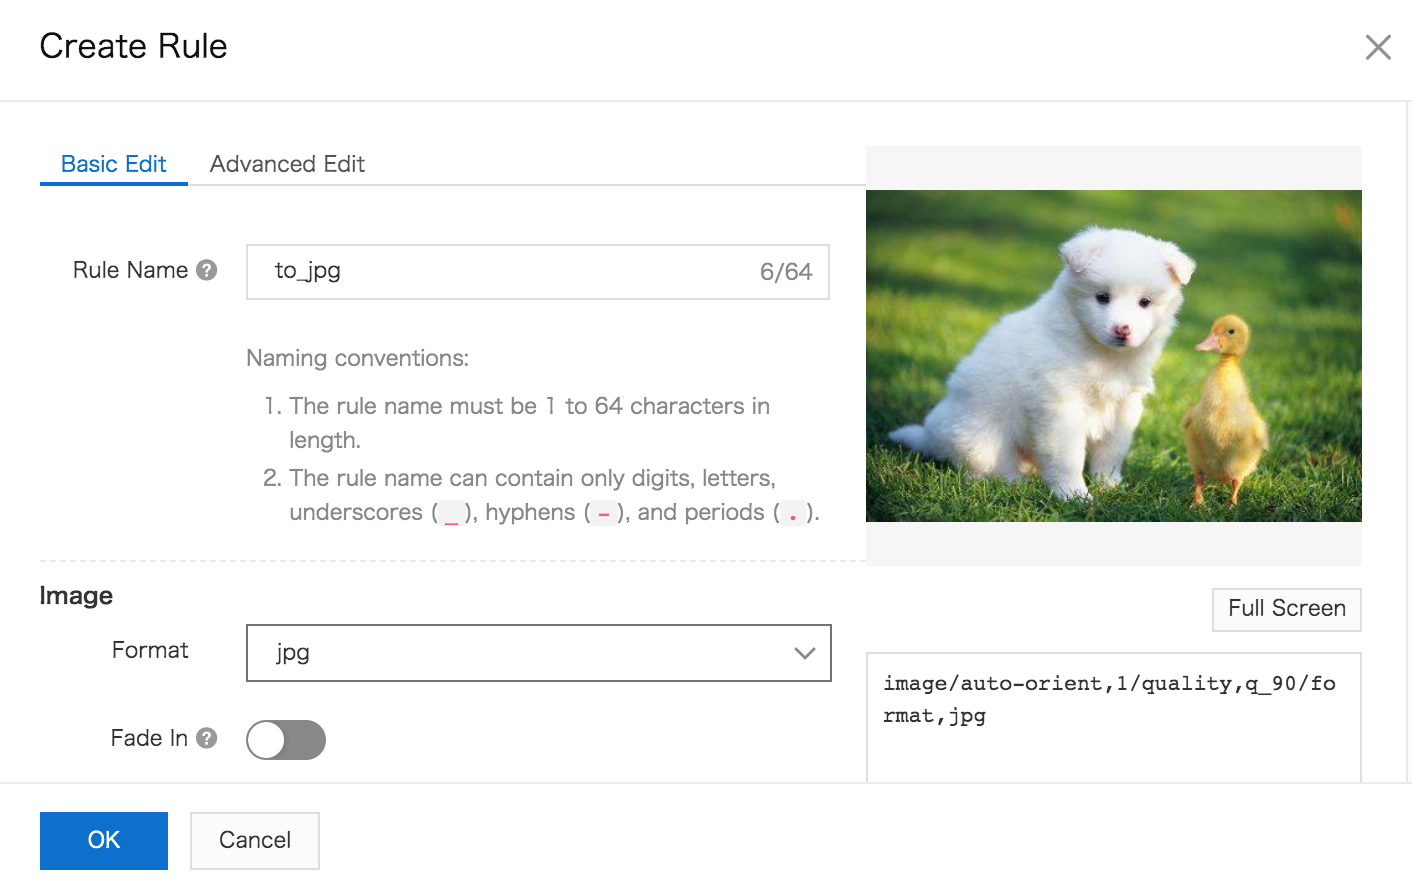

Once finished, click OK button. With this, the first rule is created.

Next, we will be doing a similar thing for Webp.
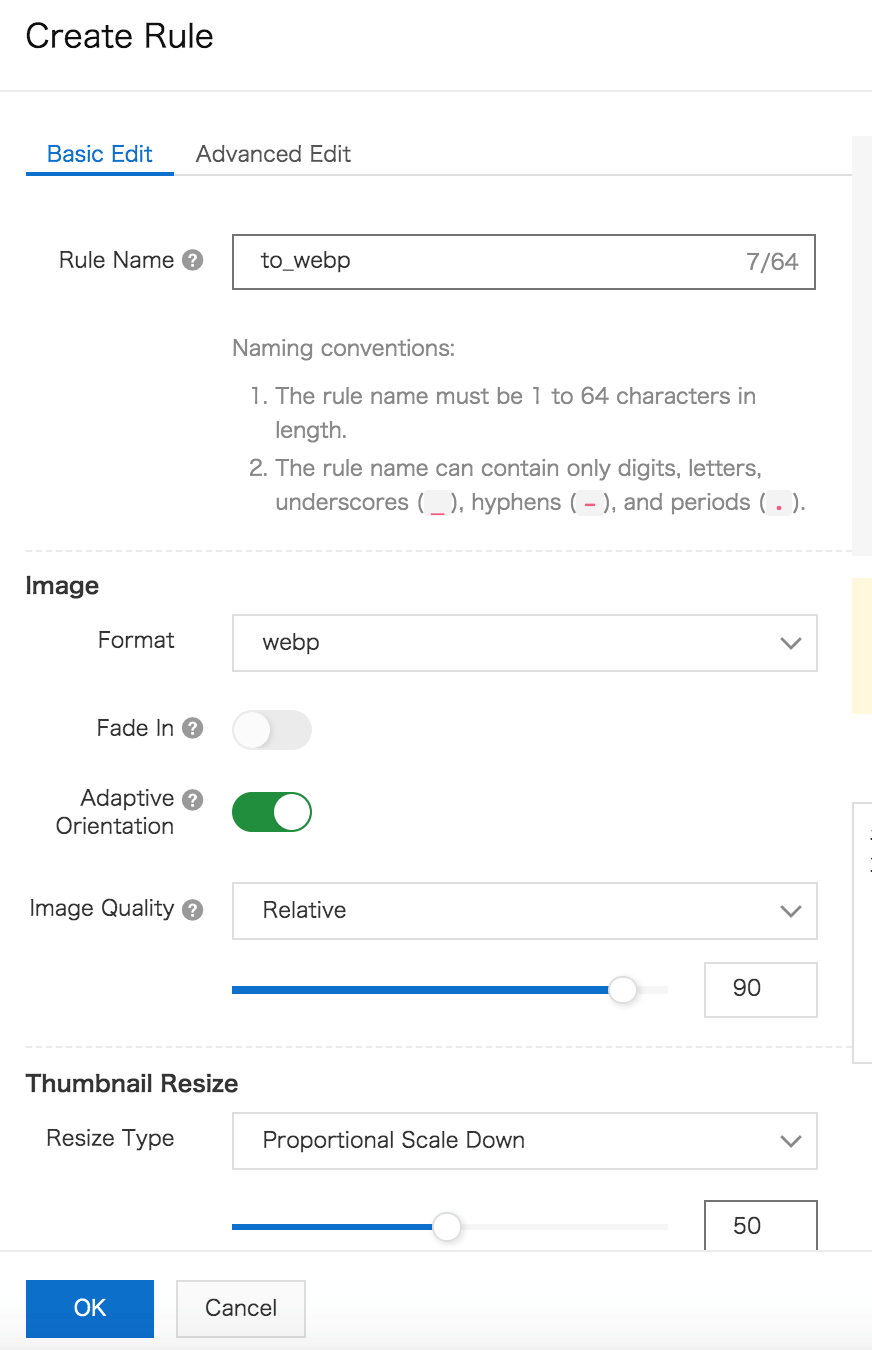
Now, we got another rule for webp.

Remember the <picture> tag is used to support both webp and non-webp image. So, let's update the following HTML code from what you see below:
<picture>
  <source srcset="image.webp" type="image/webp">
  <source srcset="image.jpg" type="image/jpeg">
  <img src="image.jpg" alt="Alt Text!">
</picture>
To this:
<picture>
  <source srcset="image.webp" type="image/webp">
  <source srcset="image.jpg" type="image/jpeg">
  <img src="image.jpg" alt="Alt Text!">
</picture>
Notice the code generated in each rule:

You can obtain the URL of the image by clicking on the image file in the Files menu clicking the View Detail link.

Click Copy File URL, which will give you the URL of the image file.
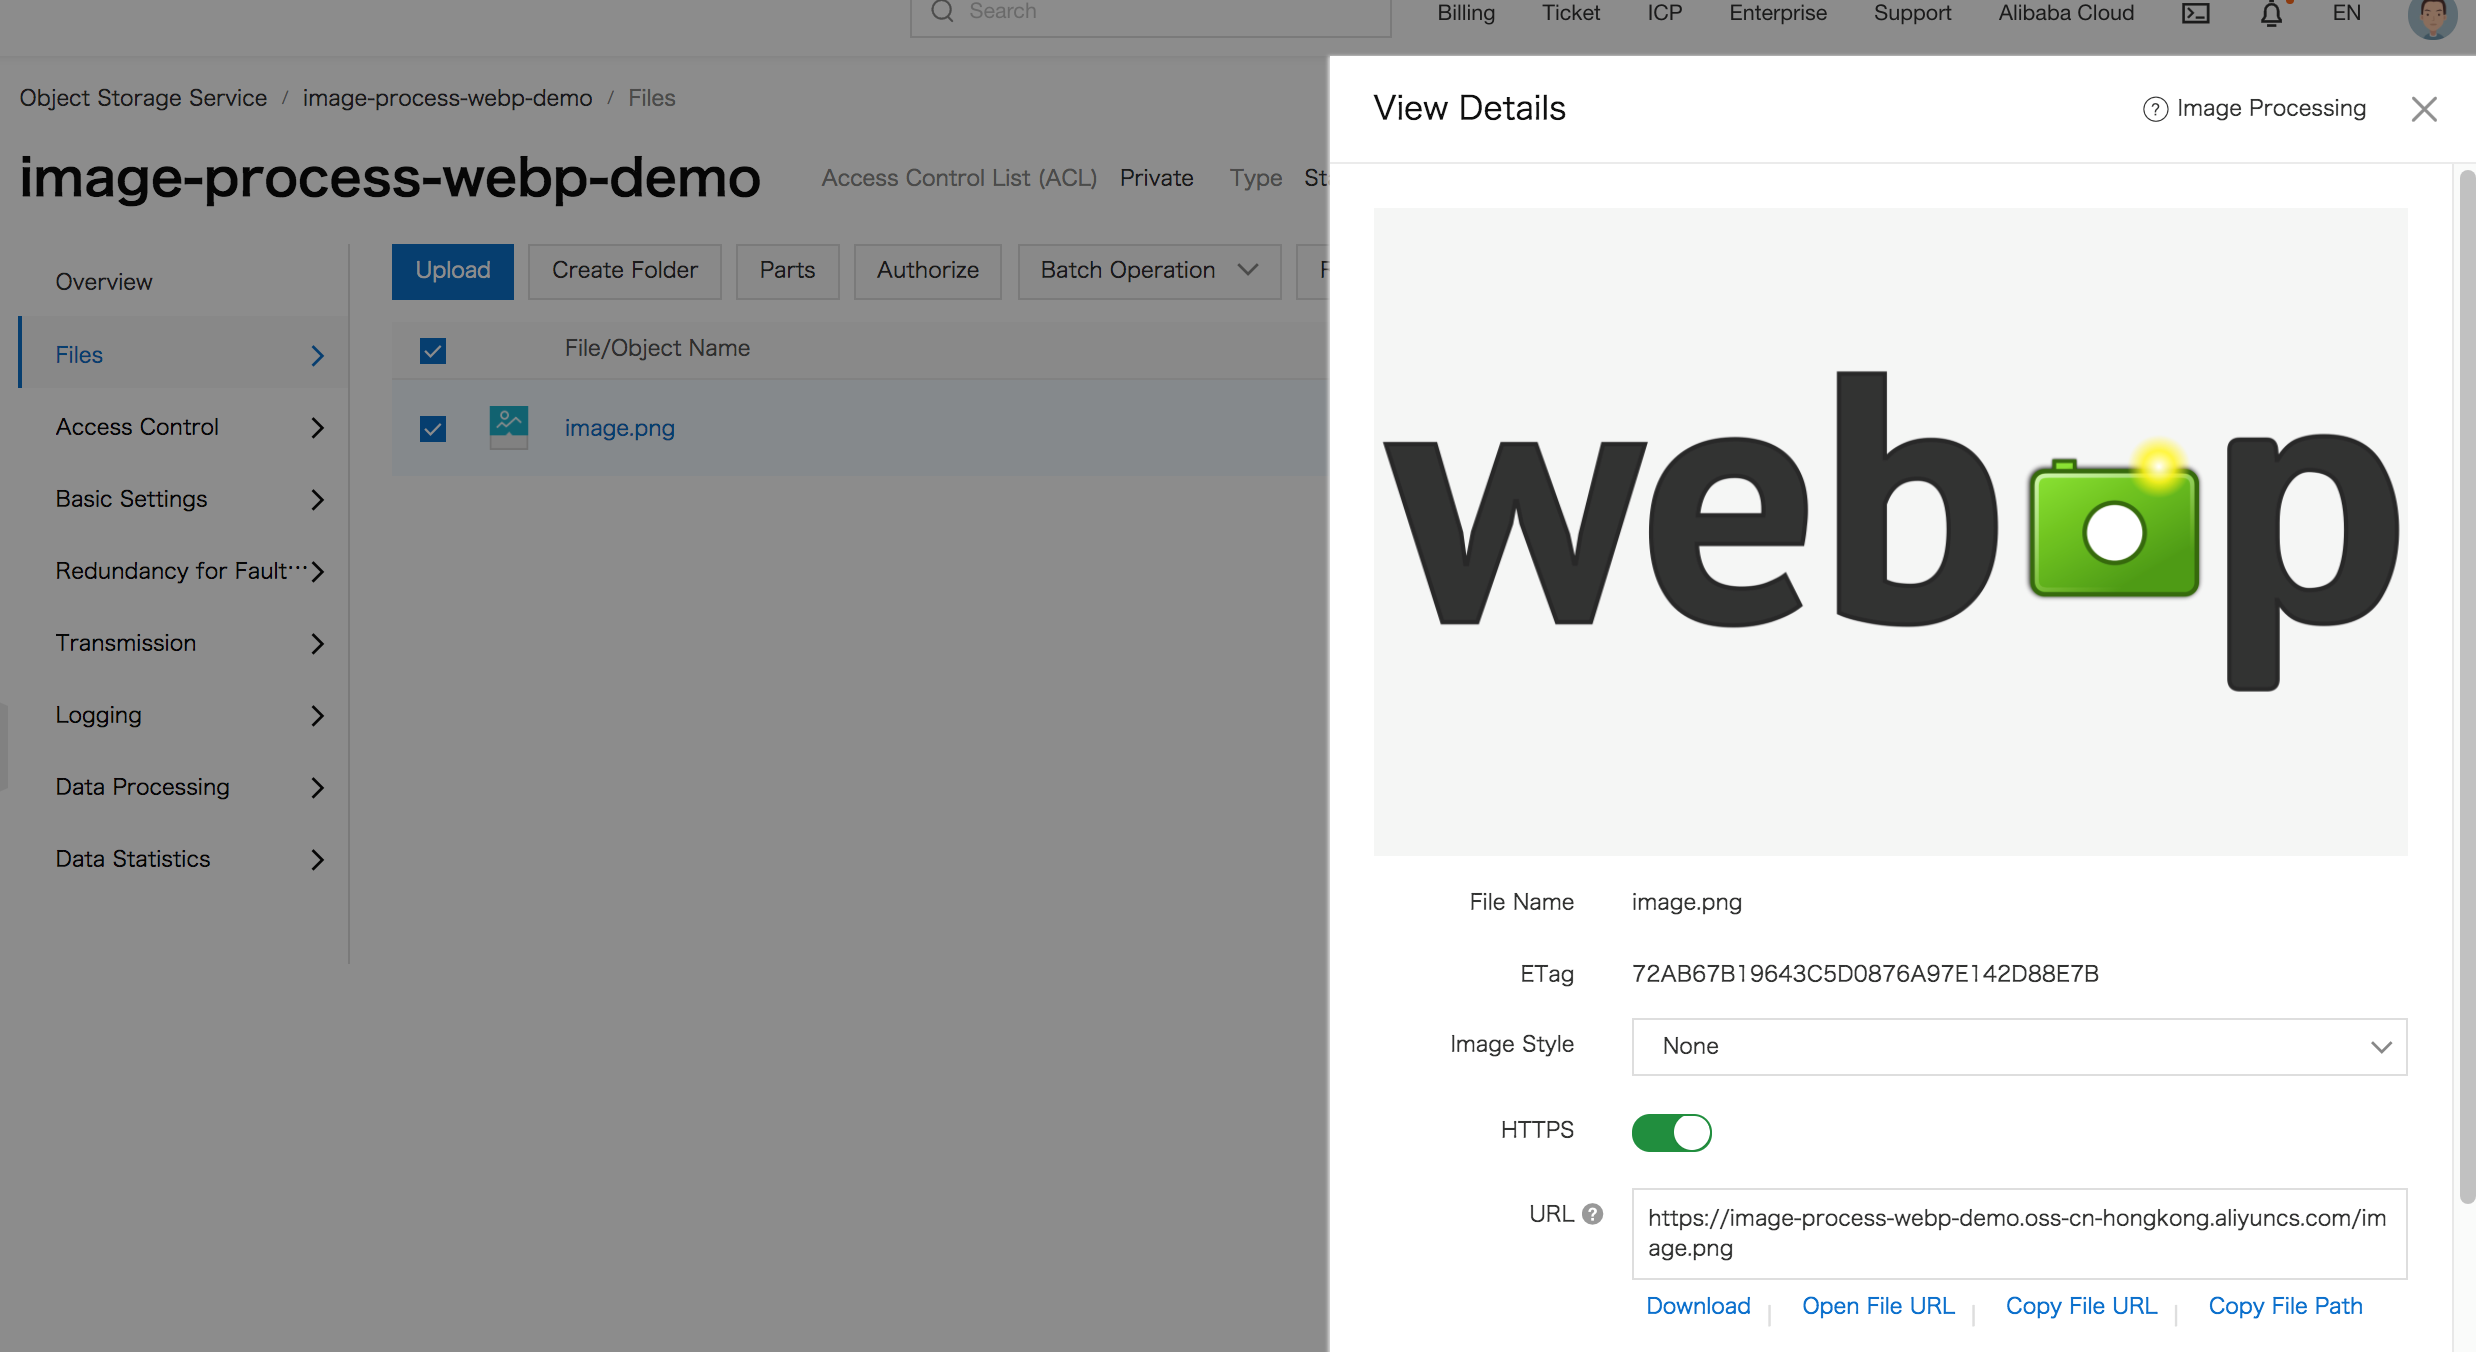
In this example, the url is https://image-process-webp-demo.oss-cn-hongkong.aliyuncs.com/image.png. And we need to append ?x-oss-process= and append the code afterward. The final URL for the JPG file is:
https://image-process-webp-demo.oss-cn-hongkong.aliyuncs.com/image.png?x-oss-process= image/auto-orient,1/resize,p_50/quality,q_90/format,jpgAnd the final URL for WebP file format is:
https://image-process-webp-demo.oss-cn-hongkong.aliyuncs.com/image.png?x-oss-process= image/auto-orient,1/resize,p_50/quality,q_90/format,webpThe resulting picture tag will look like this:
<picture>
    <source type="image/webp" srcset="https://image-process-webp-demo.oss-cn-hongkong.aliyuncs.com/image.png?x-oss-process=image/auto-orient,1/quality,q_90/format,webp">
    <source type="image/jpeg" srcset="https://image-process-webp-demo.oss-cn-hongkong.aliyuncs.com/image.png?x-oss-process=image/auto-orient,1/quality,q_90/format,jpg">
    <img src="https://image-process-webp-demo.oss-cn-hongkong.aliyuncs.com/image.png?x-oss-process=image/auto-orient,1/quality,q_90/format,jpg" alt="My Image">
</picture>
The views expressed herein are for reference only and don't necessarily represent the official views of Alibaba Cloud.

2,598 posts | 769 followers
FollowAlibaba Clouder - January 3, 2019
Alibaba Clouder - June 22, 2018
Alibaba Clouder - February 12, 2019
Alibaba Clouder - November 14, 2018
Alibaba Clouder - August 31, 2017
Alibaba Clouder - November 20, 2018

2,598 posts | 769 followers
Follow Web Hosting
Explore how our Web Hosting solutions help small and medium sized companies power their websites and online businesses.
Learn More ECS(Elastic Compute Service)
Elastic and secure virtual cloud servers to cater all your cloud hosting needs.
Learn More OSS(Object Storage Service)
An encrypted and secure cloud storage service which stores, processes and accesses massive amounts of data from anywhere in the world
Learn MoreMore Posts by Alibaba Clouder