By Alexandru Andrei, Alibaba Cloud Tech Share Author. Tech Share is Alibaba Cloud's incentive program to encourage the sharing of technical knowledge and best practices within the cloud community.
rsync is a software tool used to either copy files locally, from one path/directory to another, or transfer them between a local computer and a remote one, through a network such as LAN (Local Area Network) or the Internet. Because of its strong capabilities to reduce the amount of data that has to be sent between the local source and the remote destination, it's often used to create off-site backups. These are usually periodic (e.g., daily) and automated. The ability to resume interrupted transfers also makes it suitable for exchanging very large files between two different computers. Of course, it's not limited to these use cases; the large amount of command line options make it easily adaptable to other scenarios administrators may encounter.
rsync uses what is called a delta-transfer algorithm which compares files from source and destination and sends only the differences between them. This means that if you have a large database on server1 and you copy it to server2, the first transfer will be normal but subsequent transfers will be much faster. For example, you may have a 100GB database, but since the last synchronization, only a few megabytes have changed. rsync will only send a few megabytes across the network to refresh the backup of your database on server2. Data can also be compressed before it is sent to the remote location, shortening the time it takes to complete transfers even more, especially in the case of highly compressible content (e.g., some types of databases or text-based files).
In this article, we will be using rsync on our Elastic Compute Service (ECS) instance to synchronize files and directories between two locations.
If the Linux/BSD distribution you are using doesn't include rsync by default, you can install it on Debian/Ubuntu with:
apt install rsyncOn OpenSUSE you would use:
zypper install rsyncAnd on RedHat/CentOS:
yum install rsyncCheck your distribution's manuals to see the command you should use. E.g., future versions of RedHat/CentOS will switch to another tool for installing and managing software packages, called dnf. If you've just launched a fresh instance, you might have to update package information before running those commands (e.g., on Debian you would have to run apt update).
To copy a file from one location to another, on the same machine, the general syntax of the command is:
rsync [options] /path/to/source_file /path/to/destionation_fileFor large files, it may be useful to add -P as a command line parameter to track progress (expressed in percent of file copied), e.g.:
rsync -P /bin/cat /tmpWhen you want to copy/synchronize directories, you need to add the -r (recursive) parameter:
rsync -r /bin /tmpFor directories containing numerous files, it may be useful to add the -v (verbose) parameter to display the file currently being synchronized, which can give you an idea on how the job is progressing:
rsync -rv /bin /tmpIf the directories contain large files, you can also add the -P parameter.
/ in rsyncWhile in other file copying utilities like cp, it doesn't matter if you add a trailing slash / to a directory name, in rsync it makes a big difference. For example, if you would use this command:
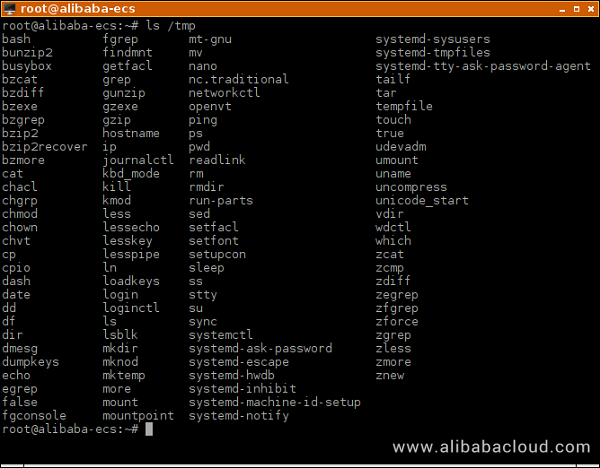
rsync -r /bin/ /tmpAll of the files from /bin would be copied in the /tmp directory. ls /tmp would show that we now have a bunch of files scattered around in our directory.

When you don't add a trailing slash /, the directory itself is copied to the destination. So a command like:
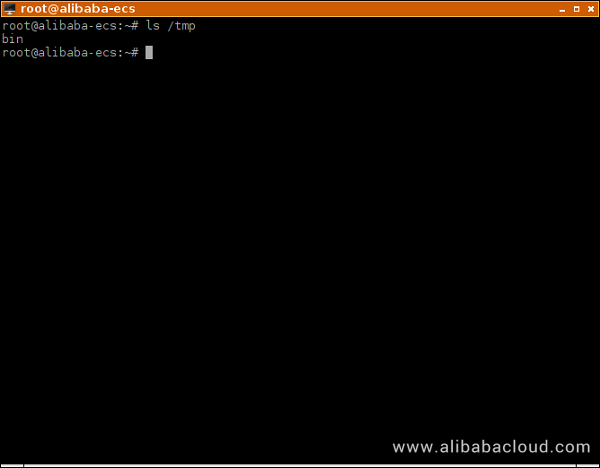
rsync -r /bin /tmpfollowed by a ls /tmp will show a much cleaner result:

It is important to remember this subtle difference, especially if you use the TAB key to autocomplete paths you type in the command line. Normally, the Bash shell automatically adds a trailing slash when autocompleting directory names. To give you a practical example, let's say that you have some website files stored in /var/www/website and a backup directory in /mnt/backups.
rsync -r /var/www/website/ /mnt/backups/website
rsync -r /var/www/website /mnt/backups
rsync can tunnel through SSH connections to send and receive files. Although the utility also includes its own (rsync) daemon that can be configured and used instead, relying on the SSH daemon is much easier (no further setup required) and much more secure as well, out of the box.
If you want to backup files/directories that are owned by multiple users, you will have to work through the root user on the destination side because it is the only one that has the privilege to freely set any ownership information and other types of metadata (ACL, SELinux contexts, etc.) A regular user can only set the file/directory owner to himself, which means owner information would be lost on the destination side, when backing up. If your use case doesn't require working with files belonging to multiple users, or special privileges to set certain types of metadata, then, you can create an additional, unprivileged user (with the adduser command) on the destination operating system. A dedicated user for rsync backups adds a bit of security and can protect against some mistakes. Whatever you choose, you will have to configure the local instance to be able to access the destination instance through SSH (to log in) and have rsync available (install it) on both the local and remote operating system.
If you're using passwords to log in to the root user on a remote instance, you could send (push) a file with this command:
rsync -v /bin/ls root@203.0.113.10:/tmpThis would copy the local file /bin/ls to the remote server found at IP address 203.0.113.10, in the directory /tmp. Instead of an IP address, we can use the DNS hostname if we have one configured, e.g.: rsync -v /bin/ls root@example.com:/tmp We can see that generally, the syntax is:
rsync [options] /path/to/local/file_or_directory remote_username@IP_ADDRESS_OR_DNS_HOSTNAME:/path/to/destinationAfter running this command, we will get an output such as this one:
root@alibaba-ecs:~# rsync -v /bin/ls root@203.0.113.10:/root
The authenticity of host '203.0.113.10 (203.0.113.10)' can't be established.
ECDSA key fingerprint is SHA256:bfmHI3x/TA5F2NFdxlXg5aMFh22HbdjE7FJdbfv8UKw.
Are you sure you want to continue connecting (yes/no)? yes
Warning: Permanently added '203.0.113.10' (ECDSA) to the list of known hosts.
root@203.0.113.10's password:
ls

sent 130,830 bytes  received 35 bytes  23,793.64 bytes/sec
total size is 130,736  speedup is 1.00
root@alibaba-ecs:~#
We would be asked for the password, which we can type at the prompt. This is fine for manual rsync transfers but if we need to automate the task we have to take a different route and use SSH keys for authentication.
To receive (pull) a file instead of sending it, we simply reverse the source and destination parameters:
rsync -v root@203.0.113.10:/bin/ls /tmpYou can read this introductory article on SSH keys if you're unfamiliar with the subject. Whatever method you use to set up these pairs, keep the private key at hand since that's what you'll need to give rsync access to the remote instance. At the moment of writing this guide, if you create a key pair in the Alibaba Console, the private key will automatically be downloaded to your computer as a .pem file.
Security tip: give the least secure server in your infrastructure the least access keys/credentials to other instances. Imagine the following scenario: server1 hosts a WordPress website. Since so many publicly accessible services are running there (Apache/nginx HTTP server, MySQL/MariaDB database server, the WordPress script itself, etc.), server1 has what is called a large attack surface, many points that an attacker can try, to find a potential weak spot. If server2 and server3 are your backup servers and only run the SSH daemon, these have a very small attack surface and are much less likely to be compromised. In such an infrastructure, you wouldn't give server1 the ability to access server2 and server3. If server1 gets hacked, the attacker can then also take control of server2 and server3. Make the instances with the most potential to be vulnerable, slaves, and the safer instances masters, so that compromised slaves cannot take control of masters and the rest of your infrastructure is unaffected. In this case, it means that you would set up server2 and server3 to be able to log in as root to server1, but not the other way around. If server1 gets compromised, the attacker won't be able to easily move on to server2 and server3. This also exemplifies the benefit of "many points that can access one point" versus "one point that can access many points". A lot of users choose the second structure, because it's easier/faster to build, but later find out that a breach in their central point allowed a breach of their entire infrastructure.
Now let's see how we would let the root user on server2 log in as root on server1, with a private SSH key. Remember, you can create and work with other usernames as well. We're just using root here to offer a practical example with commands you can follow and adapt to your needs. After opening up an SSH session and logging in to server2, the first thing we need to do is create the .ssh directory, if it doesn't already exist:
mkdir ~/.sshThe ~ in this example automatically fills in the path to the current user's home directory. So the command above is interpreted as mkdir /root/.ssh in our case. If you're not using bash as your shell's session, you may have to type the full path yourself since the ~ may not be interpreted in the same way by other shells.
Correct permissions need to be set on this directory, making it accessible only to the owner:
chmod 700 ~/.sshThe next step is to open the nano editor:
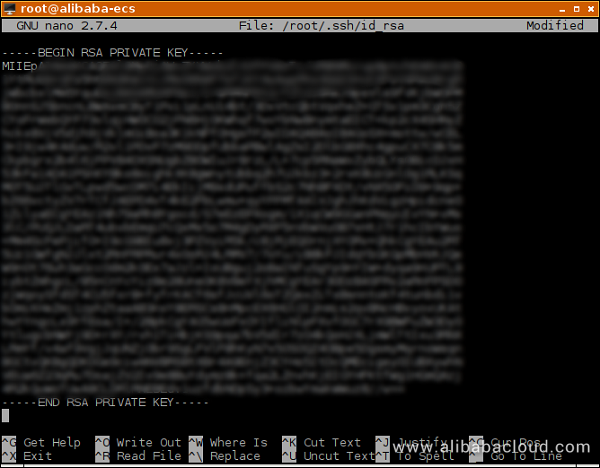
nano ~/.ssh/id_rsaAnd paste the private key:

Save the file by pressing CTRL+X, then y and finally ENTER. Now set permissions on the file so that only the owner can read and write to it:
chmod 600 ~/.ssh/id_rsaFinally, we can use rsync to transfer files, without being prompted to use a password:
rsync -v /bin/ls root@203.0.113.10:/rootNow you can create weekly, daily or hourly backups by creating a cron job that runs the rsync command of your choice.
Usually, when synchronizing directories, the -a (archive) parameter is preferred instead of -r. -a implies -r recursive copying but also preserves many of the file and directory attributes, such as permissions, timestamps, user and group owner, etc. Besides preserving file/directory structure more accurately, archive mode has the added benefit of speeding up future synchronizations of the same targets since rsync can now compare metadata such as last modification timestamps and skip reading, checksumming and comparing files that have identical times.
Another way to save network bandwidth and speed up transfers is to use compression, by adding -z as a command line option.
Since network transfers can sometimes be interrupted, it's useful to also add the -P parameter to be able to resume partially uploaded/downloaded files.
So, in most cases, when you will synchronize directories, you will use a command such as:
rsync -avPz root@203.0.113.10:/bin /tmp/As seen in the examples above, command line switches/options can be specified without adding the minus sign next to each one, i.e., rsync -a -v -z is identical to rsync -avz or rsync -vza. Let's explore a few of the most used options:
-a -- Archive mode: implies -r recursive mode, copies symlinks (-l), preserves file/directory permissions (-p), modification times (-t), user (-o) and group (-g) owners and also copies device/special files (-D). If you don't need all of these options, you can replace -a with the options you need, e.g. -og. When you want to keep all metadata on source and destination files identical, sometimes you will have to supplement the -a parameter with:
-X -- Preserve extended attributes, e.g. SELinux contexts may be stored as such attributes on distributions like CentOS/RedHat where these are used by default.-A -- Preserve ACLs (Access Control Lists)-v -- Verbose mode prints more statistics: what files are currently copied/transferred and summary about bytes transferred and speedup ratio.-r -- Copy every object contained in directories and subdirectories. Without this option, directories are skipped and only files are copied. E.g., rsync -v root@example.com:/etc/* /tmp would only copy files from /etc/. When you are copying/transferring a single directory, you have to use this option or the -a parameter, otherwise nothing happens, the directory is simply skipped.--delete -- Delete files in the destination that don't exist anymore in the source location. Used when you want to keep an exact replica of the source files/directories. Without this option, files that have been deleted in the source won't be deleted on destination, which is preferable for most backup schemas. Keep in mind that the --delete parameter exposes you to the risk of losing the entire backup, if used inappropriately (e.g., if you use the wrong source directory or an empty one). An option like --max-delete=3 so that rsync never deletes more than 3 files can reduce the amount of data you might lose. The number can be adjusted according to your use case.-P -- Implies --partial and --progress to resume partially transferred files and show progress. This is especially useful when transferring large files. Without -P or --partial, if the connection drops during a transfer, the file is deleted and you will have to restart from scratch.-z -- Compress data before sending it on the network.-h -- Show "human readable" numbers: instead of statistics being shown in bytes, they will be displayed in megabytes, kilobytes, etc., because 9.82M is easier to read than 9,821,016.You can consult the rsync manual with a command like man rsync or read it online here: https://manpages.debian.org/stretch/rsync/rsync.1.en.html
Multiplexing and Making Terminal Sessions Persistent with tmux

2,593 posts | 792 followers
FollowAlibaba Clouder - July 27, 2020
Alibaba Cloud Community - January 25, 2022
Alibaba Clouder - November 14, 2018
Alibaba Clouder - January 31, 2019
Alibaba Clouder - August 14, 2020
Alibaba Clouder - March 15, 2018

2,593 posts | 792 followers
Follow ECS(Elastic Compute Service)
Elastic and secure virtual cloud servers to cater all your cloud hosting needs.
Learn More OSS(Object Storage Service)
An encrypted and secure cloud storage service which stores, processes and accesses massive amounts of data from anywhere in the world
Learn More Data Transmission Service
Supports data migration and data synchronization between data engines, such as relational database, NoSQL and OLAP
Learn MoreMore Posts by Alibaba Clouder
Raja_KT March 6, 2019 at 4:11 am
Good one. Quite handy for referral but is there any tool to just click?