By Kenny Lai, Alibaba Cloud Solution Architect
Alibaba Cloud Content Delivery Network (CDN) provides a scalable and high-performance content delivery service for the accelerated distribution of your website content to users across the globe. Accelerated content may be vulnerable to DDOS attacks. Alibaba Cloud Anti-DDoS Premium can help to secure this content by providing value-added protection.
In this tutorial, you will learn just exactly how you can set up a website to be configured with Alibaba Cloud Content Delivery Network (CDN) with Anti-DDoS protection.
As the first part of this tutorial, we will set up a website that is hosted on Object Storage Service (OSS) use CDN for content delivery and acceleration purposes. If you have a website hosted on Alibaba Cloud it should be easy for you to follow this tutorial.
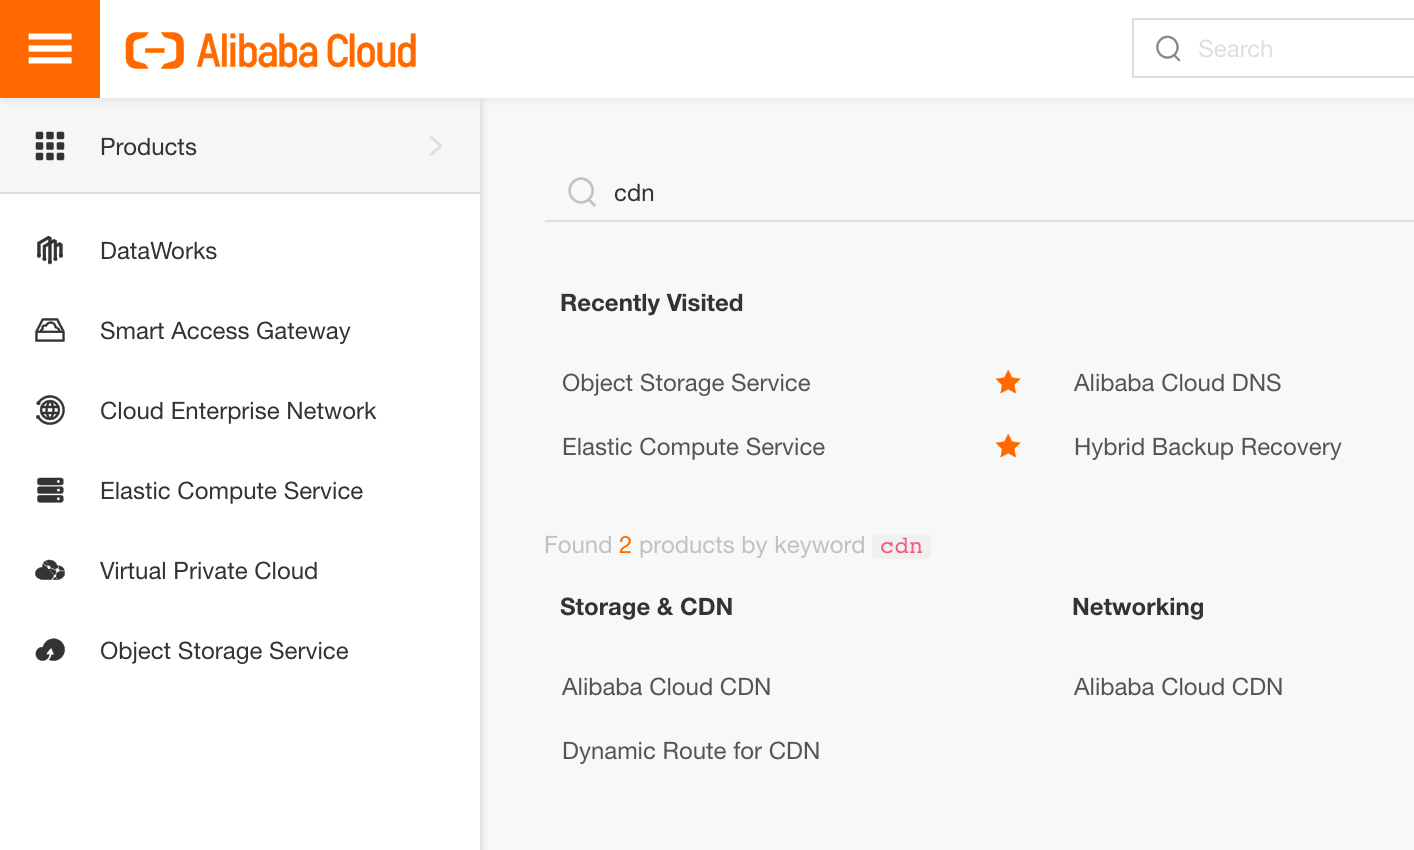
To start, log on to Alibaba Cloud. Then, after logging on to the Alibaba Cloud console, search for CDN. Click on Alibaba Cloud CDN to enter the CDN console.
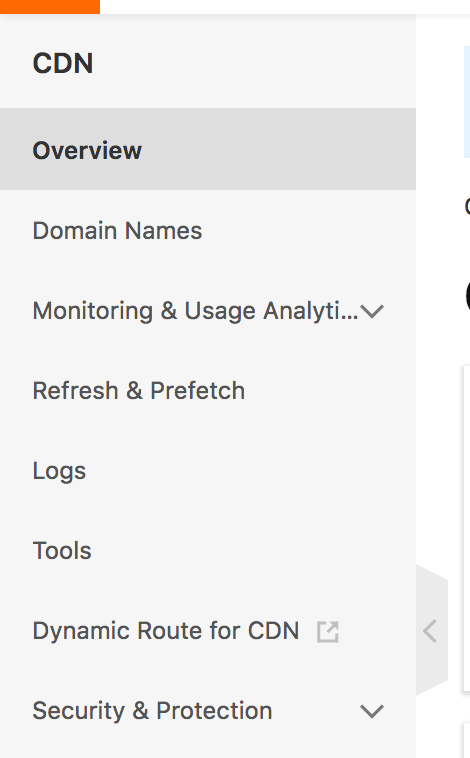
Click on Overview link in the left-side navigation pane of the CDN console.
Click Add Domain Name to add a new domain to be cache by CDN.

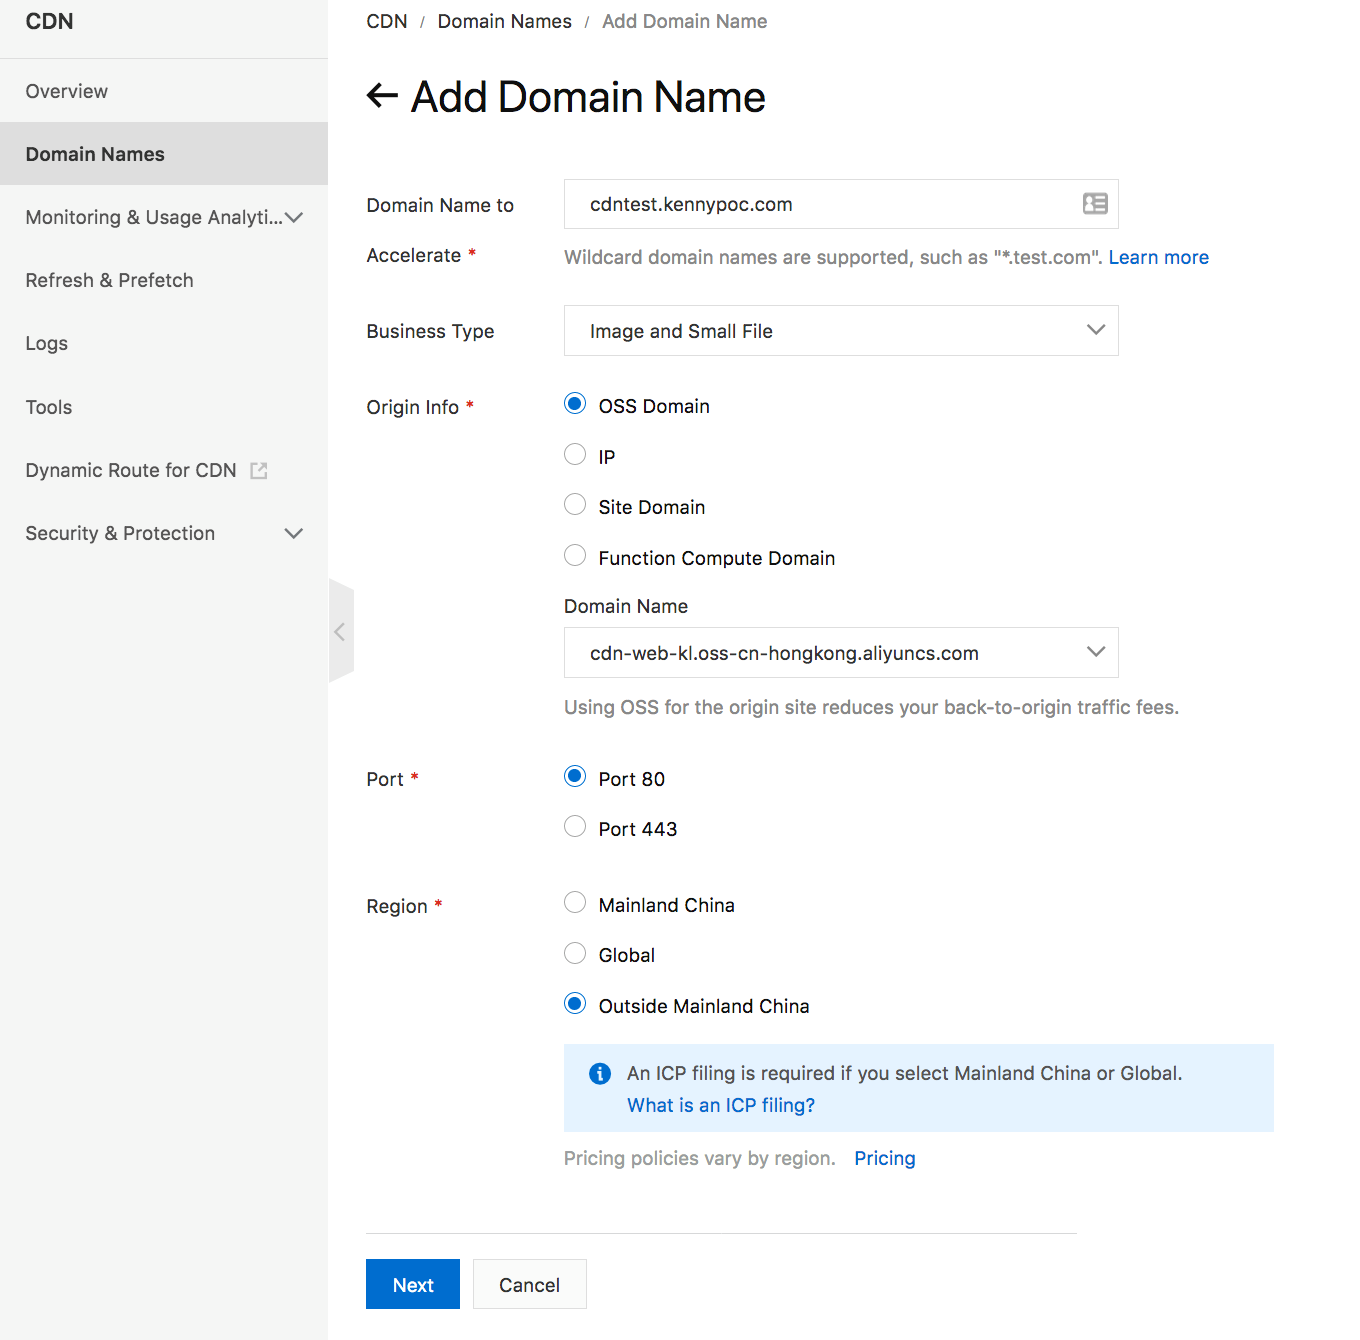
On the Add Domain Name page, enter the domain name you want to accelerate, and the origin Information. For this tutorial, I'm using an domain hosted on Alibaba Cloud OSS in this example. Enter whatever yours happens to be. You will also need to enter the port, and region information. When you're finished, click Next.
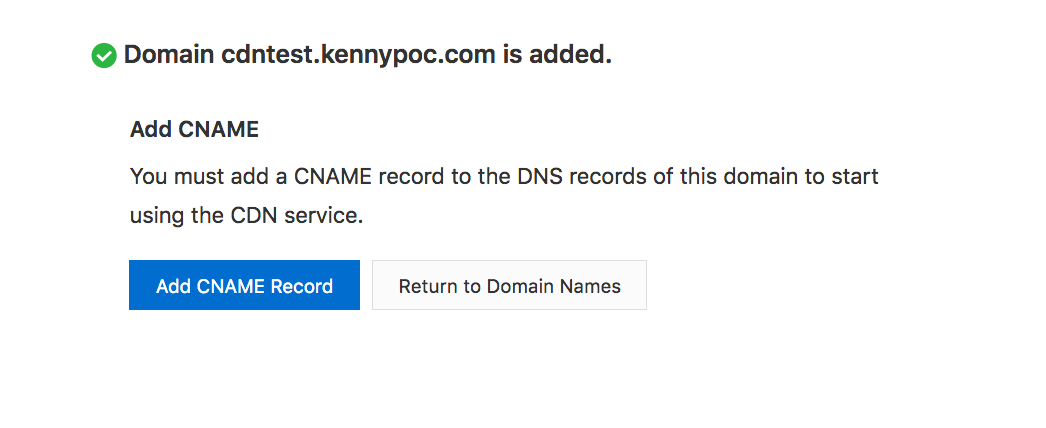
Now you have finished this part, so it's time to move to adding the cname to Alibaba Cloud Domain Name System (DNS).
Note that, if you don't associate, or rather bind, the cname to your actual domain, the CDN instance will show a warning icon next to the cname, as shown below.

On your DNS page, which for our case is Alibaba Cloud's DNS service, you'll need to add a CName record and use the cname value provided by the CDN service as the record value.
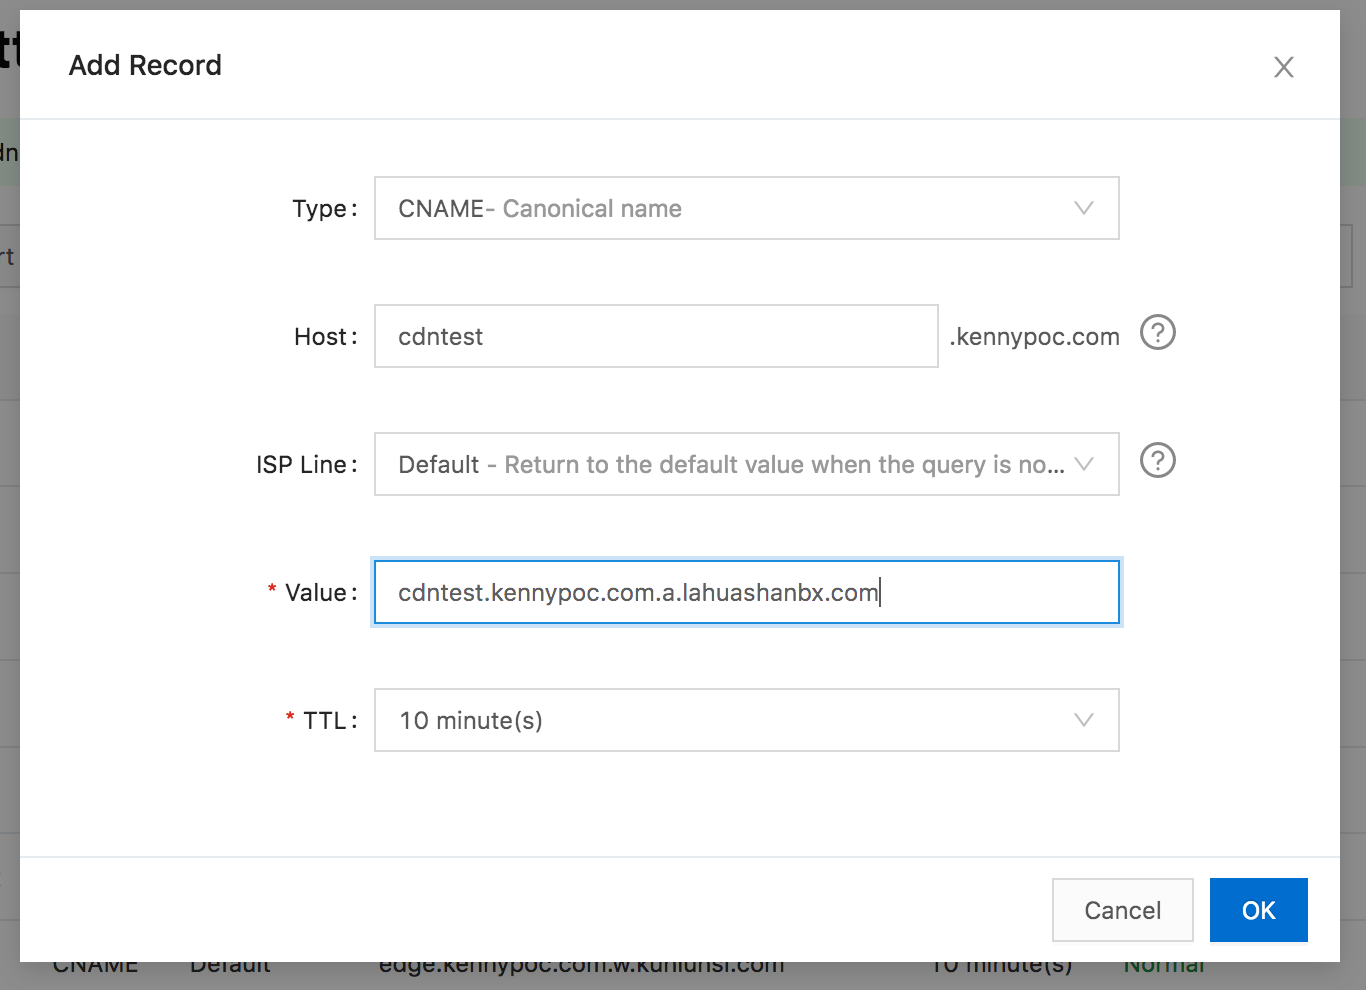
Now, you have finished setting up CDN. So, let's move on to setting up Anti-DDoS.
Now you need to activate the Anti-DDoS Premium service. By searching the keyword "anti" in the Alibaba Cloud console, you should be able to find the service. Once you do, click on the Anti-DDoS Premium link.
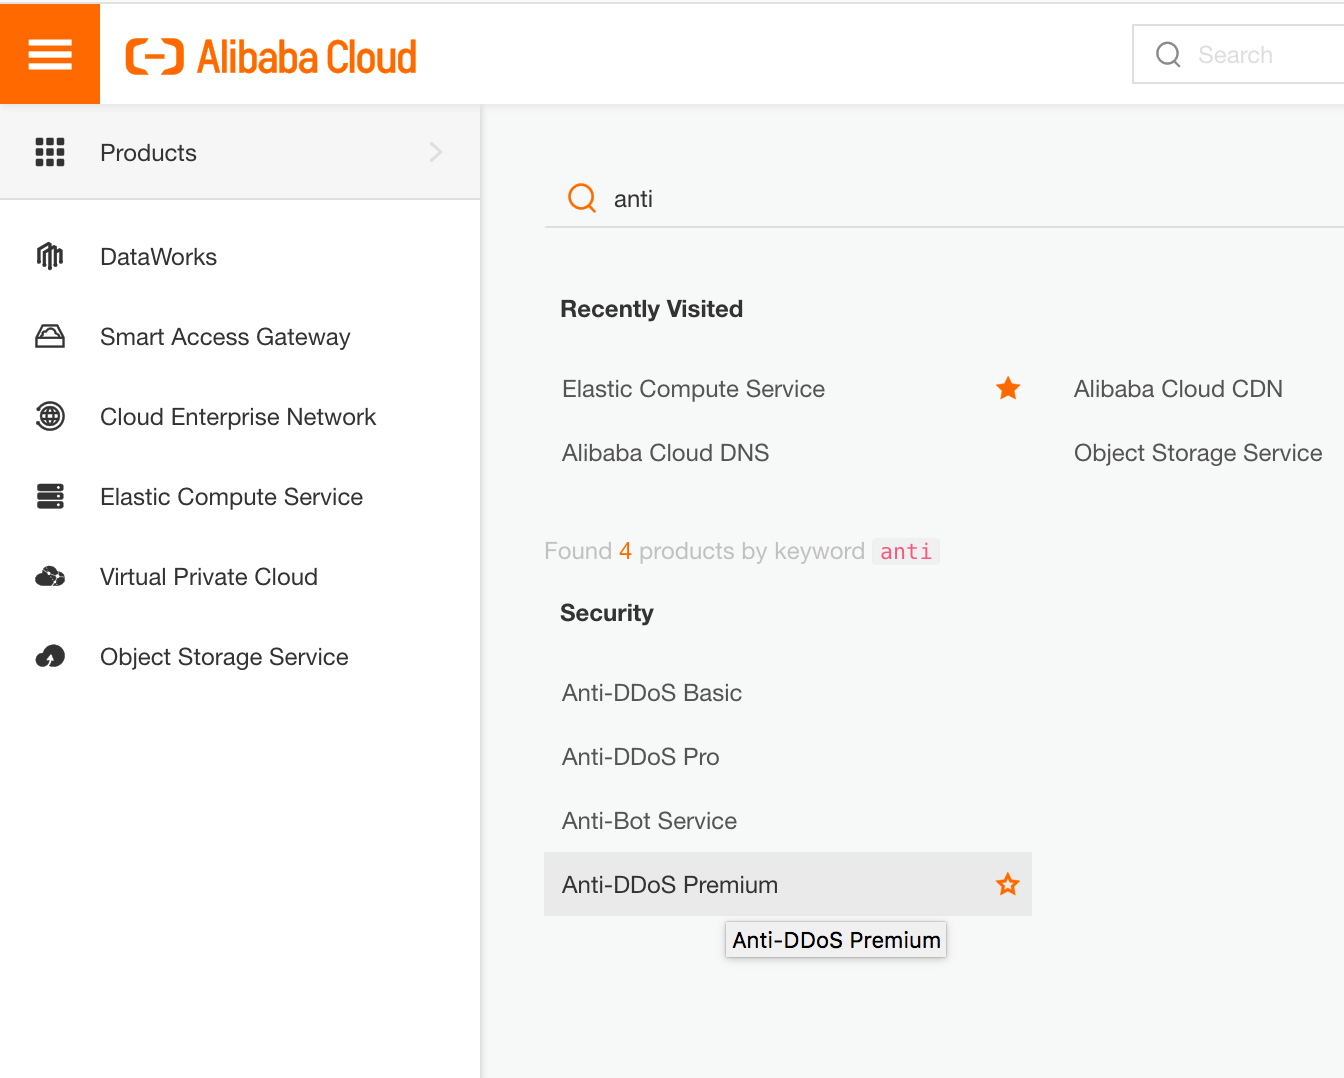
On the Anti-DDoS Premium page, click the Purchase Instances button.

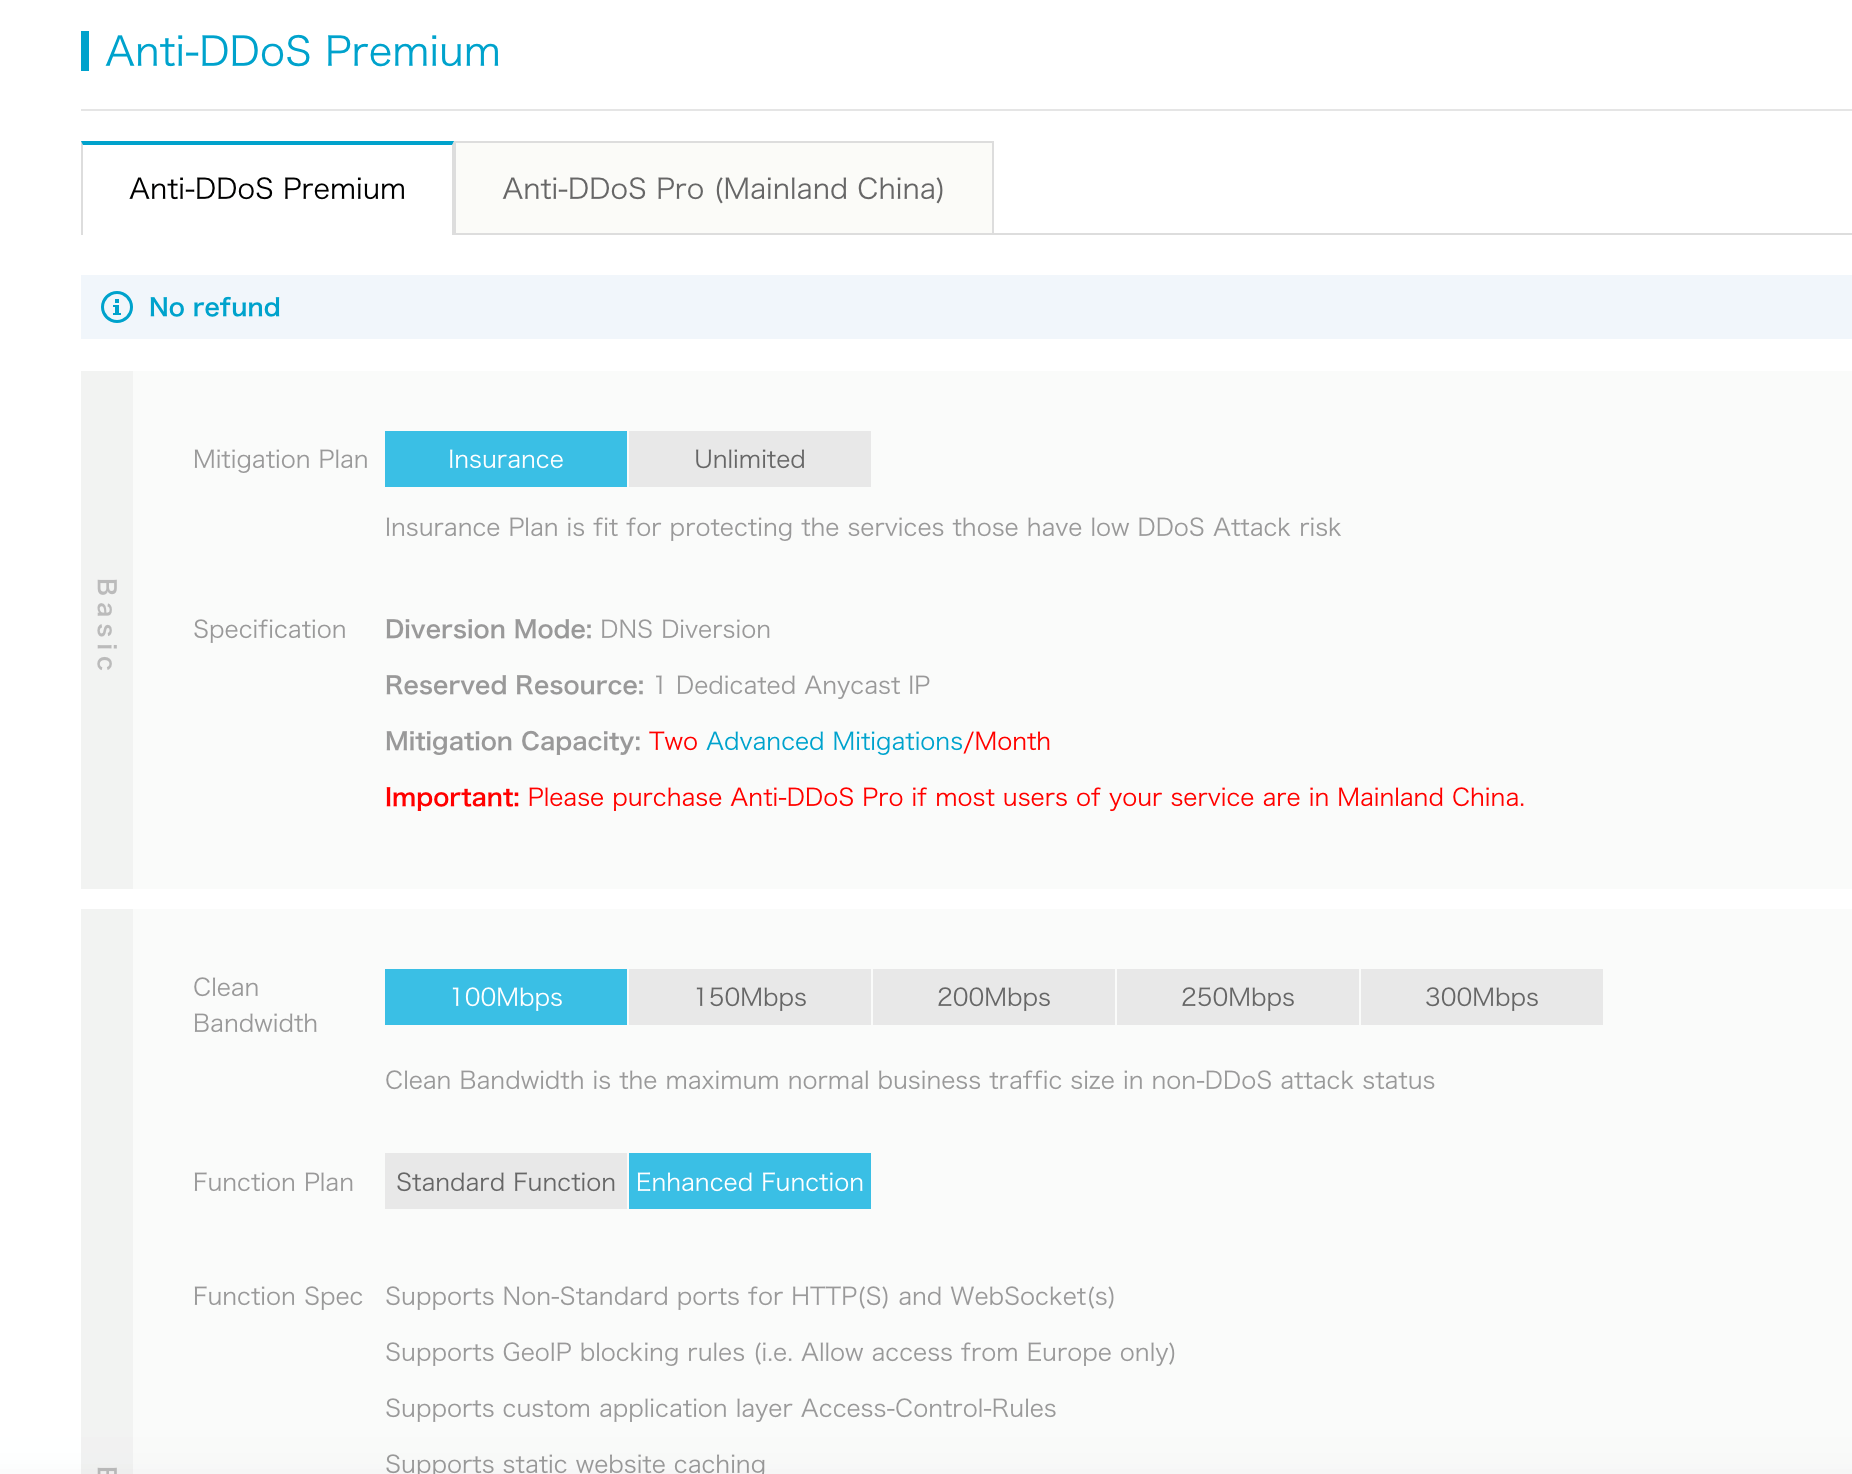
On the Purchase page, for the migration plan, you can choose either Insurance or Unlimited, then choose the bandwidth, for this tutorial I just went with the base bandwidth, and then choose the function plan. For this, you have to choose the Enhanced Function plan; otherwise CDN won't be able to work with Anti-DDoS.
After the instance is purchased, click on the blue icon next to Protected Sites to add a domain.

Name the domain to have both CDN and Anti-DDoS as "cndxddos." Select the function plan, instance and enter the domain name and protocol to support and the Server IP. Then, click on the Add button.
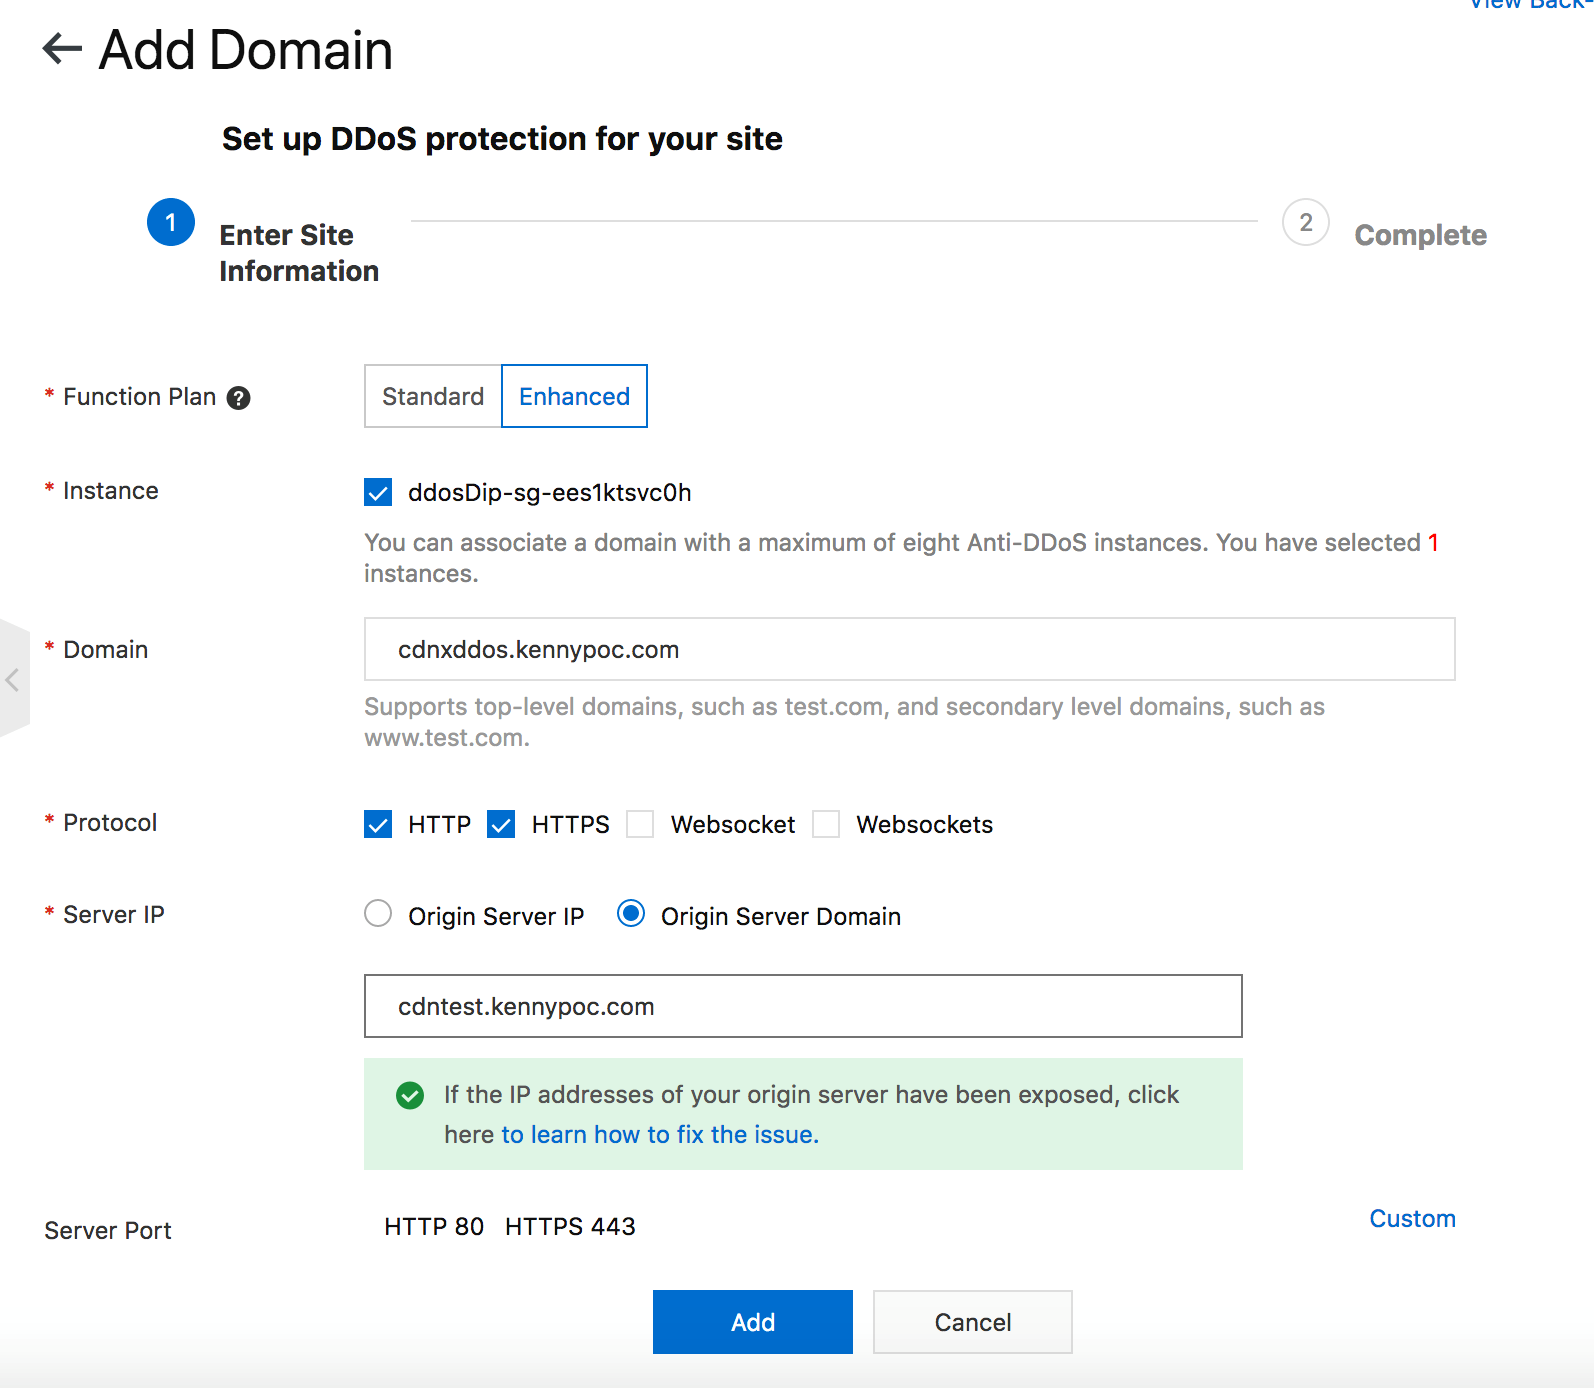
Note the CName of the ant-DDoS Instance in this page
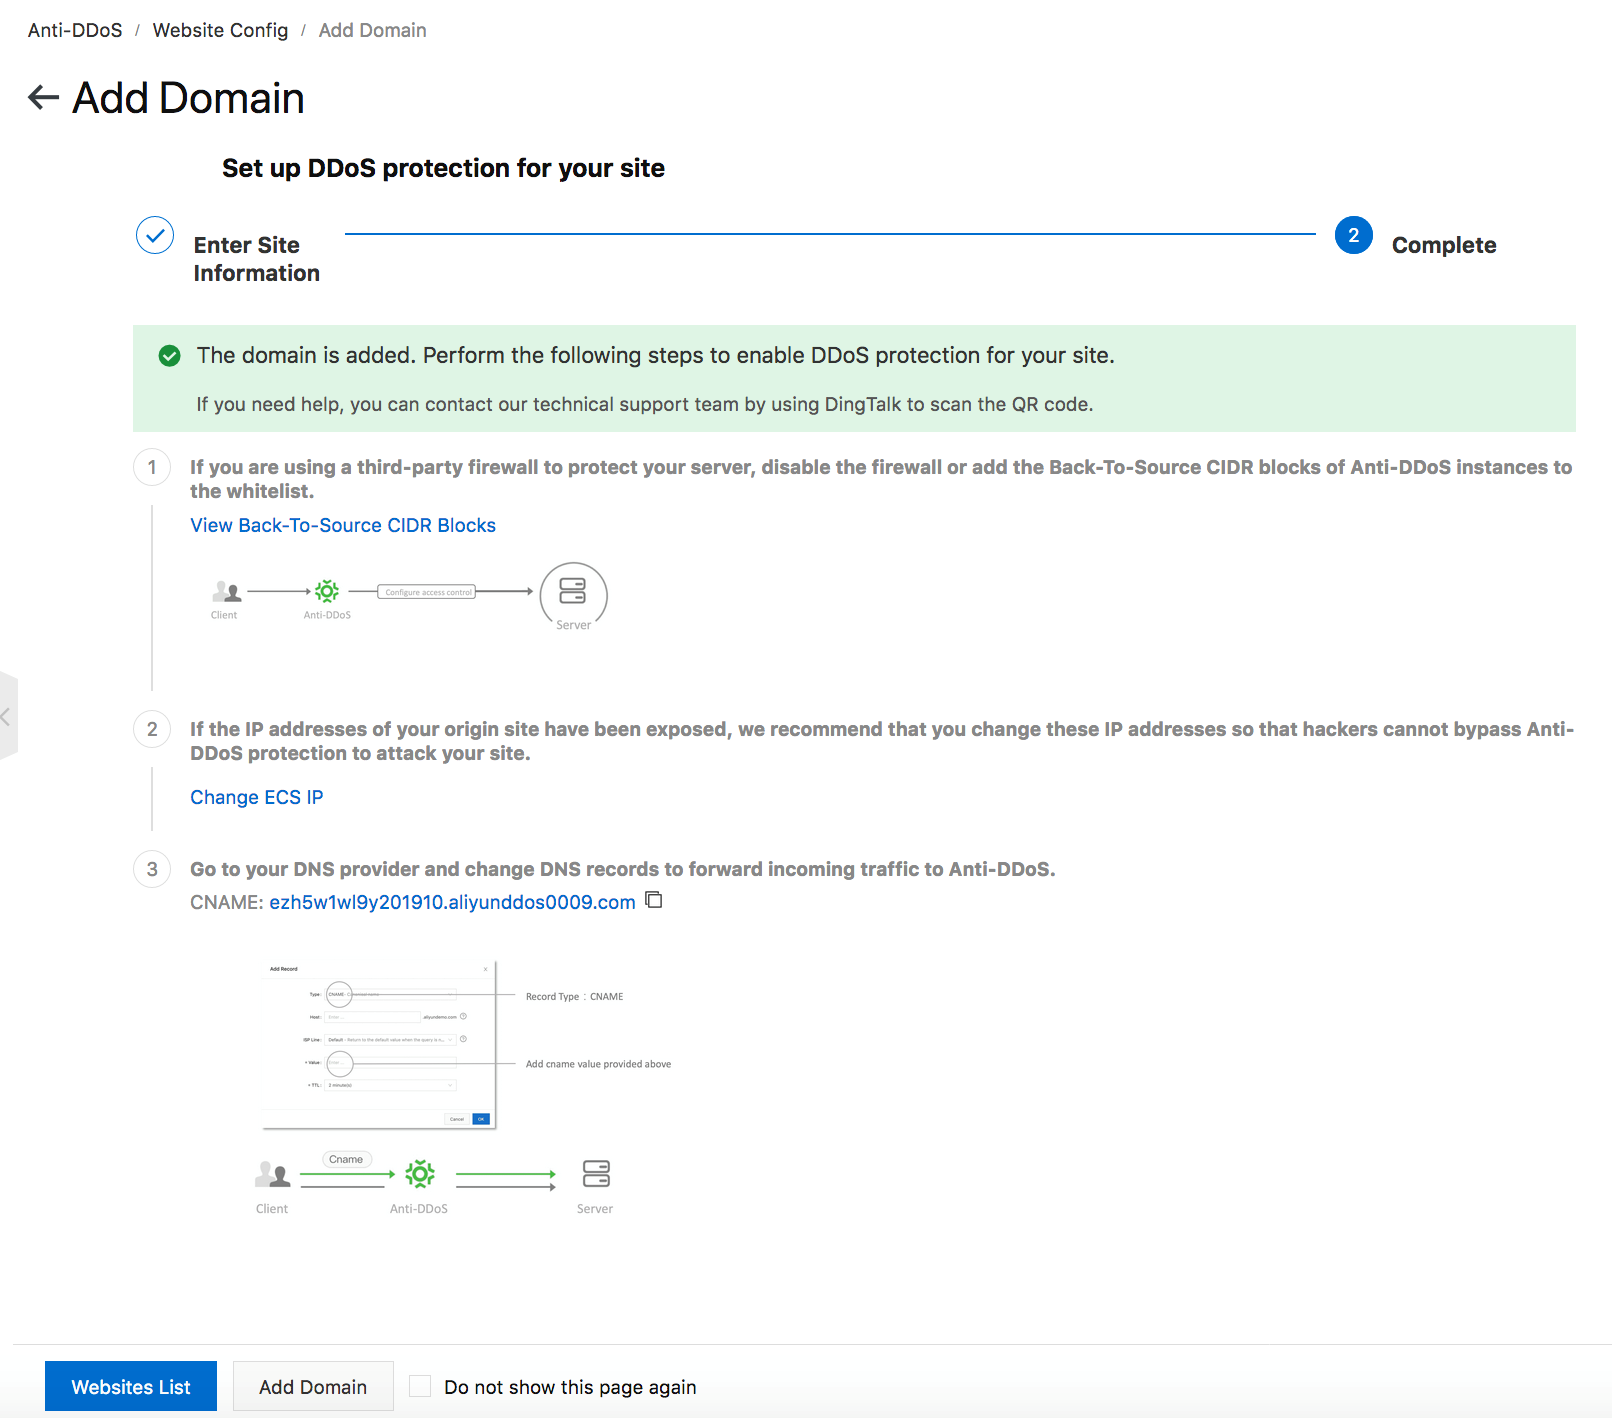
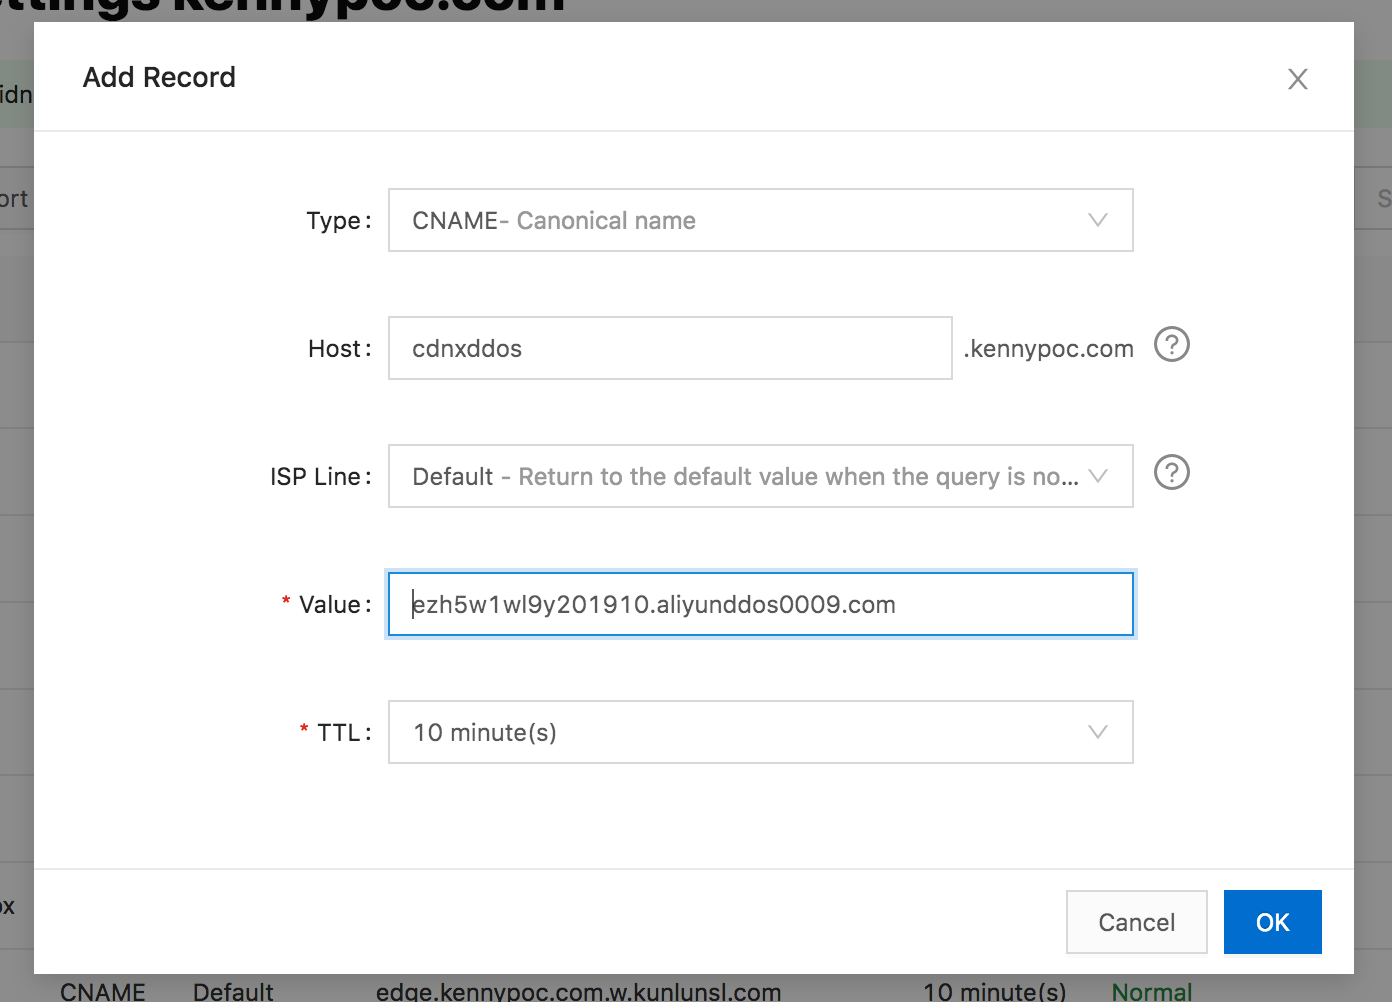
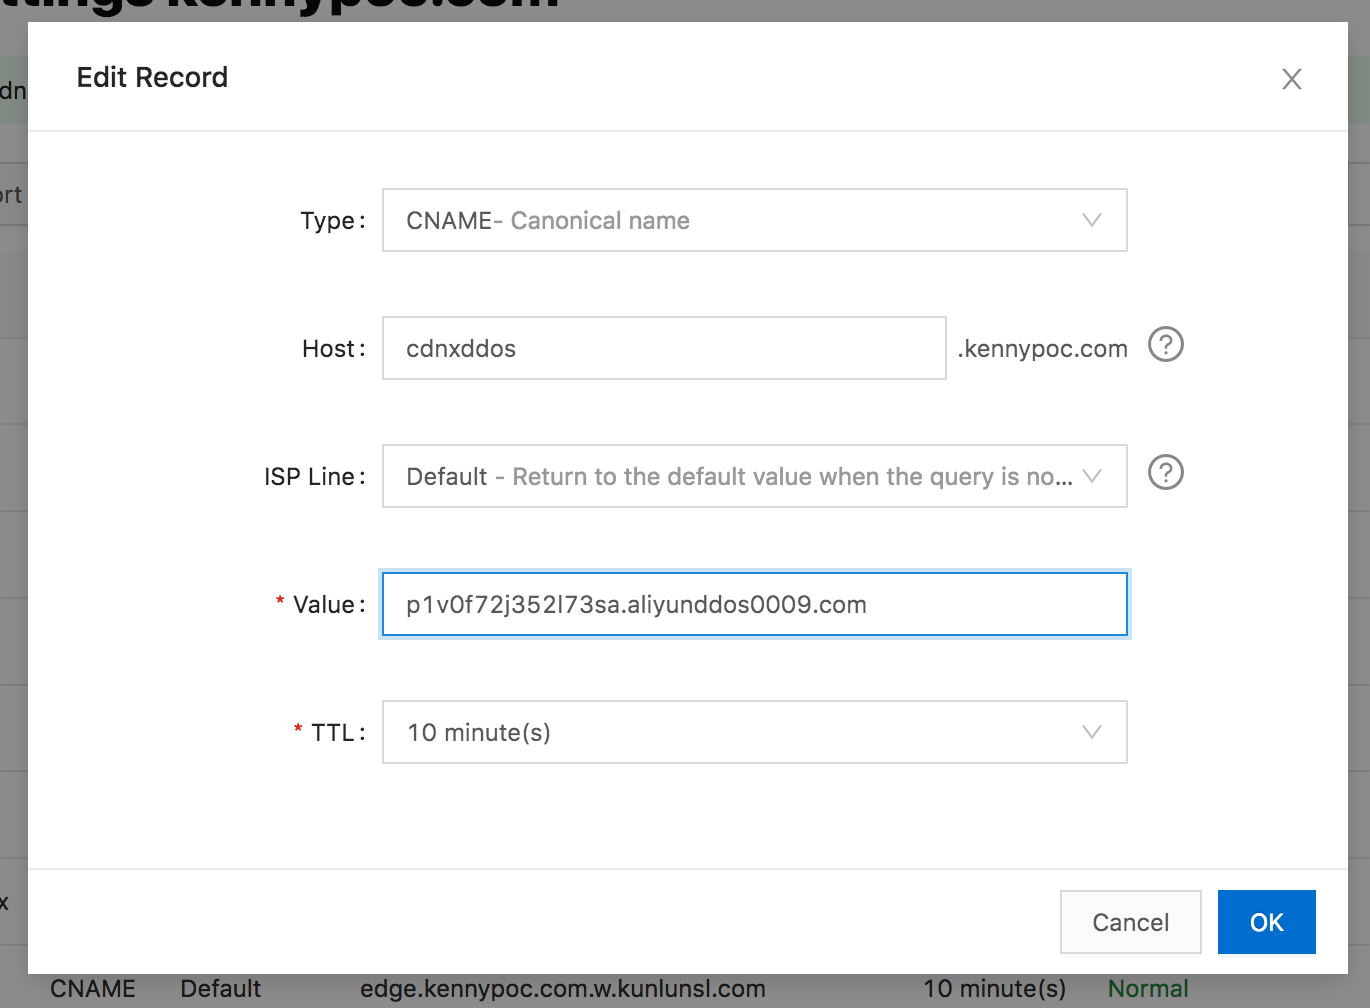
Now you need to create another DNS CName record for "cndxddos" and its value to the CName returned from above step.
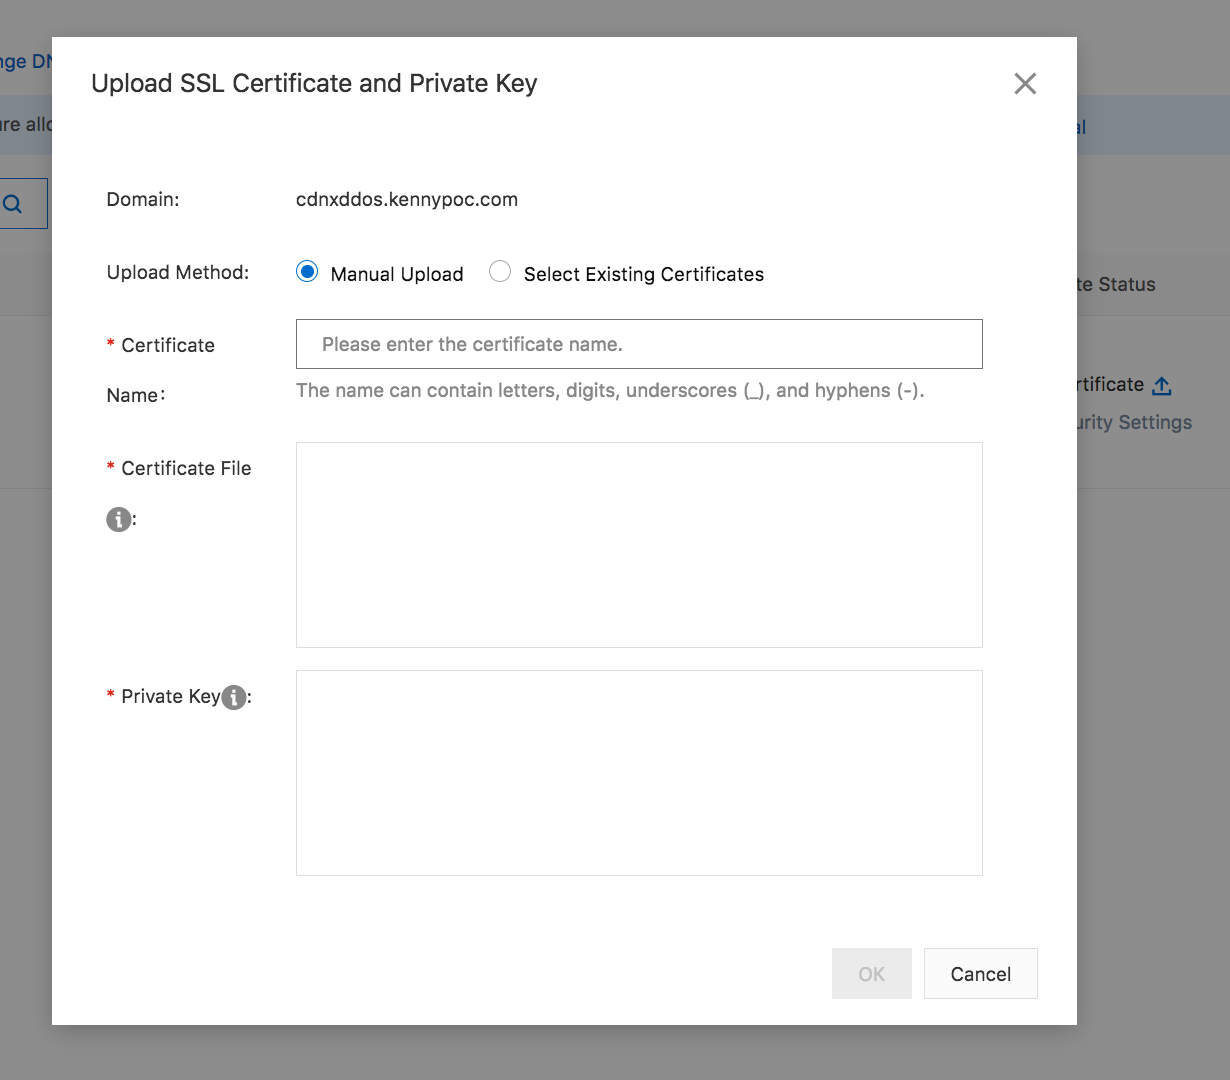
As our website also listens for HTTPS requests, it is time to get an SSL Certificate. Clicking on the Blue icon next to the No Certificate will have a new window pop up.

I recommend that you use a Let's Encrypt certificate for testing and I prepared the complete pem and private key pem to upload in this screen. Click on it and you will have an Anti-DDoS enabled website.
Now how everything is currently configured, Anti-DDoS is sit in front of CDN, which effectively cancels out the function of CDN, which is a problem. So, to let CDN be the primary facing service and have it switch to Anti-DDoS when there is an DDoS attack, we need to set up and configure the Sec-Traffic Manager.
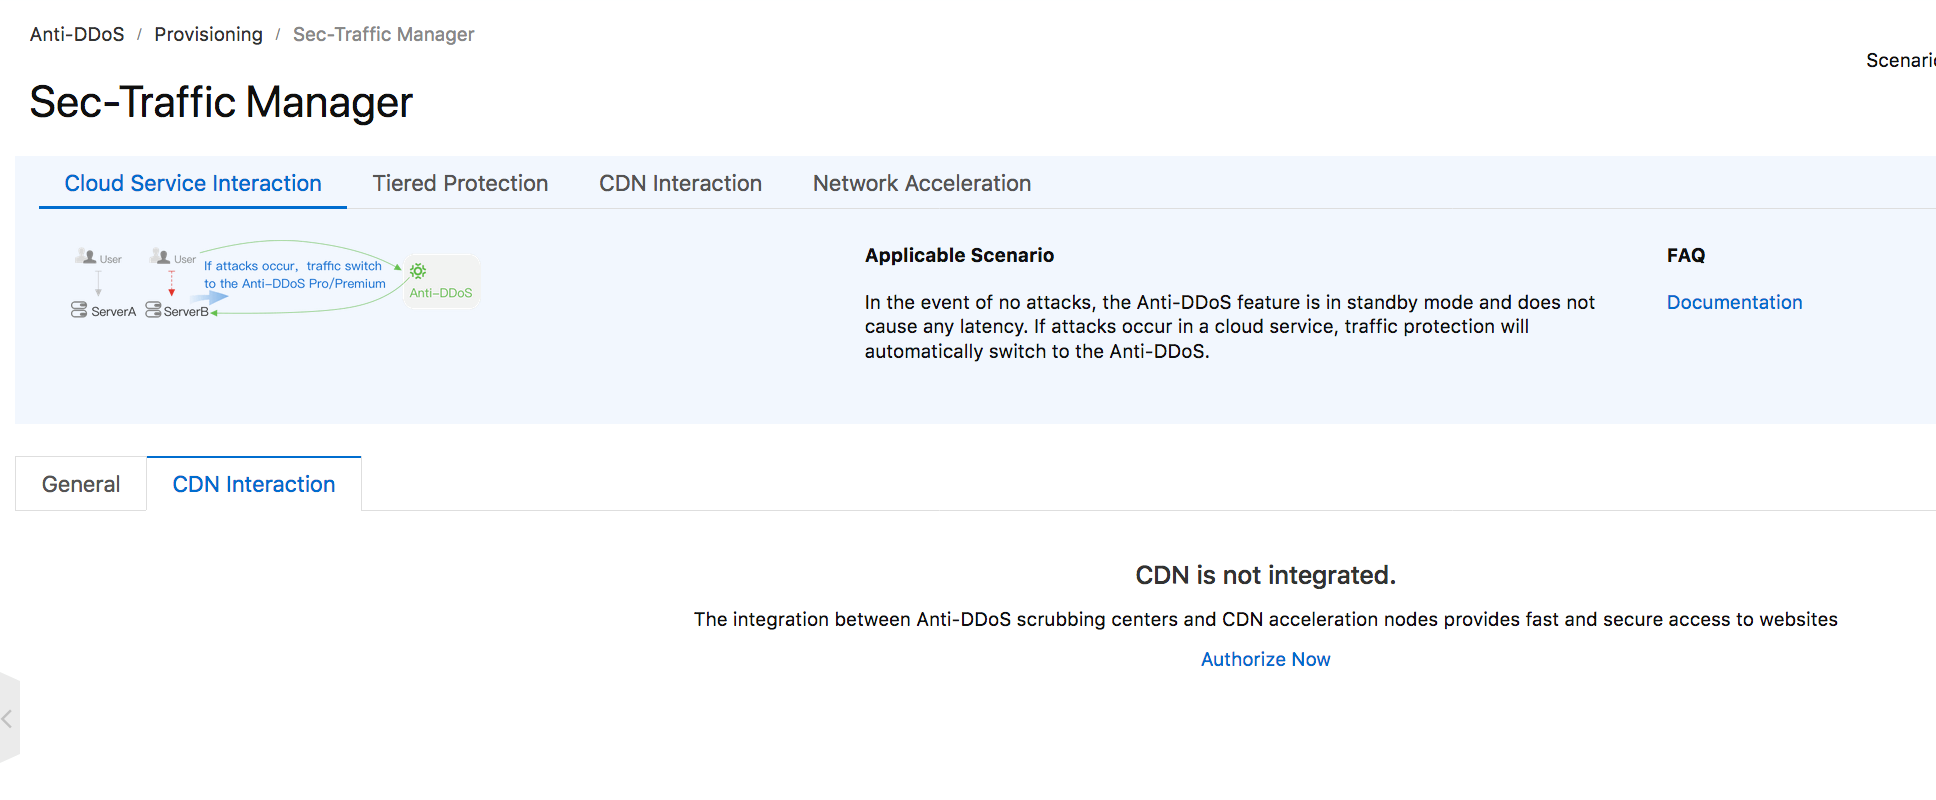
Click on Sec-Traffic Manager, which you'll find in the left-side navigation pane in the Anti-DDOS Premium console. It's under Provisioning in this pane.
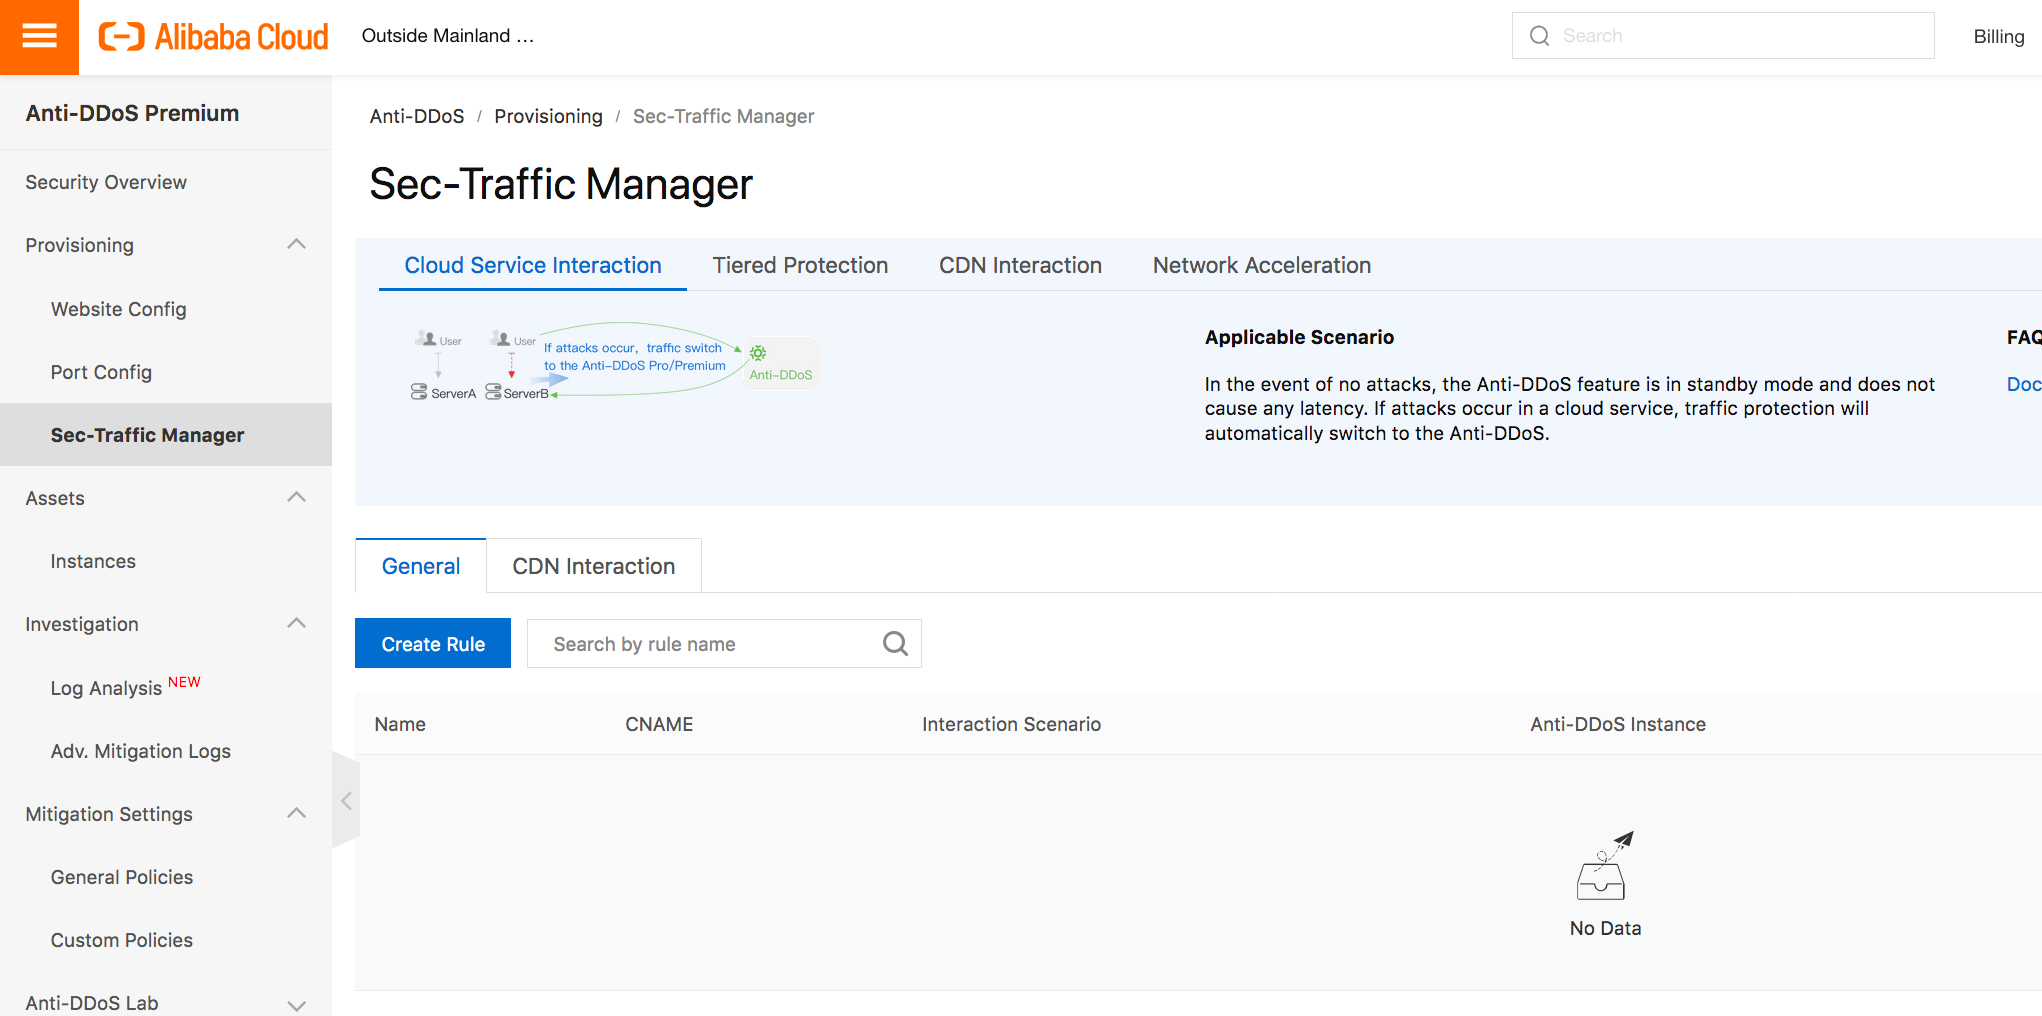
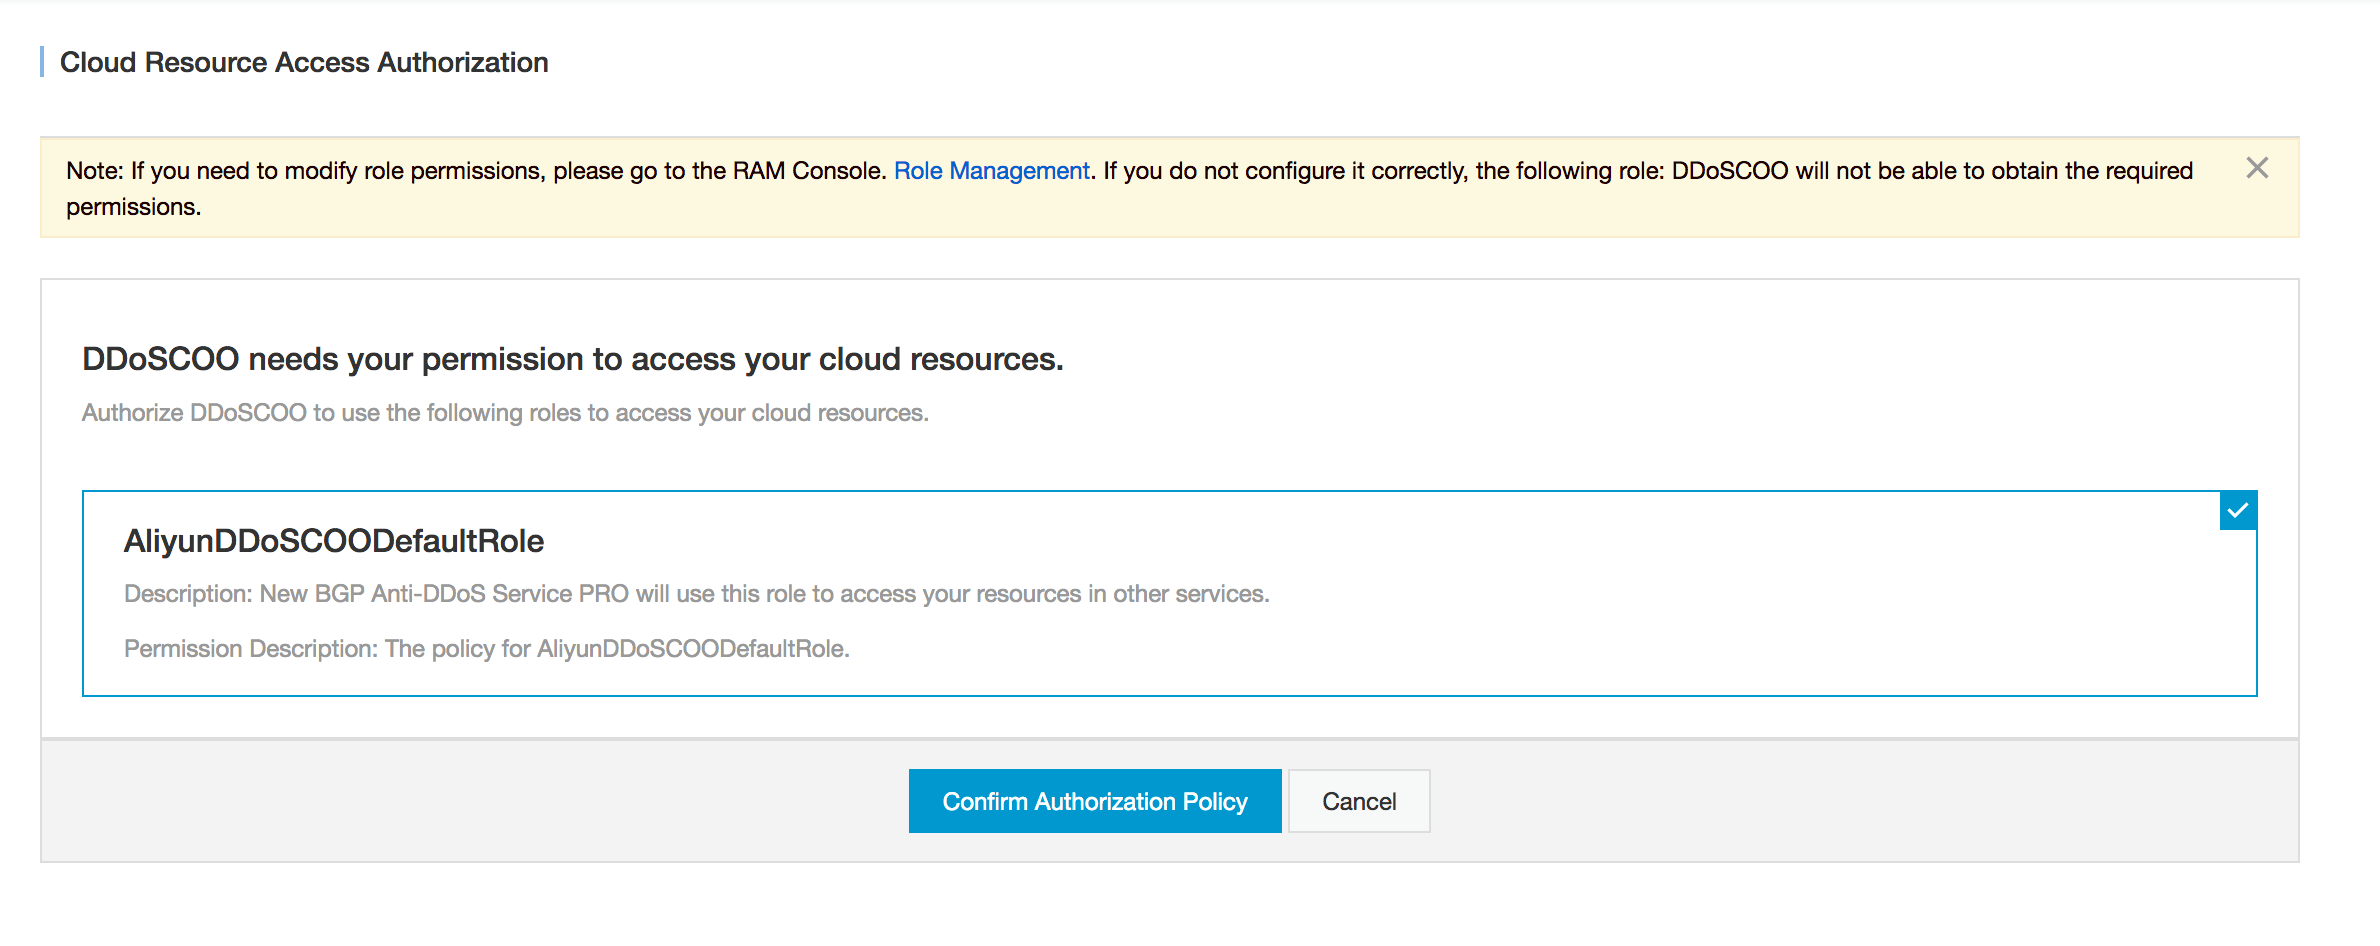
Next, click on CDN Interaction. For this, you'll need to authorize the console with the required role.
Click Confirm Authorization Policy to grant the role.
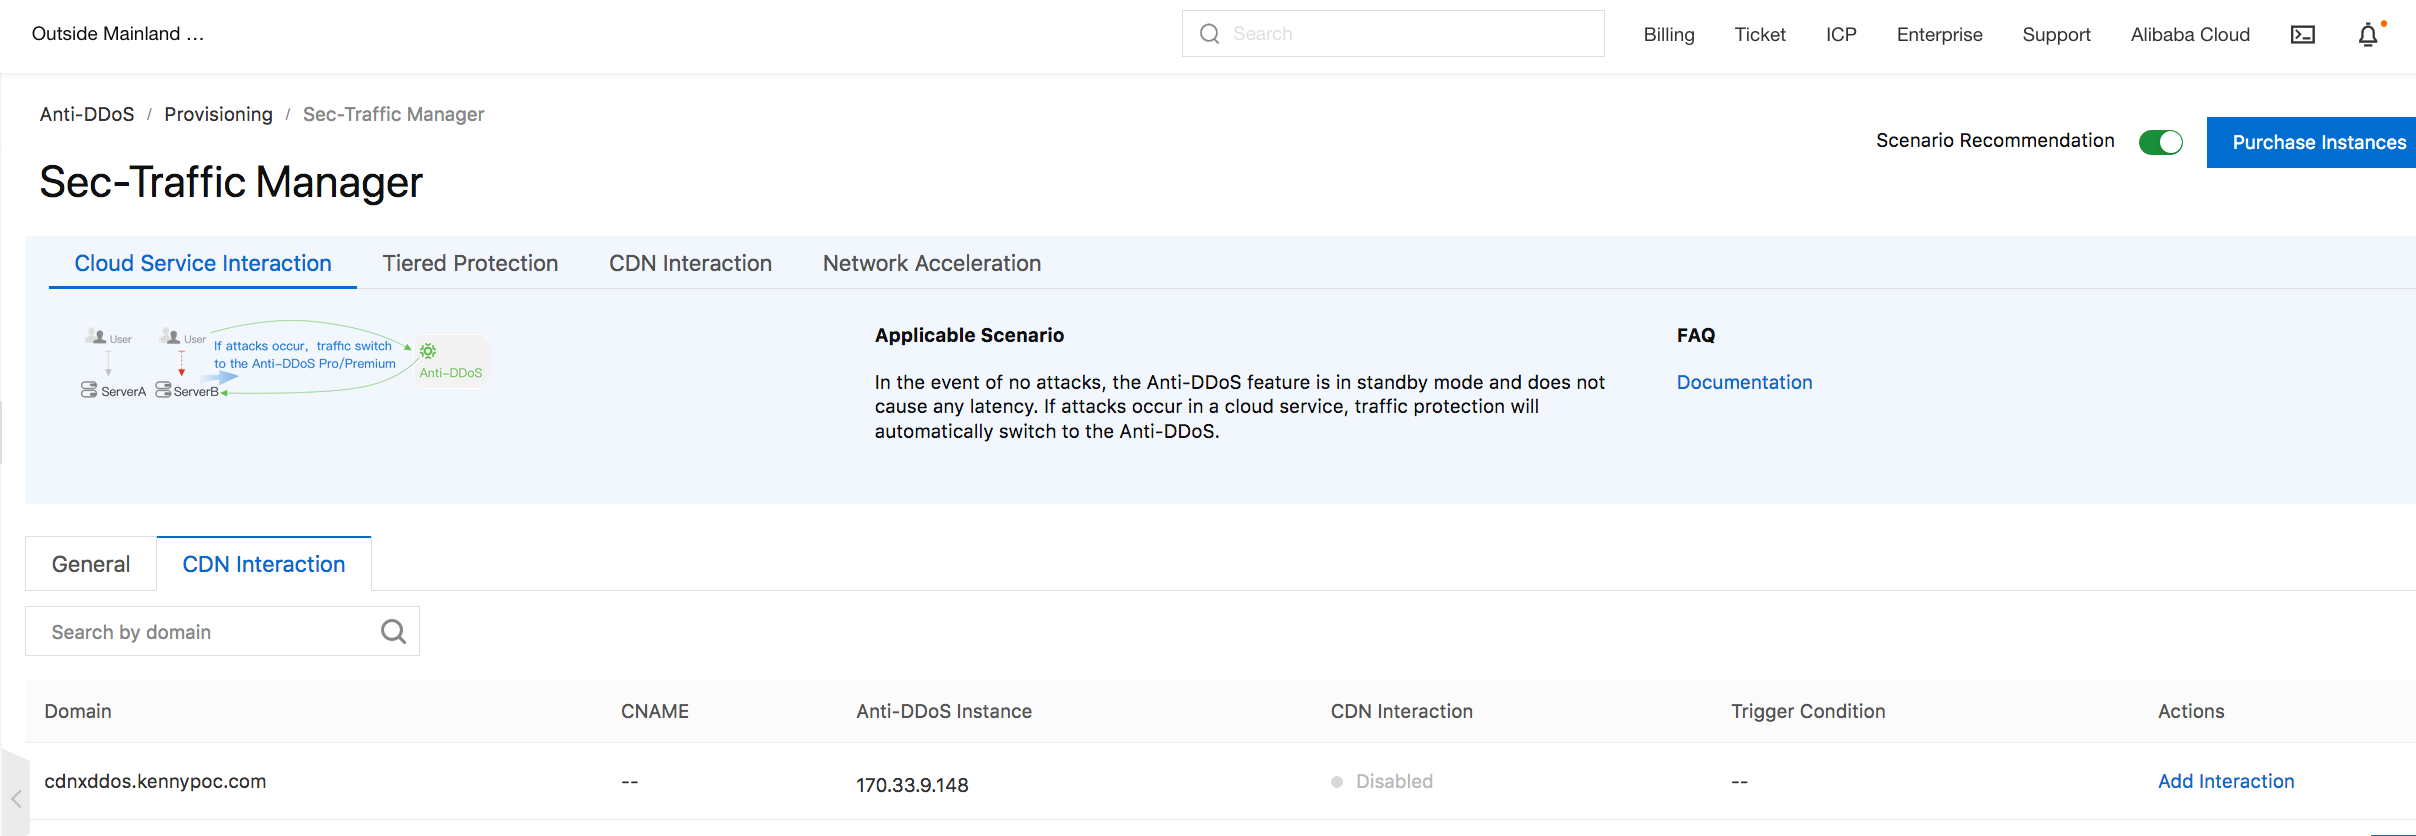
Now the console is able to read CDN information. Click the Add Interaction link.
This page shows the CDN domain "cdnxddos" is not yet created in the CDN service, so you'll have to fix that.
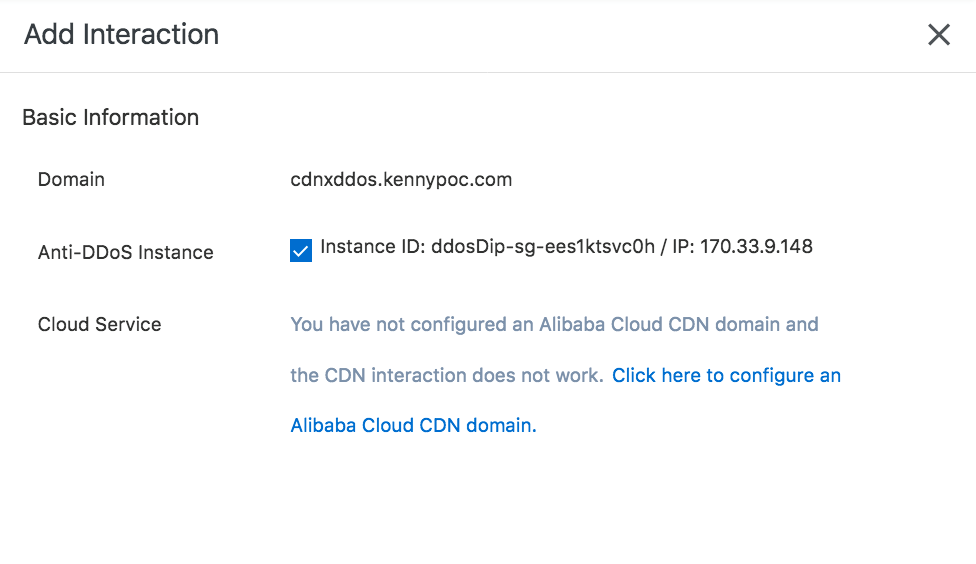
Repeat the steps outlined above for creating an CDN instance for your site, which in my case was for a domain hosted in OSS, and named it "cdnxddos.kennypoc.com."
After that's done, go back to Sec-Traffic Manager again and click Add Interaction. Now CDN should be configured and ready to define the trigger condition for the CDN/Anti-DDoS switch over.
For this, you'll have to set a trigger condition for when the number of requests per second exceeds your defined number. The trigger will cause Anti-DDoS will step in and take over the CName, keeping your website protected.
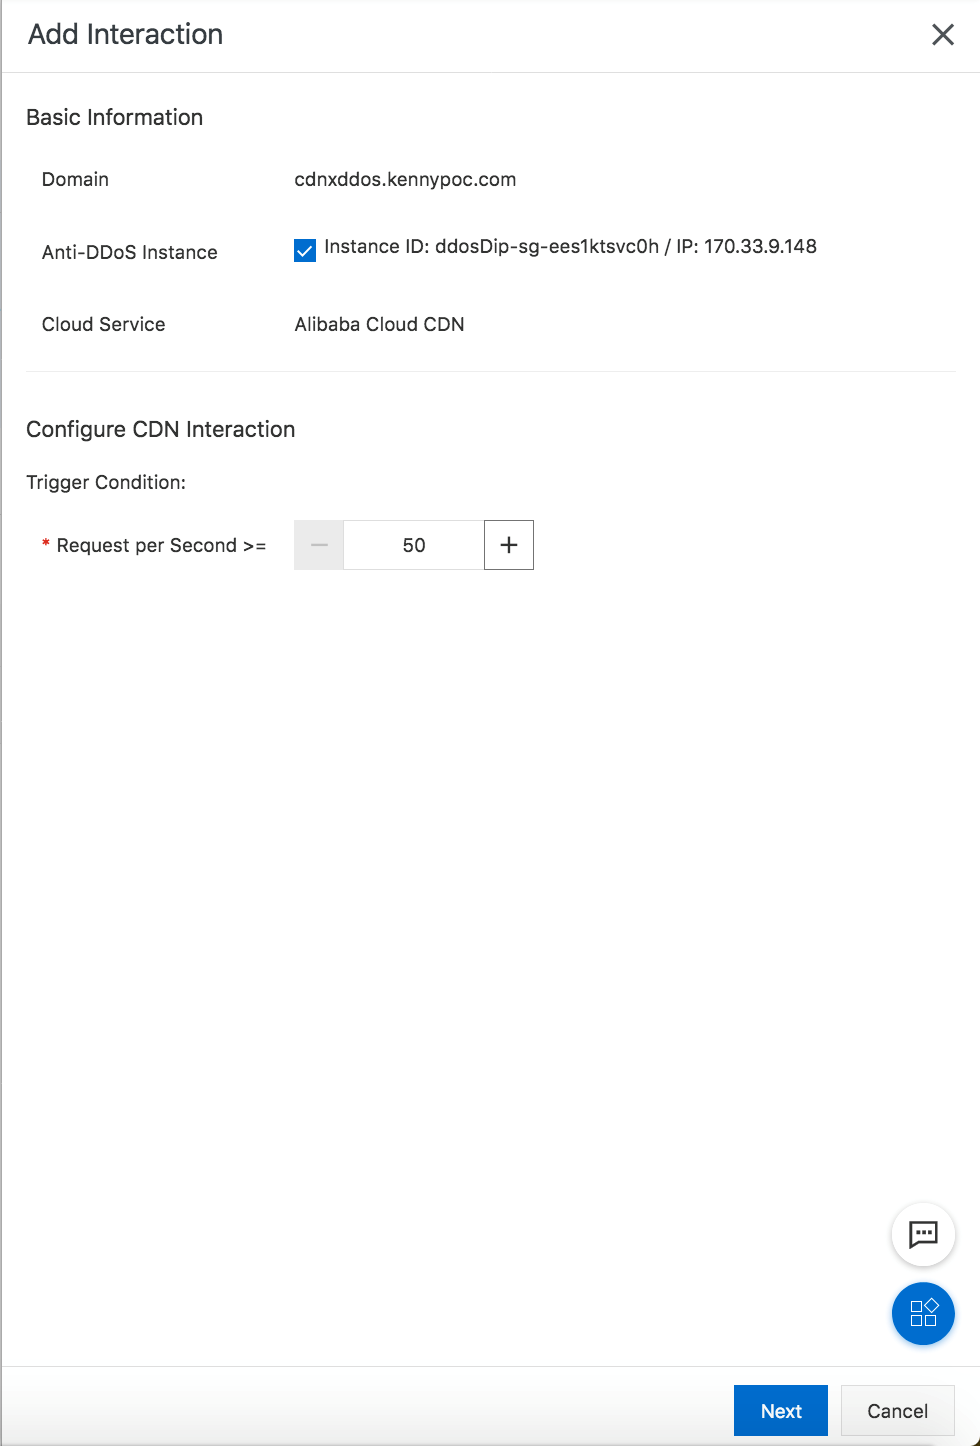
After clicking Next, the system will generate a flow aware cname. Now, you'll need to update DNS to use this cname instead.
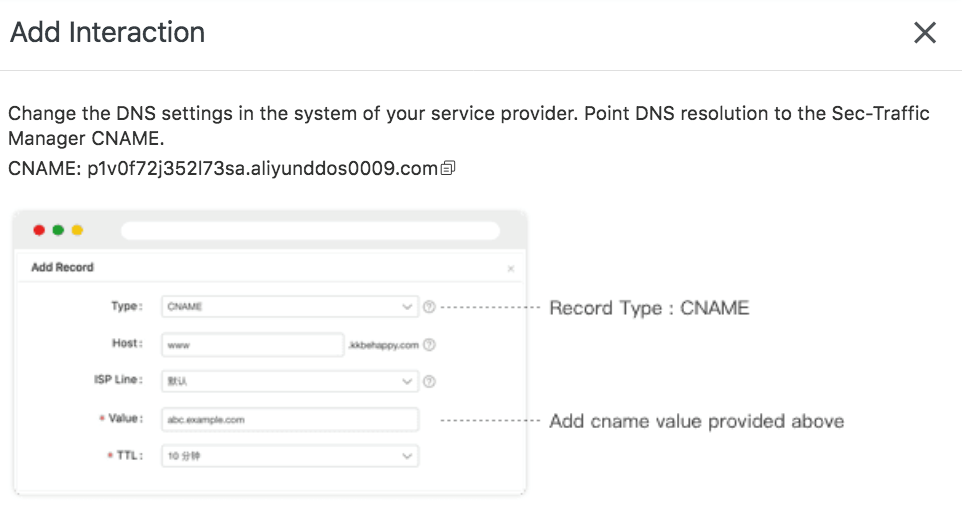
Then, update the CName record to the Sec-Traffic Manager CName
Now check that Anti-DDoS is working with CDN, to do this go to the CDN Interaction tab and see if there's green icon. If the icon is indeed green, then it indicates the services are interacting with each other properly.

Next, let's query DNS to ensure the website is serving by CDN service.

You can use the Apache benchmark tool to simulate an attack to CDN Service. This will result in a timeout, which will indicate a DNS switch over did occur.

Next, you can do the nslookup again, and it will show the Anti-DDoS cname instead of the CDN cname.

After a period of time, if no attack occurs, the DNS will automatically revert back to the CDN cname.
The views expressed herein are for reference only and don't necessarily represent the official views of Alibaba Cloud.
Combating the Epidemic: Learn How AMAP Engineers Launched a Medical Taxi Service in Just 3 Days

2,598 posts | 769 followers
FollowAlibaba Clouder - January 12, 2021
Alibaba Clouder - March 18, 2020
Alibaba Clouder - July 12, 2019
Alibaba Clouder - July 16, 2021
Alibaba Clouder - April 8, 2021
Alibaba Clouder - June 19, 2019

2,598 posts | 769 followers
Follow CDN(Alibaba Cloud CDN)
A scalable and high-performance content delivery service for accelerated distribution of content to users across the globe
Learn More Global Accelerator
Provides network acceleration service for your Internet-facing application globally with guaranteed bandwidth and high reliability.
Learn MoreLearn More
More Posts by Alibaba Clouder