This tutorial explains how to migrate a MySQL server to Alibaba Cloud, by creating a new Alibaba Cloud server instance and copying databases to it. The tutorial also discusses further issues that you may wish to consider before making a final decision on your cloud architecture for hosting MySQL databases.
To get the most from this tutorial you'll need an Alibaba Cloud account. If you don't already have one, head to www.alibabacloud.com and sign up. To help you try out the facilities you'll find a range of free trials there.
For this tutorial, we will be creating an Elastic Compute Service (ECS) virtual server. You will need to have created a Virtual Private Cloud (VPC) and an accompanying Virtual Switch (vSwitch) beforehand. If you have already created one or more server instances then you probably already have a VPC, in which case you can use it.
If you don't have one, or if you don't want to use your existing VPC as a container for the MySQL server you're about to create, you'll need to create another VPC and vSwitch before continuing. The steps required to do this are not included here, but you can follow them in this tutorial.
Moving database hosting to a cloud-based environment makes a lot of sense. Database servers benefit from powerful servers, SSD drives and a large amount of RAM, and this can be provisioned quickly and cost-effectively on a platform such as Alibaba Cloud. Equally, if your routine performance monitoring suggests that more or less RAM is needed, this can be adjusted easily with no downtime. Plus, if databases (and particularly transaction log files) grow to the point where disk space becomes an issue, adding additional capacity is simple.
When considering the migration of an existing database server to the cloud, you have one major decision to make. You can simply replace the existing server with a cloud-based one, running Linux or Windows as preferred, install and configure the appropriate database product (RDBMS), and migrate the databases. This often makes sense because you will be using technologies that you have already tested elsewhere, and which your IT staff are familiar with operating. This is the approach that will be covered in this tutorial.
Another option is to consider using the "database hosting as a service" facility offered by Alibaba Cloud, known as ApsaraDB.
ApsaraDB instances are fast, cost-effective, easy to back up via snapshot or clone, and very quick to scale when you need additional performance. They all run on SSD drives and you simply pay according to the amount of data you process. If you need more performance or storage, it can be arranged with just a few clicks on the management console. Pricing is based on a monthly subscription that starts from USD $29. Or if you prefer, a pay-as-you-go option starts from less than 3 cents ($0.29) per hour, provided that your ApsaraDB instance is active (storage and Internet traffic are additional costs).
Just as with a cloud-based Linux or Windows server instance, ApsaraDB database instances include a comprehensive monitoring system that's built-in. You can keep a close eye on the performance of your hosted databases in order to help you make decisions about whether additional resources might be required. You can set alarms and triggers so that you will automatically be notified if performance or disk space falls below specified thresholds.
With an ApsaraDB instance, there's no underlying operating system or virtual server for you to pay for, secure, patch or manage. You get to concentrate on managing just your database tables. Everything else is taken care of by Alibaba Cloud.
ApsaraDB includes security features such as real-time monitoring of network traffic, and automatic interception of SQL injection, brute force attacks and other types of database attacks. This is all built into each ApsaraDB instance and does not need to be configured or purchased separately, as would be the case if you hosted your databases on a conventional cloud server running Linux or Windows and a separate relational database management system (RDBMS).
To find out more about ApsaraDB, specifically the RDS variant for MySQL and other relational databases, visit https://www.alibabacloud.com/product/apsaradb-for-rds
The remainder of this tutorial will cover the process of creating an ECS virtual server running MySQL, and discuss options for migrating databases to it.
To start, log into your Alibaba Cloud console and, from the Products menu, choose Elastic Compute Service. Then click on the Buy Now or Create Instance button.
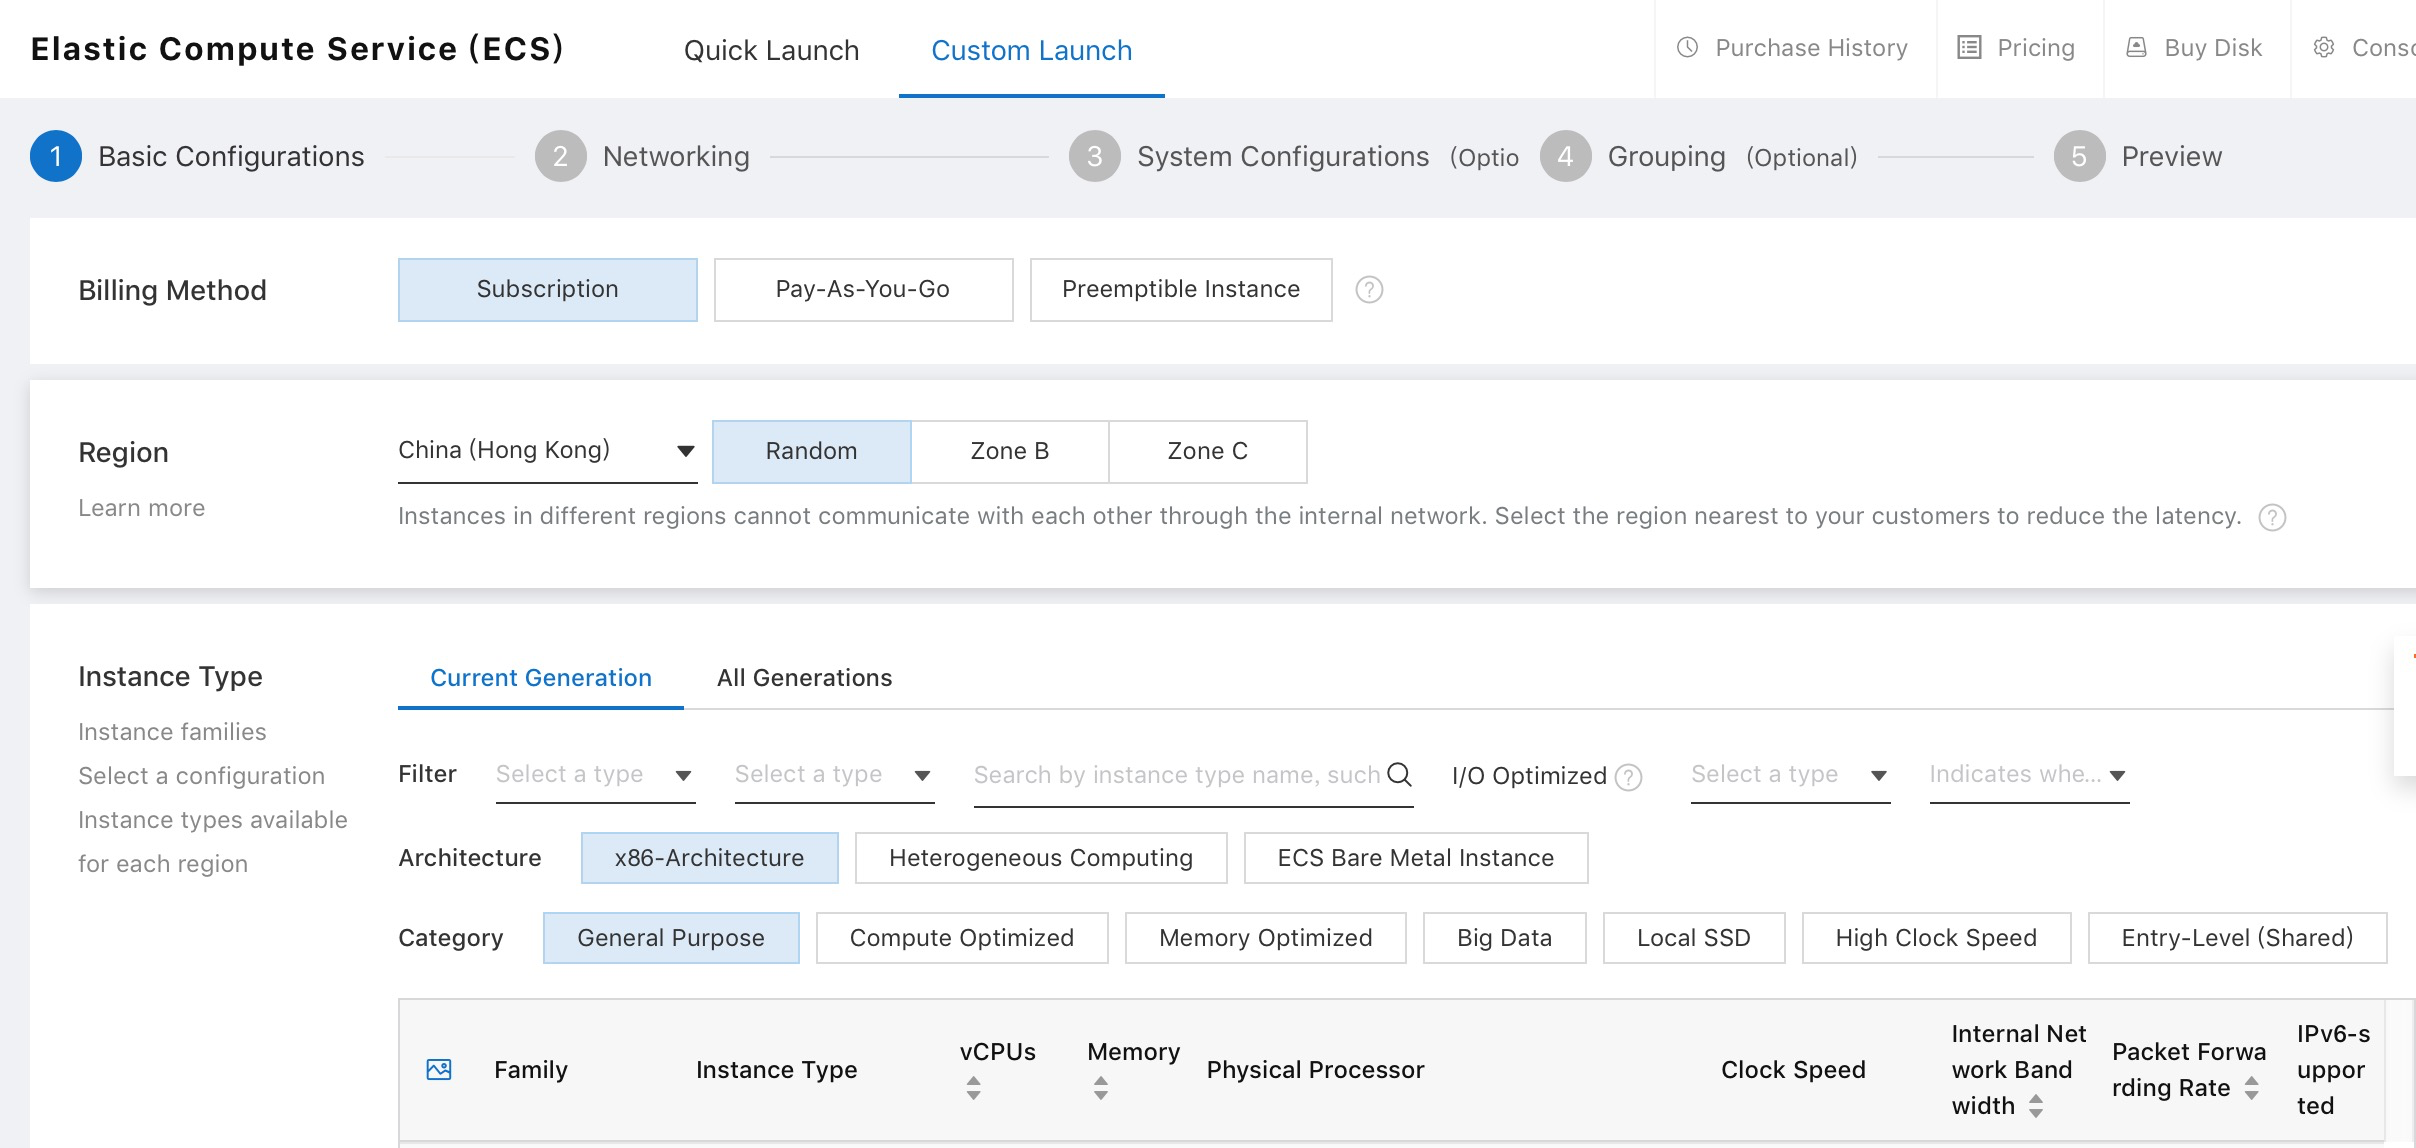
We can now create our virtual server instance. Start by choosing a billing method. For short-term evaluations and experiments, the pay-as-you-go option is simple and cost-effective. You can launch a server for just a couple of hours if you want, and then terminate it to avoid incurring any further charges.

For this tutorial, we'll choose subscription billing, which is on a monthly basis. Auto-renewal is optional and is disabled by default.
Next, we need to choose a hosting region.
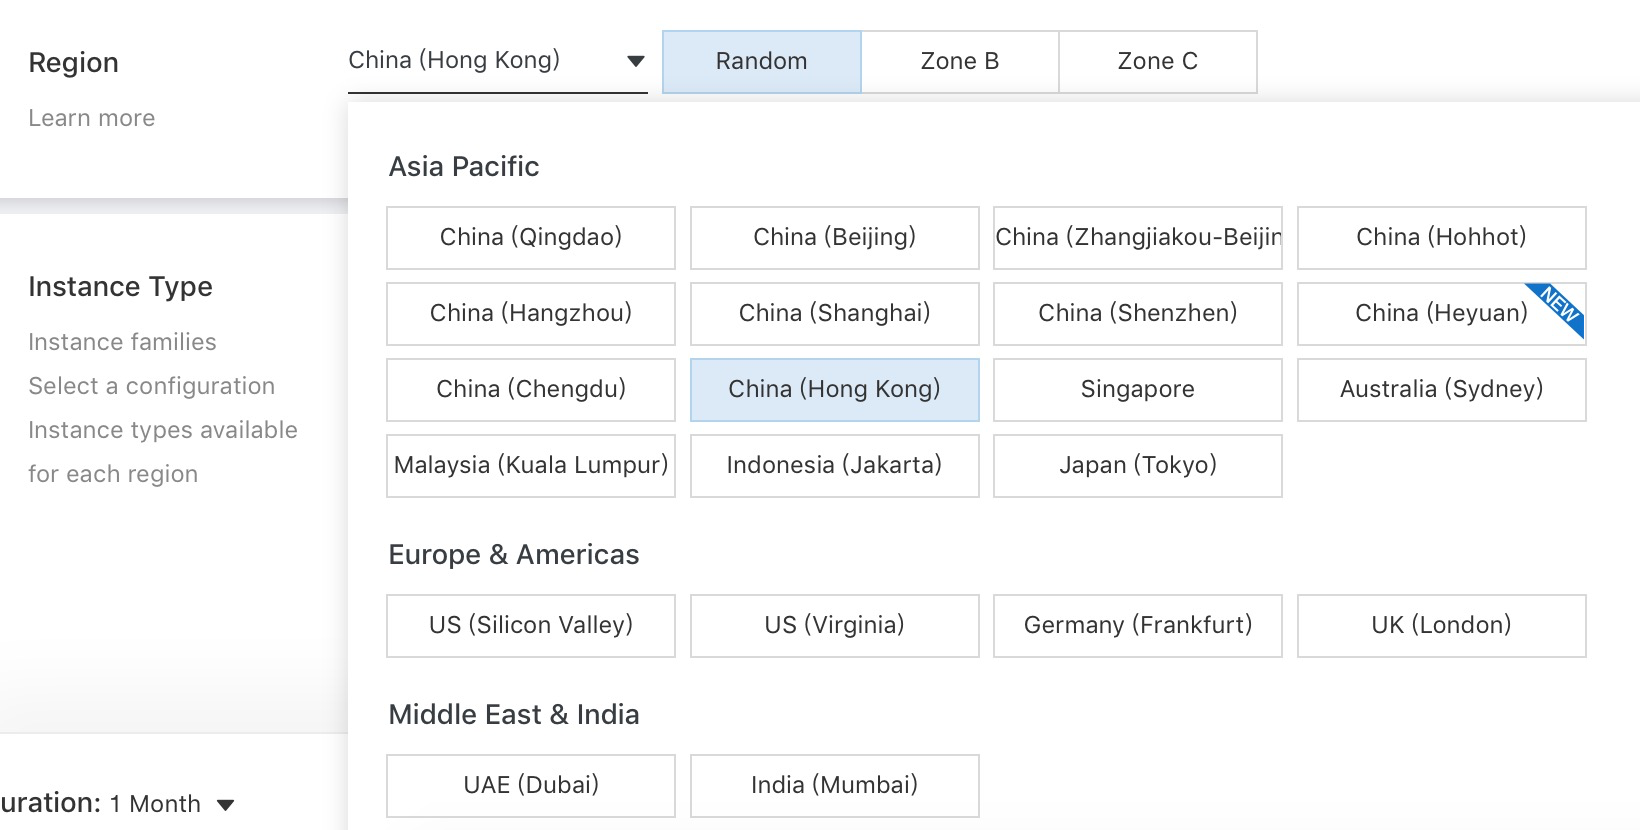
If you already have a Virtual Private Cloud set up that you intend to use, choose the region where that VPC is located, otherwise, you won't be able to assign the new server to that VPC.
For optimum performance, it is generally advisable to host a database server in the same region and zone as the other servers that will be connecting to it. However, if you prefer not to do this, and you want to enable a web server in one hosting region to communicate with a database server in another region, this can be achieved via Alibaba Cloud Express Connect.
See https://www.alibabacloud.com/product/express-connect for details.
Next, we need to choose an instance type.
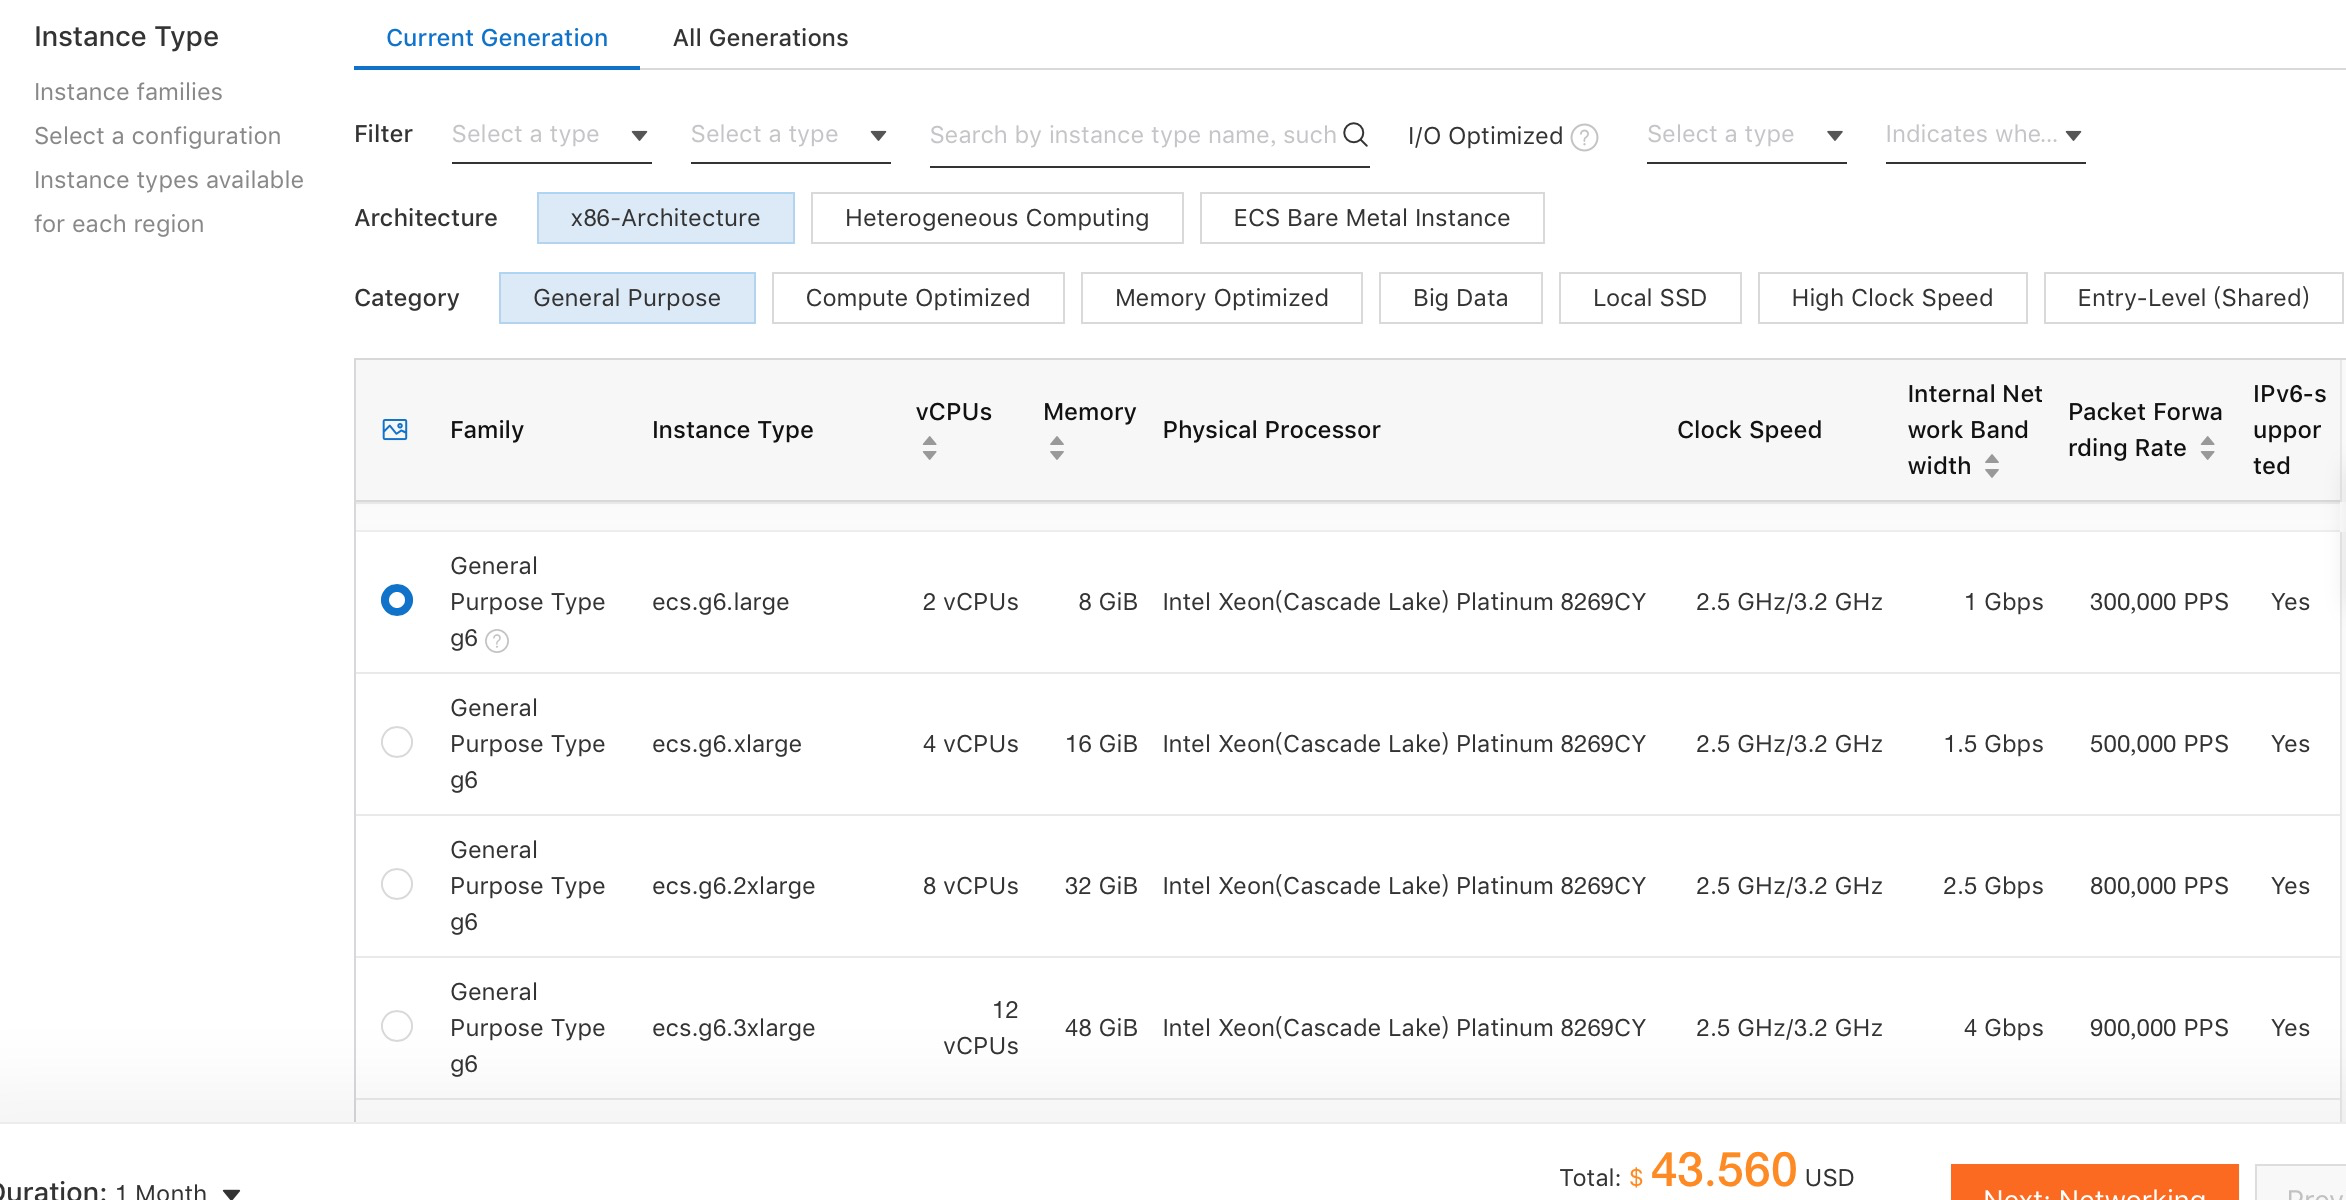
The instance type is the basic specification of the server (number of CPUs and amount of RAM). The choice of operating system will come later.
As you click the various options, the price will be updated so that you can see what each option will cost. For a database server, we recommend that you choose from the General Purpose or Memory Optimized range. It's possible to resize a server instance at a later date if necessary. For this tutorial, where performance is not a major issue, we will choose a general purpose server with two CPUs and 8GB of RAM.
Next, you need to choose an image for the server.
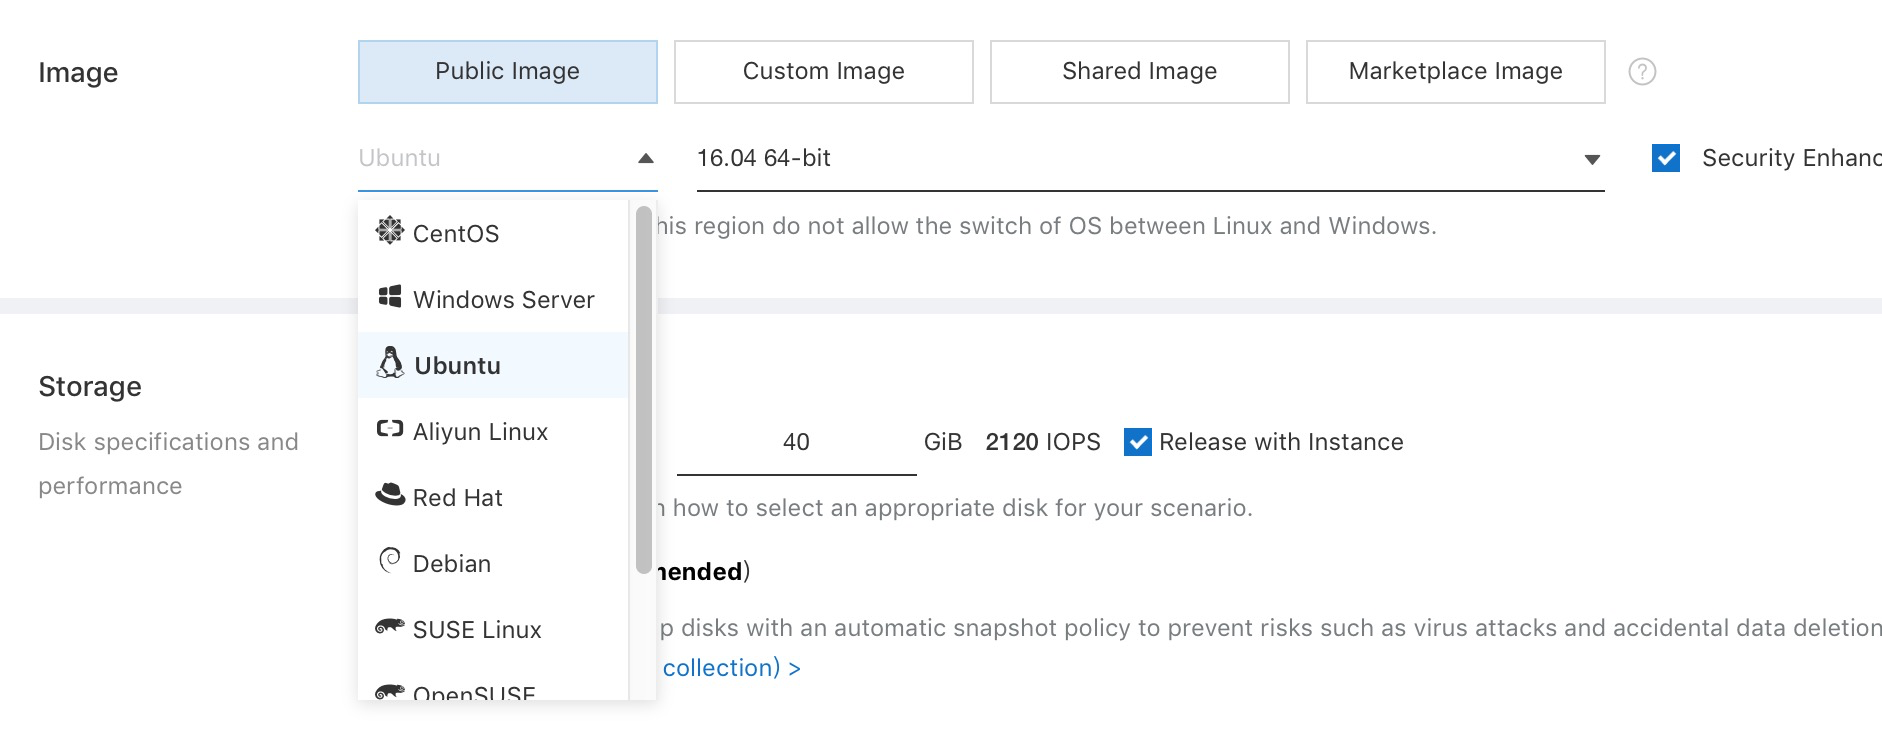
If you prefer a bare operating system, on which to install MySQL yourself, choose from the Public Image section. MySQL is available for both Linux and Windows, although Linux versions generally need fewer resources.
Another option is to click on Marketplace Image and choose from a range of ready-made server images provided by Alibaba Cloud. These images include an operating system and application software, pre-installed and suitable for use in production environments. Searching the marketplace reveals a Linux/MySQL image from Zhuyun, and we will use it for this tutorial to save having to install MySQL from scratch.
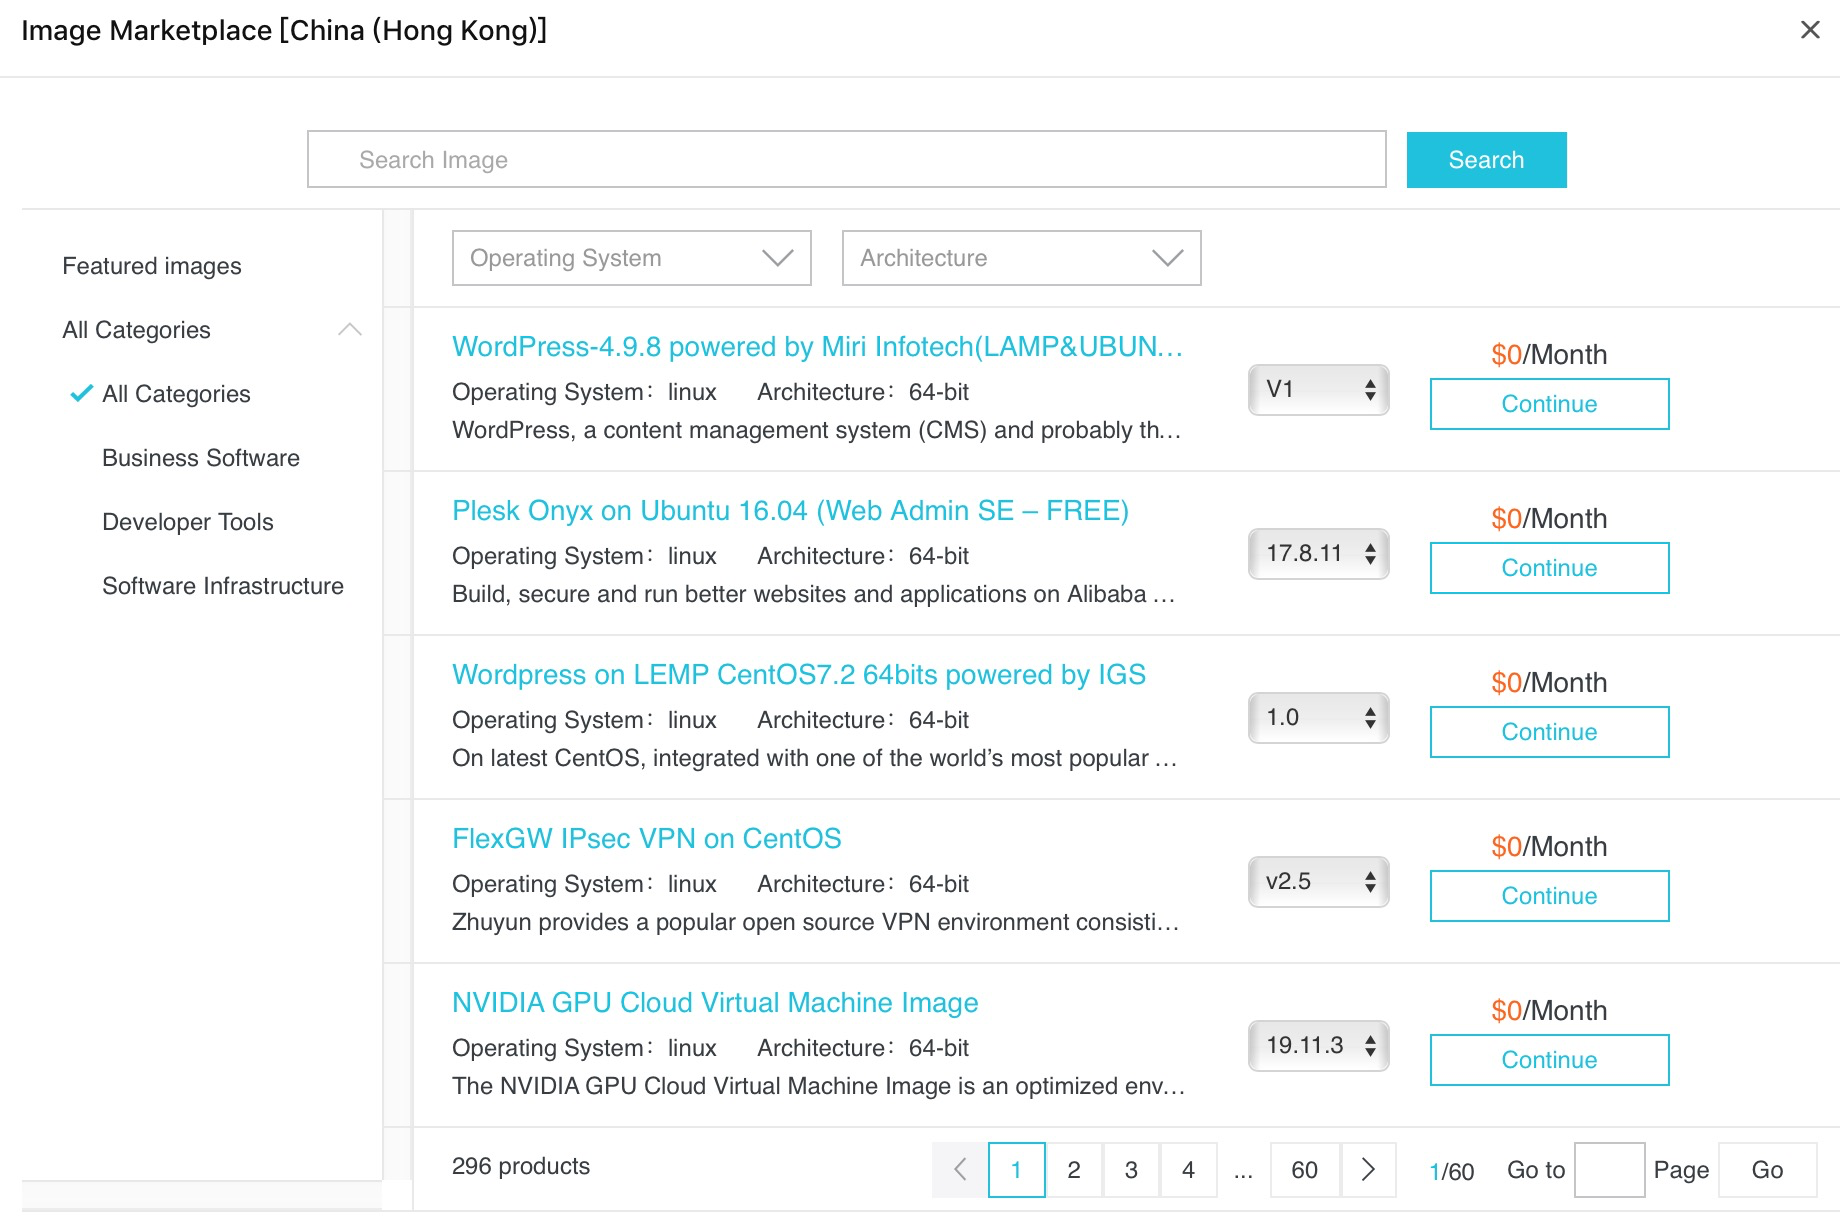
Just locate it in the list of images and click on Continue.

We can see that our chosen image is selected and that the system disk size is 40GB. Below this, we can add up to 16 data disks. You can choose their size, and whether to use conventional or SSD storage (and the corresponding change in IOPS performance). For a relatively small evaluation server, you can simply increase the size of the system disk and store databases there instead. For this tutorial, we'll do that. You can always buy additional data disks later.
Longer term, it's better to store data on data disks rather than the system disk, as data disks are individual entities that don't need to be destroyed when a server is terminated.

Next, we need to configure networking. Click on the button at the bottom of the screen.

Start by assigning your new database server to a VPC, or Virtual Private Cloud, and associated virtual switch. It is assumed for the purposes of this tutorial that you have already created these.

Next, check and configure the security group.

For this tutorial, we will leave these settings as they are. They are sufficient to allow you to log into the server via the Alibaba Cloud console in order to configure it. You will probably need to adjust them according to your needs, once you know how you and your applications will be communicating with the database server.
With everything specified, click on the Preview button to view a summary of your choices. Choose whether your monthly subscription should auto-renew (by default it will not). Finally, tick the box to agree to the terms and conditions and then click on Create Order.
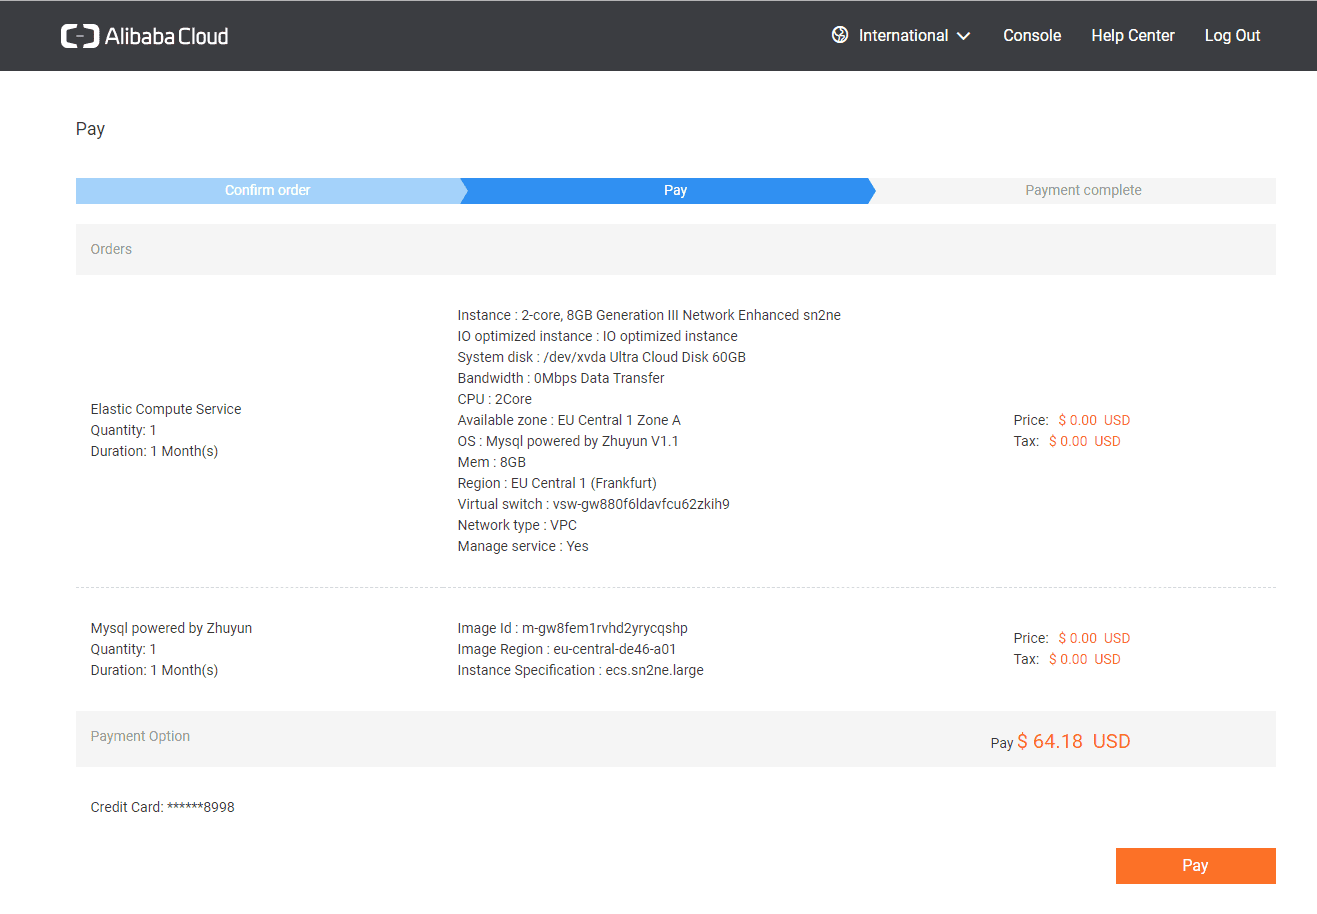
If everything is to your satisfaction, click the Pay button.

Return to the console, click on Elastic Compute Service, click on Instances on the left-hand side of the screen, and you should see your server listed.

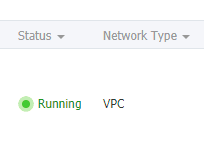
After a few moments, the status will change from Starting to Running (press the Refresh button until this is the case).
Unless or until you have configured the security group rules correctly, you will not be able to access the server directly from external locations, and your existing applications that will be storing their data on the server may not be able to access it either. You will need to adjust these settings according to your own needs. In the case of MySQL, this normally means opening port 3306 as required.
For now, we can connect to our server's command line via a browser, direct from the Alibaba Cloud console.
On the right-hand side of the panel that shows your server's details, click on the More link. Under Password / Key Pair, choose Reset Password to set the password for the root account of the server.
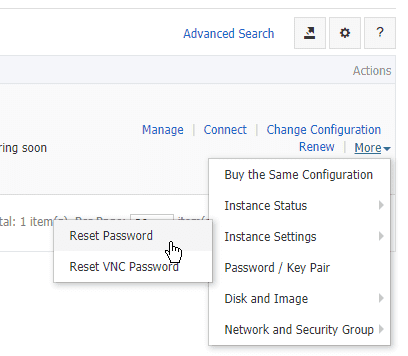
From the same More menu, restart the server for the new password to take effect.
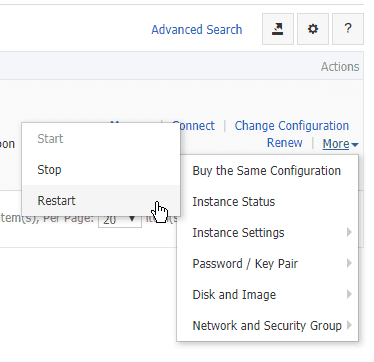
Wait until the status changes from Stopping to Running again.
Now, click on the Connect link.
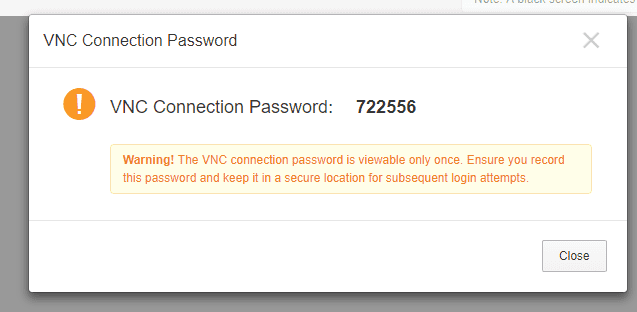
Make a careful note of the VNC connection password that is displayed as you'll only see it once. Click the Close button, then enter the VNC password (remember: next time you click the Connect button you won't be given the VNC password in advance, so ensure that you have noted it somewhere).
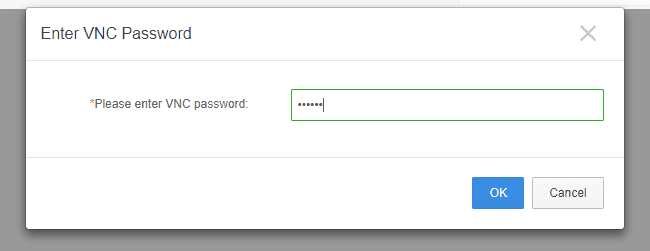
Click OK, and you are now connected via a terminal to your server.
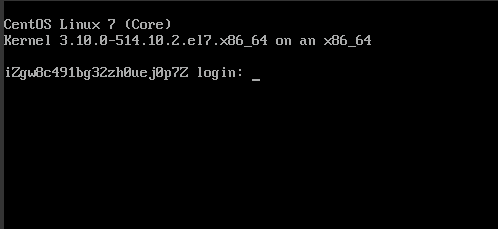
Login with a username of root, and the password you set earlier.
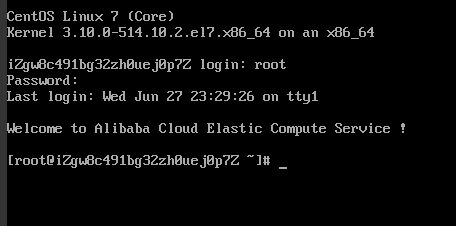
With the server and its installation of MySQL now up and running, you might want to log into MySQL via the command line to set some initial options and create one or more users. To do this, carry out the following steps:
mysql –u root –p
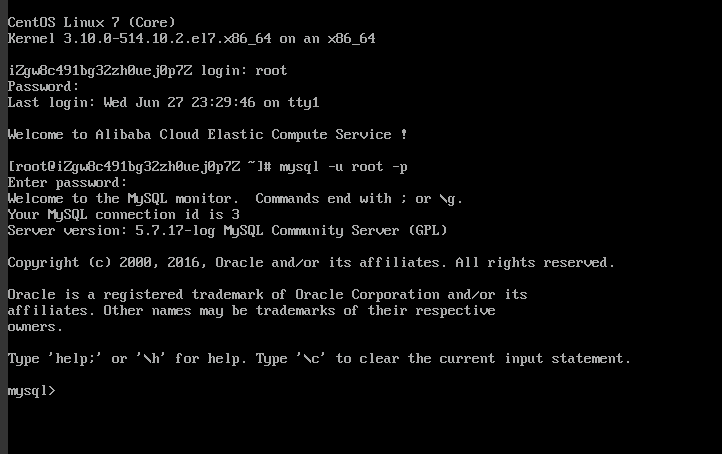
Now do the following:
1. From the MySQL command prompt type flush privileges;
2. Set a new password for the MySQL root user by typing the command:
ALTER USER 'root'@'localhost' IDENTIFIED BY 'xyz';Where xyz is the new MySQL root password you choose.
3. Go back to /etc/my.cnf and remove the skip-grant-tables line
4. Restart the server once more
You will now be able to log into MySQL as root with the password you chose, in order to create additional users. Refer to any standard MySQL documentation for information on the commands you can use at the mysql> prompt.
You now have a cloud-based Linux/MySQL server up and running. You can log into it via a browser in order to create and manage users. You can adjust the security group settings to allow access to the server from one or more IP addresses.
You are now ready to import your data. The precise way in which you do this will depend on the location and size of your existing databases, the frequency with which they change, whether this is the definitive import operation or just a trial, and the amount of downtime that is acceptable. According to your own circumstances, there are various ways in which you can import databases.
The simplest option, that doesn't require any additional software or features installed on the source or destination servers, is to use the mysqldump command on the existing server to create a backup file of one or more databases. These files take the form of a plain-text script file which, when executed on the new server at the mysql> prompt, recreates the database.
Another option is to install a local MySQL client on a PC and manage your new MySQL instance from there. MySQL-Front is free and runs under Windows, and makes it easy to create databases and upload backup files. Remember that you will need to change the security group settings on your new server to allow MySQL-Front to access it.
In this tutorial, we have shown how to create a new Alibaba Cloud server running MySQL, fully ready to host databases that have been migrated from another environment such as an existing on-premises server. We have also shown how to go about the process of migrating existing databases.
How to Set up a Website with Alibaba Cloud Web Hosting and Domains
Migrating from a Relational PostgreSQL to ApsaraDB RDS for PostgreSQL

2,593 posts | 792 followers
FollowAlenaS - May 13, 2021
Alibaba Clouder - July 2, 2019
Jack008 - June 10, 2020
Alibaba Clouder - January 10, 2018
Alibaba Clouder - February 21, 2020
Alibaba Clouder - January 27, 2021

2,593 posts | 792 followers
Follow ApsaraDB RDS for MySQL
An on-demand database hosting service for MySQL with automated monitoring, backup and disaster recovery capabilities
Learn MoreMore Posts by Alibaba Clouder