Before performing your database migration, some preparation work is required to be conducted first on the source database to ensure migration goes smoothly.
| # | Item | Expectation | DB Restart Involved? | Remark |
|---|---|---|---|---|
| 1 | server_id | Any integer greater than "1" | Yes | To enable change data replication |
| 2 | log_bin | Having a value, e.g. "binlog" or "mysql-bin", so that binary log is enabled | Yes | To enable change data replication |
| 3 | binlog_format | Having the value of "row" | No | To enable change data replication |
| 4 | binlog_row_image | Having the value of "full" | No | When the source database is MySQL 5.6.2 or later |
| 5 | Migration Account | An account with select, replication slave, replication client privilege granted | No | A DB account for migration |
| 6 | Primary Key | Every table has a primary key defined | No | To prevent the table from getting locked |
In order to migrate the change data during the migration, the items 1 to 4 as per the above table should be configured on the source database.
Check the current settings with the below commands:
# Login the source database with mysql utility
mysql -u user_name -p -h Source_DB_IP -P Source_DB_PORT

# Check the variable server_id
show global variables like 'server_id';

# Check the variable log_bin
show global variables like 'log_bin';

# Check the variable binlog_format
show global variables like 'binlog_format';

# Check the variable binlog_row_image when DB version is MySQL 5.6.2 or later
show global variables like 'binlog_row_image';
Here is an output example that matches the migration requirements.
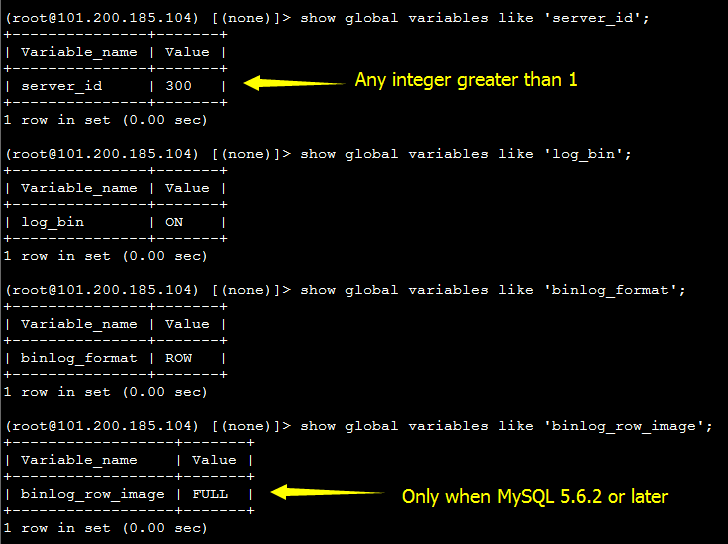
If server_id or log_bin does not match the requirement, a DB restart must be involved during reconfiguration.
# Modify DB configuration file
vi my.cnf
######## Add below lines ########
# Replication
server-id                = 300

# Binary Logging
log_bin                    = binlog
After that, restart the source database in an appropriate time window.
# Stop the source database
service mysql stop

# Start the source database
start mysql start
Variables binlog_format and binlog_row_image can be changed online; so, that will be much more convenient to adjust them.
Log in to the source database with root or any other account who has "super" privilege assigned, then execute below commands.
# Login the source database with mysql utility
mysql -u user_name -p -h Source_DB_IP -P Source_DB_PORT

# Set the binary log format to row
set global binlog_format='row';

# Set the binary log row image to full
set global binlog_row_image='full';
# Note: In order to let above change take effect, after modifying the binlog_row_image parameter, you need to terminate all connected sessions in case long connection mechanism is introduced by Application and let the application re-establish the connection to the source database instance.
Change the configuration file as well to ensure the settings remain the same, even if the source database experiences a restart.
# Modify DB configuration file
vi my.cnf

######## Add below lines ########
binlog_format                = row
binlog_row_image            = FULL
Here is an example of the variables in the configuration file.

A database account with select, replication slave and replication client privilege granted should be created on the source database.
Log in to the source database with root or any other account that has "super" privilege assigned, then execute below commands.
# Login the source database with mysql utility
mysql -u user_name -p -h Source_DB_IP -P Source_DB_PORT

# Create migration account
grant select, replication slave, replication client on *.* to  'macc'@'%' identified by 'm2RDSmysql';
flush privileges;

# Check the privilege
show grants for macc;
Since change data replication is selected, the non-transactional table without primary key defined is to be locked during the data migration to ensure data consistency.
Write operation is not allowed against the locked table during the locking period, which depends on the table data volume.
The locked table will be released only after it has been migrated.
Check the tables with the following SQL in non-business hours.
select
    table_schema, table_name
from
    information_schema.tables t
where
    not exists( select
            table_schema, table_name
        from
            information_schema.key_column_usage k
        where
            t.table_schema = k.table_schema
                and t.table_name = k.table_name
                and k.constraint_name = 'primary')
        and t.table_schema not in ('performance_schema' , 'information_schema', 'mysql');
Conduct primary key modifications during non-business hours.
Here is an example of adding a primary key to an existing table.
# Table definition

CREATE TABLE `my_pk` (
  `id` bigint(20) NOT NULL,
  `areaid` varchar(50) NOT NULL
) ENGINE=InnoDB DEFAULT CHARSET=latin1;

# Add primary key when MySQL 5.6 or later
alter table my_pk algorithm=inplace, lock=none, add primary key(id);

# Add primary key
alter table my_pk add primary key(id);Now, let's see how to access the Data Transmission Service (DTS) console and start the migration.
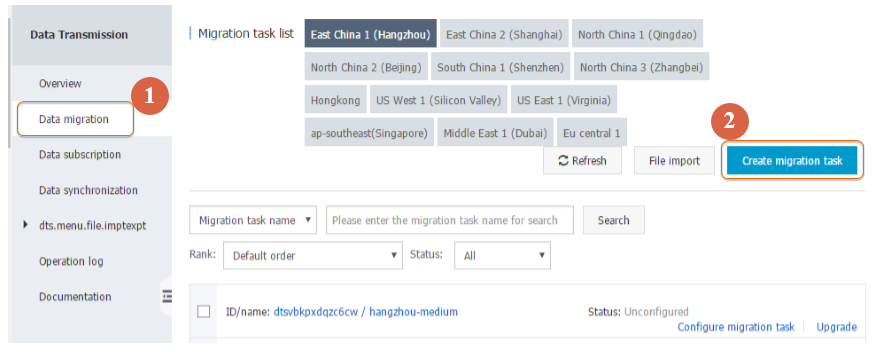
Open the DTS console and click the "Create Migration Task" button at the top-right corner of the Data Migration page.
Configure the connection information of the self-built MySQL instance and the target RDS instance.
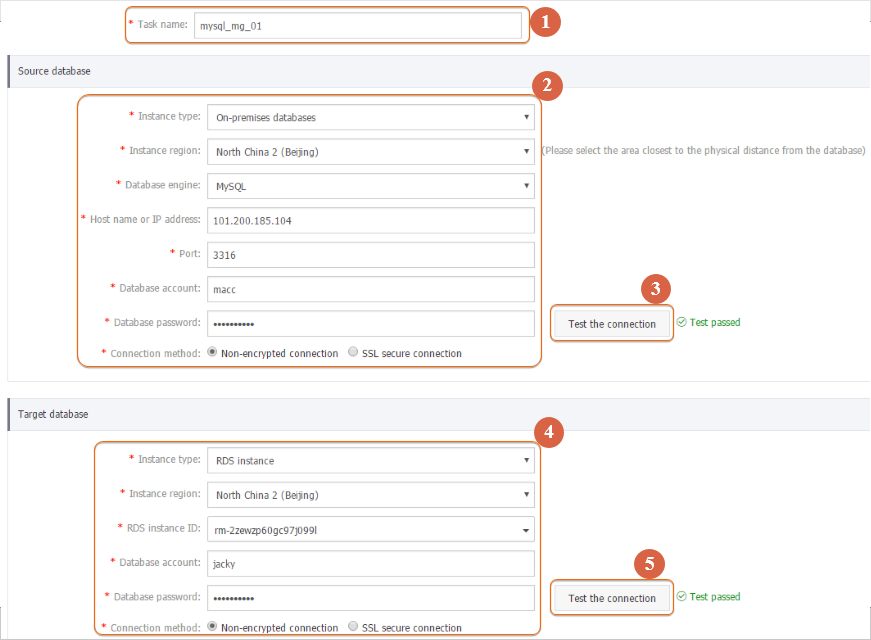
Then click the "Authorize whitelist and enter into next step" button at the lower right corner to open the next page.

Select all the "Migrate object structure", "Migrate existing data", and "Replicate data changes" migration types, then choose the "To-be-migrated objects"; when finished, click the "Pre-check and start" button.
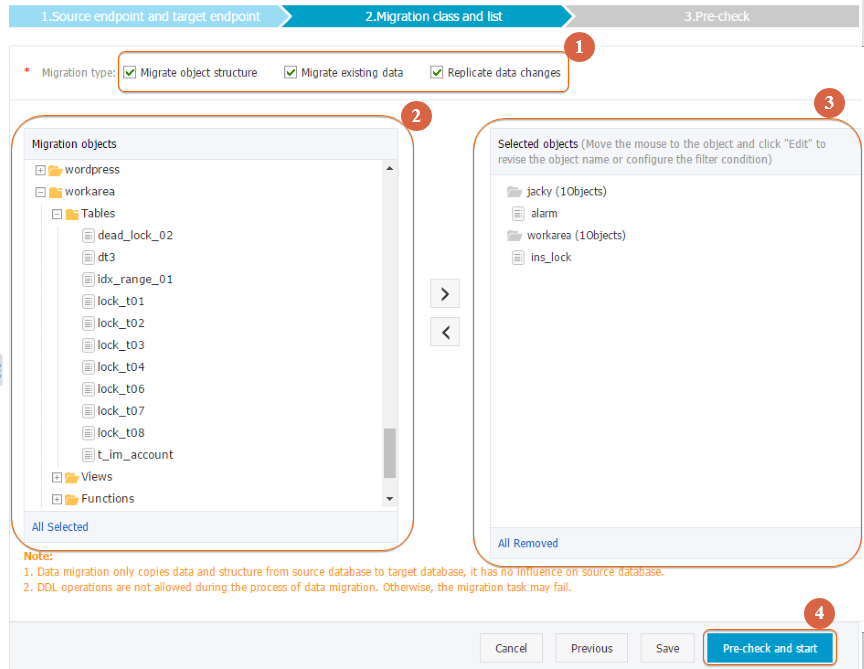
If any check fails during pre-check, click the "Information" button and get the details about the failure and solution.
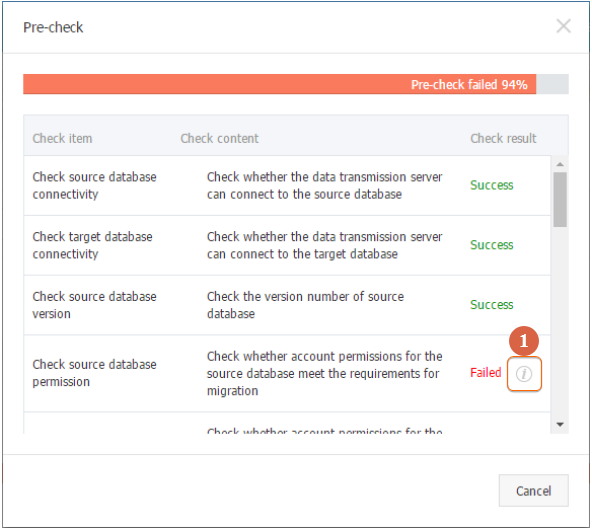
In our case, since we have tables without a defined primary key, reload and lock tables privileges should be granted to the migration account.
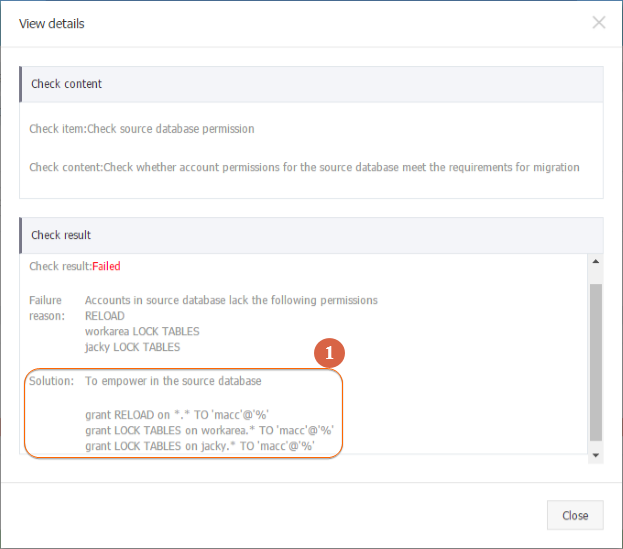
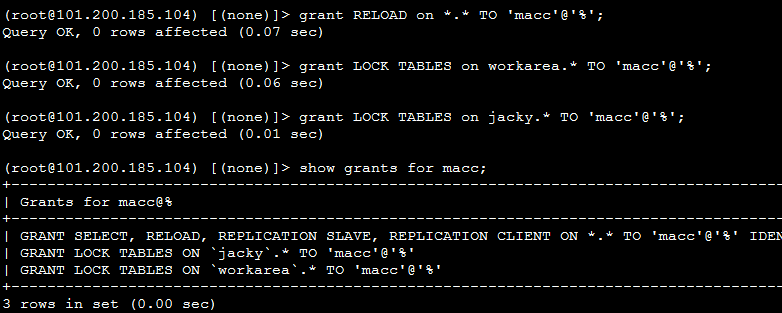
After the solution has been applied, cancel the pre-check and click the "Revise task configuration" of the migration task.

Then rerun the pre-check. Repeat this circle if needed until it gets 100% success, then click "Next".
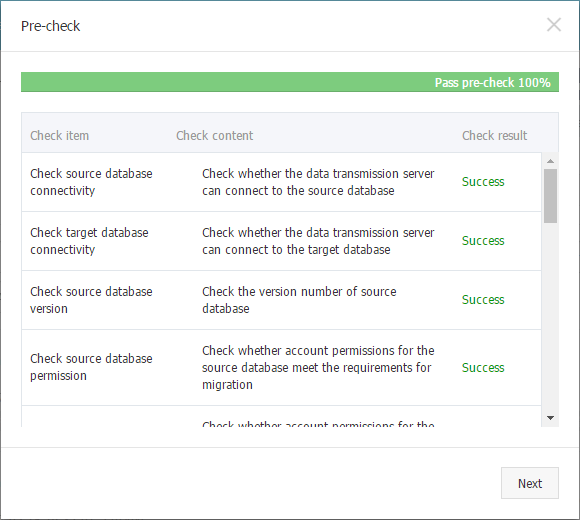
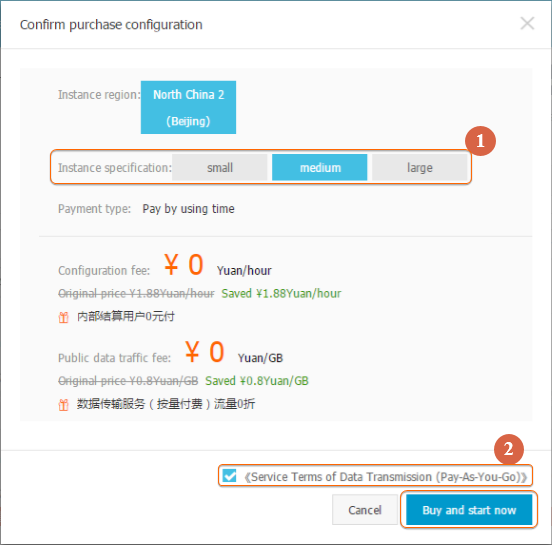
Choose an appropriate migration specification based on the data volume, then agree with the terms and start the migration.
Once the target RDS for MySQL instance is synchronized ("Without delay") with the source self-built MySQL instance, we can make a decision when to conduct the cut-over.

First, stop the application in the chosen cut-over window (obviously in non-business hours) so that no incremental data will be written into the source MySQL instance.
Then, insert a table row as the "finish tag" manually into the source instance.

Check if it has been replicated to the target RDS for MySQL instance.

Once the "finish tag" data is found on the target RDS instance, which means all data is synchronized between the source instance and the target instance, the preparation work is done.
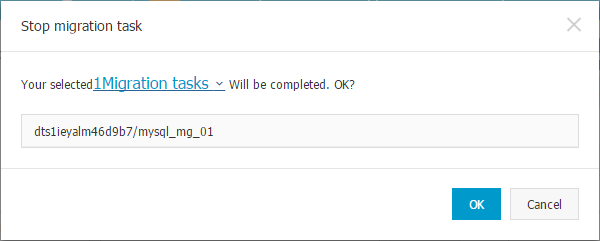
Select the migration task and click the "Finish" button on the DTS console page and agree to stop the migration.

After the migration task is finished, direct the application to use the target RDS for MySQL instance by modifying the application DB connection string.
Finally, start the application and perform the verification.
Learn more about how Alibaba Cloud can help you simplify your database migration process through the Data Transmission Service
Alibaba Clouder - January 27, 2021
Alibaba Clouder - February 1, 2021
Alibaba Clouder - August 2, 2019
Alibaba Cloud Product Launch - January 22, 2019
Alibaba Clouder - January 5, 2018
Alibaba Clouder - July 9, 2020
 Data Transmission Service
Supports data migration and data synchronization between data engines, such as relational database, NoSQL and OLAP
Learn More PolarDB for MySQL
Alibaba Cloud PolarDB for MySQL is a cloud-native relational database service 100% compatible with MySQL.
Learn More Tair
Tair
Tair is a Redis-compatible in-memory database service that provides a variety of data structures and enterprise-level capabilities.
Learn More Database Security Solutions
Protect, backup, and restore your data assets on the cloud with Alibaba Cloud database services.
Learn More