By Alena Subotina, Product Marketing Manager at Devart
To successfully follow the steps of this guide, you need to:
To connect to ApsaraDB RDS using dbForge Studio for MySQL:
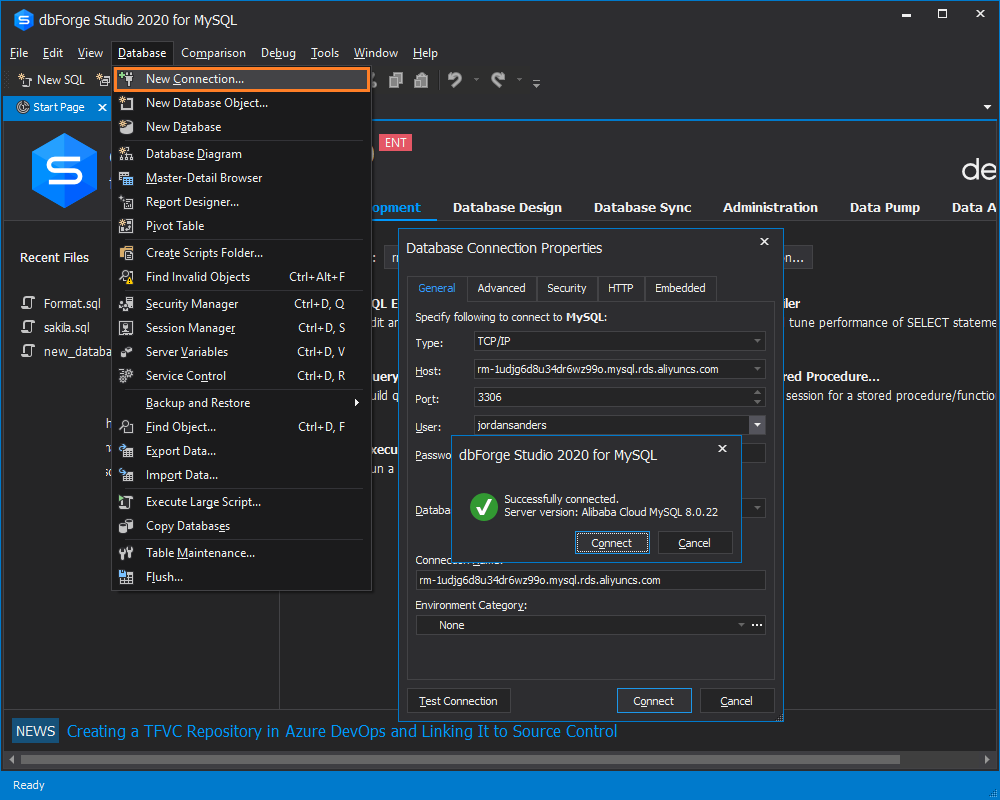
Note: You must apply for a public endpoint and add your IP address to a whitelist for your ApsaraDB RDS MySQL instance to connect to your RDS instance over the Internet.
With dbForge Studio for MySQL, you can transfer your databases to Alibaba Cloud using three different methods. The different methods depend on your needs and your project requirements.
With the Copy databases functionality provided by dbForge Studio for MySQL, you can perform the delicate and potentially laborious procedure of database duplication in several simple steps. This method allows migrating several databases in one go.
In this tutorial, we will migrate the sakila database from the MySQL server to ApsaraDB RDS for MySQL.
To migrate a database using the Copy Databases functionality:
1. On the Database menu, click Copy Databases
2. On the Copy Databases tab, specify the source and target connection and select the database(s) to be migrated. We enter the ApsaraDB RDS connection credentials and select the sakila database. Click the green arrow to initiate the process.
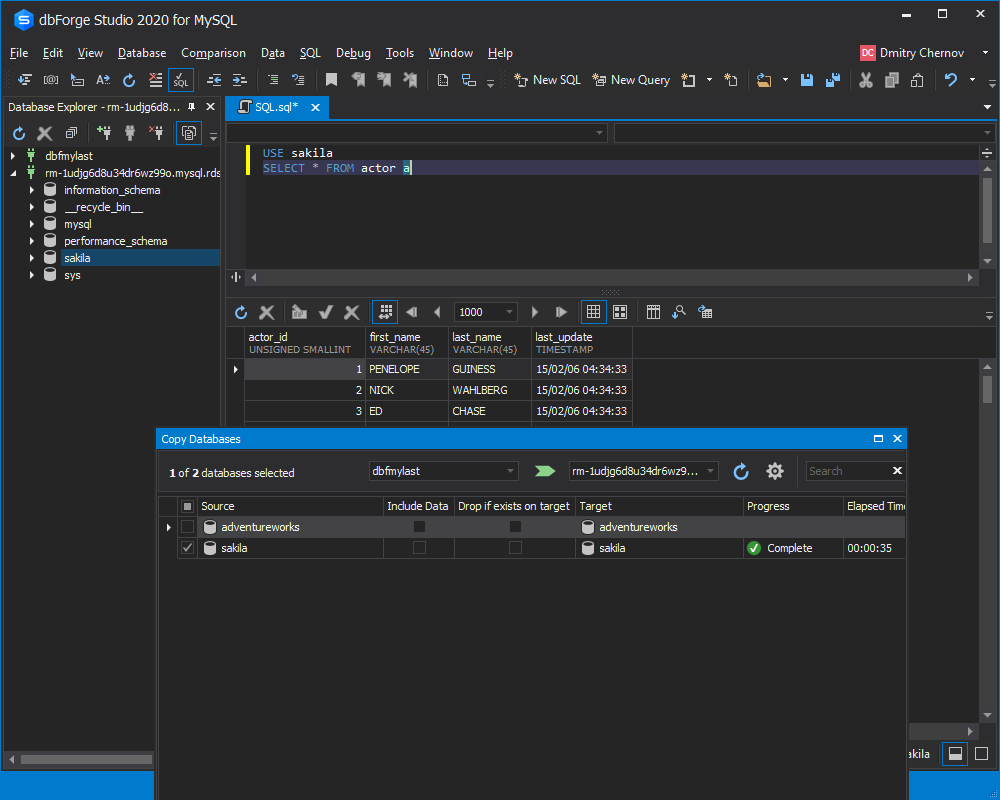
3. Check the results. The sakila database has been transferred successfully to ApsaraDB RDS.
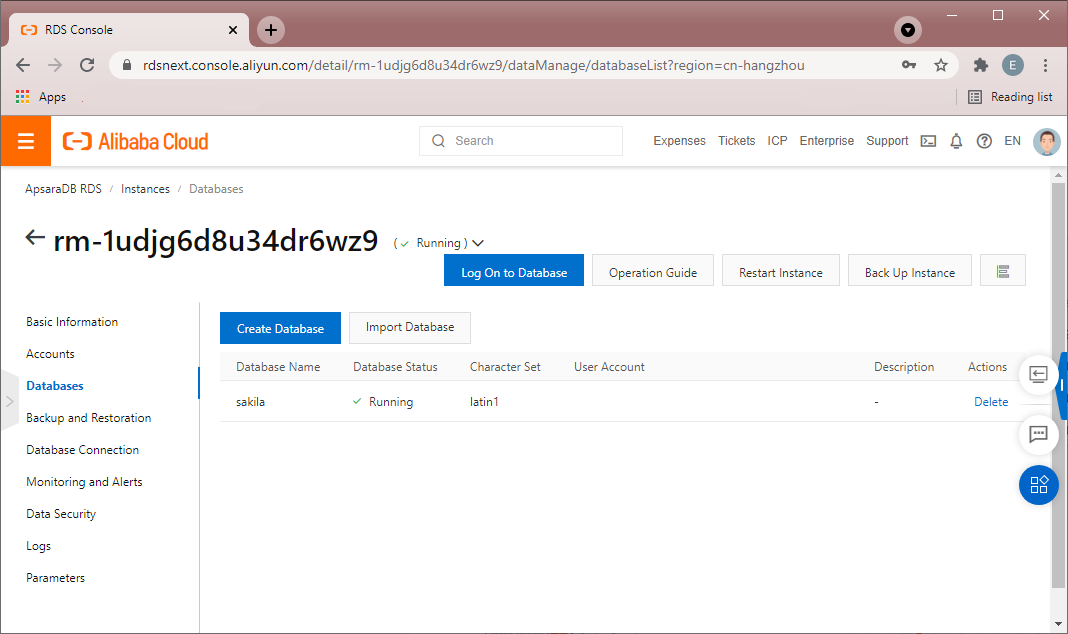
The logic behind the database migration process using the Backup and Restore functionality of dbForge Studio for MySQL is to create a backup of the MySQL database and restore it on ApsaraDB RDS. This method enables partial database transfer. You can select the objects to be moved.
In this tutorial, we will migrate the world database that resides on our local MySQL server to ApsaraDB RDS.
Step 1 - Backup a database
1.1 On the Database menu, point to Backup and Restore, and then click Backup Database
1.2 On the Backup content tab of the Database Backup Wizard, select the database objects you want to backup, and then click Next
1.3 On the Options tab, configure the backup settings, and then click Next
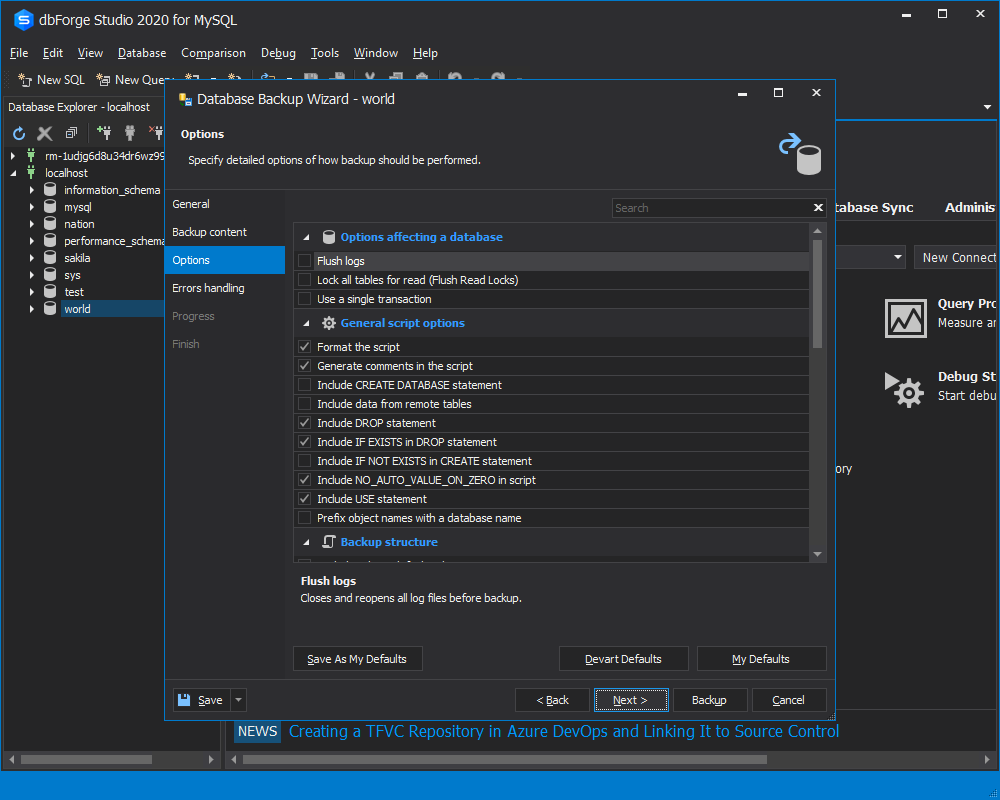
1.4 On the Errors handling tab, specify the error processing behavior and logging options
1.5 Click Backup
Step 2. Restore a database
2.1 Connect to ApsaraDB RDS as shown above
2.2 Right-click the ApsaraDB RDS connection in Database Explorer, point to Backup and Restore, and then click Restore Database
2.3 In the Database Restore Wizard, select a file with the database backup
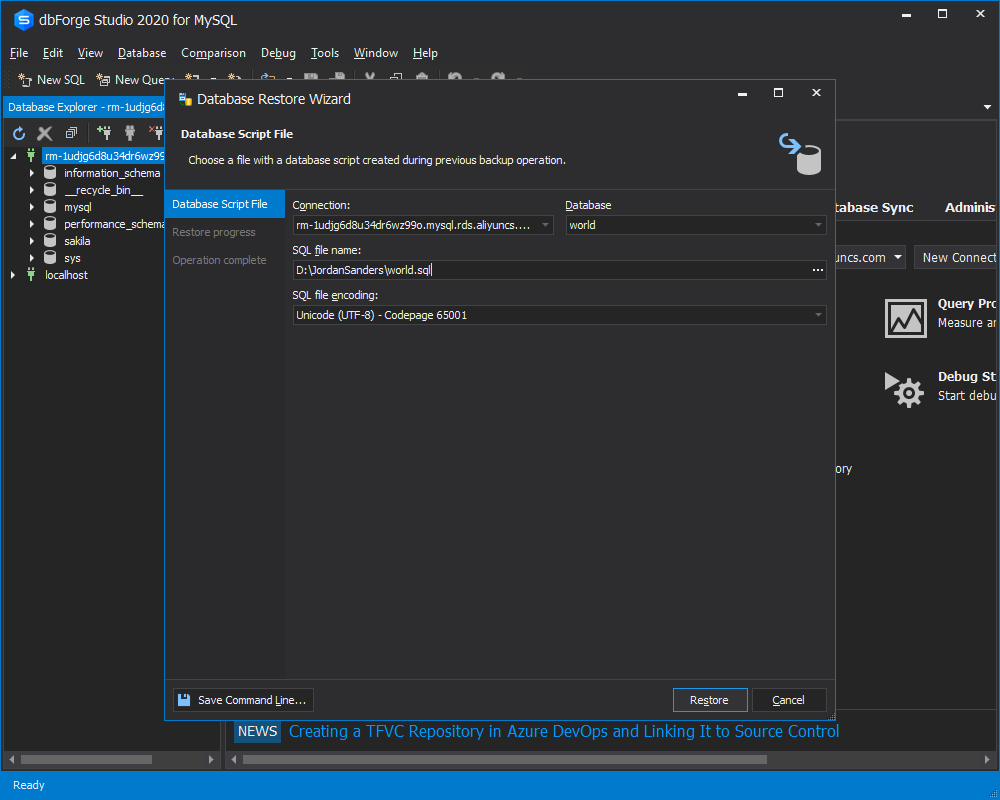
2.4 Click Restore
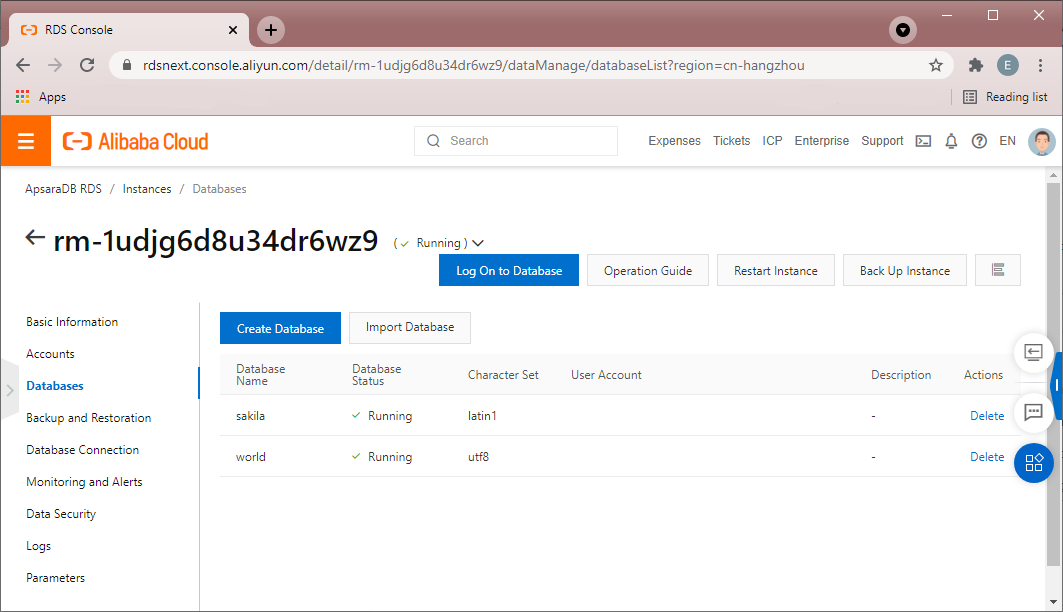
2.5 Check the results on ApsaraDB RDS
The idea behind the database transfer process using Schema and Data Compare tools of dbForge Studio for MySQL is to create an empty database on ApsaraDB RDS, synchronize it with the required MySQL database first using the Schema Compare functionality, and then use the Data Compare functionality. This way MySQL schemas and data will be faultlessly moved to ApsaraDB RDS.
In this worked tutorial, we will migrate the nation database that resides on our local MySQL server to ApsaraDB RDS.
Step 1 - Connect to ApsaraDB RDS and create an empty database
1.1 Connect to ApsaraDB RDS as described above
1.2 Right-click the ApsaraDB RDS connection and click New Database
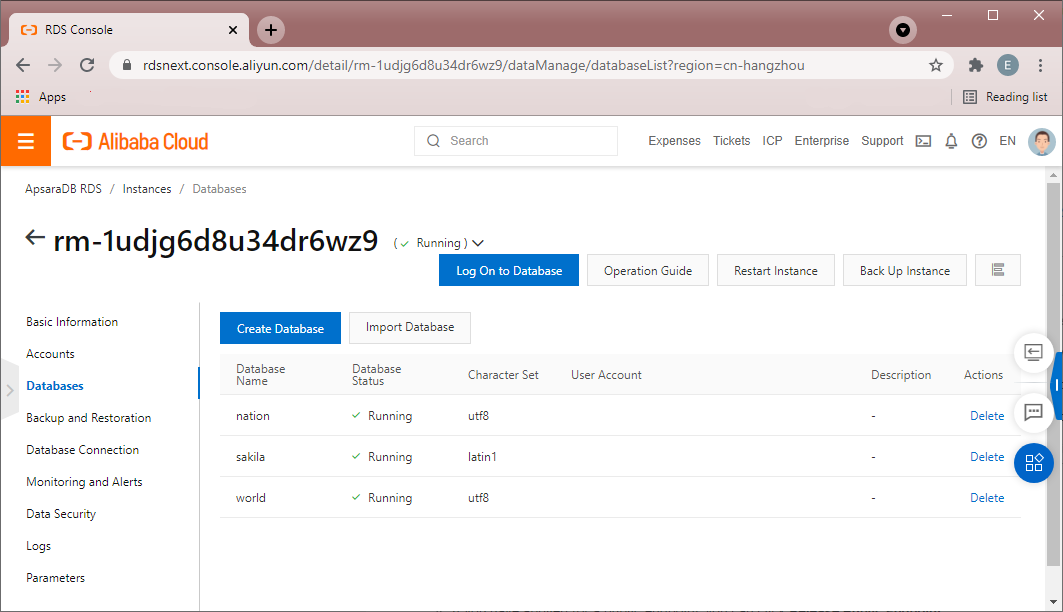
1.3 On the tab that appears, specify the name of the new database, charset, and collation, then click Apply Changes
As a result, a new database will appear on our ApsaraDB RDS instance.
Step 2 - Synchronize schemas
2.1 On the Comparison menu, click New Schema Comparison
2.2 In the New Schema Comparison Wizard that appears, select the Source and the Target, and then specify the schema comparison options. Click Compare
2.3 In the comparison results grid, select objects for synchronization. Then, click the green arrow button to open the Schema Synchronization Wizard.
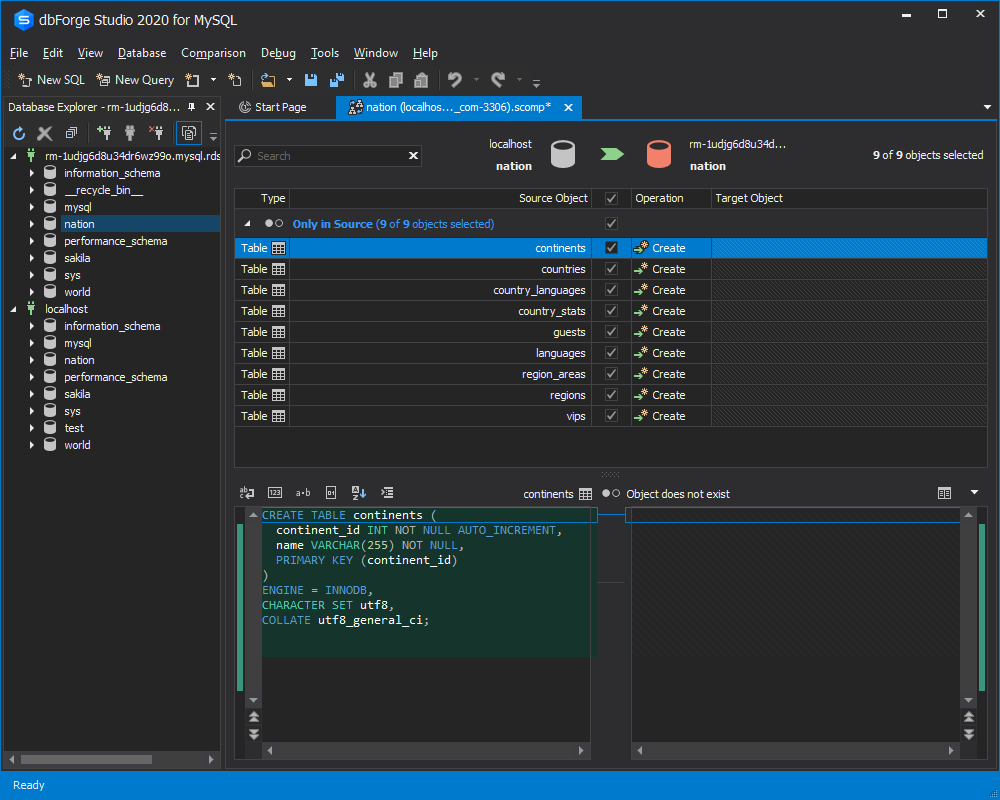
2.4 Walk through the steps of the wizard configuring schema synchronization. Click Synchronize to deploy the changes on ApsaraDB RDS
Step 3 - Compare data
3.1 On the Comparison menu, click New Data Comparison
3.2 In the New Data Comparison Wizard, select the Source and the Target, and then specify the data comparison options and change the mappings if necessary. Click Compare
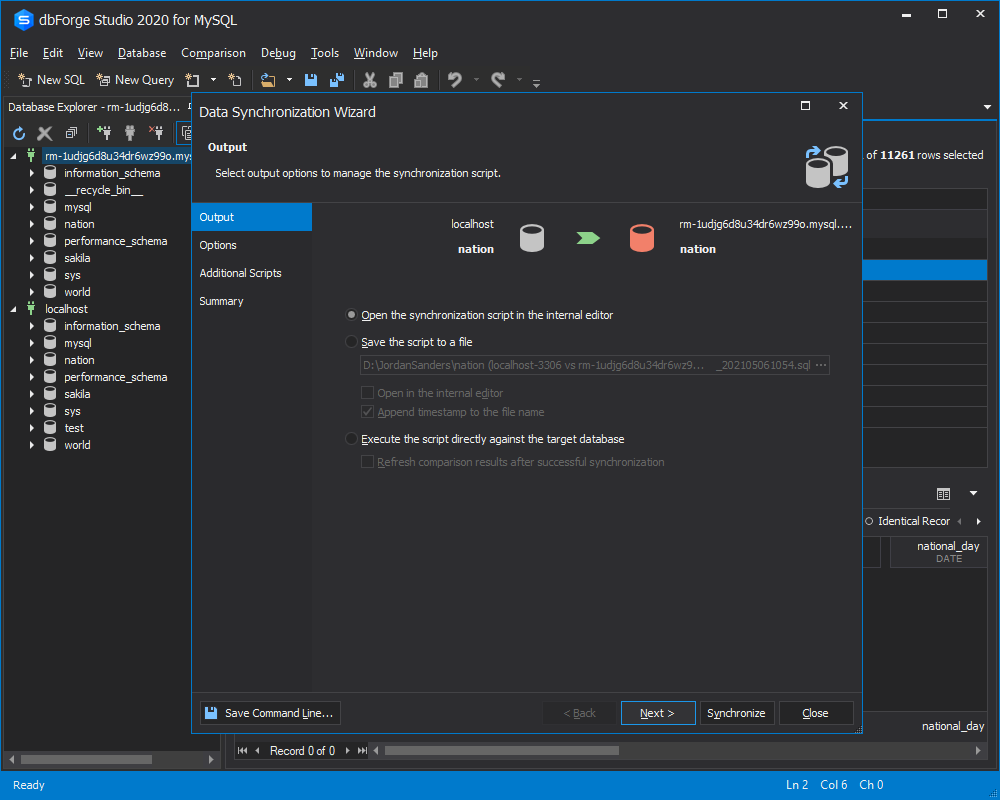
3.3 In the comparison results grid, select the objects for synchronization. Then, click the green arrow button to open the Data Synchronization Wizard.
3.4 Walk through the steps of the wizard configuring data synchronization. Click Synchronize to deploy the data changes.
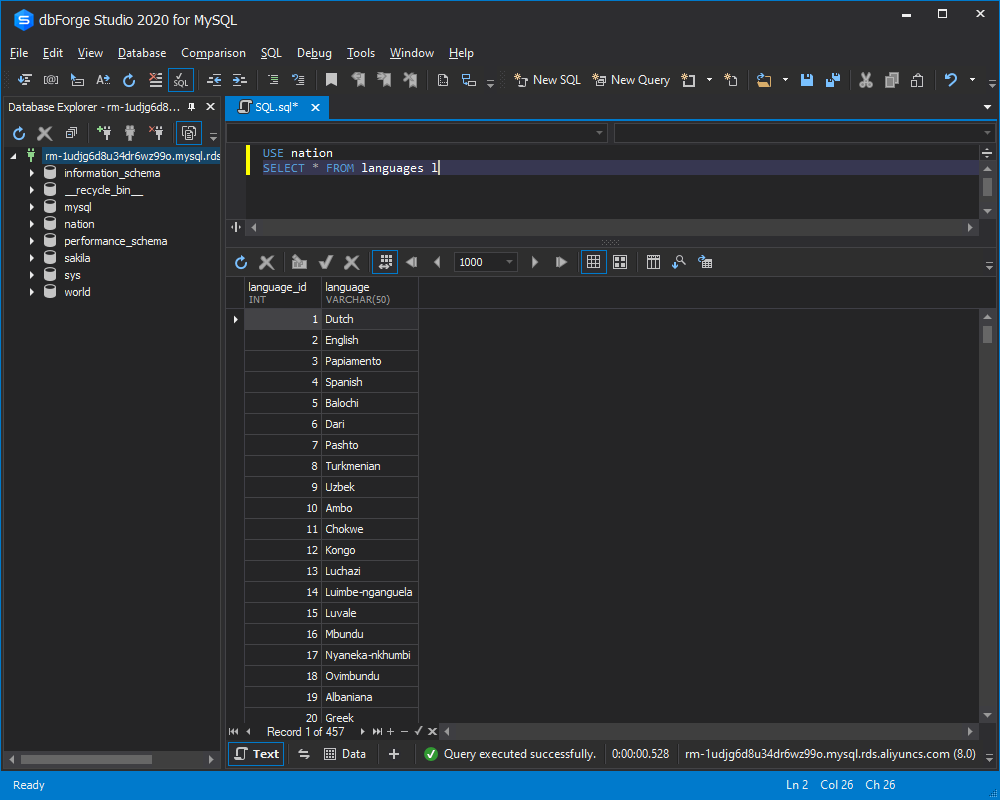
3.5 Check the results
Nowadays, Alibaba Cloud is gaining more popularity, as it provides a comprehensive suite of cloud computing services to businesses worldwide. Lots of companies choose to move their workloads to Alibaba Cloud. Migration doesn't need to be toilsome and time-consuming. dbForge Studio for MySQL boasts powerful and accurate database migration tools that can significantly facilitate the process. The Studio sets up, performs, automates, and schedules database transfers easily.
AlenaS - June 9, 2021
AlenaS - February 8, 2022
Alibaba Clouder - May 27, 2019
JDP - October 28, 2021
Alibaba Clouder - February 11, 2020
Alibaba Clouder - February 21, 2020
 ApsaraDB RDS for MySQL
An on-demand database hosting service for MySQL with automated monitoring, backup and disaster recovery capabilities
Learn More ApsaraDB RDS for PostgreSQL
An on-demand database hosting service for PostgreSQL with automated monitoring, backup and disaster recovery capabilities
Learn More ApsaraDB RDS for MariaDB
ApsaraDB RDS for MariaDB supports multiple storage engines, including MySQL InnoDB to meet different user requirements.
Learn More ApsaraDB RDS for SQL Server
An on-demand database hosting service for SQL Server with automated monitoring, backup and disaster recovery capabilities
Learn MoreStart building with 50+ products and up to 12 months usage for Elastic Compute Service
Get Started for Free Get Started for Free