This tutorial explains how to manage disk drives on a Windows-based Elastic Compute Service (ECS) server on Alibaba Cloud. We walk through the process of creating a data drive on one server, then destroying the server and mounting its data drive on a new server running a different version of Windows Server.
We also discuss how to monitor the performance of a drive, and how to change its size.
To follow this tutorial, you'll need an Alibaba Cloud account. If you don't already have one, head to www.alibabacloud.com and sign up. To help you try out the facilities you'll find a range of free trials there.
You'll also need to set up a billing method, and to create a VPC (virtual private cloud) and vSwitch (virtual switch). The VPC and vSwitch act as your private cloud-based LAN, and thus as a container for the cloud servers that you create.
In the days before the widespread adoption of virtualized and cloud-based servers, when each server was a physical box on a shelf in a data center, managing storage was incredibly difficult. Each disk drive was a physical device, sometimes partitioned into two or more logical drives. Sometimes a server had just one logical drive, which held both the operating system and data. More often, the OS would be confined to one drive (typically C: on Windows) and data would be on other drives starting from D: and working their way through the alphabet.
For a server running an operating system other than Windows, the situation was generally the same, albeit with different methods of partitioning and mounting volumes.
Adding, removing and resizing drives was time-consuming and inconvenient, involving extended periods of downtime, and almost always involved physically opening up the server to install more devices. To avoid having to do this too often, drives were often over-specified, with empty space reserved for future use. This caused a lot of unnecessary expense, but would normally merely delay the inevitable day when a technician with a screwdriver would be required. Followed, of course, by a few tense minutes when power was applied to the newly-expanded server and everyone waited to check that it would still power up and that all the cables were in the right place.
There was also the ongoing debate as to whether application software belonged on the OS or system drive, or on a data drive. In the case of a Windows-based machine running SQL Server, for example, should the SQL Server application be on the OS drive, a data drive (along with the actual databases), or on its own drive?
Cloud computing and virtualized servers means that disk drive roulette is mostly a thing of the past. Creating one or more disk drives on a server requires nothing more than ticking a few boxes on a web-based console. More importantly, adding new drives or enlarging existing ones is almost as simple, with minimal downtime that involves little more than a reboot.
When you're setting up a new cloud server, whether running Windows, Linux or something else, it's important to keep the OS on its own drive. While many people have tended to create Windows installations, especially on desktops, with just a single C: drive, it really makes sense to have at least two drives. This allows you to manage, resize and back up each drive independently.
If a server encounters a problem and needs to be rebuilt, or simply needs upgrading, it's possible to preserve its data drives and mount them directly onto a replacement server. And that's what we're going to do in this tutorial, in order to show how data drives exist within the Alibaba Cloud infrastructure as separate entities that aren't intrinsically bound to one particular cloud server.
In the sections that follow, we'll create a Windows 2016 server with separate OS and data disks. We'll then destroy the server and its system disk, but retain the data disk, which we will then attach to a new Windows 2008 server instance.
To start, log into your Alibaba Cloud account. Head to the management console and, from the main products menu, choose Elastic Compute Service. From the menu on the left-hand side of the screen, choose Instances, and then select a region from the list at the top of the screen. If this is purely for test purposes then it doesn't matter which region you choose. In these examples we'll use Frankfurt.
Click on the blue Create Instance button and you'll see something like this.

Choose the Pay-As-You-Go billing method, as this will allow you to run the servers for just a few cents per hour, after which you can delete them. Subscription billing is on a per-month basis, which we don't need.
Under Instance Type, leave the default option set. This will be a server with 8GB of RAM and two CPUs, which is sufficient for our purposes.
In the Image section, choose the Public Image button and then, from the dropdown boxes, choose Windows Server 2016. For this tutorial we'll select the English version.
Next, you'll see the all-important storage section.

As you can see, we have selected a 40GB system disk. We've also added a single additional 20GB data disk. Because the purpose of this tutorial is to ultimately delete this server but retain the data disk, we have unselected the "Release with Instance" box for the data disk.
Click on the Next – Networking button and assign your server to a VPC and vSwitch. If you don't have one set up in the region within which your server is hosted, you'll need to return to the console and create one. Just use the default options which are offered.
Now click the orange Preview button and you'll see a summary of your chosen options.
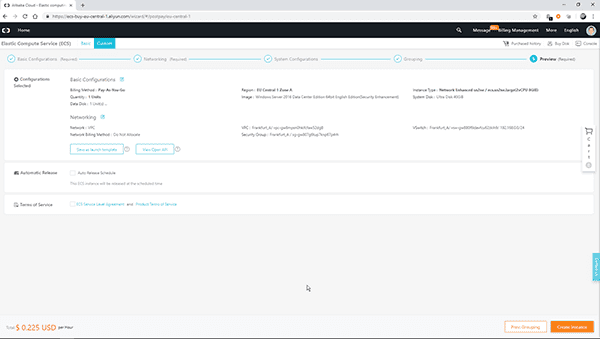
Note the optional Automatic Release settings. If you won't be using this server for long, you can schedule its automatic removal for a specific date and time, after which it will be deleted and you will no longer incur any charges. We won't use the automatic release feature right now, but it's useful to bear in mind for the future when you're evaluating Alibaba Cloud services as it can save you money.
Accept the terms of service then click on Create Instance.
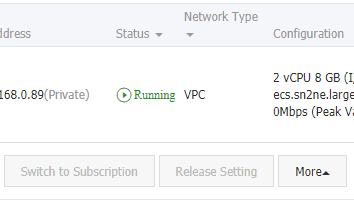
After a couple of minutes, the console display will show that your instance is up and running.

We need to set the Administrator password for this instance so, from the More menu, under Password/Key Pair, choose Reset Password. Enter the password that you want to use.
You need to restart the instance in order for the new password to take effect so, again from the More menu, under Instance Status, choose Restart.
Wait a couple of minutes and your instance will be shown as Running.
From the menu on the left-hand side of the console screen, under Block Storage, choose Disks. Here you can see your two cloud disks – one the 40GB system disk and the other a 20GB data disk.

There's also a Create Disk button at the top of the screen. You can create additional disks from this screen if you wish, but for the moment we will stick with the two we already made. So, click your browser's Back button to return to the console.
Let's connect to our Windows Server 2016 instance to verify that all is working. Click on the Instances link on the left-hand side of the screen and then click the blue Connect link for the server.
Connecting to a server from the browser-based console is simpler than connecting via a Remote Desktop tool, and avoids the need to create a security group in order to open the Remote Desktop firewall port 3389. The first time you use the Connect link, you'll be shown the VNC password for the server. Make a careful note of it, as it will not be shown again.
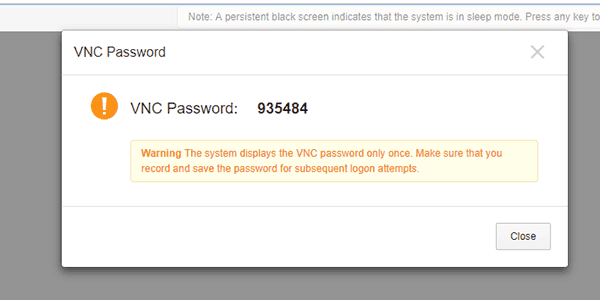
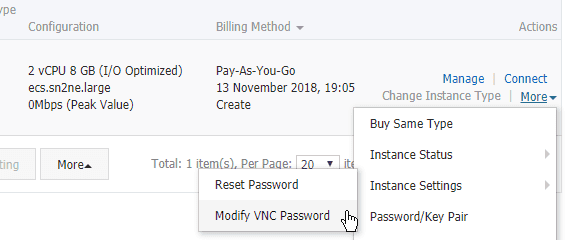
However, if you do forget, there's an option to reset or change it under Modify VNC Password.
Enter the VNC password and you should see the server lock screen which is asking you to press Ctrl-Alt-Delete to unlock it.
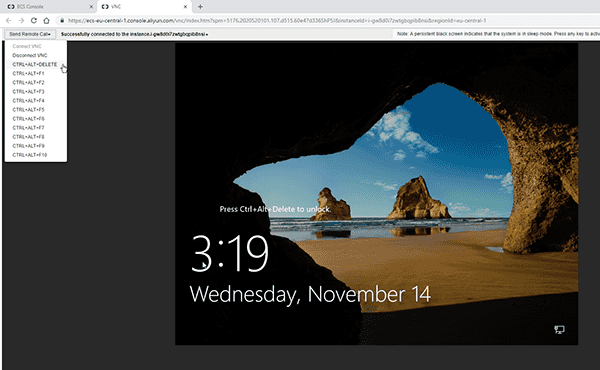
Choose the option at the top of the screen to send these keystrokes to the server, then log in using the administrator password you set.
You will see that the computer has two drives. Drive C: is the 40GB system disk and D: is our 20GB data disk.
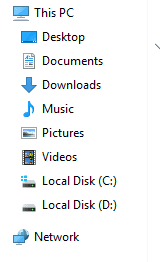
Use Windows File Explorer, or any other means, to create some content on the data disk.

We will now delete the Windows 2016 instance. Log out by sending Ctrl-Alt-Delete again and then choosing Sign Out.
Return to the console and to the list of instances.
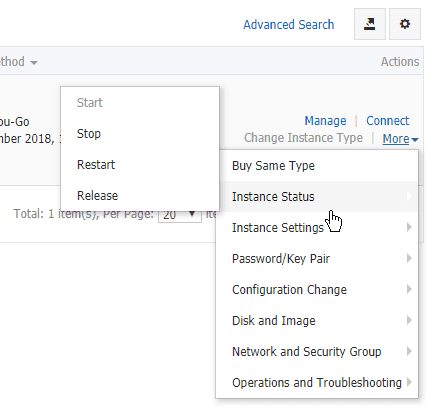
From the More link, under Instance Status, stop the instance. When it shows as having been stopped, select the Release option to delete it. After a short while, the server instance will be removed from your list.
Head to the Disks link on the left-hand side of the screen. Note that the 40GB system disk no longer exists but the 20GB data disk is still intact, as we specifically configured this disk not to be deleted along with its associated server instance.

Let's create a second server instance and attach our data disk to it. Click on the Instances link at the top of the menu on the left-hand side and proceed as before, to create another Pay-As-You-Go instance.
For this example, we'll choose Windows Server 2008. You can choose 2012, or 2016 again, if you prefer.
Create a system disk, but don't create any data disks for now.
On the Preview screen, set an automatic release schedule if you wish, to delete this server after one or two hours if you'll no longer be needing it.
When the server shows as Running, repeat the steps from earlier in this tutorial to set an administrator password, then restart the instance.
When it shows as Running again, head to the Disks menu on the left-hand side of the screen.

There's our new Windows Server 2008 system disk, and the as-yet-unmounted data disk.
Click on the More link for the unmounted disk, then choose Mount. Select the instance ID. Also tick the "release disk with instance" box, as we will no longer need this sample data disk once we delete the instance.
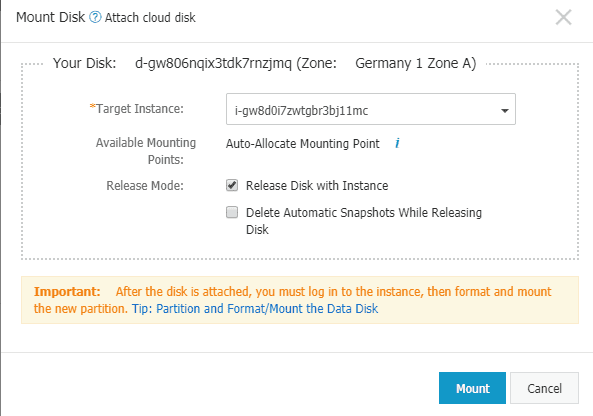
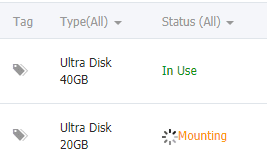
Click the Mount button, then wait until the disk's status changes from Mounting to In Use.
Now head back to the Instances link. Click on Connect for the instance, make a note of the VNC password, and log in using the password you set.
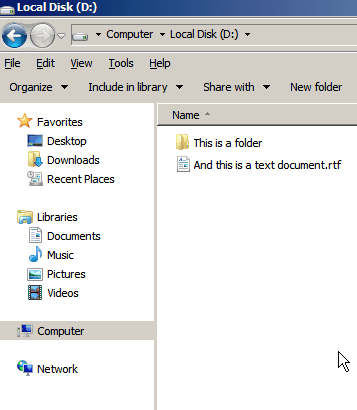
And there's our data disk, safely transferred from one cloud server to another, complete with the sample content we created.
You can now delete the instance in order to avoid incurring additional hourly costs. Or wait for it to be automatically released, if you chose that option.
As you have seen, Alibaba Cloud makes it really easy to create cloud disks, attach them to servers, and move disks between server instances too. From the Disks menu on the console you can create up to 750 disks if you need to, ready to assign to instances, and there's also an API available if you want to create and manage cloud disks programmatically.
Although we've used Windows for these examples, you can of course use cloud disks on Linux-based servers too, in the same way.
You can resize a data disk, even if it's attached to a running instance. To illustrate this, start by creating a Windows Server 2016 instance with a 40GB system disk and a 30GB data disk, using the same methods we have used elsewhere in this tutorial.
Tick the Release with Instance box when you create the data disk, in order to avoid incurring extra costs after the server has been deleted. In addition, use the "automatic release" feature to delete the server after, say, three hours. This keeps costs down while allowing sufficient time for this particular experiment.
With the instance created, log in and verify that the server with the two disks has been created as specified. In this case, Server Manager shows the information we need.

Sign out of the instance, then return to the console and verify that the instance is still running.

Select the Disks menu on the left-hand side of the console, from where you can see the server's two disks.

Now let's resize the 30GB data disk. From the More menu, on the disk's detail line, choose Resize Disk. (Note that this option isn't available for the system disk). For this example, we'll change it to 60GB. Sizes up to 2TB (2048GB) are supported.

Click the Confirm to resize button. Then restart the server instance.
We now need to log into the server in order to make the newly-added disk space available. Server Manager shows that our data drive has a capacity of 60GB but only 30GB has been allocated so far.
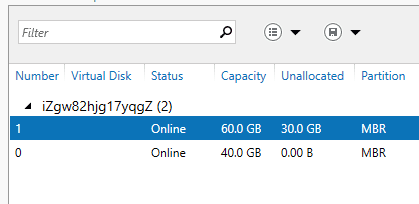
You need to follow the OS-specific procedure to extend a disk volume. In the case of Windows Server 2016, right-click on the drive in the lower part of the Server Manager storage display and choose Extend Volume.

Enter the size that corresponds to the additional space that you added via the Alibaba Cloud management console.
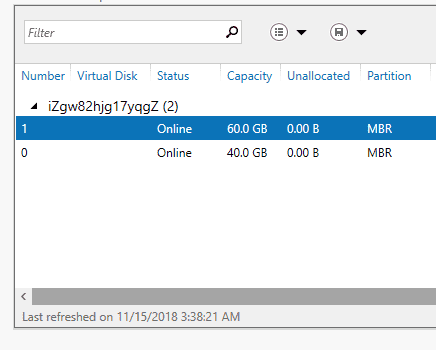
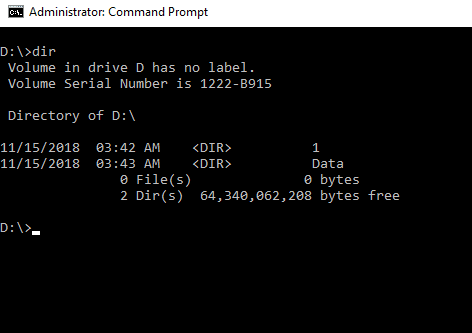
The new space is now added. We can verify, in this case via a command prompt DIR command, that there is some 60GB of free space.
You can monitor the performance of an Alibaba Cloud disk and, if necessary, change the specification of the drive to improve its performance.
To monitor a disk, go to the management console and view your cloud disks.
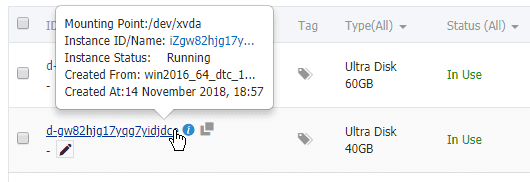
Click on the blue id link of the disk you want to monitor. This will show you a basic information screen about the drive and its current status. Now click on Disk Monitoring on the left-hand side of the console.
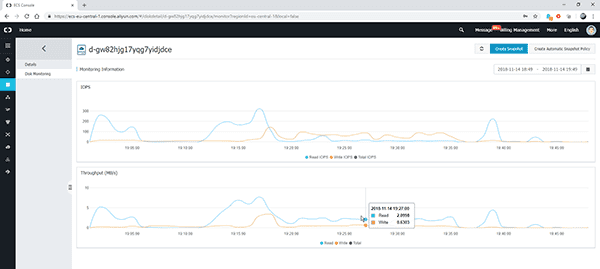
You can now view detailed information about the drive's performance and load. From the menu at the top of the screen you can choose a specific time period to study.
In this tutorial we have created a Windows ECS server with a system and a data drive, then destroyed that server and allocated its data drive to an entirely different instance running a different version of Windows Server.
We have also shown how to resize a cloud disk, and how to monitor its performance.
To try all this for yourself, just head to www.alibabacloud.com. If you don't already have an account it's free to sign up, and there are lots of free trial offers available that allow you to evaluate most of the services without incurring any costs.
Bootstrapping Function Compute for Web Using NodeJS SDK: Part 1

2,598 posts | 769 followers
FollowAlibaba Clouder - August 9, 2019
Alibaba Clouder - January 27, 2021
Alibaba Clouder - February 13, 2021
Alibaba Clouder - February 11, 2020
Alibaba Clouder - February 11, 2020
Alibaba Clouder - February 21, 2020

2,598 posts | 769 followers
Follow Storage Capacity Unit
Plan and optimize your storage budget with flexible storage services
Learn More Alibaba Cloud Drive Solution
Build your cloud drive to store, share, and manage photos and files online for your enterprise customers
Learn More Drive and Photo Service
A low-code, high-availability, and secure platform for enterprise file management and application
Learn More Hybrid Cloud Storage
A cost-effective, efficient and easy-to-manage hybrid cloud storage solution.
Learn MoreMore Posts by Alibaba Clouder