By Dassi Orleando, Alibaba Cloud Community Blog author.
In this quick tutorial, you will learn how to install Stacer, which is a system monitor utility, on a machine installed with Ubuntu or a similar Linux operating system. Also, in this tutorial, you'll be learning some of the benefits of using Stacer as your system monitor utility.
Stacer can be defined as a Linux utility. It is open-source and an all-in-one system optimizer and monitoring system that can be helpful to managing an entire system through monitoring the system's CPU, memory, disk space, as well as other items like system info, current downloads, and current uploads. The utility can also be involved in monitoring startup applications and in managing services.
There are currently several different versions. The latest version at the time of writing this article is the V1.0.9. I recommend that you stick to installing and setting up this particular version-as it is the one that I am using in this tutorial. Stacer's source code is hosted on GitHub.
Before you can continue on to the rest of the tutorial, make sure that you have the following:
Stacer is a Linux App, meaning that it can be installed in any system that is running on a Linux Kernel. For this tutorial, though, you'll want to have your OS be Ubuntu 18.04 LTS, so it will be easier to following along. For Stacer to be installed on Linux operating system, two other packages needed are: the Curl and Systemd. There are several different methods for installing Stacey on Ubuntu machine:
For the sake of simplicity in this tutorial, we are going to be using the third method. To do this, we will run some commands in a terminal window and use an external package repository. First we can add this respository with this command:
sudo add-apt-repository ppa:oguzhaninan/stacerNext, after the appropriate PPA is on our machine, we can update our packages list and sources with the sudo apt-get update command, and then install it with the sudo apt-get install stacer command.
In the future, if you want to uninstall Stacer, you can use this command: sudo apt-get remove stacer. Of course, however, if you installed Stacer by using a binary, that is, a deb or rpm executable file-rather than the way we did above-then you'll need to double-click on that file again then click remove package in the displayed interface to have it cleared out.
Stacer has many uses and as a result as found its place among many different kinds of users for monitoring various aspects and items of their computer. But before we talk about its uses-by specifically going through the many tabs of its interface-let's first take a quick look at the application itself.
After the app is installed, you should be able to quickly see it in your applications draw, as shown below:
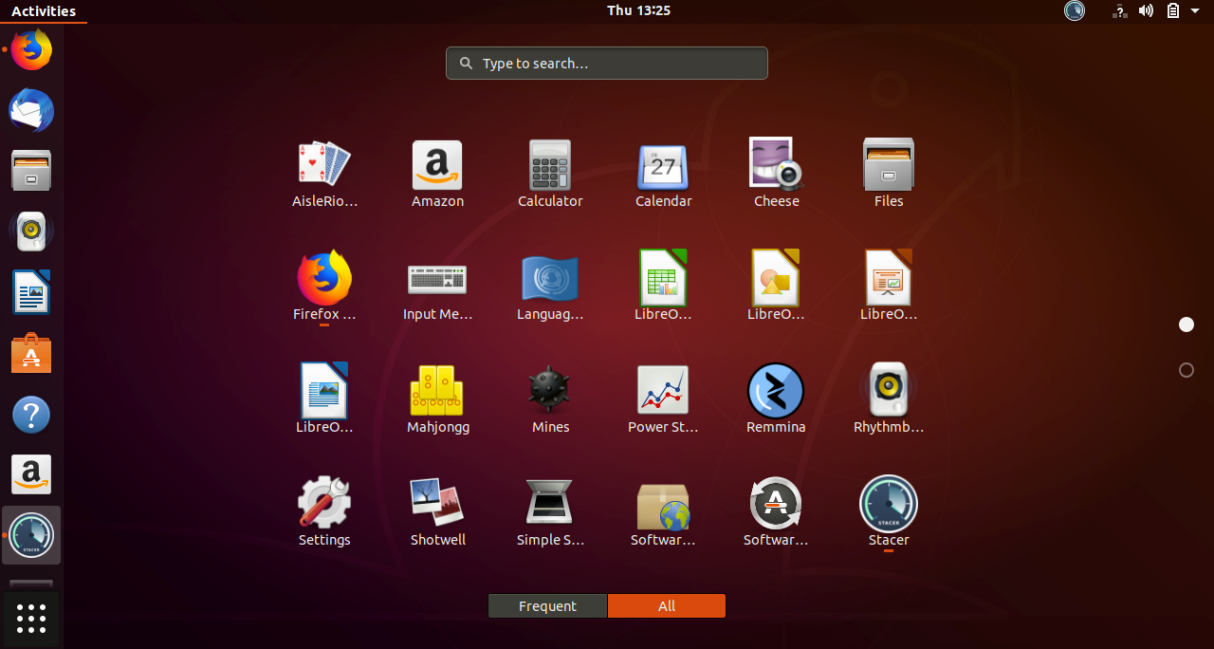
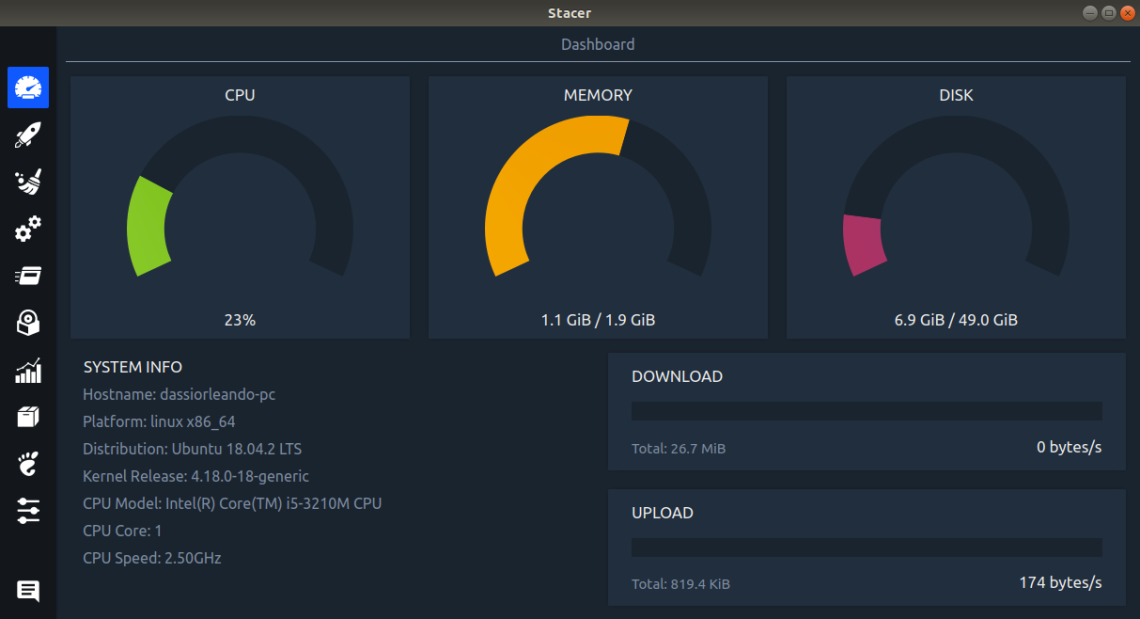
Now, the main page of the page looks like this. At a glance, you can see various monitored items with the CPU, memory, and the disk, right front and center.
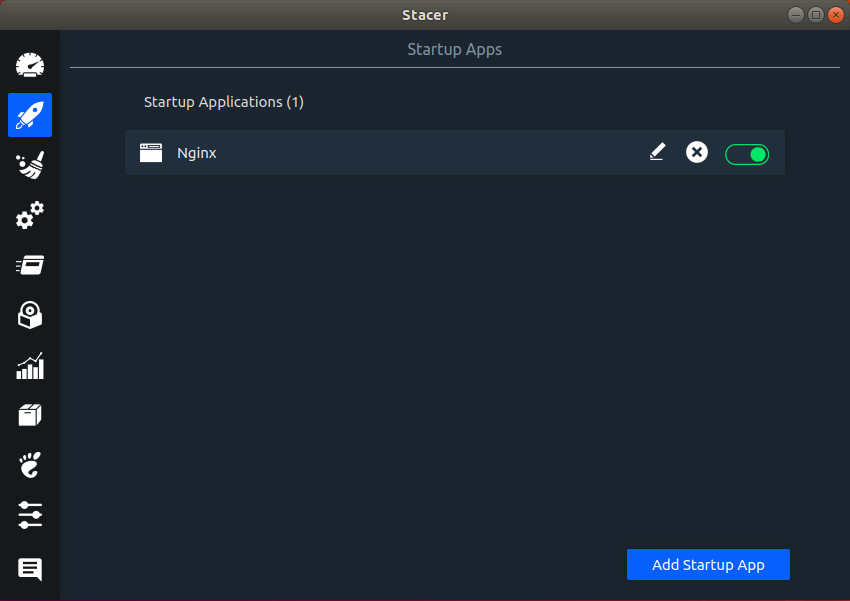
Looking at the left-navigation pane in the app, you can see a rocket icon. This is for the tab dedicated to Startup Apps-that is, apps or other items that you have open automatically on the startup of your computer. From this interface, you can easily monitor these items. In the screenshot below, you can see there's a startup item, which happens to be Nginx. It is enabled (indicated by the toggle being set to green) to start automatically on the startup of your Linux machine.
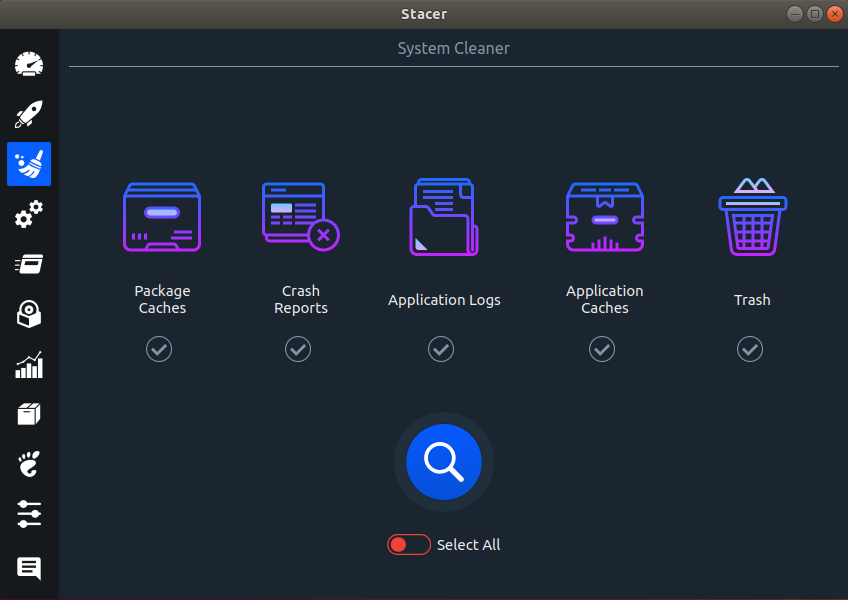
The next tab, represented by a broom icon, is for system cleaning. From this interface, you can do things like clear package cache or empty your system's trash. Conveniently you can do these all at once if you'd so like to.
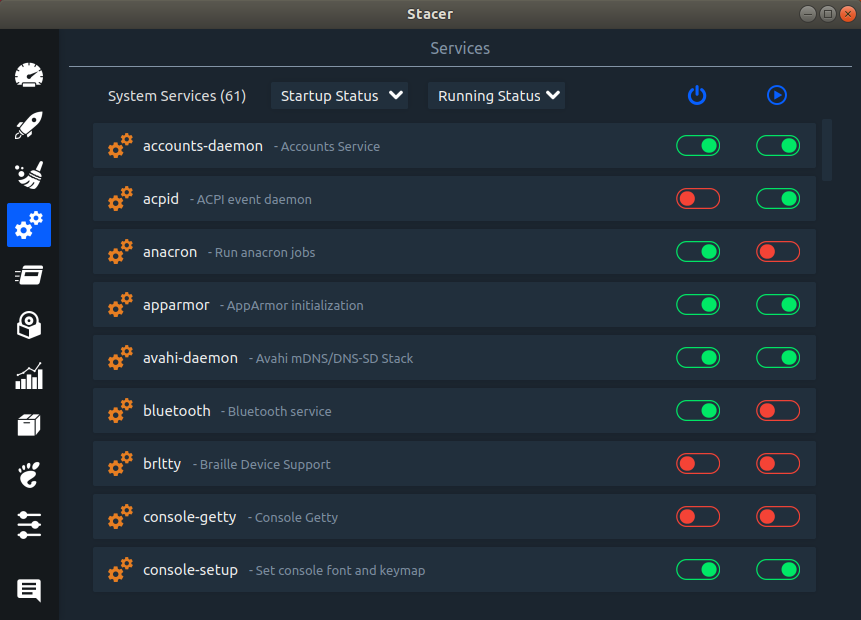
Next is a gear icon; this represents the system services monitoring area. On this tab, you can turn on or off or even enable or disable services quickly.
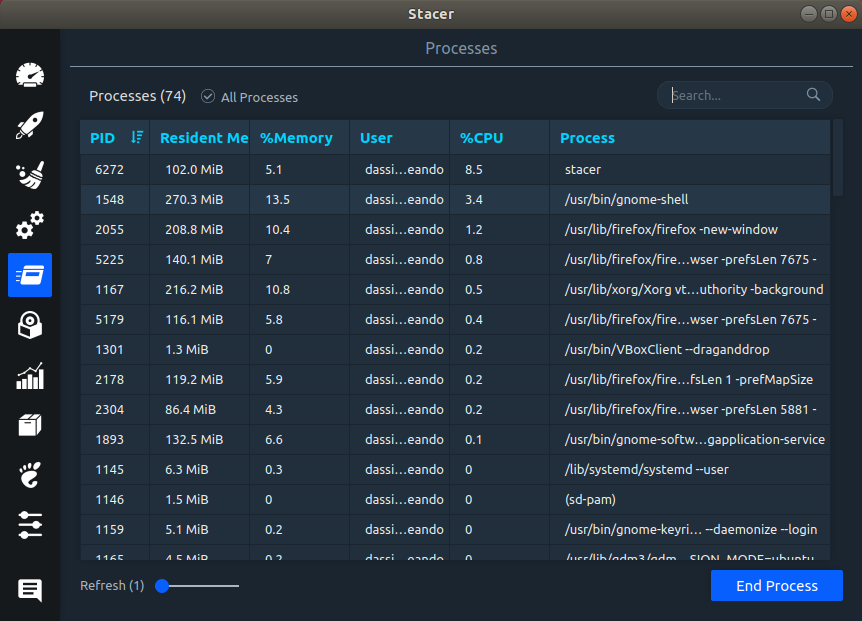
Next is a menu icon. This tab is for system processes. On this tab, you'll see a list of system processes along with some details for each process, such as the process name as well as the percentage of memory and CPU it's using, so on. This page is really the best place to go to see what your machine is actually up to.
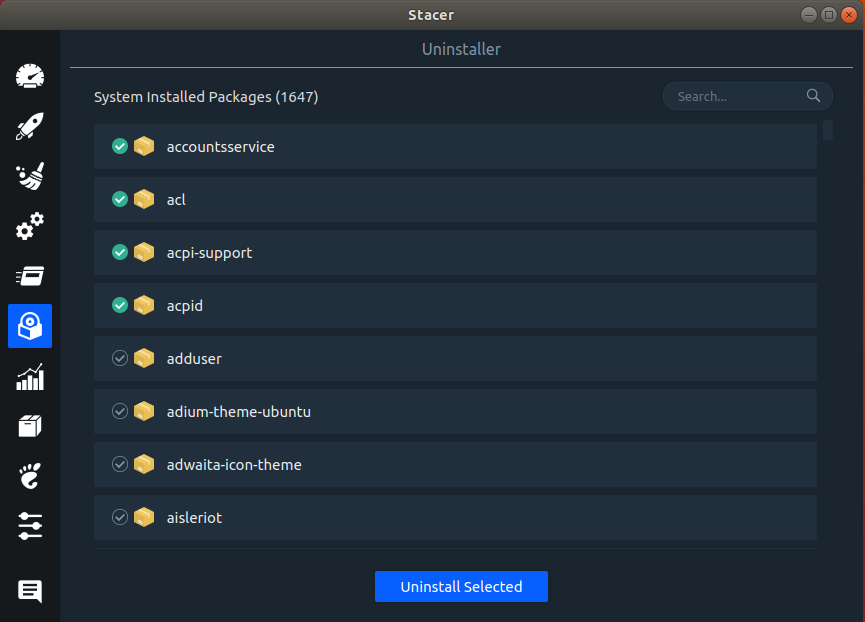
Next is a disk icon, which is for the Unistaller tab of Stacer. You can use this area to find applications and their packages to uninstall them. You can uninstall in batches.
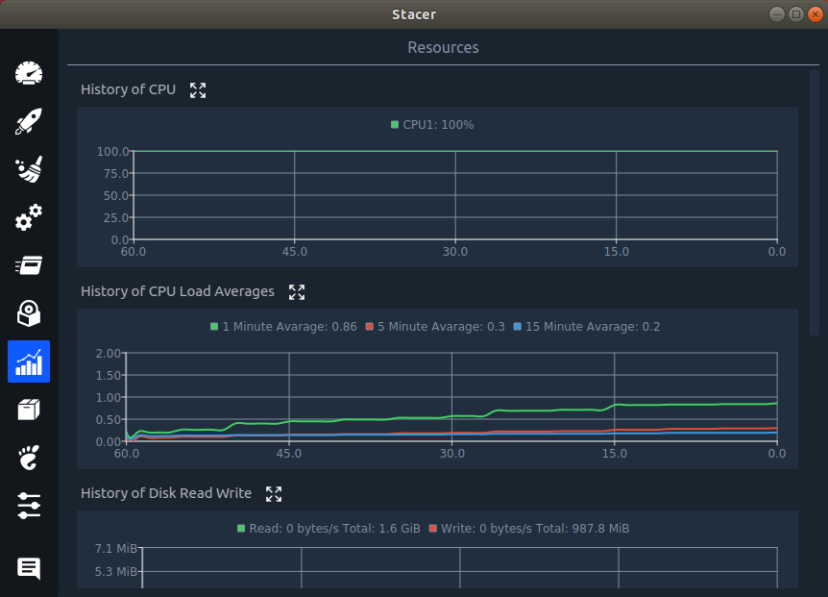
Next is a tab with a bar graph icon. This is the Resources tab, where you can check how the whole system has been performing. This tab has a bunch of graphs, which are separately, for the CPU, RAM, the Disk, and network activity.
Next there's a tab with a files cabinet icon. This tab is for managing APT repository. Interestingly, in the past, it would have been difficult to manage these from a terminal window or analogous command line interface, but here, given the convenient application interface, it's as easy as pie. You can manage your repositories effortlessly. You can easy enable or disable, update, add, or even delete repositories.
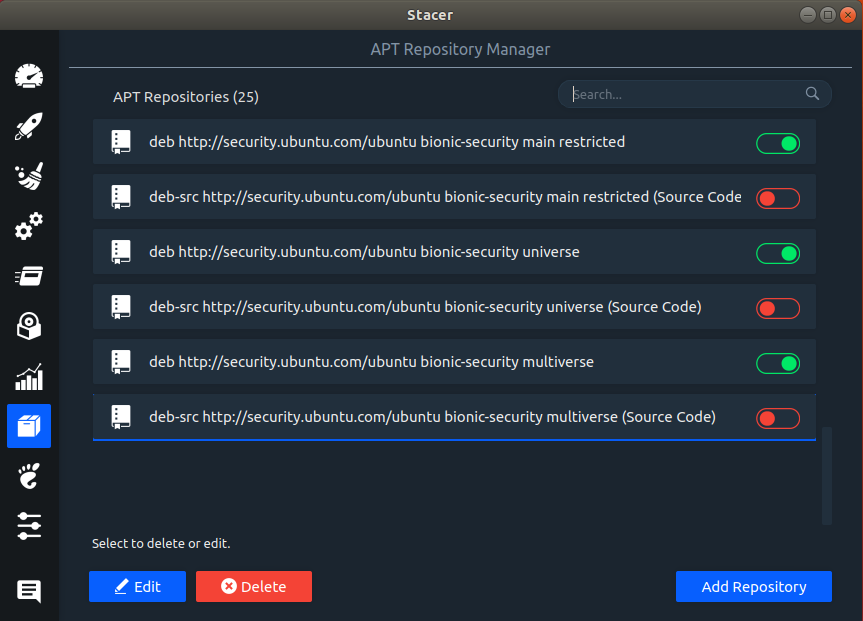
For the switches next to each repository, similar to what we saw on the Services tab, green indicates that the software repository is enabled, and intuitively red conversely indicates that the repository is disabled. Likewise, you can change the status, to toggle a repository to the enabled or disabled status.
Next is a foot icon. This is for the Gnome settings tab. This tab allow you to quickly update some of your Gnome configurations, such as the hardware acceleration, workspace settings, and title bar actions and appearance settings.
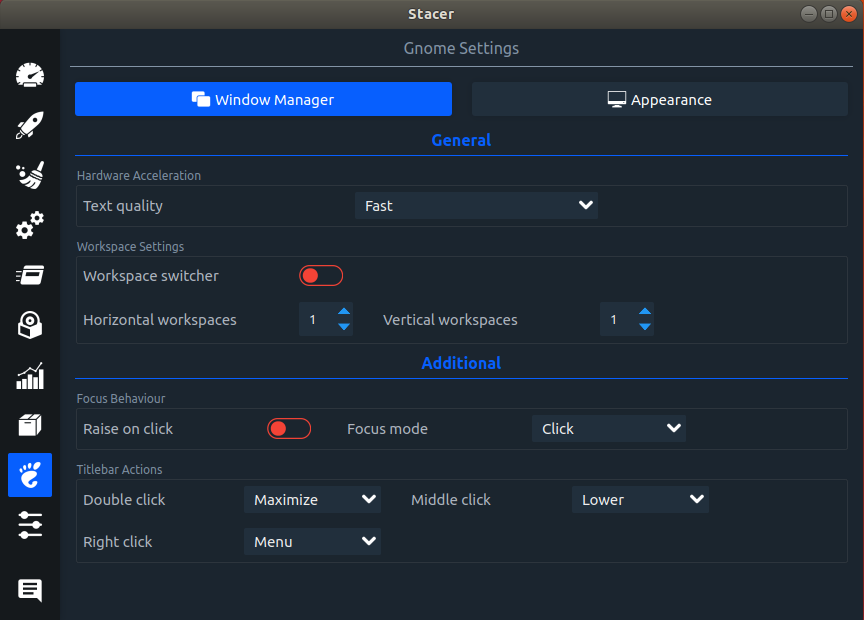
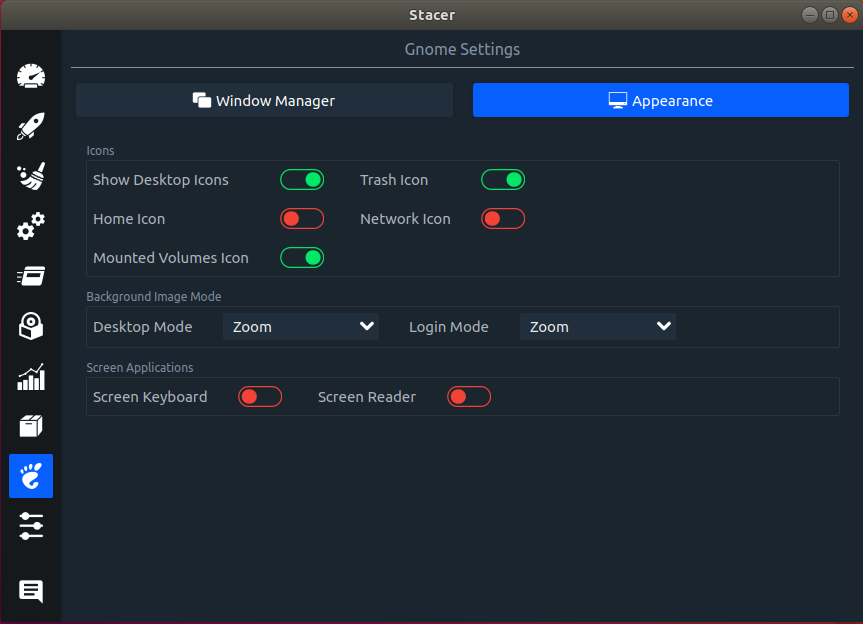
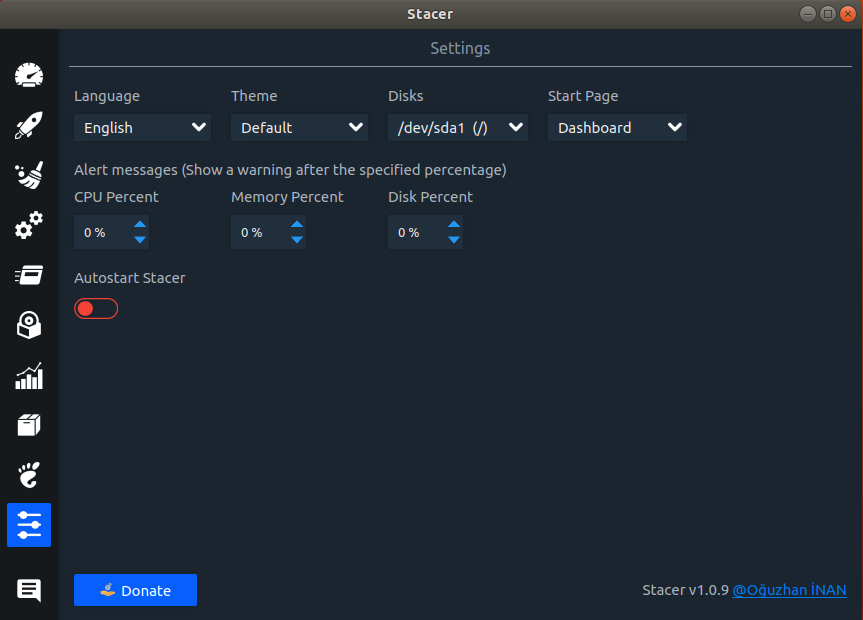
Next is a tongle lines icon. This tab is the Settings tab. On this tab, you can quickly update some system settings, including the language, them, as well as the disk and tart page settings. Also, you can check or clear an option to specify whether Stacer is started automatically or not. Last, you can also specify some thresholds for the RAM and CPU, allowing you to be notified if or when these thresholds are reached.

2,593 posts | 792 followers
FollowHiteshjethva - January 8, 2020
Alibaba Clouder - June 13, 2019
Hiteshjethva - March 2, 2020
Alibaba Clouder - July 15, 2019
Alibaba Clouder - August 16, 2019
Alibaba Clouder - February 26, 2018

2,593 posts | 792 followers
Follow Marketplace
Marketplace is an online market for users to search and quickly use the software as image for Alibaba Cloud products.
Learn More ECS(Elastic Compute Service)
Elastic and secure virtual cloud servers to cater all your cloud hosting needs.
Learn MoreMore Posts by Alibaba Clouder