By Hitesh Jethva, Alibaba Cloud Community Blog author.
Monitorix is a free, open-source, simple and lightweight system monitoring software that can be used to monitor CPU usage, memory usage, disk usage and network usage. It is used for Linux and Unix based system, but due to its simplicity, it can be used on embedded devices. It mainly consists of two programs a collector and a CGI script.
In this tutorial, you will learn how to install Monitorix on an Alibaba Cloud Elastic Compute Service (ECS) instance that is installed with Ubuntu 16.04.
For this tutorial, you will need the following items:
For reference purposes, see create a new ECS instance and connect to your instance. Also, once you are logged into your Ubuntu 16.04 instance, you can run the apt-get update –y command to update your base system with the latest available packages.
By default, Monitorix is not available in the Ubuntu 16.04 default repository. So you will need to add the Monitorix repository to your system. Do so by following these steps:
First, download and add the GPG key with the following command:
wget http://apt.izzysoft.de/izzysoft.asc
apt-key add izzysoft.asc
Next, add the repository with the following command:
echo "deb http://apt.izzysoft.de/ubuntu generic universe" | tee -a /etc/apt/sources.listNext, update the repository and install Monitorix with the following command:
apt-get update -y
apt-get install monitorix apache2-utils -y
After installing Monitorix, start the Monitorix service with the service monitorix start command.
First, you will need to enable authentication for Monitorix. You can do this by editing Monitorix default configuration file.
nano /etc/monitorix/monitorix.confMake the following changes:
title = Monitorix Server
hostname = Node1


        <auth>
                enabled = Y
                msg = Monitorix: Restricted access
                htpasswd = /var/lib/monitorix/htpasswd
        </auth>
Save and close the file, when you are finished. Then, restart Monitorix service with the service monitorix restart command. Next, you can now check the status of Monitorix with the service monitorix status command. The output will be like the following:
● monitorix.service - LSB: Start Monitorix daemon
   Loaded: loaded (/etc/init.d/monitorix; bad; vendor preset: enabled)
   Active: active (running) since Sun 2018-12-09 20:15:30 IST; 4s ago
     Docs: man:systemd-sysv-generator(8)
  Process: 16566 ExecStop=/etc/init.d/monitorix stop (code=exited, status=0/SUCCESS)
  Process: 16577 ExecStart=/etc/init.d/monitorix start (code=exited, status=0/SUCCESS)
   CGroup: /system.slice/monitorix.service
           ├─16617 /usr/bin/monitorix -c /etc/monitorix/monitorix.conf -p /var/run/monitorix.pi
           └─16668 monitorix-httpd listening on 808

Dec 09 20:15:29 Node1 systemd[1]: Stopped LSB: Start Monitorix daemon.
Dec 09 20:15:29 Node1 systemd[1]: Starting LSB: Start Monitorix daemon...
Dec 09 20:15:30 Node1 monitorix[16577]:    ...done.
Dec 09 20:15:30 Node1 systemd[1]: Started LSB: Start Monitorix daemon.
Next, you will need to create admin user and password for Monitorix. You can do this by running the following command:
htpasswd -d -c /var/lib/monitorix/htpasswd adminThe output will look like the following:
Enter password for admin user:


New password:
Re-type new password:
Adding password for user adminBy now, Monitorix is installed and listening on port 8080, and so now it's time to access it through a web browser. Do this by following these steps:
Open your web browser and type the address http://192.168.0.102:8080/monitorix. You will be redirected to the following page:
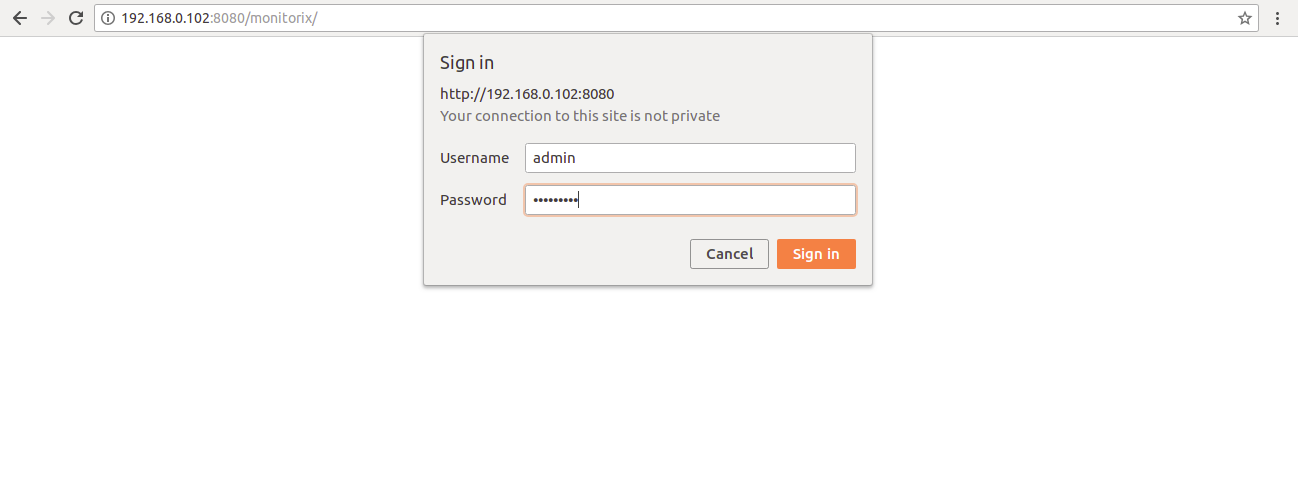
Now, provide your admin username and password, then click on the OK button. You should see the following page:
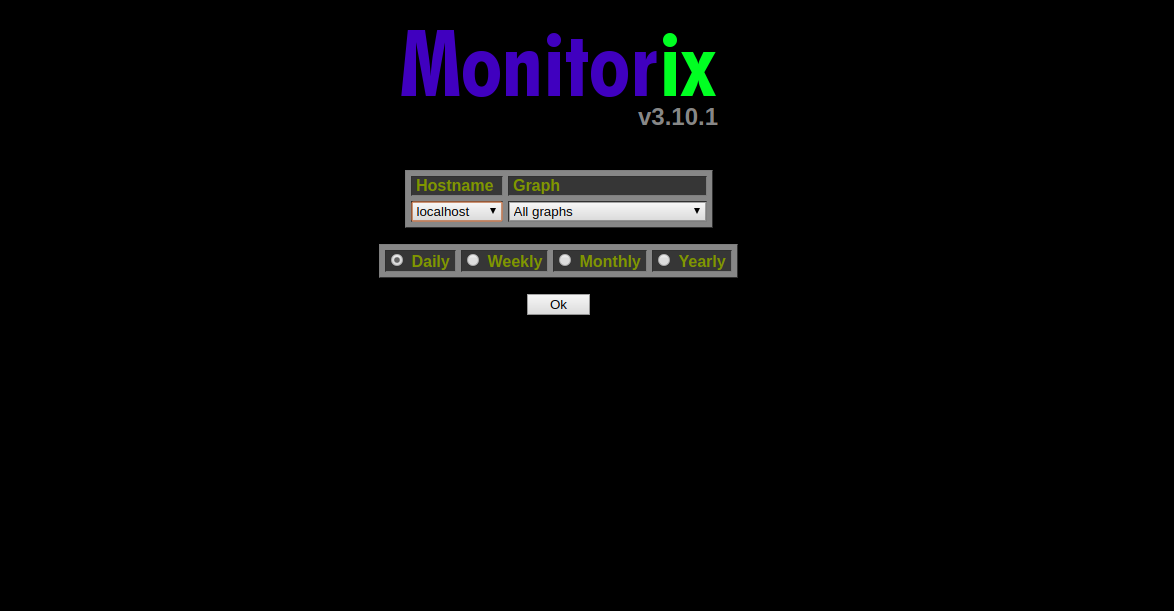
Now, choose the type of monitoring and click on the Ok button. You should see the following page:
System load average and global kernel usage
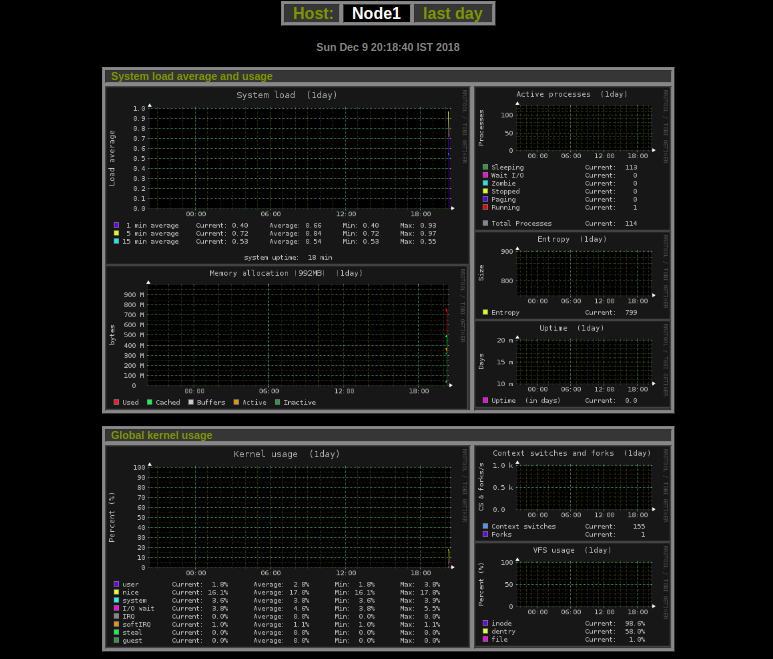
Filesystem usage and I/O activity, Network traffic and usage
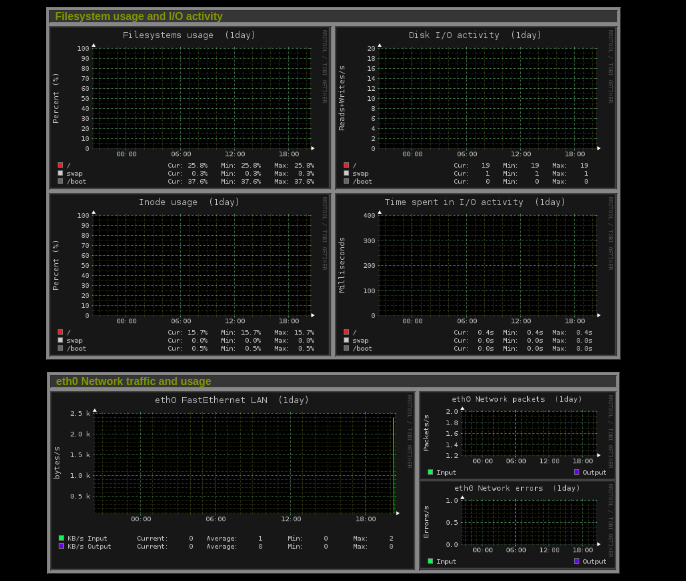
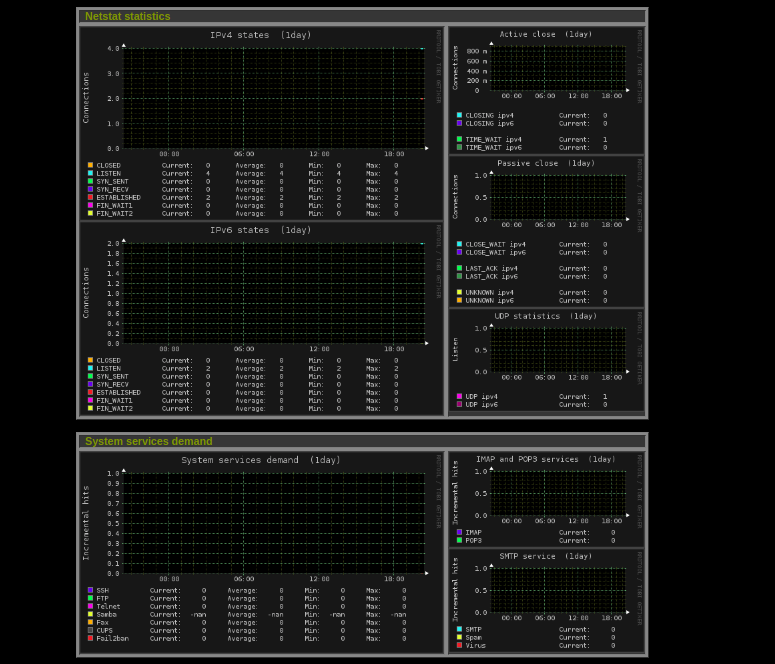
Netstat statistics and System services demand
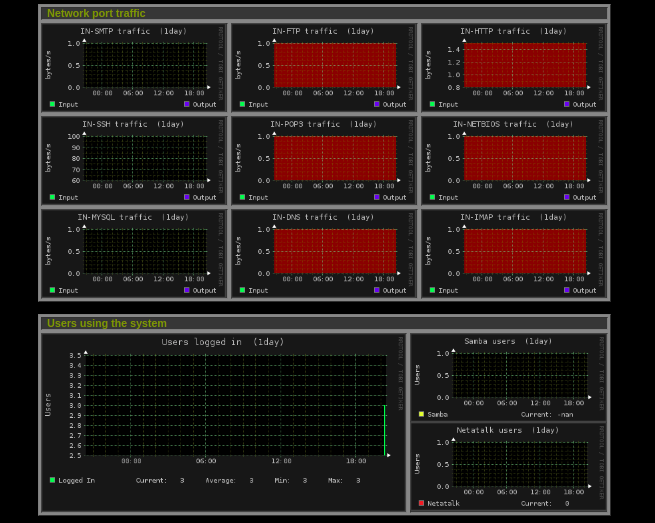
Network port traffic and Users using the system
Now you have successfully installed Monitorix on Ubuntu 16.04 server. I hope you can now easily understand and use Monitorix to monitor your server resources.

2,593 posts | 791 followers
FollowAlibaba Clouder - November 17, 2020
Alibaba Clouder - August 3, 2020
Alibaba Cloud Native - November 16, 2023
Deepuu - September 1, 2025
Alibaba Cloud Native - August 14, 2024
Alibaba Developer - March 14, 2022

2,593 posts | 791 followers
Follow ECS(Elastic Compute Service)
Elastic and secure virtual cloud servers to cater all your cloud hosting needs.
Learn MoreLearn More
 OSS(Object Storage Service)
An encrypted and secure cloud storage service which stores, processes and accesses massive amounts of data from anywhere in the world
Learn MoreMore Posts by Alibaba Clouder