The general-purpose production studio is a versatile solution that provides features such as stream mixing, graphic packaging, and real-time captions for a wide range of live streaming scenarios. This topic describes how to use the general-purpose production studio for live video streaming.
Prerequisites
The production studio service is enabled. For more information, see Enable the production studio service.
An accelerated domain name is added and a canonical name (CNAME) record is configured for the domain name. For more information, see Add an accelerated domain name and Configure a CNAME record for a streaming domain.
(Optional) If you want to select a video source from the ApsaraVideo Live console, a streaming domain for the video source is added and a CNAME record is configured. For more information, see Add a streaming domain and Configure a CNAME record for a streaming domain.
(Optional) If you want to select a video source from the media library, a domain name for ApsaraVideo VOD is added and a CNAME record is configured. For more information, see Add a domain name for ApsaraVideo VOD and Configure a CNAME record for an ApsaraVideo VOD domain name.
(Optional) If you want to use the live recording feature, the service for storing recordings is enabled. For more information, see Record live streams to OSS.
You have read the development guide. For more information, see Development guide.
Background information
For a list of supported live centers, see Service regions. Support for other live centers will be added in the future. This topic describes the entire process of setting up a general-purpose production studio and performing real-time production.
The production studio service provides a series of API operations. These operations support the management of production studios, media sources, layouts, components, program lists and interfaces, scenes and audio, channels, and standby videos. This topic describes how to use these API operations to quickly integrate the general-purpose production studio service.
General-purpose production workflow
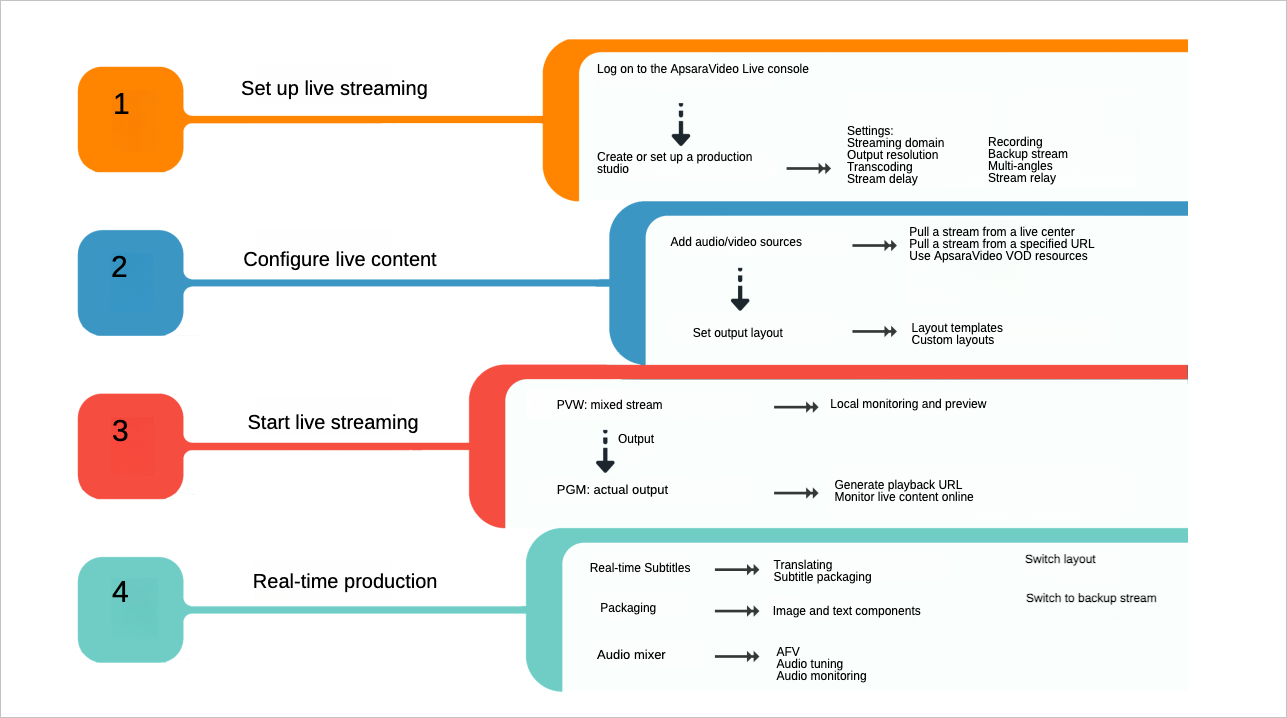
As shown in the figure, the workflow for using a general-purpose production studio includes the following stages:
Live stream settings: Use the production studio console to configure features such as the streaming domain name, output definition, transcoding, and recording.
Live stream configuration: Add audio and video assets for the live stream and set the output layout for the added assets.
Start the live stream: After the live stream starts, the mixed stream is output to the Program View (PVW) for preview. The final live stream is output as the Program (PGM) stream.
Real-time production: During production, you can adjust the live content and stream effects using features such as real-time captions, graphic packaging, and the audio mixer.
Console guide
Live stream settings
Log on to the ApsaraVideo Live console. In the navigation pane on the left, choose .
Find the general-purpose production studio that you created and click Open in the Actions column.
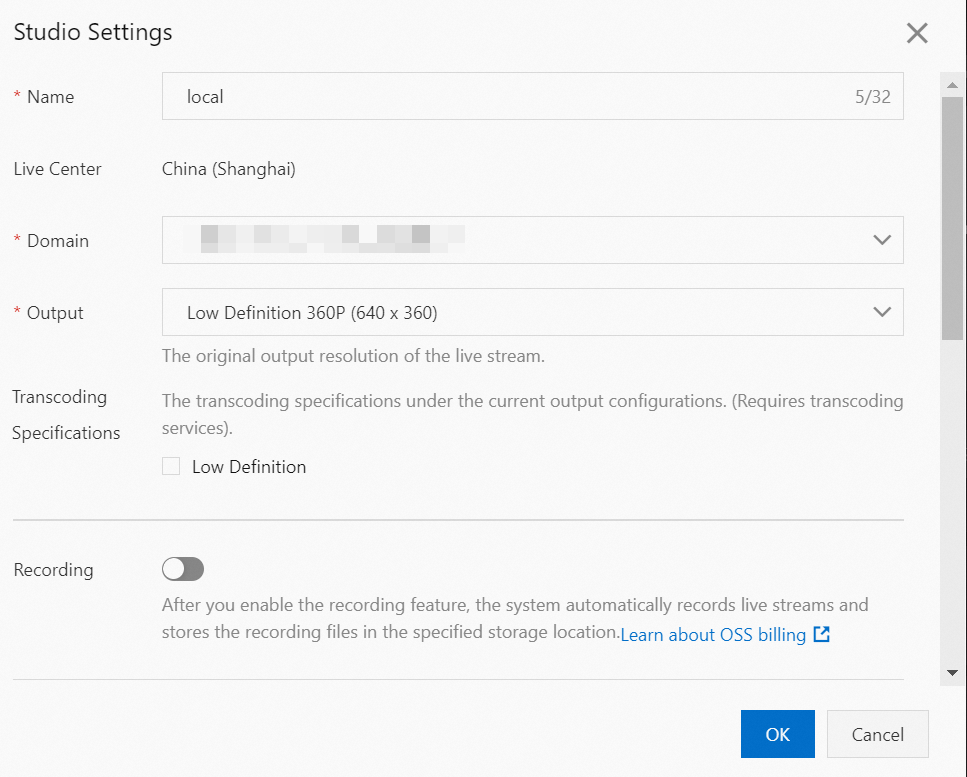
When you create a production studio instance and open the production studio UI for the first time, the configuration panel appears. After you configure the parameters, click OK.
If this is not your first time, you can also click Live Stream Settings in the upper-right corner of the UI to open the panel and configure the production studio.
Configuration item
Procedure
Domain Name
Click the Domain Name text box. From the Domain Name drop-down list, select the streaming domain name for which a CNAME record is configured.
Output
From the Output drop-down list, select the original resolution of the live stream. Valid values: Low Definition, Standard Definition, High Definition, Ultra High Definition 1080p (1920 × 1080), Portrait Low Definition, Portrait Standard Definition, Portrait High Definition, and Portrait Ultra High Definition 1080p (1080 × 1920).
Transcoding Specifications
Low Definition
Standard Definition
High Definition
Ultra High Definition 1080p (1920 × 1080)
After you configure the output, you can also set the transcoding specifications for the live stream. Select one or more transcoding specifications, such as Low Definition, Standard Definition, High Definition, or Ultra High Definition 1080p (1920 × 1080).
NoteYou can select multiple transcoding specifications. However, the definition of the transcoded stream cannot be higher than the original stream. If you select Low Definition as the transcoding format, viewers can switch between Original Quality and Low Definition during playback.
Recording Settings
(Optional) Turn on the Recording Settings switch to enable recording.
You can select automatic recording or manual recording. Automatic recording starts when the live stream begins. Manual recording lets you start or stop recording as needed after the live stream begins.
Set the storage location for the live stream recordings.
NoteThe storage location must be in the same region as the production studio. Cross-region recording is not supported.
Select one or more storage formats for the recording files.
Set the recording cycle. For example, if you set the cycle to 10 minutes, a new recording file is generated every 10 minutes.
Stream Delay
(Optional) Turn on the Stream Delay switch to set a delay for the output. The valid range is 15s to 300s.
Standby Video
(Optional)
Live Stream: Select Select from ApsaraVideo Live Console or Enter a live URL. to specify a standby video.
VOD Resource: Click Select. From the list of VOD video sources, select a VOD video to serve as a standby clip before the live stream starts or if the stream becomes abnormal.
ImportantAll VOD assets used, such as VOD sources and standby videos, must be in the same region as the production studio. The production studio does not support selecting VOD videos from other regions as assets. For example, if you use a production studio in China (Shanghai), your assets must also be in ApsaraVideo VOD in China (Shanghai).
Image: Click Select From Media Library or Local Upload to specify a standby image. You can upload JPG or PNG images. The maximum file size is 10 MB.
Multi-way Stream Relay
(Optional) Click Add URL to set a relay address.
ImportantAfter you add or delete a relay address, disconnect and restart the PGM for the settings to take effect.
Using third-party platform features incurs additional relay fees. By default, each domain name provides three free relay addresses. If you exceed this limit, the extra addresses are billed. The billing standard is the same as that for stream relay in the live center. For more information, see Billing of stream relay in the live center.
Live stream configuration
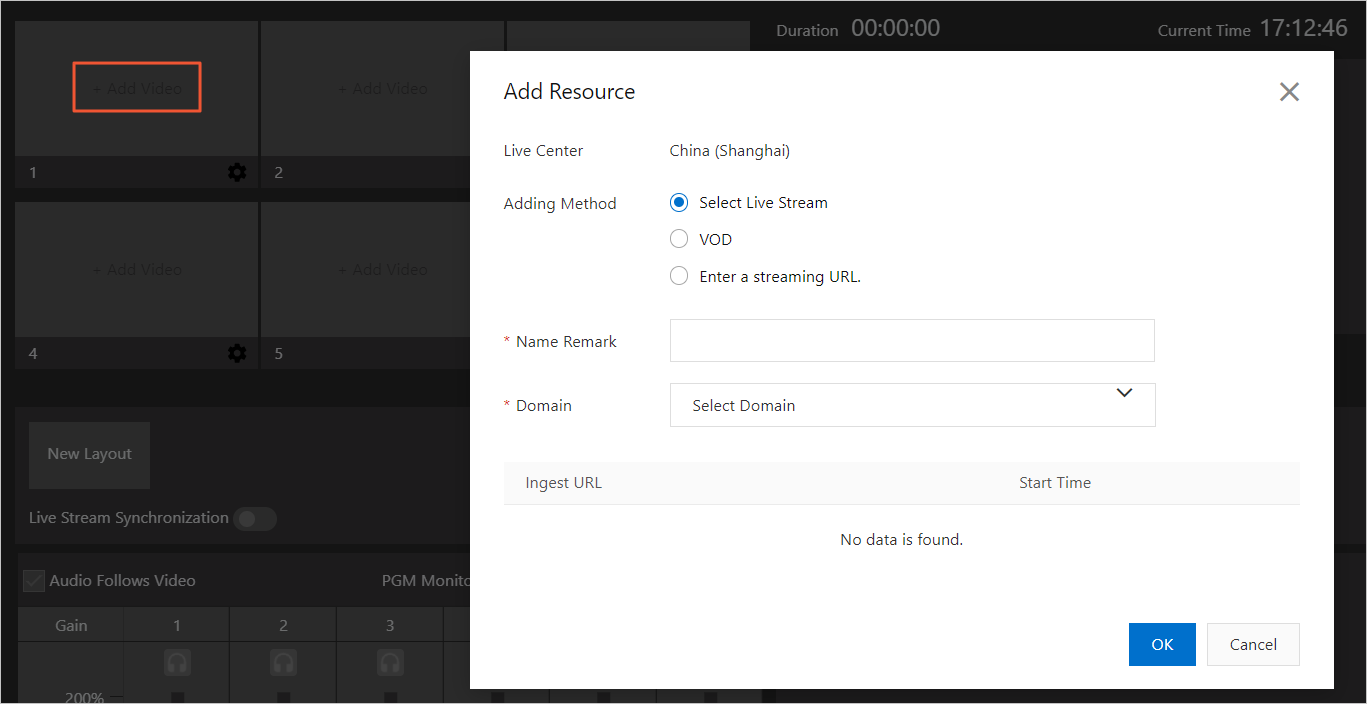
Click + Add Media File. In the Add Resource panel, add a live stream or VOD video as the video source.
How to add
Operation
Live Stream
Select from Live Console: After you select a domain name, a list of all live streams under that domain name automatically appears. Select the ingest URL to add to the current production studio instance.
Enter Live Stream URL: Enter a valid live stream URL. The RTMP, FLV, and RTS formats are supported.
VOD
Click Select. In the list of video assets from the media library, select a video. Set playback to Once or Loop.
(Optional) Set the start time for playback switching. This start time takes effect only when you set the asset and sync it to the PGM.
Click OK to add the video.
NoteTo use VOD video assets from the VOD option, you must go to the ApsaraVideo VOD console. From the More drop-down list, select Use for Live Production. Wait for the video to upload and complete pre-processing before you can use it in the production studio. For information about pre-processing rules and billing methods, see ApsaraVideo VOD pricing.
Image
Select From Media Library: Click Select Image and choose an image from the media library.
Local Upload: Upload a local image. You can upload JPG or PNG images. The maximum file size is 10 MB. The uploaded image is stored in the VOD media library.
Local Stream Ingest
Stream ingest method:
Screen sharing: Share your screen. You can select an application window or your desktop as the input source.
Camera stream ingest: Use your local camera as the input source.
Resolution: Select a suitable resolution.
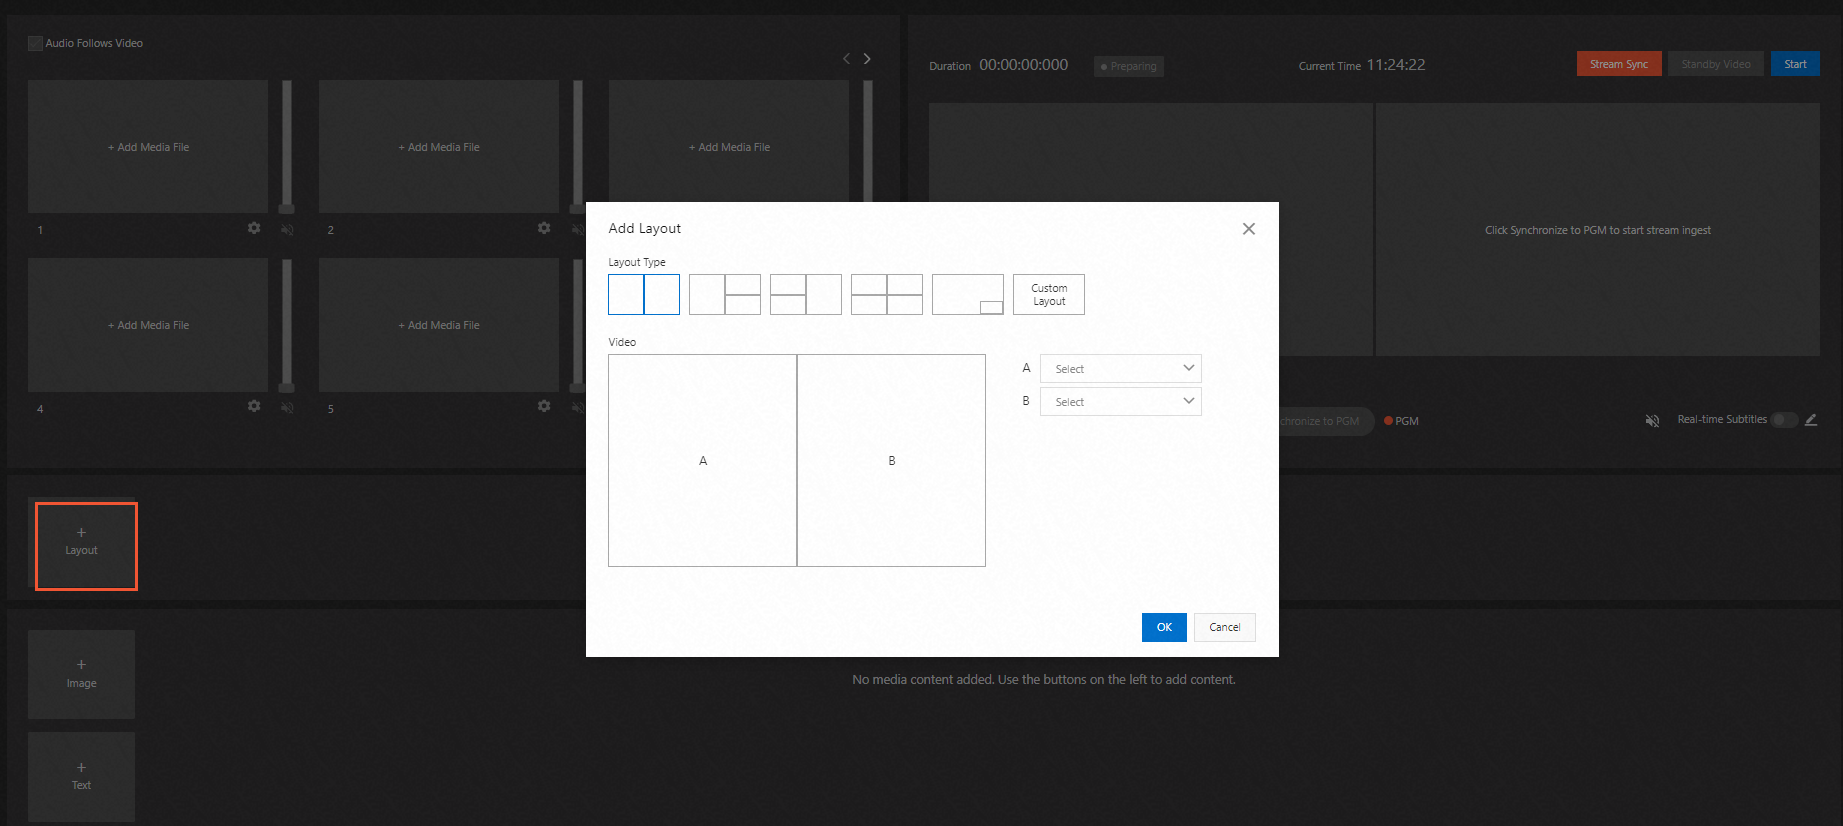
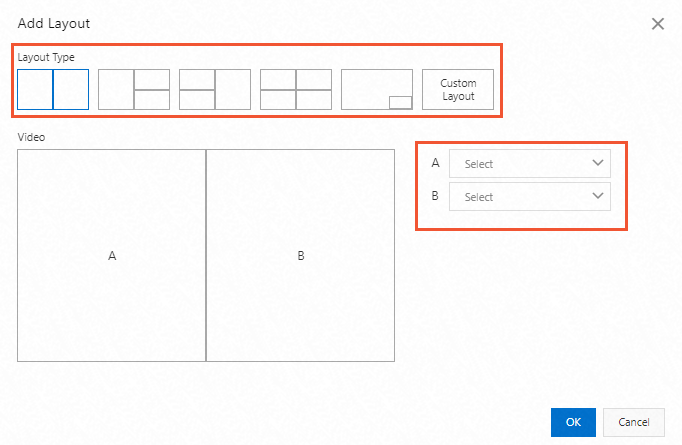
Set the output layout.
Click + Layout. Select a layout type for the video output. Associate a media asset with each video position in the layout.
 Note
NoteThe video sources in a layout must be unique and cannot be empty.
After you add the layout and start the live stream, click the Layout that you created. The live stream is then mixed and output based on the selected layout.
Start the live stream
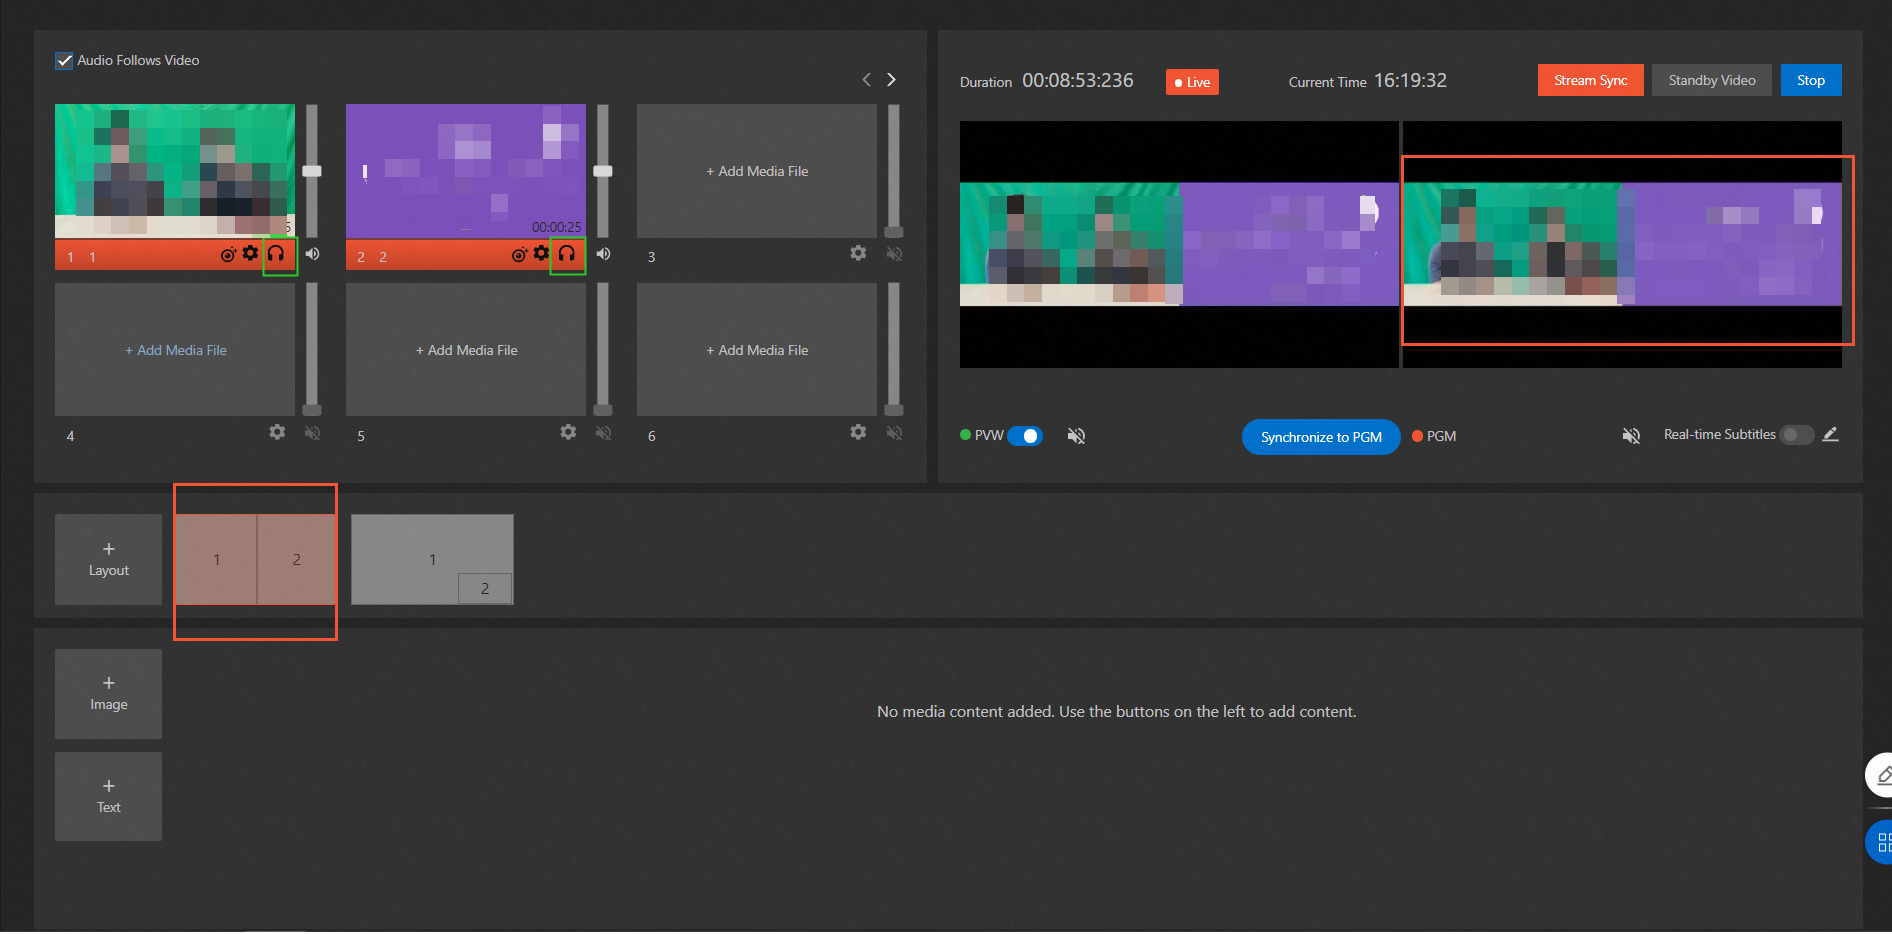
Click Start Live Streaming. The mixed content from the video source is output to the PVW window.
ImportantBilling starts after you click Start Live Streaming in the upper-right corner of the console. Closing the web page does not stop the live stream or the PGM output. The production studio continues to run and incur charges. To stop the service, you must click Stop.
The PVW window is for you to debug the video. This stream is not visible to viewers. After you preview the stream, click Synchronize to PGM to make the content visible to viewers.
Click Synchronize to PGM. The content is then broadcast as the official live stream to end users.
Real-time production
While the stream is live, you can use the following features to edit and adjust the live content and stream effects in real time.
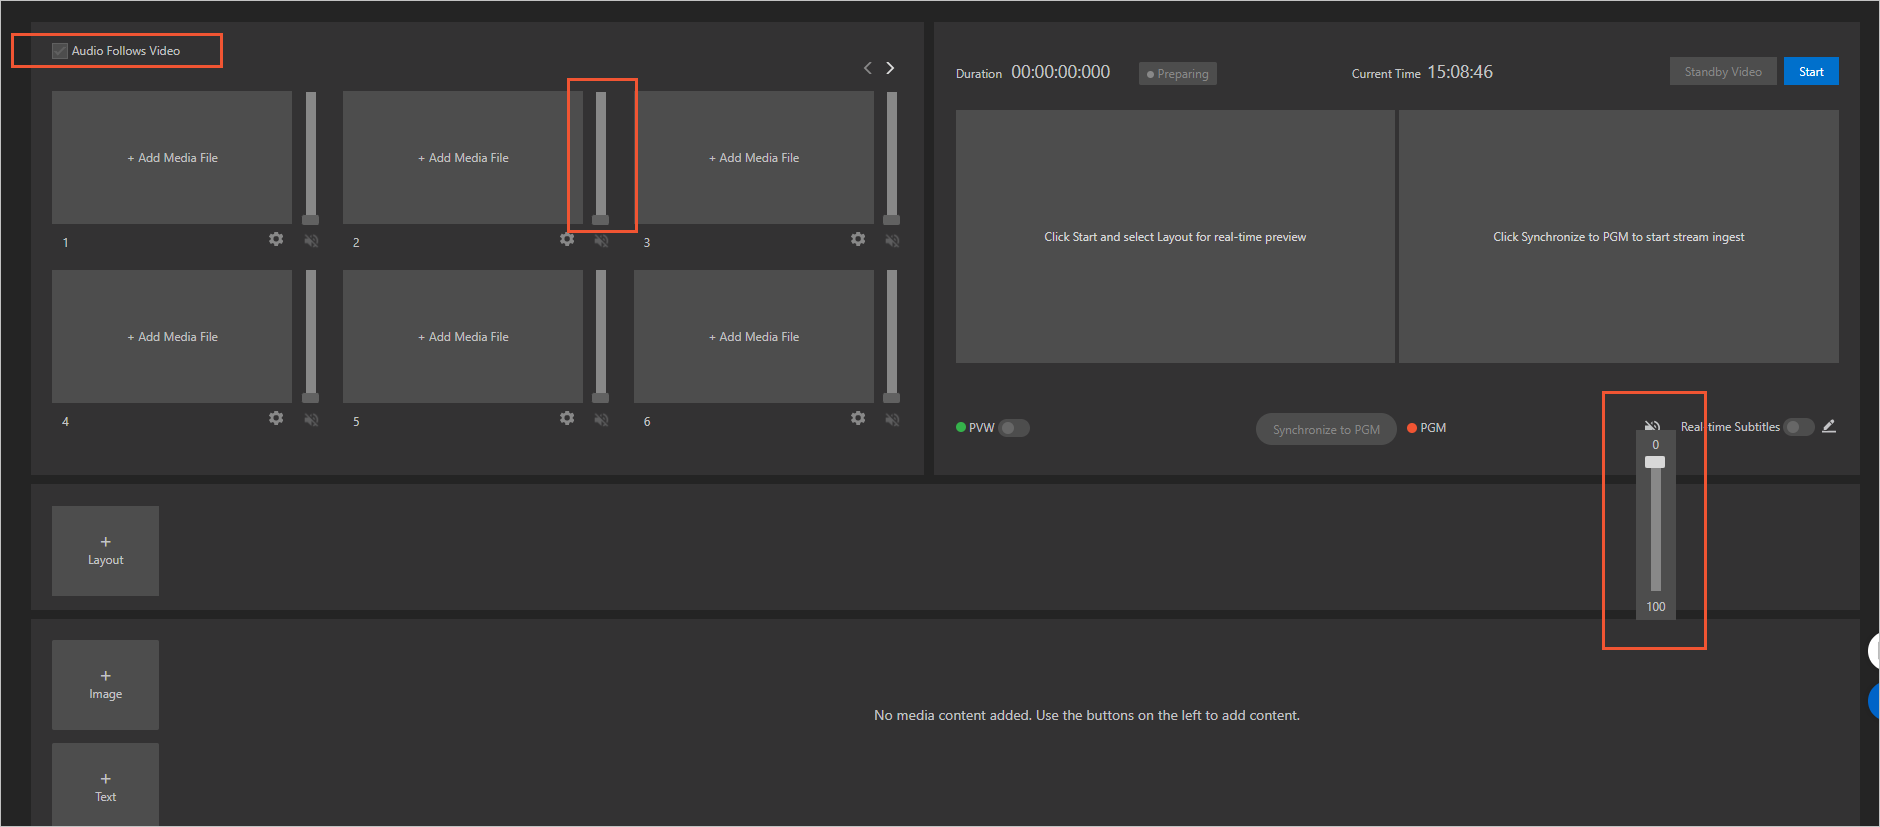
Click the audio mixer button and slide it up or down to adjust the stream volume.
Audio Follows Video: By default, the PVW window displays video without audio. When you select the Audio Follows Video option and click Synchronize to PGM, the audio from the video source in the PVW window is sent to the PGM stream. The audio from other video sources is muted by default. You can use the audio mixer to configure the audio from all video sources to be included in the output stream.
Audio Follows Video (unchecked): When you sync the PVW window to the PGM stream, if Audio Follows Video is not selected, the audio from the video source in the PVW window is not sent to the PGM stream.
Set the caption style and enable bilingual translation.
The real-time captions feature performs real-time speech recognition on the audio of a live stream. It then displays the recognized text as captions on the stream. The recognized captions can be translated in real time. You can display captions in the source language of the stream's audio, the translated target language, or both.
Translation is supported between Chinese, English, Spanish, and Russian. The real-time captions feature not only adds a professional touch to your content but also allows viewers to follow along in environments where audio is unavailable. Real-time translation makes it easier for a multinational, multilingual audience to understand the live content. This feature is highly effective for cross-border e-commerce and international event live streaming.
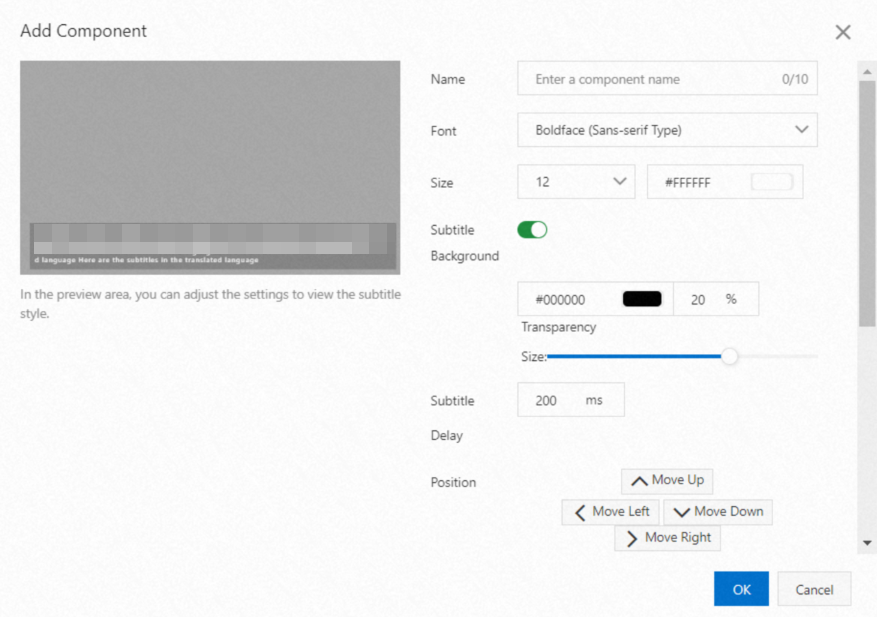
Click Live Subtitles to open the caption component window.
Set the component name, font style, size, position, video source, source language, and translation language. You can preview the effect in the preview area on the left. When you are finished, click OK to save.
Insert effects such as watermarks, logos, and banner text into the live stream.
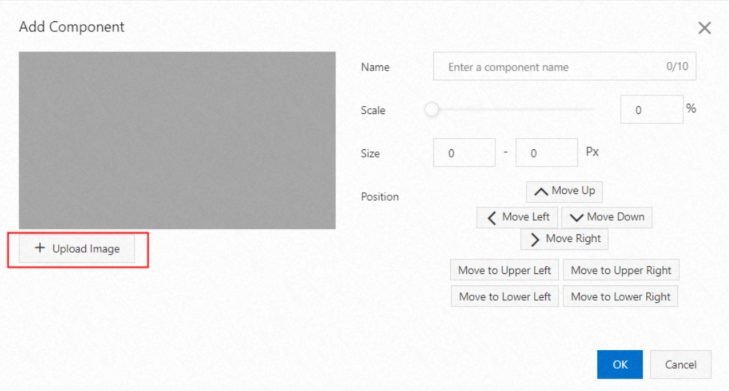
Add an image
Click Image to open the image component window.
Click Upload Image and select an image from your local machine. After the image is uploaded, set the component name, scaling (size), and position. You can preview the effect in the preview area on the left. When you are done, click OK to save.
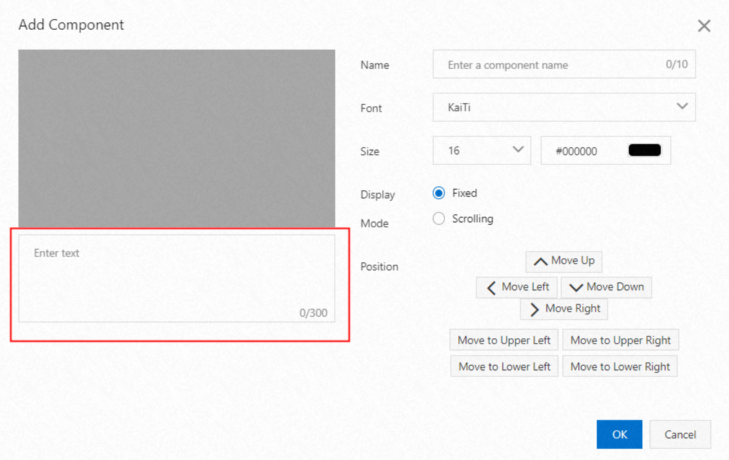
Add text
Click Text to open the text component window.
Enter text in the input box. Then, set the component name, font style, size, display style, and position. You can preview the effect in the preview area on the left. When you are done, click OK to save.
Change the video stream layout. You can create up to 20 layouts.
Click Switch to Standby. If an issue occurs with the live stream, you can switch to the standby video in real time to ensure a smooth broadcast.
API operation guide
You can call the following API operations to quickly integrate and use the general-purpose production studio service. The process includes the following steps:
Create and configure a general-purpose production studio. For more information, see CreateCaster and SetCasterConfig.
Add a video resource for the production studio. For more information, see AddCasterVideoResource.
Add a layout for the production studio. For more information, see AddCasterLayout.
(Optional) Add a component for the production studio. For more information, see AddCasterComponent.
Start the production studio. For more information, see StartCaster .
Set the playback scene. For more information, see SetCasterSceneConfig.
Stop the production studio. For more information, see StopCaster.