By Eugene S. Chung, Solution Architect
When you're exploring a dataset, you need to start by loading the data and getting it into a convenient format. And if the dataset is quite large, it can take almost half a minute just to read the training data from disk. If you're fitting a model, you usually need to set up a feature matrix and do other pre-processing first, so it can sometimes start to feel like "Edge Of Tomorrow:" read the data, trim the outliers, build some features, make a feature matrix, start fitting a model and the you suddenly get killed because you forgot to load a library you needed. That means going back to the beginning, and starting the cycle all over again.
Notebooks save you from this cinematic fate. Instead, coding with Jupyter Notebook is like a fight scene from The Matrix: once the feature matrix is ready, time freezes and you can work on it as you like. Notebooks help you play around and explore data more productively, because you only have to load the data once, so it's much faster to iterate and try out new experiments.
Notebooks are great for presenting your work, because of the ability to switch some cells from regular code to Markdown. Markdown is quick to learn and easy to use. Introducing your work with some Markdown cells will make your scripts look slick and professional, helping you put your best data science face forward.
Some people have the ability to write code just once: they think about a problem for a while, then sit down and type out the solution. But if you're anything like me, it takes more than one go to get it right. I usually inch towards the answer, gradually stumbling and fumbling towards something that works. Notebooks really suit that workflow because you can re-execute each cell as often as you like, trying out lots of small variations until you're ready to move on to the next bit. You don't need to execute all of your code every time you want to test a change.

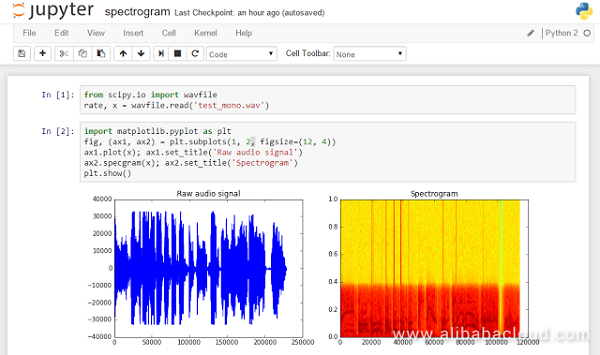
Figure 1. Example shot from Jupyter Notebook (Source: https://goo.gl/xWsl4E)
This article shows you how to install Jupyter Notebook with PyODPS running to Docker on an Alibaba Cloud Elastic Compute Service (ECS) instance.
For the PyODPS from its definition on the website (http://pyodps.readthedocs.io), it is a Python version of the ODPS SDK, which provides the basic operation of the ODPS object; and provides a Data Frame framework that makes it easy to perform data analysis on ODPS. ODPS is now rebranded as MaxCompute, but the name of the SDK remains as ODPS.

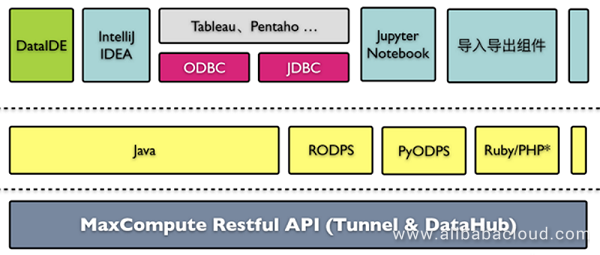
Figure 2. MaxCompute (ODPS) configuration
For your convenience, visit this code repository for an automated Docker installation on ECS, which is done by using Ansible playbook.
Run from the node to install the image to your instance or you can add this to your playbook script.
$ docker pull jupyter/notebook To make sure the installation works, run the code below.
$ docker run -p 8080:8888 jupyter/notebook jupyter notebook --no-browserThe image exports volume where to .ipynb files are store at. Try to mount the volume to host path as below.
$ docker run -p 8080:8888 /home/notebooks:/notebooks jupyter/notebook jupyter notebook --no-browserGo to http://[your node ip address]:8080 from your web browser.
Attach to the container to move on to next step.
$ docker exec -i -t [container name] /bin/bashUpdate pip. Run this command inside of the container.
$ pip install --upgrade pipRun this inside of the container to install PyODPS.
$ pip install 'pyodps[full]'Run unittest to make sure the installation is successful.
$ python -m unittest discoverCreate a new image by committing.
$ docker commit -c='CMD ["jupyter", "notebook", "--no-browser"] ' [existing container name] [your new container name with tag]Run Jupyter
$ docker run -p 8080:8888 [your container name with tag]You can see Notebook WebUI from http://[your node ip address]:8080
That's it! If you followed the steps correctly, you should have Jupyter Notebook set up on an Alibaba Cloud Elastic Compute Service (ECS) instance with MaxCompute service for PyODPS.
Creating a React JS Application Image with Packer and Ansible on Alibaba Cloud

2,593 posts | 792 followers
FollowAhmed Gad - August 26, 2019
Alibaba Clouder - October 14, 2019
Alibaba Cloud Native Community - April 2, 2024
Alibaba Cloud MaxCompute - May 5, 2019
JDP - June 18, 2021
JDP - July 31, 2020

2,593 posts | 792 followers
Follow MaxCompute
Conduct large-scale data warehousing with MaxCompute
Learn More ECS(Elastic Compute Service)
Elastic and secure virtual cloud servers to cater all your cloud hosting needs.
Learn MoreLearn More
More Posts by Alibaba Clouder