Based on the installed and deployed PolarDB-X, this article describes how PolarDB-X works with Spring Boot and WordPress to develop applications, as well as best practices for PolarDB-X connection pools and transparent distribution.
The experimental operations in this section are mainly performed using the Alibaba Cloud Lab on the Alibaba Cloud official website.
PolarDB-X Practice Series – Part 1: How to Deploy Open-Source PolarDB-X: https://www.alibabacloud.com/blog/polardb-x-practice-series-part-1-how-to-deploy-open-source-polardb-x_599590
Procedure:
1. Install and start Docker
i. Run the following command to install Docker:
curl -fsSL https://get.docker.com | bash -s docker --mirror Aliyunii. Run the following command to start Docker:
systemctl start docker2. Run the following command to install PolarDB-X:
docker run -d --name some-polardb-x -p 8527:8527 polardbx/polardb-x:2.1.0PolarDB-X allows you to connect using the MySQL command-line client, third-party clients, and third-party program code that complies with the MySQL interaction protocol. This section describes how to connect to the PolarDB-X database using the MySQL command-line client.
Procedure:
1. Run the following command to install MySQL:
yum install mysql -y2. Run the following command to check the version of MySQL:
mysql -VThe following result is returned, indicating you have successfully installed MySQL:

3. Run the following command to log in to the PolarDB-X database:
mysql -h127.0.0.1 -P8527 -upolardbx_root -p123456Description:
mysql: [Warning] Using a password on the command line interface can be insecure. ERROR 2013 (HY000): Lost connection to MySQL server at 'reading initial communication packet', system error: 0Please wait a minute and execute the login command again.
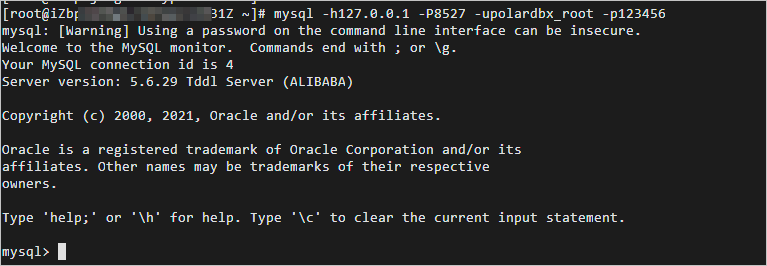
The following result is returned, indicating you have successfully logged in to the PolarDB-X database.
4. Enter exit to exit the database:

Procedure:
1. Run the following command to install JDK 1.8 using yum:
yum -y install java-1.8.0-openjdk*2. Run the following command to check whether the JDK is successfully installed:
java -versionThe following result is returned, indicating you have successfully installed JDK 1.8.

This section describes how to download and edit the Spring Boot sample project and connect it to the PolarDB-X database.
Make sure that the PolarDB-X and JDK are installed. Please see the Install PolarDB-X and JDK section above for details.
Description:
Please see Spring Boot Sample Tutorial for more information about Spring Boot.
1. Run the following command to install Git:
yum -y install git2. Download the Spring Boot sample project:
i. Run the following command to download the Spring Boot sample project:
git clone https://github.com/spring-guides/gs-accessing-data-mysql.gitii. Run the following command to go to the initial directory:
cd gs-accessing-data-mysql/initial
git checkout b8408e3a1e05008811d542b706107d45160556ac
iii. Run the following command to view the sample code:
ls
3. Create a database:
i. Run the following command to log in to the PolarDB-X database:
mysql -h127.0.0.1 -P8527 -upolardbx_root -p123456ii. Run the following SQL statement to create the database, db_example:
create database db_example;iii. Run the following SQL statement to create the user, springuser:
create user 'springuser'@'%' identified by 'ThePassword';iv. Run the following SQL statement to grant permissions to the springuser:
grant all on db_example.* to 'springuser'@'%';v. Exit the database:
exit4. Configure the application.properties file and connect the database to the Spring Boot sample project.
i. Run the following command to open the application.properties configuration file:
vim src/main/resources/application.propertiesii. Press i to enter the edit mode, find the parameter spring.datasource.url, and change the port number of the parameter value to 8527:
spring.datasource.url=jdbc:mysql://${MYSQL_HOST:localhost}:8527/db_exampleiii. The following figure shows the content of the modified file. After you press Esc, enter :wq, and press Enter to save and exit.

5. Create the Entity Model.
i. Run the following command to create a User class:
vim src/main/java/com/example/accessingdatamysql/User.javaii. Copy and paste the following code into the User class:
package com.example.accessingdatamysql;
import javax.persistence.Entity;
import javax.persistence.GeneratedValue;
import javax.persistence.GenerationType;
import javax.persistence.Id;
@Entity // This tells Hibernate to make a table out of this class
public class User {
  @Id
  @GeneratedValue(strategy=GenerationType.AUTO)
  private Integer id;
  private String name;
  private String email;
  public Integer getId() {
    return id;
  }
  public void setId(Integer id) {
    this.id = id;
  }
  public String getName() {
    return name;
  }
  public void setName(String name) {
    this.name = name;
  }
  public String getEmail() {
    return email;
  }
  public void setEmail(String email) {
    this.email = email;
  }
}
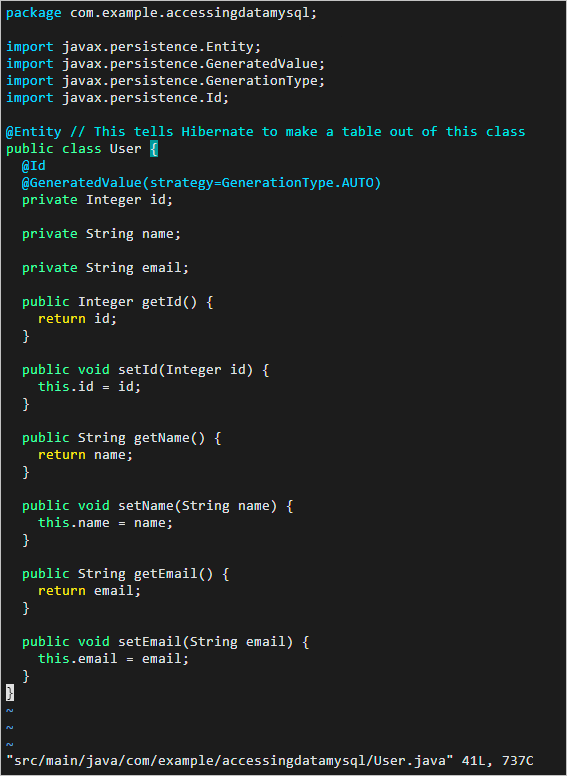
iii. The following figure shows the content of the modified file. After you press Esc, enter :wq, and press Enter to save and exit.
6. Create a repository and save user records
i. Run the following command to create a UserRepository class:
vim src/main/java/com/example/accessingdatamysql/UserRepository.javaii. Copy and paste the following code into the UserRepository class
package com.example.accessingdatamysql;
import org.springframework.data.repository.CrudRepository;
import com.example.accessingdatamysql.User;
// This will be AUTO IMPLEMENTED by Spring into a Bean called userRepository
// CRUD refers Create, Read, Update, Delete
public interface UserRepository extends CrudRepository<User, Integer> {
}
iii. The following figure shows the content of the modified file. After you press Esc, enter :wq, and press Enter to save and exit.

7. Create a Controller class to handle HTTP requests to applications
i. Run the following command to create a MainController class:
vim src/main/java/com/example/accessingdatamysql/MainController.javaii. Copy and paste the following code into the MainController class:
package com.example.accessingdatamysql;
import org.springframework.beans.factory.annotation.Autowired;
import org.springframework.stereotype.Controller;
import org.springframework.web.bind.annotation.GetMapping;
import org.springframework.web.bind.annotation.PostMapping;
import org.springframework.web.bind.annotation.RequestMapping;
import org.springframework.web.bind.annotation.RequestParam;
import org.springframework.web.bind.annotation.ResponseBody;
@Controller // This means that this class is a Controller
@RequestMapping(path="/demo") // This means URL's start with /demo (after Application path)
public class MainController {
  @Autowired // This means to get the bean called userRepository
         // Which is auto-generated by Spring, we will use it to handle the data
  private UserRepository userRepository;
  @PostMapping(path="/add") // Map ONLY POST Requests
  public @ResponseBody String addNewUser (@RequestParam String name
      , @RequestParam String email) {
    // @ResponseBody means the returned String is the response, not a view name
    // @RequestParam means it is a parameter from the GET or POST request
    User n = new User();
    n.setName(name);
    n.setEmail(email);
    userRepository.save(n);
    return "Saved";
  }
  @GetMapping(path="/all")
  public @ResponseBody Iterable<User> getAllUsers() {
    // This returns a JSON or XML with the users
    return userRepository.findAll();
  }
}
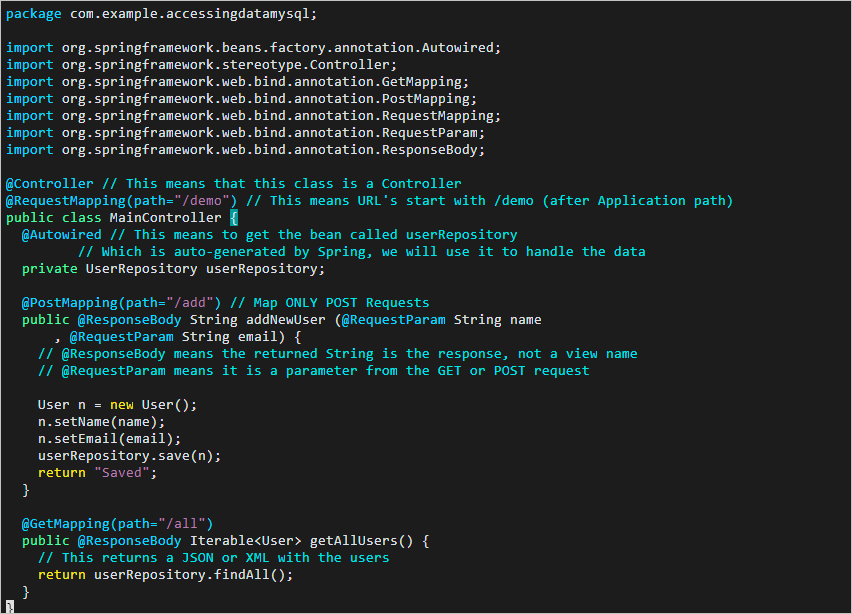
iii. The following figure shows the content of the modified file. After you press Esc, enter :wq, and press Enter to save and exit.
8. (Optional) Create an application
Description:
AccessingDataMysqlApplication class has been created in the Spring Boot sample project. You can skip this step.
i. Run the following command to create a AccessingDataMysqlApplication class.
vim src/main/java/com/example/accessingdatamysql/AccessingDataMysqlApplication.javaii. Press i to enter the edit mode and copy and paste the following code into the User class:
package com.example.accessingdatamysql;
import org.springframework.boot.SpringApplication;
import org.springframework.boot.autoconfigure.SpringBootApplication;
@SpringBootApplication
public class AccessingDataMysqlApplication {
  public static void main(String[] args) {
    SpringApplication.run(AccessingDataMysqlApplication.class, args);
  }
}
iii. The following figure shows the content of the modified file. After you press Esc, enter :wq, and press Enter to save and exit.

9. Run the following command to run the Spring Boot sample project:
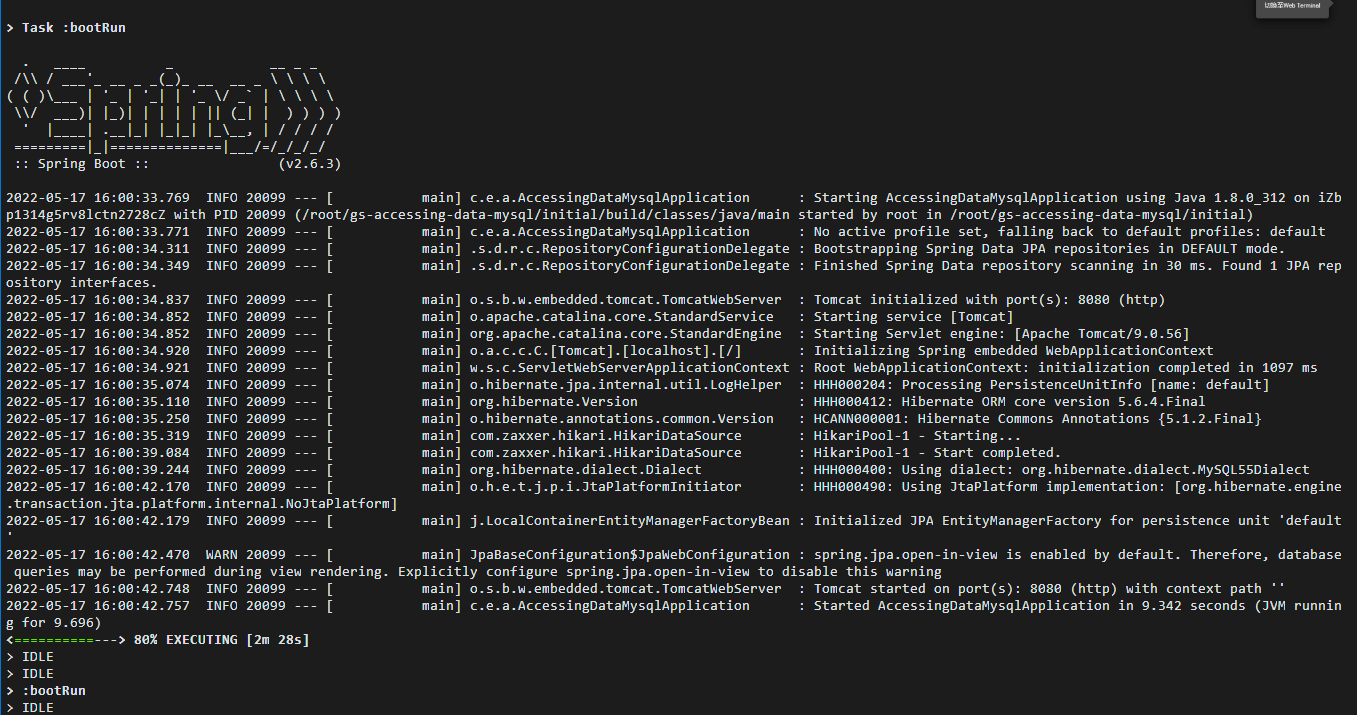
./gradlew bootRunPlease wait for about two minutes. The following result is returned, indicating the system is running successfully.
10. Test
i. On the experiment page, click the  icon in the upper-right corner to create a new terminal window.

ii. In the new terminal window, run the following command to add a record:
curl localhost:8080/demo/add -d name=First -d email=someemail@someemailprovider.comThe following result is returned, indicating you successfully added a record.

iii. Run the following command to query records:
curl 'localhost:8080/demo/all'The following result is returned. You can query the information of the newly added record.

iv. Run the following command to log in to the PolarDB-X database:
mysql -h127.0.0.1 -P8527 -upolardbx_root -p123456v. Run the following SQL statement to use the database:
use db_example;vi. Run the following SQL statement to query the user table:
select * from user;The following result is returned. You can query the newly added record in the user table.

vii. Exit the database:
ExitThis section describes how to build a blog site using WordPress Docker image and PolarDB-X.
Make sure that you have installed PolarDB-X. Please see Install PolarDB-X and Log in to PolarDB-X above for more information.
Description:
WordPress provides the Docker image for quick installation. Please see Docker Hub for more information.
1. Run the following command to install WordPress:
docker run --name some-wordpress -p 9090:80 -d wordpress2. Create a WordPress database:
i. Run the following command to log in to the PolarDB-X database:
mysql -h127.0.0.1 -P8527 -upolardbx_root -p123456ii. Run the following SQL statement to create a database, WordPress:
create database wordpress;iii. Exit the database:
exit3. Configure WordPress:
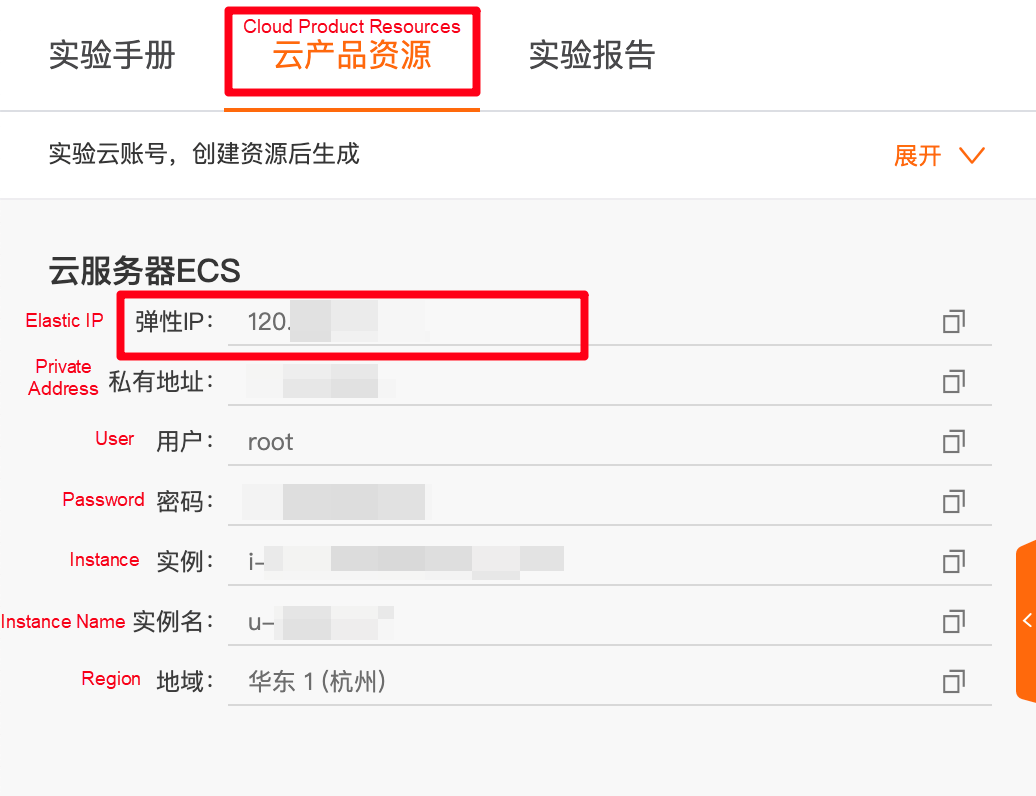
i. In your local browser, open a new tab and visit http:// IP of ECS>:9090.
Description:
You need to replace the with the Elastic IP of ECS in the cloud product resource list.
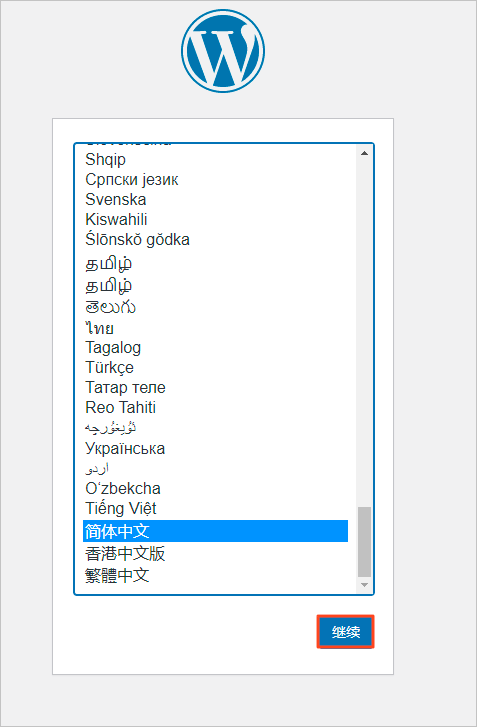
ii. On the initialization page, select Simplified Chinese and click Continue:
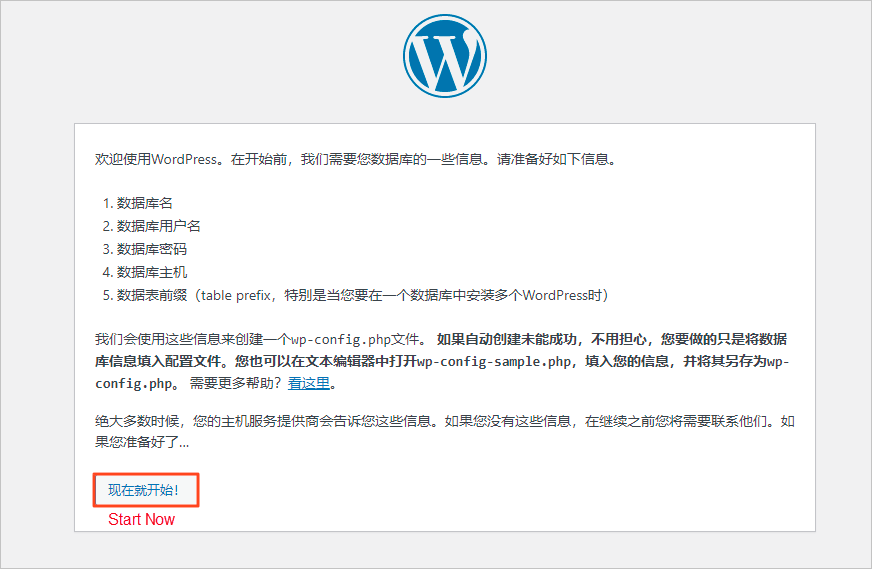
iii. On the prepare page, click Start Now:
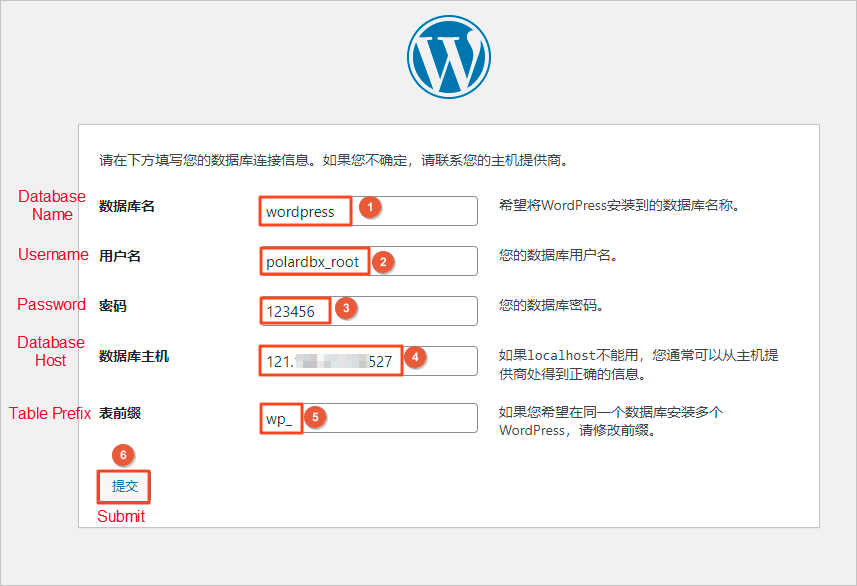
iv. On the database configuration page, configure the database according to the description and click Submit.
Database Name
The default database name is wordpress.
Username
Enter polardbx_root
Password
Enter 123456
Database Host
Enter :8527. You need to replace the with the Elastic IP of ECS in the cloud product resource list.
Table Prefix
The default table prefix is wp_.
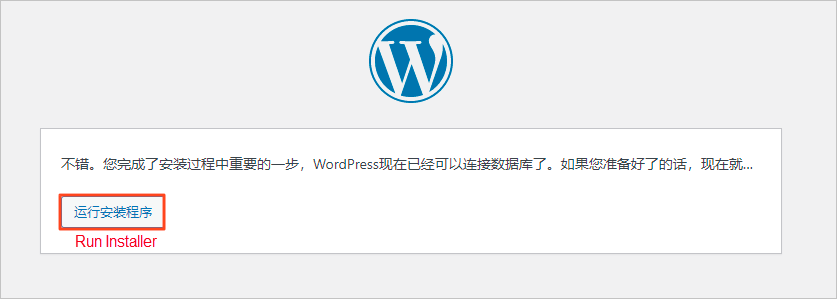
v. On the database configuration complete page, click Run Installer:
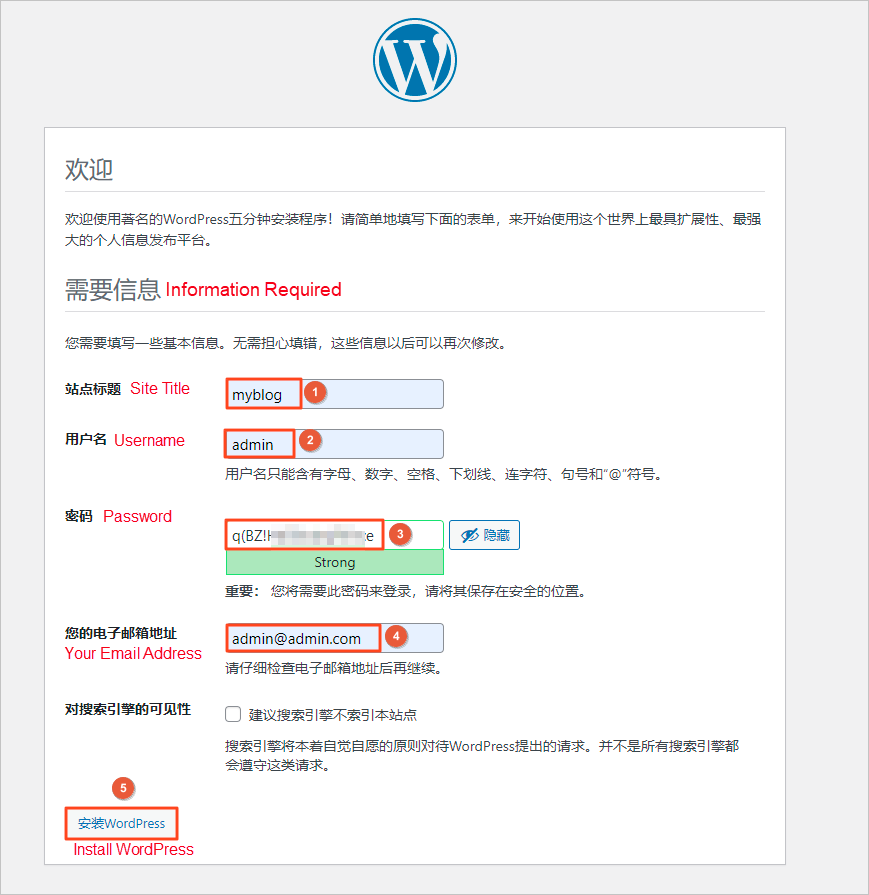
vi. On the information configuration page, configure related information according to the description and click Install WordPress.
Site Title
Enter a site title (such as myblog)
Username
Enter a username (such as admin)
Password
Enter the password
Your Email Address
Enter your email address. You are advised to use a valid email address.
If you do not have an email address, enter a virtual one, such as admin@admin.com, but you will not be able to receive information.
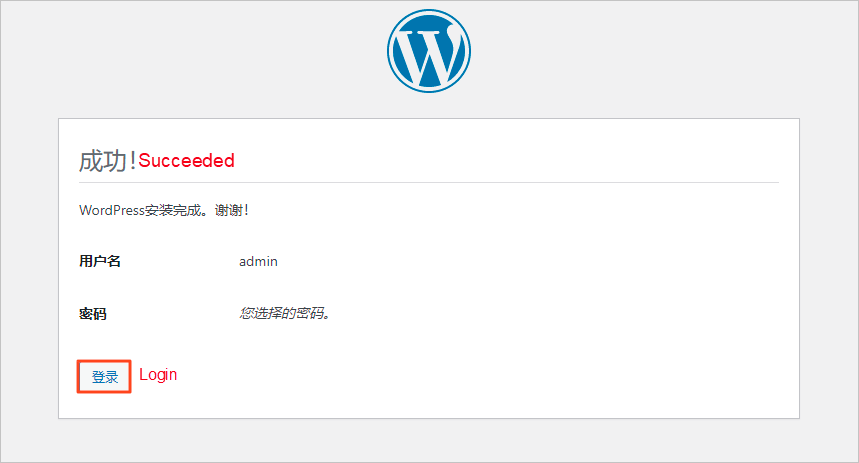
vii. On the success page, click Login:
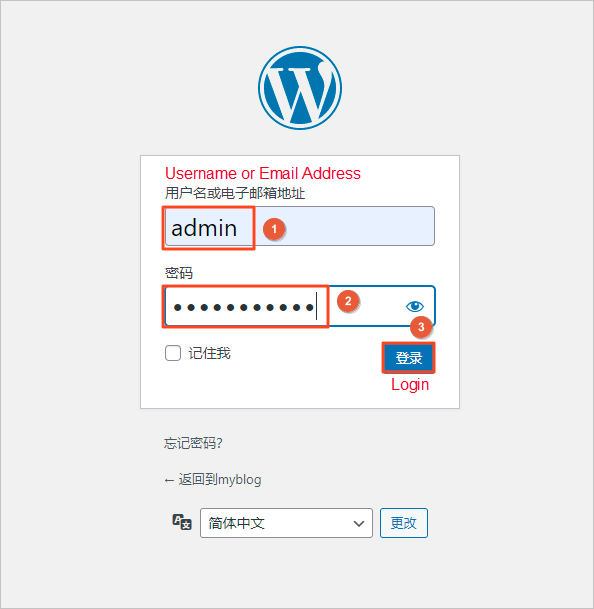
viii. On the login page, enter your username and password and then click Login:
[Infographic] Highlights | Database New Feature in January 2023
Performance Optimization of RDS AliSQL for Binlog – Extreme IO Optimization
ApsaraDB - April 20, 2023
ApsaraDB - December 21, 2022
ApsaraDB - April 20, 2023
ApsaraDB - April 16, 2025
ApsaraDB - April 10, 2024
ApsaraDB - December 12, 2025
 PolarDB for PostgreSQL
Alibaba Cloud PolarDB for PostgreSQL is an in-house relational database service 100% compatible with PostgreSQL and highly compatible with the Oracle syntax.
Learn More PolarDB for Xscale
Alibaba Cloud PolarDB for Xscale (PolarDB-X) is a cloud-native high-performance distributed database service independently developed by Alibaba Cloud.
Learn More PolarDB for MySQL
Alibaba Cloud PolarDB for MySQL is a cloud-native relational database service 100% compatible with MySQL.
Learn More Database for FinTech Solution
Leverage cloud-native database solutions dedicated for FinTech.
Learn MoreMore Posts by ApsaraDB