By Jeff Cleverley, Alibaba Cloud Tech Share Author. Tech Share is Alibaba Cloud's incentive program to encourage the sharing of technical knowledge and best practices within the cloud community.
In this series of tutorials we will implement a modern development and deployment workflow for WordPress on an Alibaba Cloud Elastic Compute Service (ECS) instance with LEMP (Linux, Nginx, MariaDB, PHP) installed. In Part 2, we will create staging and local sites with duplicator.
This workflow will create and utilize staging and local development environments alongside the live production site. It will use the Git version control system to push changes to the staging environment for testing, before updating the live site.
In the first tutorial, we created our Staging Site subdomain, configured Nginx to serve the subdomain, secured the subdomain with an SSL certificate, and created the database our WordPress staging site will require.
In the previous tutorial, we created a staging and local environment using a plugin. In this tutorial we will use a more advanced and modern method using WP-CLI and terminal commands.
This tutorial only requires that the first tutorial in this series has been completed, it doesn't require completion of the previous tutorial. So if you haven't completed Part 1, then please do so first before returning here.
All instructions in this tutorial will be issued by my superuser 'new_user' using the sudo command where necessary. Please replace my superuser with your own when issuing the tutorial's commands.
The tutorial examples will also be using 'another-example-domain.com' as my main site domain, and 'staging.another-example-domain.com' as my staging site domain, remember to replace these with your own site's domain and staging site's domain in the relevant files and commands.
If you have completed the previous tutorial, Part 2. - Create a WordPress Staging Site with Duplicator, but now also wish to complete this tutorial and learn how to do it using WP-CLI, then you should delete the Staging sites root domain with the following command before you begin here. In this case, issue this command on your server:
$ sudo rm -rf /var/www/staging.another-example-domain.comYou should also delete the Local site you created with your chosen Local LEMP Application. As we will also be recreating this environment using terminal commands.
WP-CLI is the command line interface for WordPress, and it is an incredibly powerful tool for WordPress developers. With it you can update plugins, configure installs, manipulate your WordPress database, manage user and options, and so much more, all without using a browser.
If you have already installed WP-CLI, skip this step and move onto Step 2. You can check to see if WP-CLI is installed on your server with the following command:
$ wp --infoIf WP-CLI is installed it will return information about your PHP Binary, PHP version, the location of your php.ini file, and the directory and path for your WP-CLI installation.
If it isn't installed, then download the WP-CLI PHP Archive file 'wp-cli.phar' using either 'curl' or 'wget':
$ curl -O https://raw.githubusercontent.com/wp-cli/builds/gh-pages/phar/wp-cli.pharor
$ wget https://raw.githubusercontent.com/wp-cli/builds/gh-pages/phar/wp-cli.pharNow, we need to make the 'wp-cli.phar' file executable:
$ chmod +x wp-cli.pharAfter that, it is best to move the file somewhere in your PATH such as the '/usr/local/bin/' directory, so that it can be run directly from anywhere:
$ sudo mv wp-cli.phar /usr/local/bin/wpRun the wp --info command again to check it has been installed correctly:
$ wp --infoChange directory to your '/var/www/' directory:
$ cd /var/wwwCopy and paste your production site's entire root folder into the same '/var/www/' directory. Use the '-rf' tag to recursively copy all contained subdirectories and files.
Make sure the name of the copied directory exactly matches the root directive in the Nginx configuration file for your staging domain. In my case, my staging domain Nginx configuration file, located at /etc/nginx/staging.another-example-domain.com, contains the following root directive:
root /var/www/staging.another-example-domain.com;So I need to issue the following command:
$ sudo cp -rf another-example-domain.com staging.another-example-domain.comYou can list the directories within the /var/www/ directory to ensure everything is correct:
$ ls Your terminal should look similar to this:
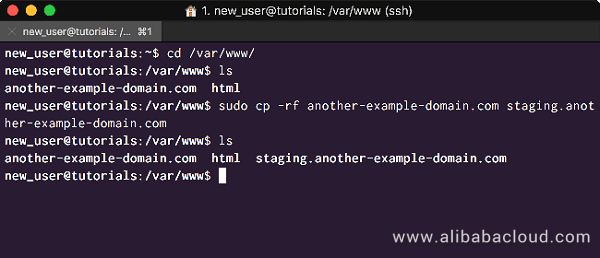
First change directory to your staging site's root directory:
$ cd /var/www/staging.another-example-domain.comWith WP-CLI it is faster to just delete the production site's 'wp-config.php' file and create a new one for the staging site, than it is to edit it for the staging site. So go ahead and delete the existing 'wp-config.php' file:
$ sudo rm wp-config.phpIf you list the remaining files and subdirectories in the staging sites root directory, your terminal will look like this:
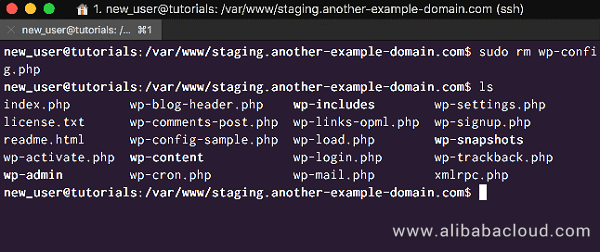
Now we want to use WP-CLI to create a new 'wp-config.php' file, but to do that we need our superuser to take ownership of the Staging sites root directory, do that with the following command:
$ sudo chown -R new_user:www-data /var/www/staging.another-example-domain.comNow if we can list the directories and their owners in the /var/www/ directory with the following command:
$ cd /var/www
$ ls -l
And we can confirm the change of directory ownership.
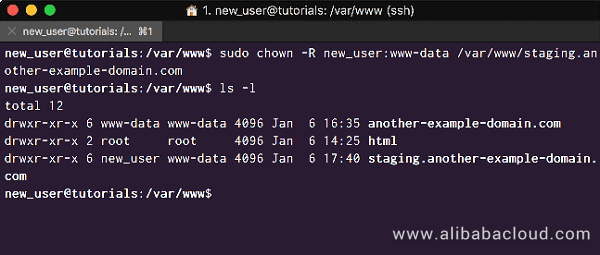
Once this is done, we will be able to create a 'wp-config.php' file using WP-CLI. Do that by issuing the following command, using the database name, database user, and database password from the very first step of Part 1 in this series.
$ wp config create --dbname=staging --dbuser=new_user --dbpass=new_users_passwordWP-CLI will return a 'Success' message upon the successful creation of the file. You can also check the directory using the 'ls' command to ensure the file has been created:
Change directory to your production sites root directory:
$ cd /var/www/another-example-domain.comNow use the WP-CLI database command to export your production site's database to your superuser's home directory '~/':
$ wp db export ~/production-db.sqlThis should only take a few seconds and your terminal should look similar to this:

Next, change directory to your staging site's root directory:
$ cd /var/www/staging.another-example-domain.comYou can make sure your staging database is empty using the WP-CLI database reset command:
$ wp db reset --yesTo import the production database, from your superuser's home directory, into the staging database use the following command:
$ wp db import ~/production-db.sqlYou will receive a 'Success' message from WP-CLI, you can also check to see that your staging database contains all the correct WordPress database tables with the following command:
$ wp db query "show tables;"If you followed along closely, your terminal window will now look like the following:
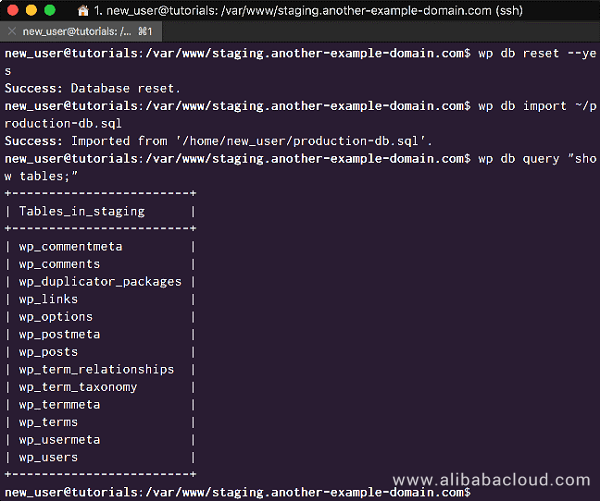
At this point, our staging database still contains all the database entries for the original production site domain. We need to search for all references to the production domain and replace them with the staging site domain.
This is trivial with WP-CLI. However, since we are amending the database which is always a risky action, we will run our search and replace command as a dry run first:
$ wp search-replace another-example-domain.com staging.another-example-domain.com --dry-run --network WP-CLI will now search through your staging database tables and return all the replacements that will be made if you run the command without the '--dry-run' flag. Your terminal will look like this:
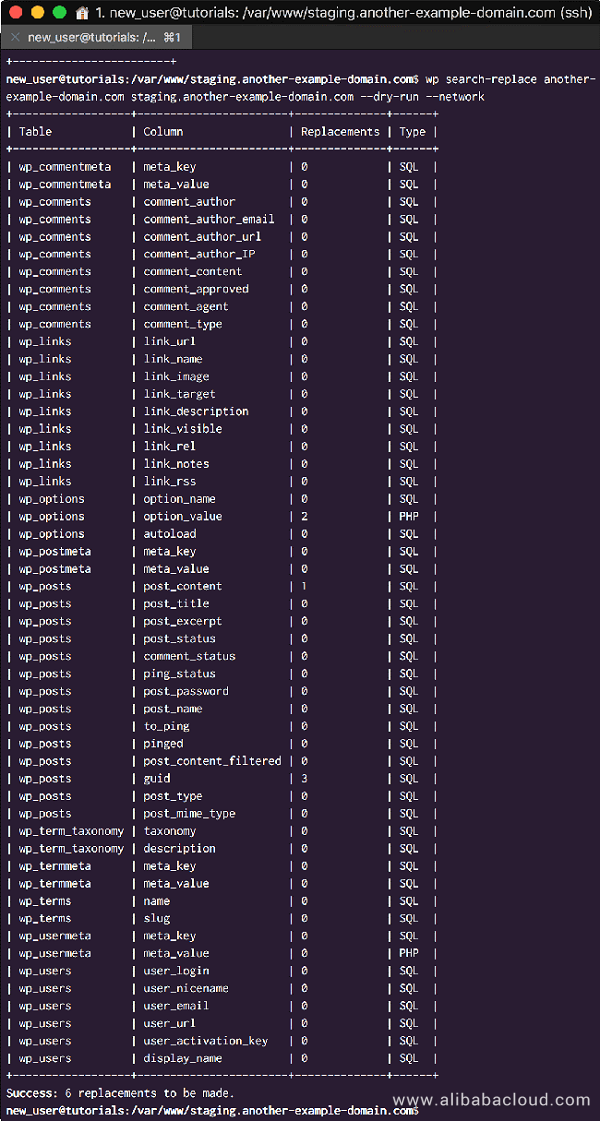
As you can see, WP-CLI found 6 replacements to be made in my case. Now issue the command without the '--dry-run' flag to actually execute the Search and Replace.
$ wp search-replace another-example-domain.com staging.another-example-domain.com --network Upon successful execution your terminal will look like this:
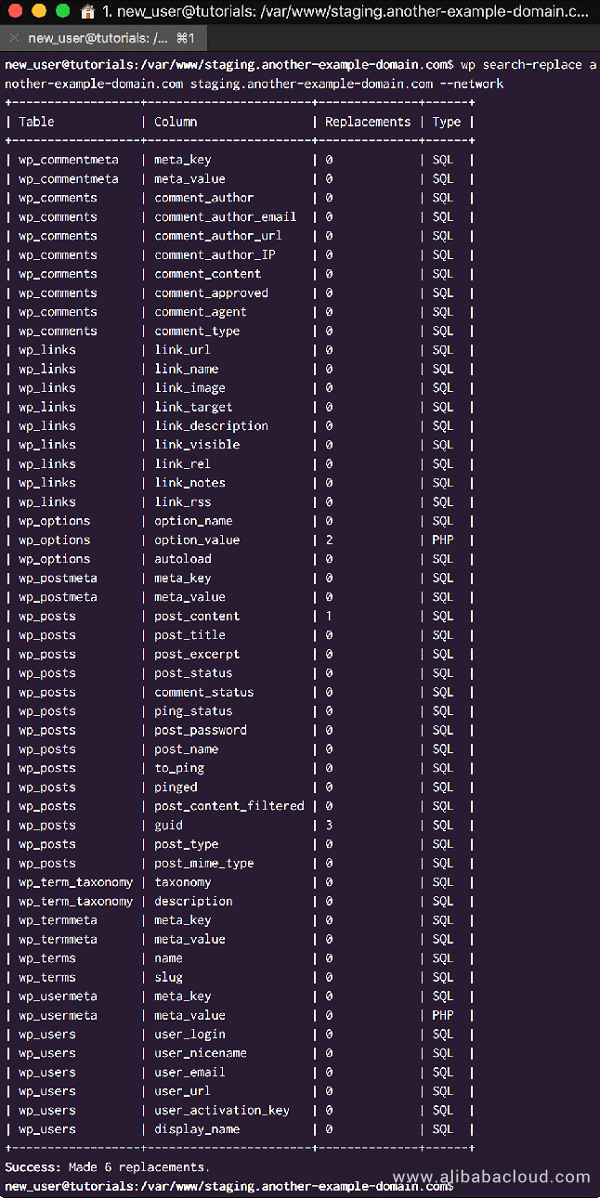
Your site will now be up and running, but before we visit it, let's change the sites name so that we can easily identify it as the staging site for when we are committing changes later in this series.
To do this we can use one of the WP-CLI 'wp option update' commands:
$ wp option update blogname "Staging Site WPCLI"Upon success your terminal will look like this:

Now we can visit our site:
http://staging.another-example-domain.com
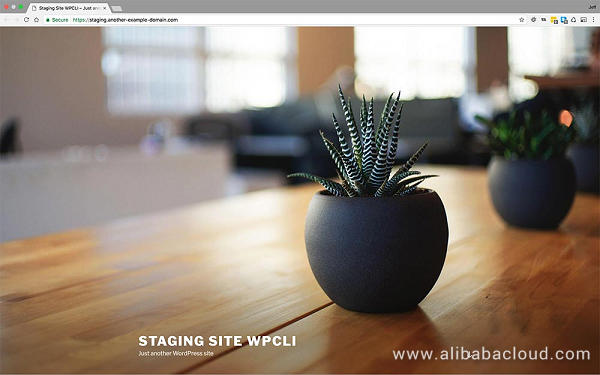
We have successfully created a staging site that is an exact copy of our production site, apart from the title change:
Currently the staging site directory belongs to the superuser. This means the web server user 'www-data' won't be able to write to the directories and make change and we won't be able to install or delete plugins or themes from the WordPress admin.
To fix this problem issue the following command:
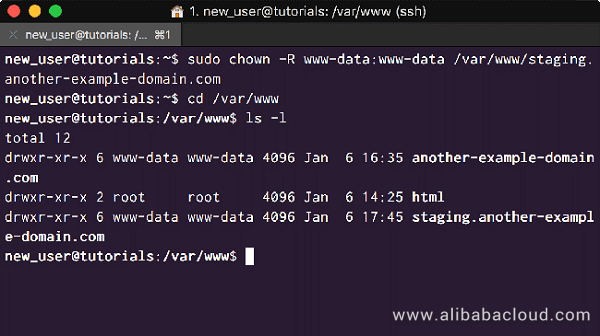
$ sudo chown -R www-data:www-data /var/www/staging.another-example-domain.comWe can check the ownerships by changing into the /var/www/ directory and listing the subdirectories and their owners:
$ cd /var/www
$ ls -l
Now the staging site's owner and group should both be 'www-data' as in the following screenshot:
Our staging site can now be publicly accessed at the following url:
http://staging.another-example-domain.com
But since the purpose of this site is for testing it shouldn't be publicly accessible. We can restrict access to our staging site using HTTP Basic Authentication.
Use Apache Utilities to Create a Password File
First install 'apache2-utils' on the server:
$ sudo apt-get update
$ sudo apt-get install apache2-utils
Now we need to make a password for our authorized users. When we first use this utility we need to include the '-c' flag in order to create a new file. I will store the '.htpasswd' password file safely in the server's nginx directory.
To create an authorized user and password, and store the file in the chosen directory, issue the following command:
$ sudo htpasswd -c /etc/nginx/.htpasswd new_userYou will be prompted to supply and confirm a password for your user. If you want to add additional users, you can use the same command, but omit the '-c' flag.
Configure NGINX Password Authentication for the Staging Subdomain
Now we need to configure Nginx to use Basic Authentication and check this file before serving files from the protected directories.
Open the staging subdomain's Nginx configuration file for editing:
$ sudo nano /etc/nginx/sites-available/staging.another-example-domain.comInside the 'Location / ' add an authentication message to be displayed, and the location of the HTTP authentication password file '.htpasswd':
location / {
    ……
    auth_basic "Staging Site - Access Restricted!";
    auth_basic_user_file /etc/nginx/.htpasswd;
}
Save your changes and exit the file. Remember to check your Nginx configuration file for syntax errors, and reload Nginx if there are none:
$ sudo nginx -t
$ sudo systemctl reload nginx
Now when you try to visit your staging server your browser will present an authorization pop up that requires you to enter your user name and password before the site loads.
While we are setting up our deployment, we do not need this protection immediately, it will only hinder our work in these tutorials. So we can turn it off for now, by commenting out the lines added above. Once the tutorials are complete and everything is set up, we will return to this setting and re-enable the HTTP authentication.
Temporarily disable Basic HTTP Authentication by re-opening the staging subdomain's nginx configuration file for editing:
$ sudo nano /etc/nginx/sites-available/staging.another-example-domain.comAnd make the following changes to disable authentication:
location / {
    ……
    # auth_basic "Staging Site - Access Restricted!";
    # auth_basic_user_file /etc/nginx/.htpasswd;
}
Save and close the file. Check your Nginx configuration for syntax errors, and if there are none, reload Nginx:
$ sudo nginx -t
$ sudo systemctl reload nginx
Make sure you return to this file and re-enable authentication at the end of this series.
To develop locally, you will need to configure a LEMP stack on your local machine. Luckily, there are many great applications for this in the WordPress and wider PHP development ecosystem. You can choose from several applications:
There are also other more configurable and advanced, but less user friendly tools such as:
I find 'Local by Flywheel' to be the most user friendly and is focused on WordPress development, it is perfect for our needs.
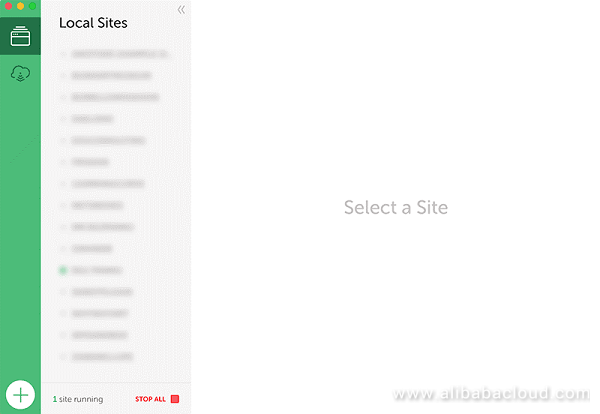
Local by Flywheel makes it very easy to create a site. Click the large + button in the bottom left corner of the application to start the WordPress site creation wizard:
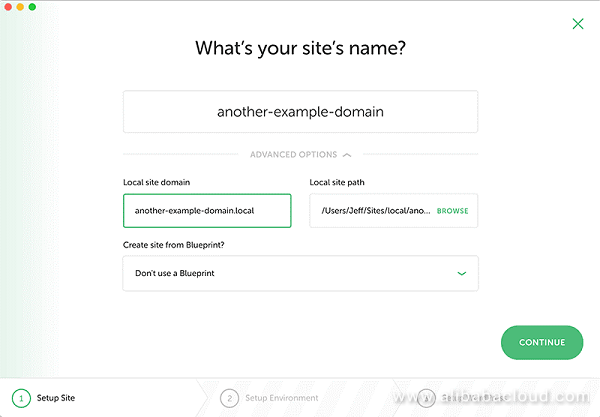
Add your Local Development site domain name:
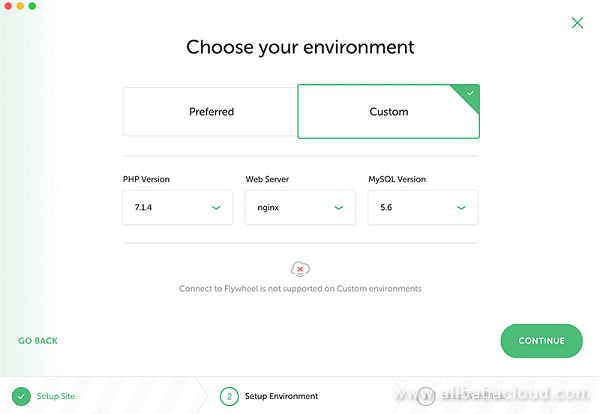
Configure your test environment. This should closely match your live environment, so choose PHP7, Nginx, and the latest version of MySQL:
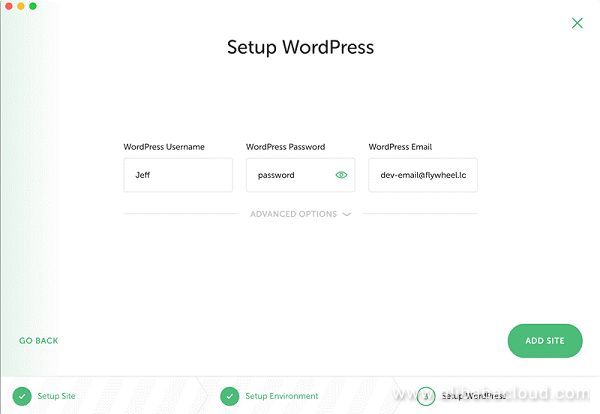
Finally, set up your WordPress site with an admin user, password and email.
Your site is now ready. In the Local application you can see your site in the left navigation, and the main panel and tabs include all the information about your Local LEMP stack, Local site root directory, Local site domain, Database, SSL and more. On the database tab you can see your Local site's database host, database name, username and password.
To download a copy of the production sites files and directories to our local machine, we will use an SFTP client. There are many FTP/SFTP clients, but may I recommend FileZilla as it is a good cross-platform, free and open source client.
Since we are using SSH to connect to our server, we have SSH keys which FileZilla can use to make a secure SFTP connection to our server for uploading files. You can find the instructions by visiting https://wiki.filezilla-project.org/Howto
Use your chosen SFTP client to download the entire Production directory located at '/var/www/another-example-domain.com' to a safe place on your local machine.
Next download the Production site's database, 'production-db.sql'. You exported it with WP-CLI in the first tutorial in this series. It can be located in your superusers home directory.
On your local machine, delete the entire contents of you Local Sites 'public' directory. This is the directory containing all the WordPress files and directories.
On your local machine, delete the production sites 'wp-config.php' file. This will be in the directory you downloaded from the server containing all the production site files and directories. Now copy all the production sites remaining files into the Local Sites 'public' directory.
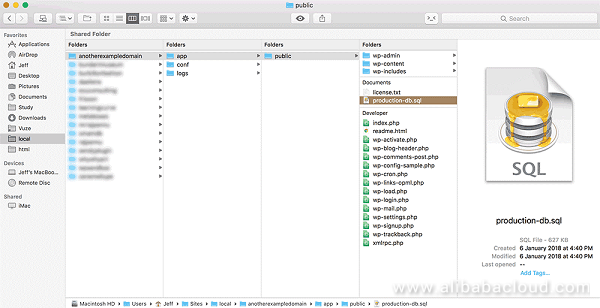
Also copy your production site's database file, 'production-db.sql', into your Local Sites 'public' directory. Your local directory should now look something like this, it contains all the Production sites WordPress files and directories except the WordPress configuration file, and the exported 'production-db.sql' database file:
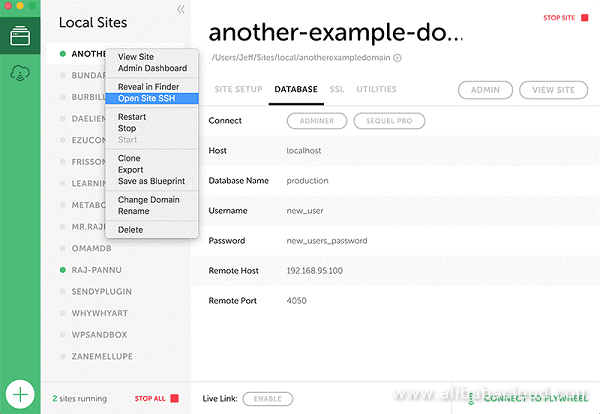
Local creates each of its sites on a LEMP stack within their own Docker environment. This means we can SSH into the environment and run server tools from the terminal, including WP-CLI. Open an SSH connection to your Local Sites Environment like this:
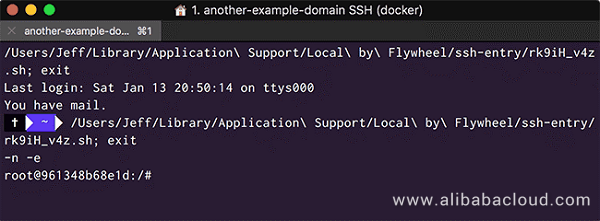
You will now have a terminal window open like so:
Use the following command in the local terminal window to create your 'wp-config.php' file, you will need to use the database name, user, and password from your Local environment:
# wp config create --dbname=local --dbuser=root --dbpass=rootYou will receive a Success message on your terminal window.
Change directory into your Local site's public folder, and list the contents:
# cd /app/public
# ls
You should see all of the standard WordPress files and directories, including the exported production site database 'production-db.sql'. Now we should delete all the existing entries in the Local database:
$ wp db reset --yesThen import the production database into the local database use the following command:
$ wp db import production-db.sqlYou will receive another Success message from WP-CLI, you can also check to see that your staging database contains all the correct WordPress database tables with the following command:
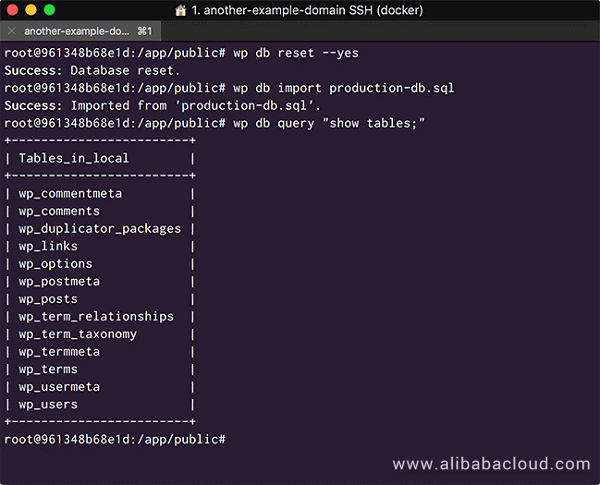
$ wp db query "show tables;"Your terminal window should now look like this:
At this point, our local database still contains all the database entries for the original production site domain. As before with the staging site, we need to search for all references to the production domain and replace them with the local site domain.
First we do a test run:
$ wp search-replace another-example-domain.com another-example-domain.local --dry-run --network WP-CLI will now search through your local database tables and return all the replacements that will be made if you run the command without the '--dry-run' flag. Your terminal will look like this:
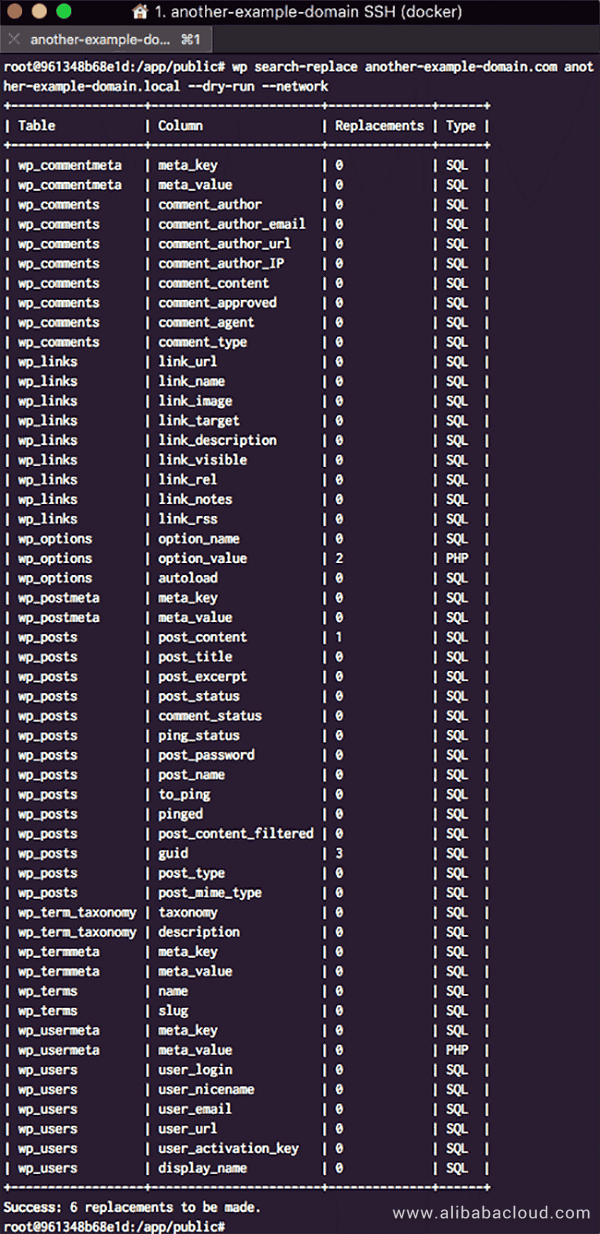
As you can see, WP-CLI found 6 replacements to be made in my case. Now issue the command without the '--dry-run' flag to actually execute the Search and Replace.
$ wp search-replace another-example-domain.com another-example-domain.local --network Upon successful execution your terminal will look like this:
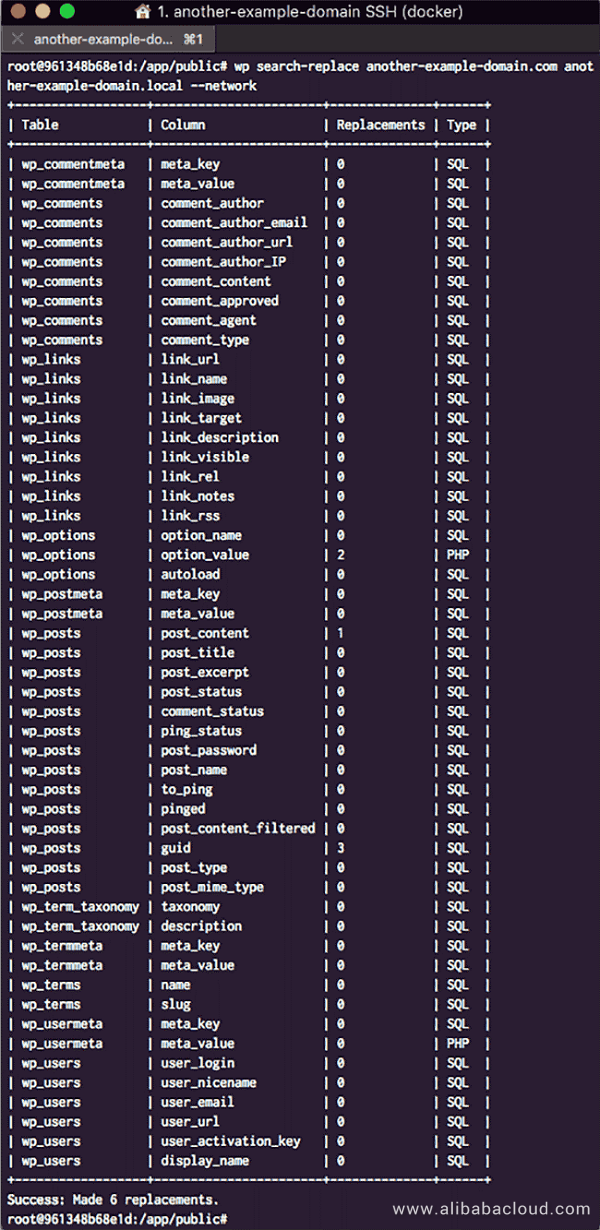
Your site will now be up and running, but before we visit it, let's change the sites name so that we can easily identify it as the Local site for when we are committing changes later in this series.
To do this we can use one of the WP-CLI wp option update commands:
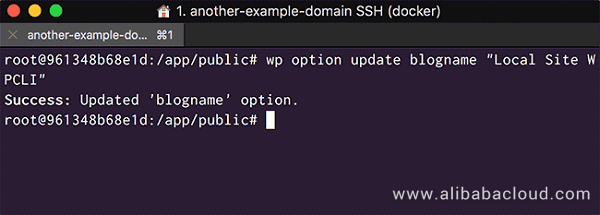
$ wp option update blogname "Local Site WPCLI"Upon success your terminal will look like this:
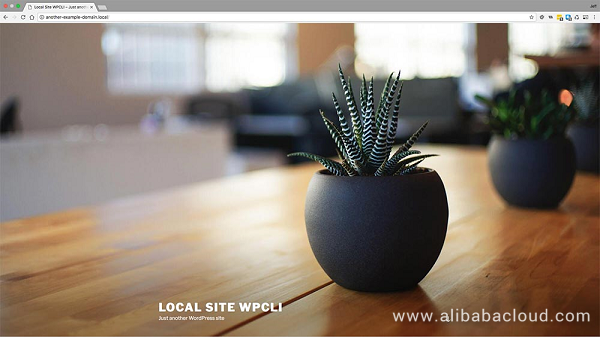
Now we can visit our site:
http://another-example-domain.local
We have now successfully created a local site that is an exact copy of our production site, apart from the title change:
Now we have created our staging and local development environments, we can move on to creating a deployment workflow using Git that will take changes from our local environment and allow us to test them on the Staging site before we push them live to the Production site.
We will do this in Part 4 of this series, the next article in this series..
Implementing a Modern WordPress Workflow on Alibaba Cloud - Part 2
Implementing a Modern WordPress Workflow on Alibaba Cloud - Part 4

2,593 posts | 793 followers
FollowAlibaba Clouder - July 3, 2018
Alibaba Clouder - July 3, 2018
Alibaba Clouder - July 4, 2018
Alibaba Clouder - May 9, 2018
Alibaba Clouder - May 17, 2019
Alibaba Clouder - February 21, 2020

2,593 posts | 793 followers
Follow ECS(Elastic Compute Service)
Elastic and secure virtual cloud servers to cater all your cloud hosting needs.
Learn More Domains
Over 20 million domain, free WHOIS privacy protection.
Learn MoreLearn More
More Posts by Alibaba Clouder