WordPress is an open-source content management system (CMS), that is estimated to power 30 percent of the world wide web. It's a fast and powerful way to get a website up and running and with such widespread adoption, there are plenty of plugins, themes and community support for its on-going development.
Alibaba Cloud supports launching and hosting multi-tier WordPress installations. In this tutorial we will show you just how to do that. A multi-tier installation uses multiple components for a faster and more secure experience. For example, a two-tier installation (as demonstrated here), uses Alibaba Cloud Elastic Compute Service (ECS) and Alibaba Cloud Relational Database Service (RDS) to host the MySQL database. We will also look at using Alibaba Cloud to create a shared upload folder (for WordPress multi-site installation) and implementing a Server Load Balancer and Auto-Scaling.
This process should take under four hours to fully set up (not including domain name DNS propagation, which usually takes 24 hours). Once running, we estimate it to cost under USD $2 per day to run.
Make sure to select or create a security group that is not too permissive or unsecure. You can create the security group prior to getting started. A good security group would allow the following ports to connect:
SSH (22)
HTTP (80)
HTTPS (443) – Optional
To find security groups, you can go under:
Elastic Compute Service > Security Group > Your Region > Your Security Group > More > Configuration Rules > Internet Ingress.
Create a new security group by clicking on the top right button. You will then see this box. Type in a Security Group name. You will need to select or create a VPC for this Security Group.
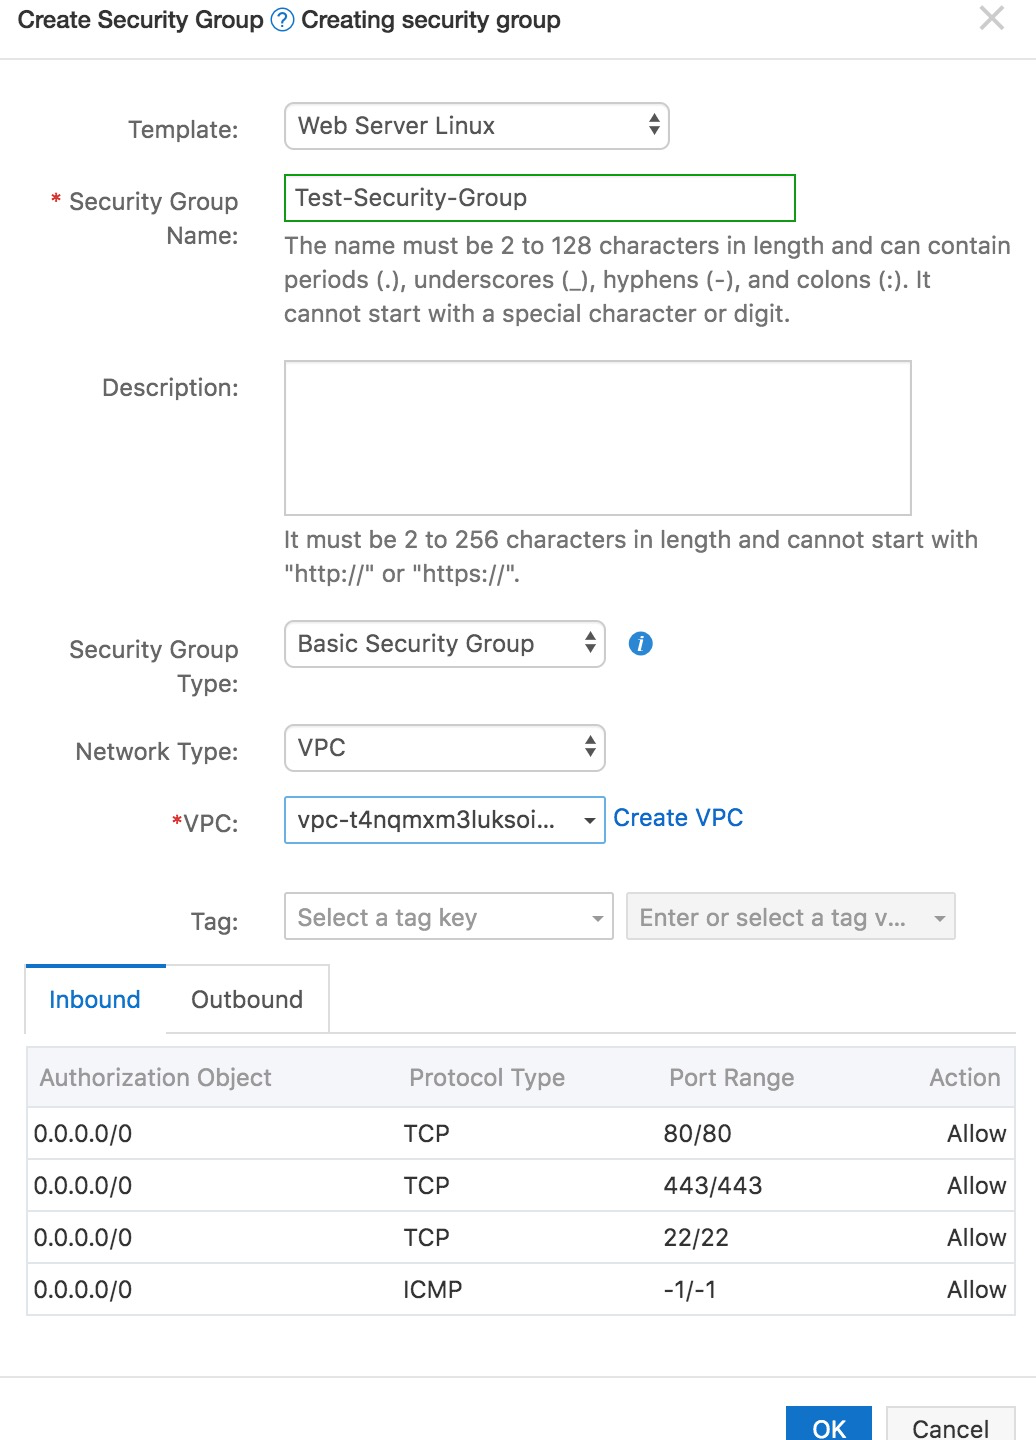
Once the group is created, you will be able to create quick default rules as shown in the dialogue box that follows. For this tutorial, you will need to allow access to your ECS instance with ports SSH (22) and HTTP (80). If you are setting up SSL (HTTPS) on your WordPress site, you will need to allow access via HTTPS (443). For the Authorization Object, you can allow access from only specific IP addresses or allow all IP addresses by using the Authorization Object 0.0.0.0/0. For more information on Alibaba Cloud Security Groups, visit this knowledge base link.
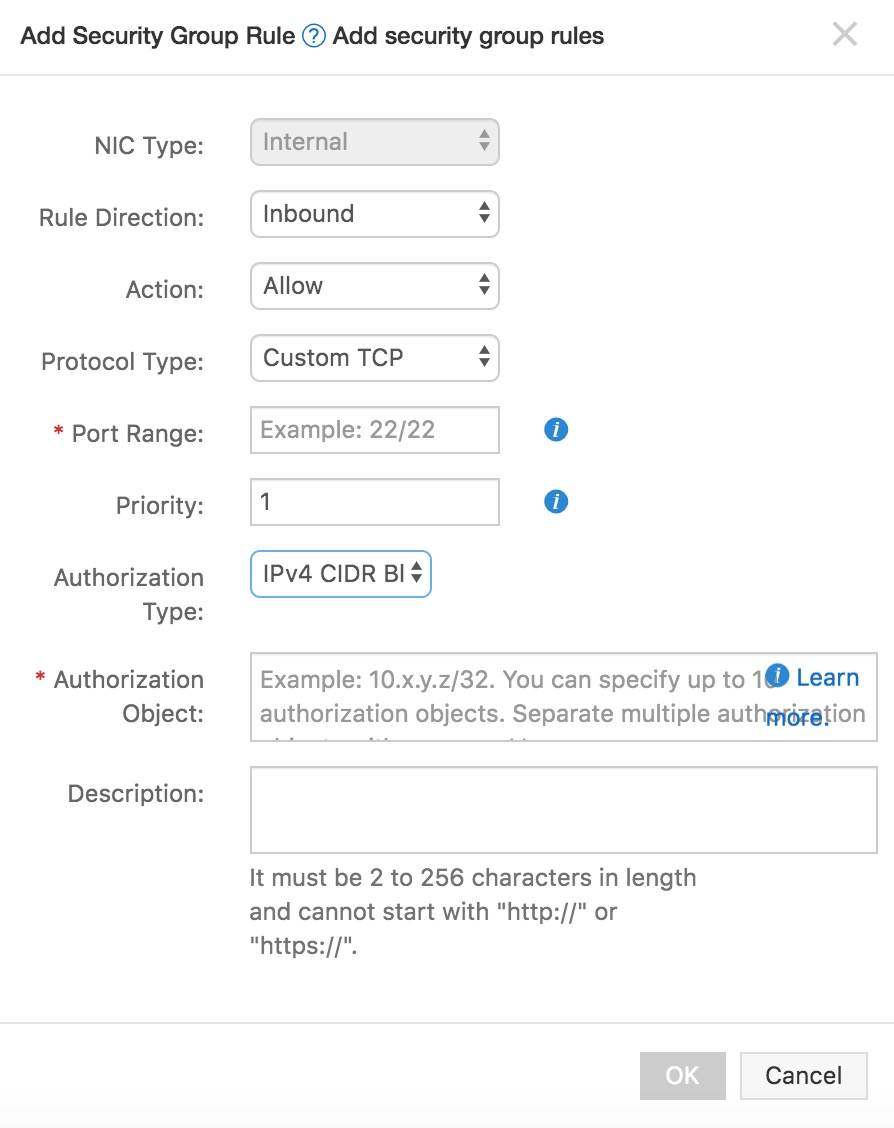
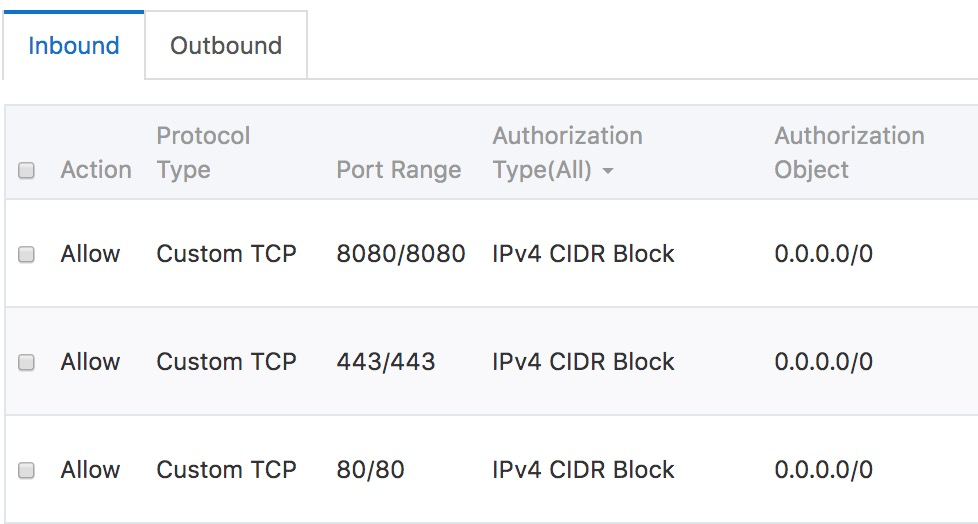
At the end of the process we should have something like this:
You can either deploy WordPress by yourself via SSH (Step 1a) or you can use an image on the marketplace as shown in step 1b.
After you create the machine to host your WordPress (Ubuntu 14.04), it's always a good idea to start any installation with a fresh repository update:
$ sudo apt-get updateECS instances only provide root user access by default. It's a good security habit to create a user for our web application. Here we will use wordpress but it could be anything. As root, execute:
$ adduser wordpressLet's install Apache server by executing the following:
$ sudo apt-get install apache2 apache2-utilsWe want to enable Apache2 web server to start the system at boot time as follows:
$ sudo update-rc.d apache2 defaults
$ sudo service apache2 restart
Now test whether the server is running. Open a web browser and enter http://server_ip_address (public IP address). The Apache2 default index page will be displayed when the web server is up and running.
Optional: AH00558: apache2: Could not reliably determine the server's fully qualified domain name, using 10.25.165.55. Set the ServerName directive globally to suppress this message
If you see this error and you want to fix it and already have a domain, you can edit the /etc/apache2/apache2.conf to add ServerName domain.
$ sudo vim /etc/apache2/apache2.confTo install the PHP dependencies for our application we need to execute:
$ sudo apt-get install php5-mysql php5 libapache2-mod-php5 php5-mcrypt php5-gd libssh2-phpOur application uses .php files rather than .html. To allow apache to deliver this content, we need to update a configuration file as follows:
$ sudo vim /etc/apache2/mods-enabled/dir.confFrom:
<IfModule mod_dir.c>
DirectoryIndex index.html index.cgi index.pl index.php index.xhtml index.htm
</IfModule>
To:
<IfModule mod_dir.c> DirectoryIndex index.php index.html index.cgi index.pl index.xhtml index.htm </IfModule>A restart of apache is needed:
$ sudo service apache2 restartTo test the configuration is working we can create a PHP file:
$ sudo vim /var/www/html/info.phpAnd insert:
<?php phpinfo(); ?>Check the result at http://{domain}/info.php – this {domain} could be your public IP.
WordPress uses MySQL to store information about the site. We will install MySQL on the ECS instance. To start installation of the necessary packages, execute:
$ sudo apt-get install mysql-server php5-mysqlFollow the steps of the installation process and finish with a clean setup:
$ sudo mysql_install_db
$ sudo mysql_secure_installation
Enter Y to every step of the second command. Once the MySQL setup is done we have to create the database for the site, which we will name wordpress along with a user wordpressuser and password test-password to allow our WordPress site to work on MySQL and have isolated rights (or privileges) to this database.
$ mysql -u root -p
$ CREATE DATABASE wordpress;
$ CREATE USER wordpressuser@localhost IDENTIFIED BY 'test-password';
$ GRANT ALL PRIVILEGES ON wordpress.* TO wordpressuser@localhost;
$ FLUSH PRIVILEGES;
$ exitNext, we will download the WordPress files from the project's website using the link to the latest stable version:
$ cd ~
$ wget http://wordpress.org/latest.tar.gz
$ tar xzvf latest.tar.gz
Then we will move the content of this directory to our apache default directory:
$ sudo rsync -avP ~/wordpress/ /var/www/html/
$ cd /var/www/html/
We will need to change the ownership of our files to the previously created user. We chose the username wordpress, so execute:
$ sudo chown -R wordpress:www-data *This will set up the ownership properties (permissions) that we are looking for. Now we need to create the last directory with more permissive rights, as it's open to public.
$ mkdir /var/www/html/wp-content/uploads
$ sudo chown -R :www-data /var/www/html/wp-content/uploads
We now need to configure the WordPress site to access the MySQL database. To do this, we modify the configuration file, wp-config-sample.php and in the process rename it to wp-config.php.
$ cd /var/www/html/
$ cp wp-config-sample.php wp-config.php
$ vim wp-config.php

define('DB_NAME', 'wordpress');
define('DB_USER', 'wordpressuser');
define('DB_PASSWORD', 'test-password');
Your WordPress site should now be up and running. You can test it by visiting your public IP or domain name.
In this version of Step 1, we will deploy WordPress directly from an image on the Marketplace.
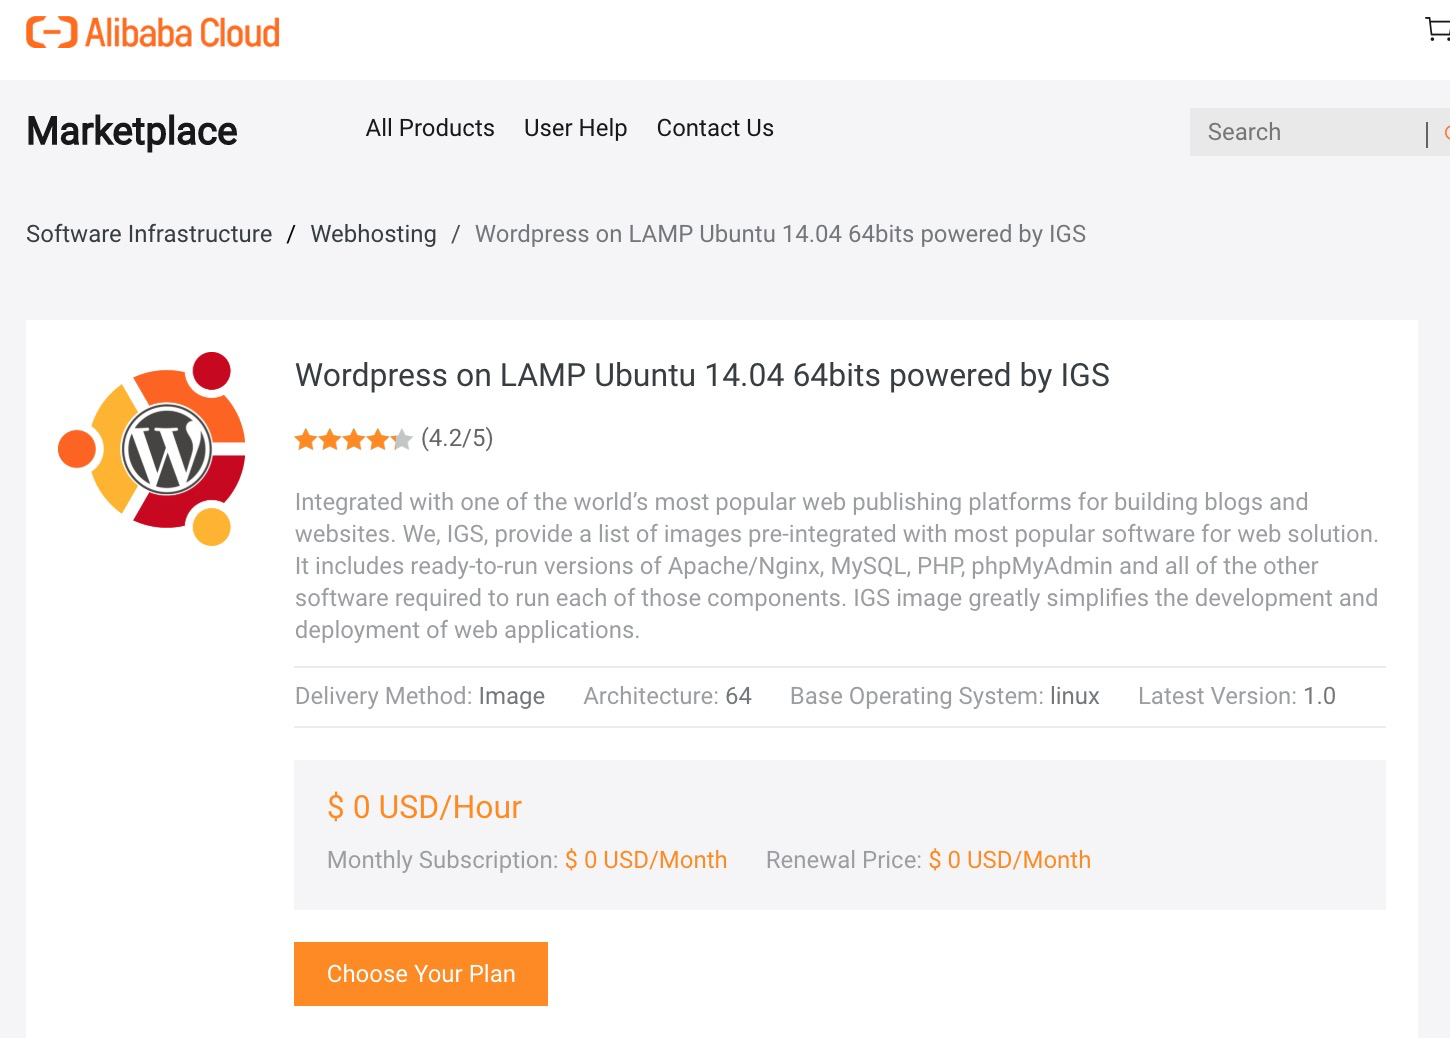
Login to Alibaba Cloud and choose a pay-as-you-go ECS instance to host WordPress.


Reset the ECS instance password inside the ECS console. Restart the instance for the password change to take effect.

Firstly, deactivate the MySQL from starting as we won't use it. Doing so will prevent resource waste on our machines. We will connect to the ECS instance via SSH and deactivate the ECS MySQL. If you are new to SSH, you will need to generate a Key Pair in the ECS instance settings and save the .pem file to your computer. Adjust the permissions on the .pem file so that only you can access it. This Alibaba Cloud guide shows how to connect with SSH onto your Linux ECS instance. A common error such as:
SSH permission denied (publickey)Could be due to not having port 80 open on your ECS instance. This is managed in security groups in the console shown below. Another common error is not having the key pair bound to your WordPress ECS instance. A restart is required on the instance after binding a key pair.
Then in command line (such as terminal on a Mac) connect through SSH onto the machine we just created and proceed with the following commands:
$ sudo service mysqld stop
$ sudo update-rc.d mysqld disable
On the console, create an Apsara for MySQL instance (through ApsaraDB for RDS), ideally in the same geographical location so it uses the intranet for a faster connection speed. This also means we can configure your database so it cannot be accessed from the Internet, providing increased security.
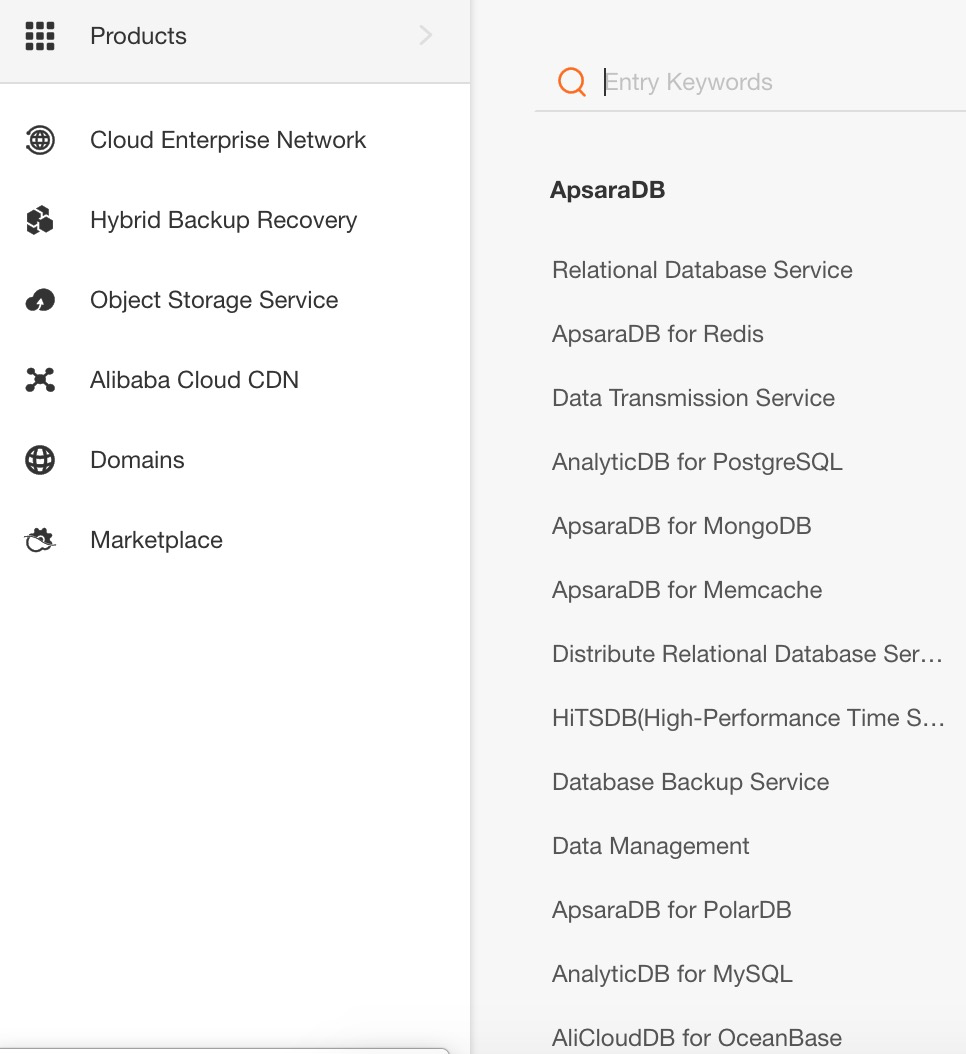
During the configuration process, be sure "Network Type: VPC" is selected. Now it is time to configure the database. Go to ApsaraDB for RDS and click manage on your new instance.
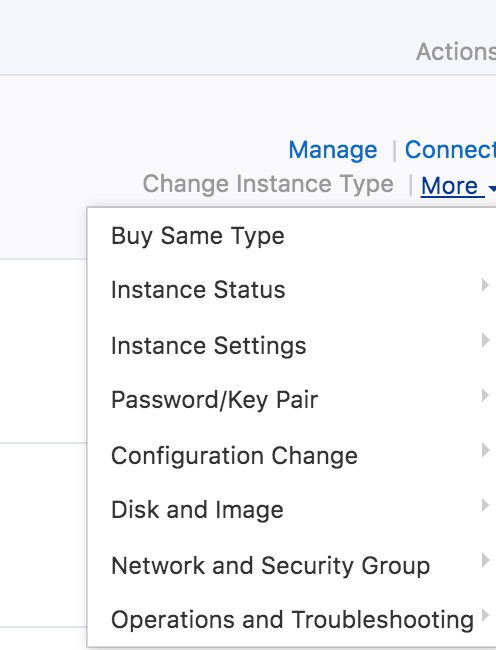
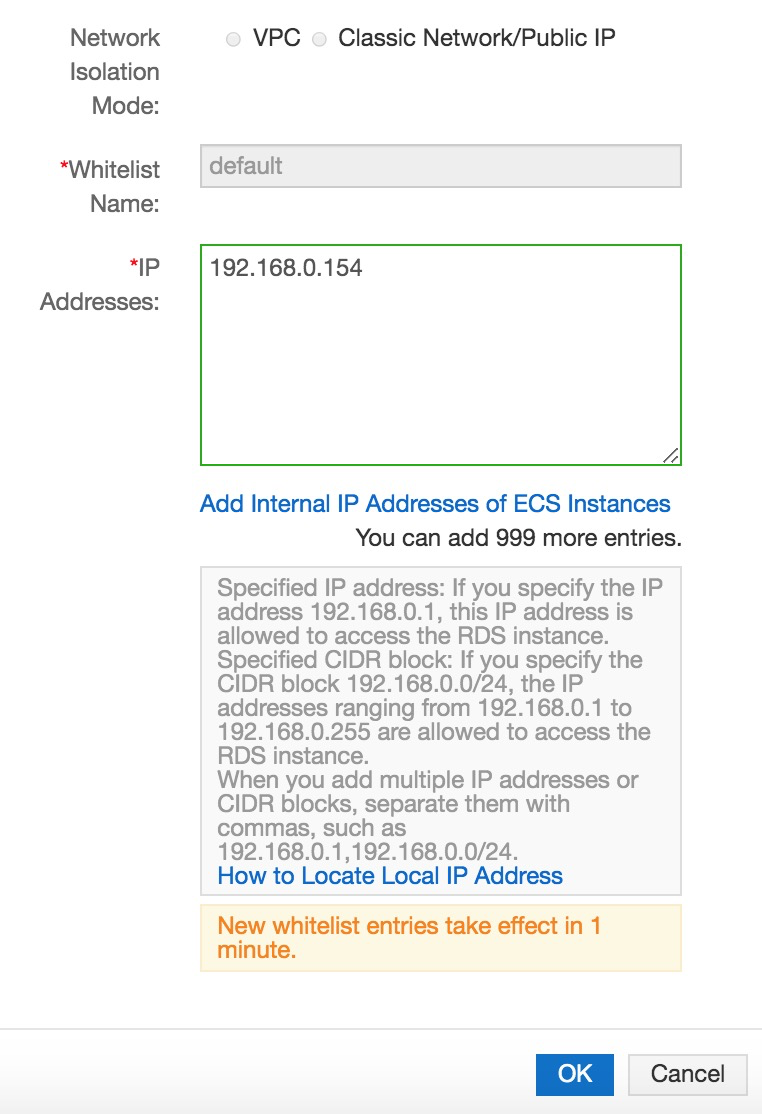
To allow the ECS instance to connect to the RDS instance, we need an intranet address. We get this by setting the RDS whitelist to include the ECS internal private IP.
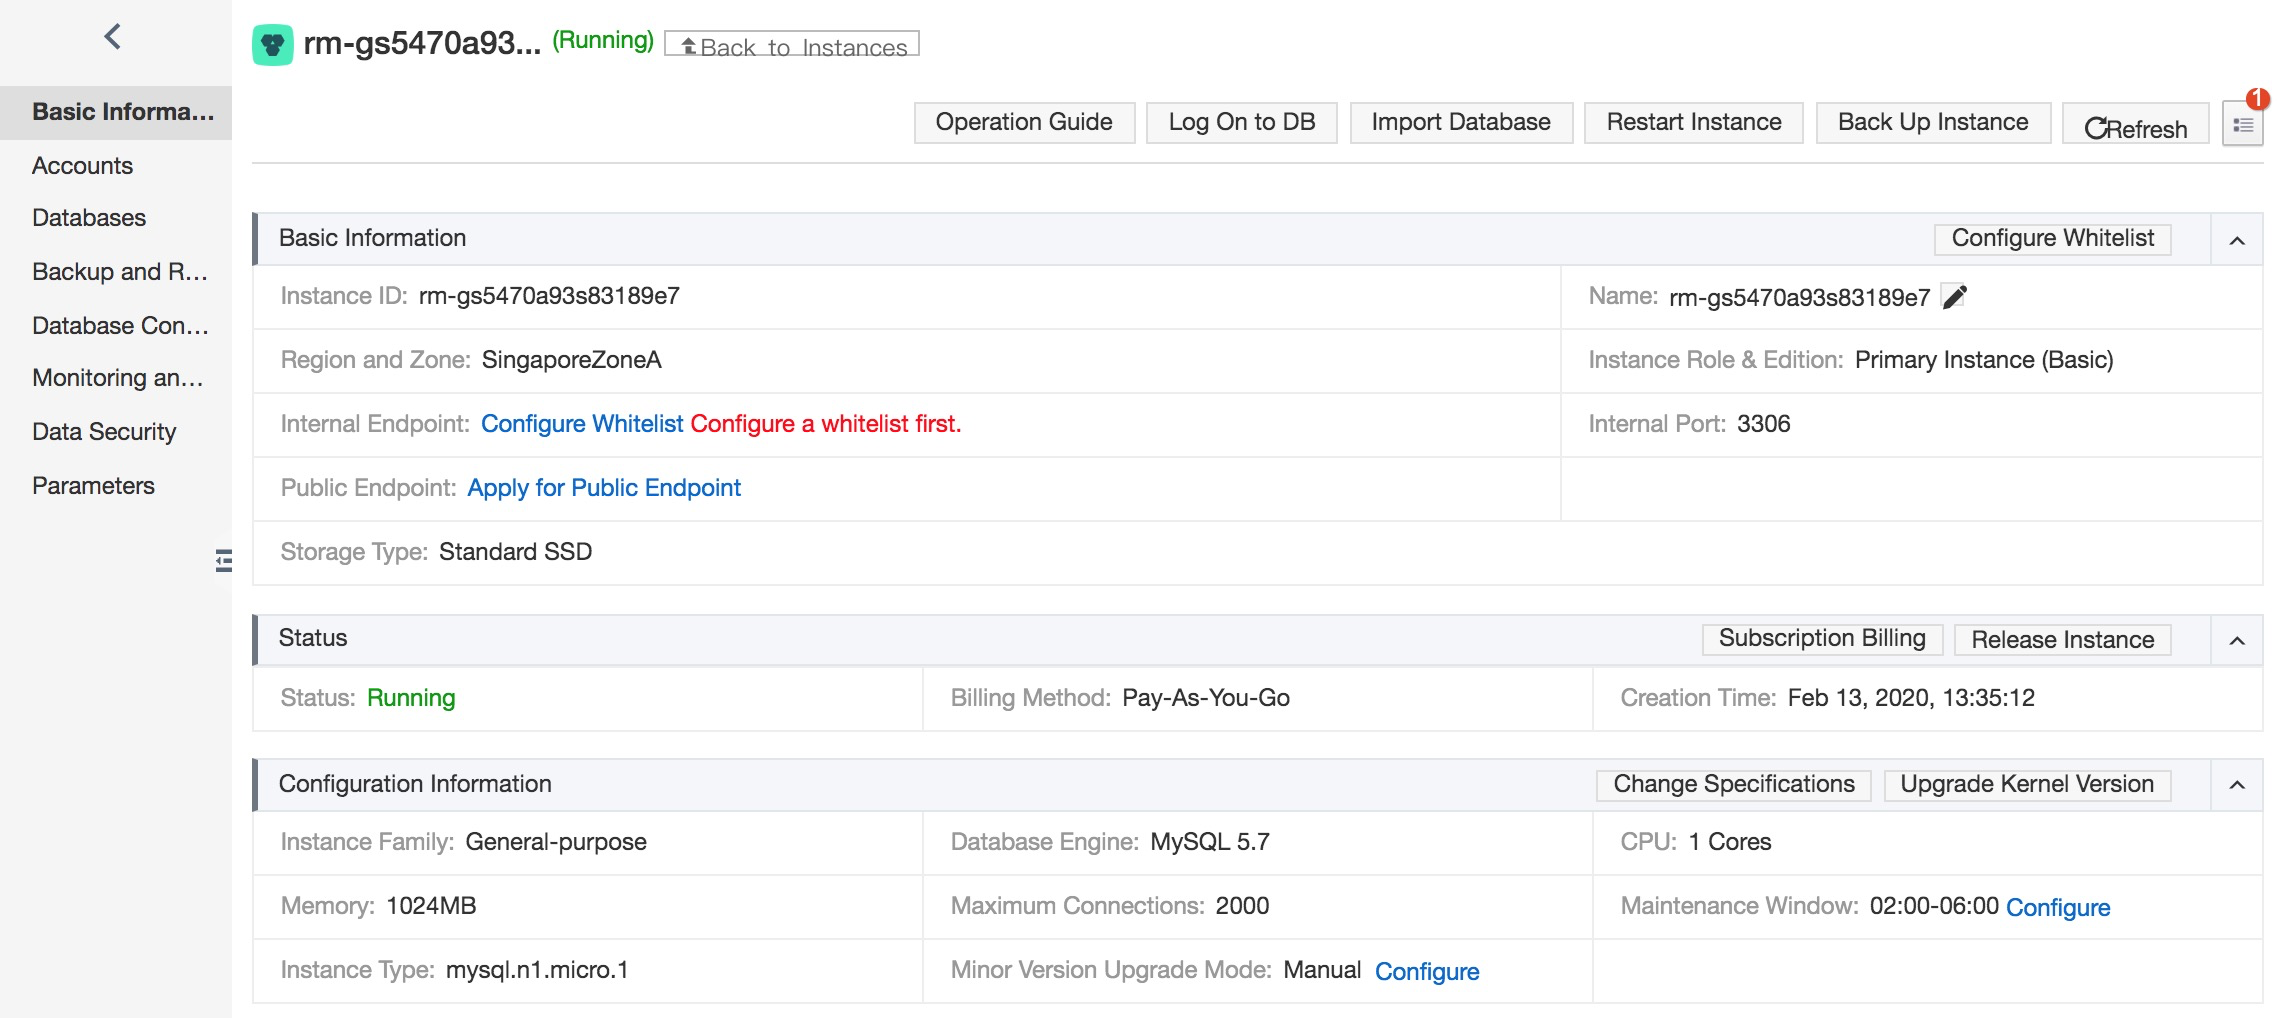
Click Set Whitelist (in blue), under Basic Information.
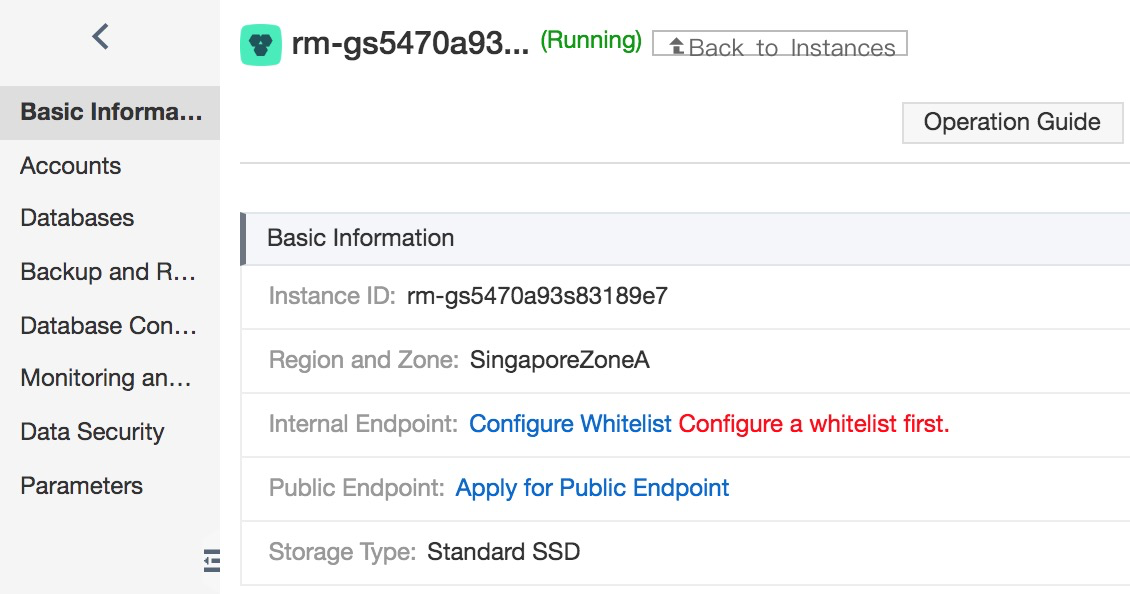
Set the Whitelist to include your ECS instance private IP (if your RDS is in the same region as your ECS instance) or VPC subnet to allow future auto-scaled machines to connect.
Create a Database user account (and password):
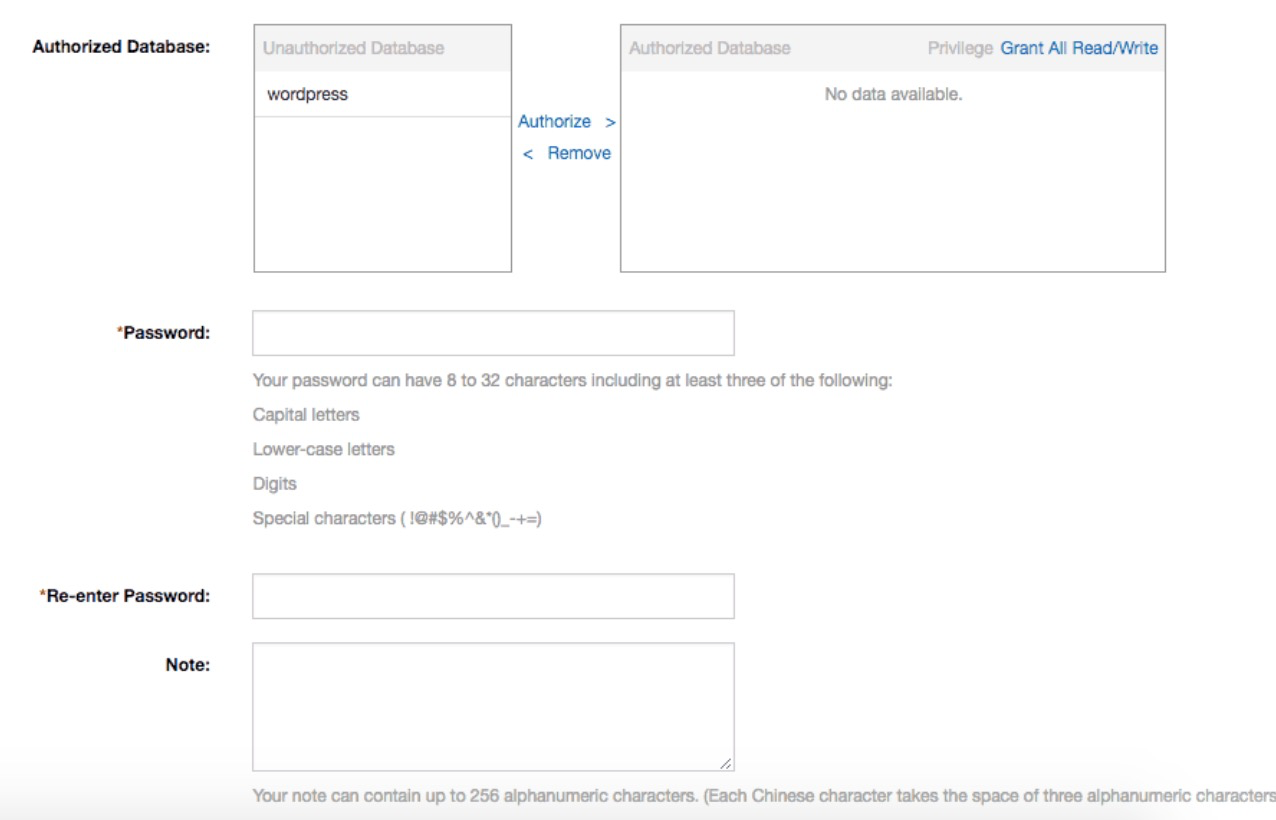
Create a Database, adding the account as an authorized user and granting all read/write privileges. WordPress uses the utf8 as default character setting (charset), the standard charset for modern data which supports all Internet-friendly languages.

Now connect via SSH onto ECS and configure the new MySQL host configuration by editing /data/wwwroot/default/wp-config.php. Alternatively, you could use a visual FTP client such as Filezilla and use SFTP to connect to the instance.
$ cd /data/wwwroot/default/
$ vim wp-config.php

define('DB_NAME', 'wordpress');
define('DB_USER', 'wordpressuser');
define('DB_PASSWORD', 'test-password');
define ('DB_HOST', 'RDS_INTERNAL_ADDRESS');
To make sure that everything is well configured on the network side, you can ping the address of the RDS instance.
Proceed with the installation of WordPress by visiting http://ECS_public_IP.
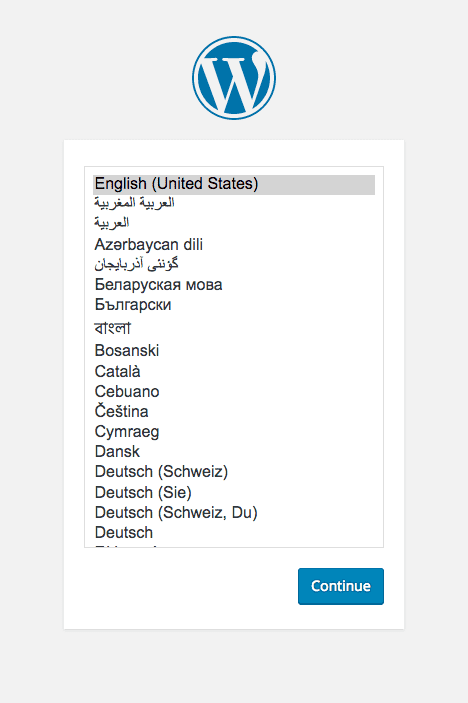
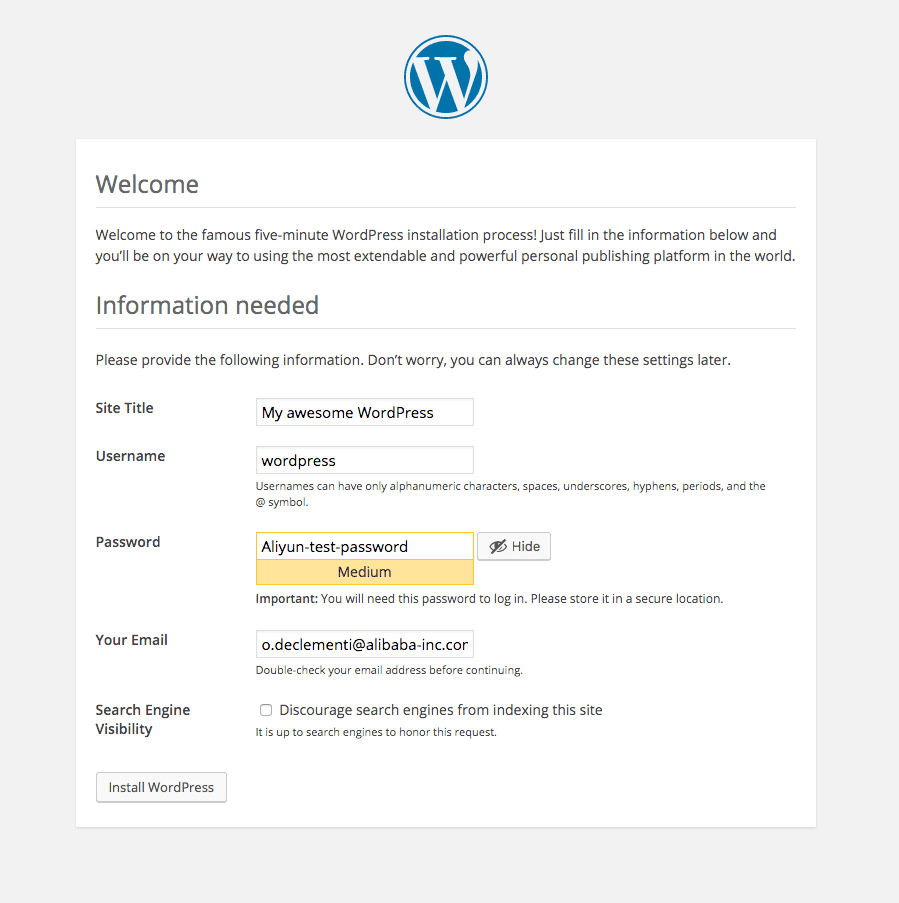
You should now have a fully workable two-tier WordPress installation. A common error is to see Error establishing database connection. This is usually a mistake in your wp-config file, so check for errors in the connection details and your RDS whitelist (to allow the ECS to connect).
Now your WordPress site is live and accessible via your ECS public IP, you can add a domain. To do this, set an A record in your domain settings to point to your ECS public domain. If you want your naked domain (such as your domain name without any prefix such as www) to point to your website, you will need to use @ in the host name for the A record.
After setting up a domain, your WordPress site is ready to use. In the upcoming sections, we will make a more comprehensive installation with more tiers, that is more suitable for larger sites.

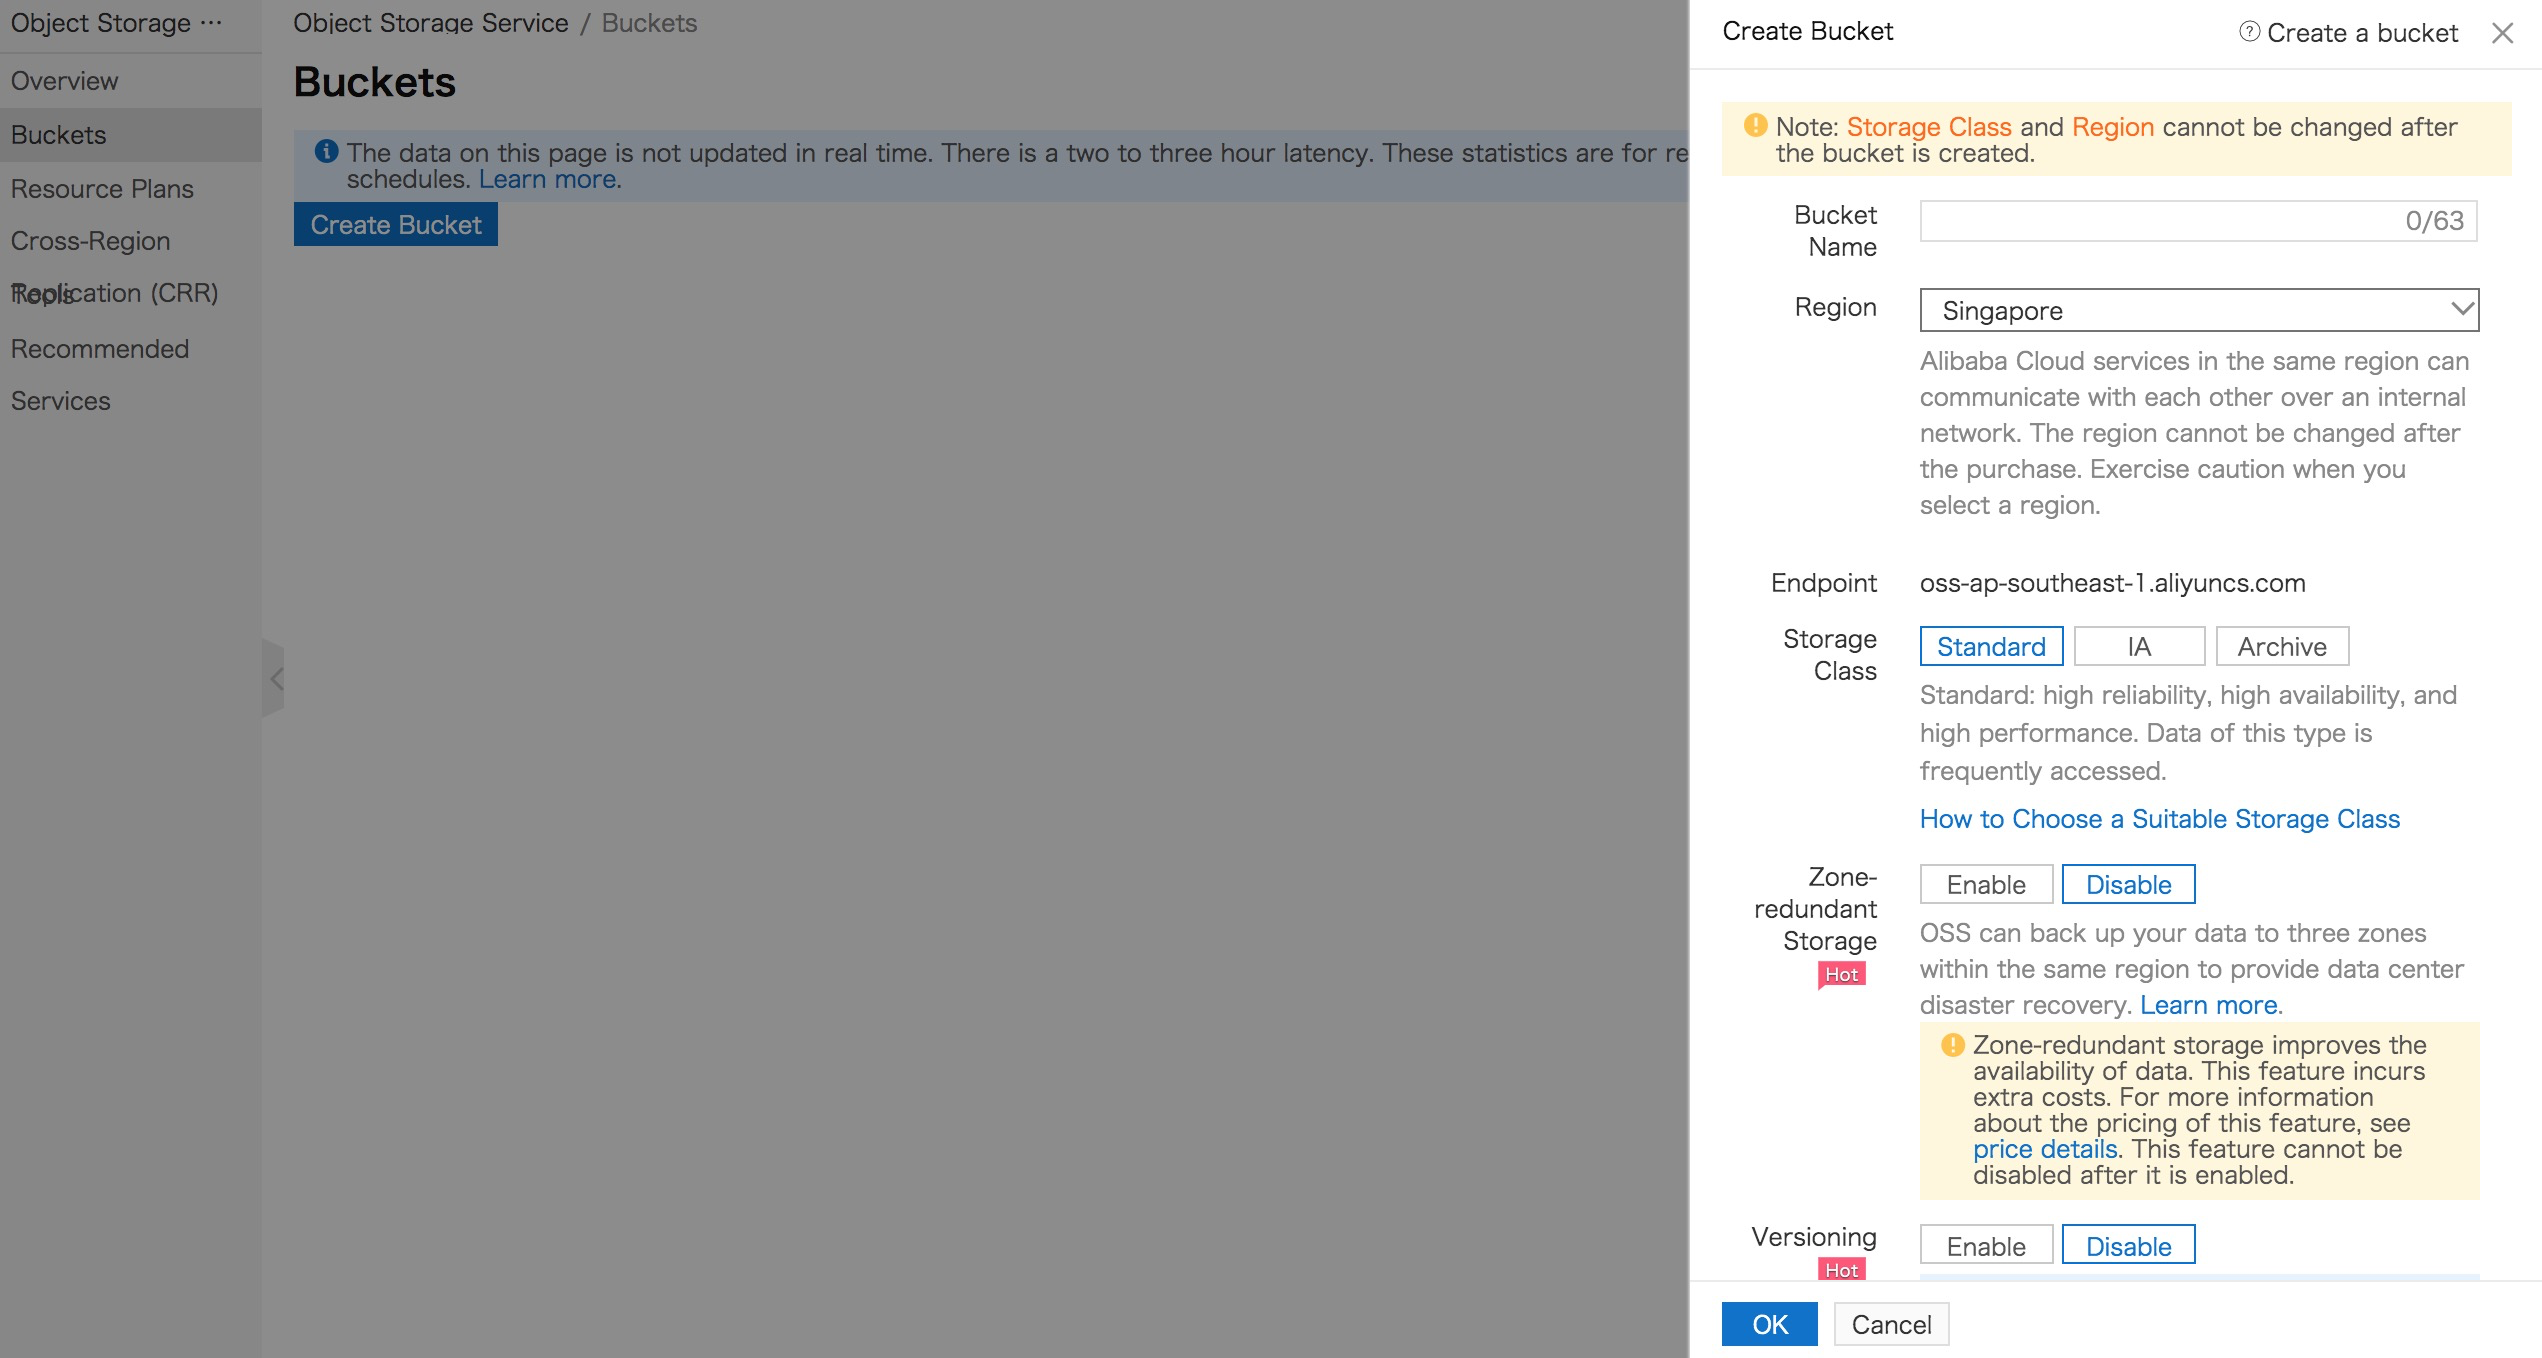
We can now create a shared folder where all the VMs in our cluster can write and read files. Let's move on to the bucket creation by selecting Object Storage Service and enabling the service.
Create a new bucket in the same region of ECS and RDS. Select your region from the dropdown menu.
Create an Access Key by visiting https://ak-console.aliyun.com/ and selecting Create Access Key.
We will use the Access Key details in the next section. Back on the machine's terminal, we will start moving the wp-content folder onto OSS.
$ cd /data/wwwroot/default/
$ mv wp-content local-wp-content
Please select the corresponding installer on the Version Releases Page to download and install the tool. The latest version is recommended.
$ sudo apt-get update
$ sudo apt-get install gdebi-core
$ sudo wget https://github.com/aliyun/ossfs/releases/download/v1.80.4/ossfs_1.80.4_ubuntu14.04_amd64.deb
$ sudo gdebi ossfs_1.80.4_ubuntu14.04_amd64.deb
For the next step, you will need to find the correct internal address for your region. Once found, we will mount the bucket to the wp-content directory.
Bucket-name:AccessKeyID:AccessKeySecret$ sudo –u www echo BUCKET_NAME:AccessKeyID:AccessKeySecret > /etc/passwd-ossfs
$ chown www:www /etc/passwd-ossfs
$ chmod 640 /etc/passwd-ossfs
$ sudo -u www mkdir /data/wwwroot/default/wp-content
$ sudo -u www ossfs BUCKET_NAME /data/wwwroot/default/wp-content -ourl= OSS_INTERNAL_ADDRESS
$ sudo -u www cp -r local-wp-content/* wp-contentLogin to your WordPress dashboard and upload a piece of media (such as an image). It's now stored on OSS. Restart the machine.
Now, we will automatically mount the OSS at boot. To do so, we will setup our bootscript in /etc/init/:
$ cat > /etc/init/wordpress-oss.conf
description "Mount WordPress OSS" start on startup
script
sudo -u www ossfs BUCKET_NAME /data/wwwroot/default/wp-content -ourl=OSS_INTERNAL_ADDRESS
end script
And test it:
$ sudo service wordpress-oss start
wordpress-oss start/running, process 2000
If mounted, reboot again and check again that it's all good.
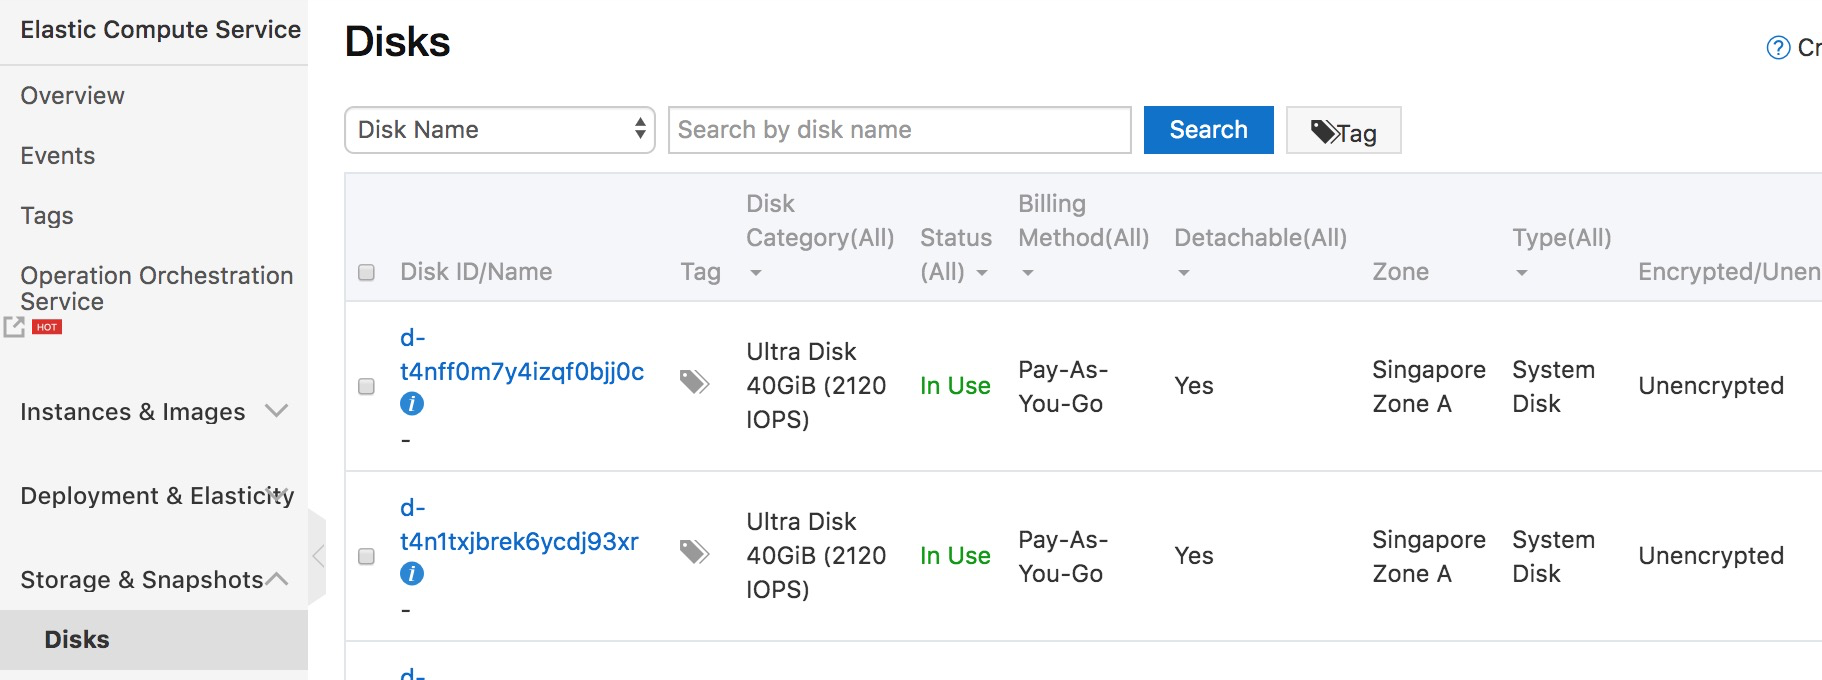
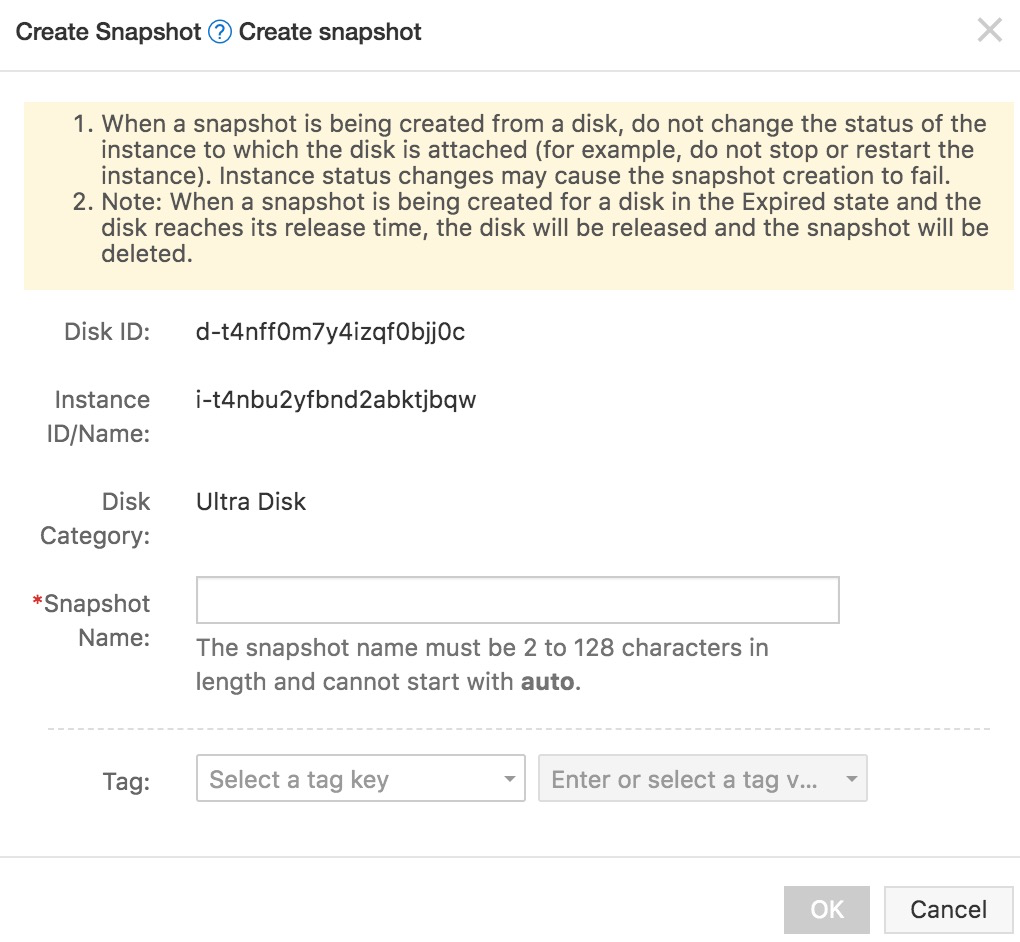
Now we will create an image to duplicate our first machine to turn it into an efficient WordPress cluster. To do so, go to create a snapshot on the console. Under Cloud Disks in your console window, click Create Snapshot on the right hand side. Snapshots may take a while (around 15 minutes), just enough time to get a coffee.
In the dialogue box, choose a name for your Snapshot.
While the Snapshot is being created, we can create a Server Load Balancer and configure it to work with the current WordPress virtual machine. Activate a Server Load Balancer from the console and we will configure a listener. You can leave the Health Check Configuration options blank as they will be picked up automatically when a backend server pool is added.
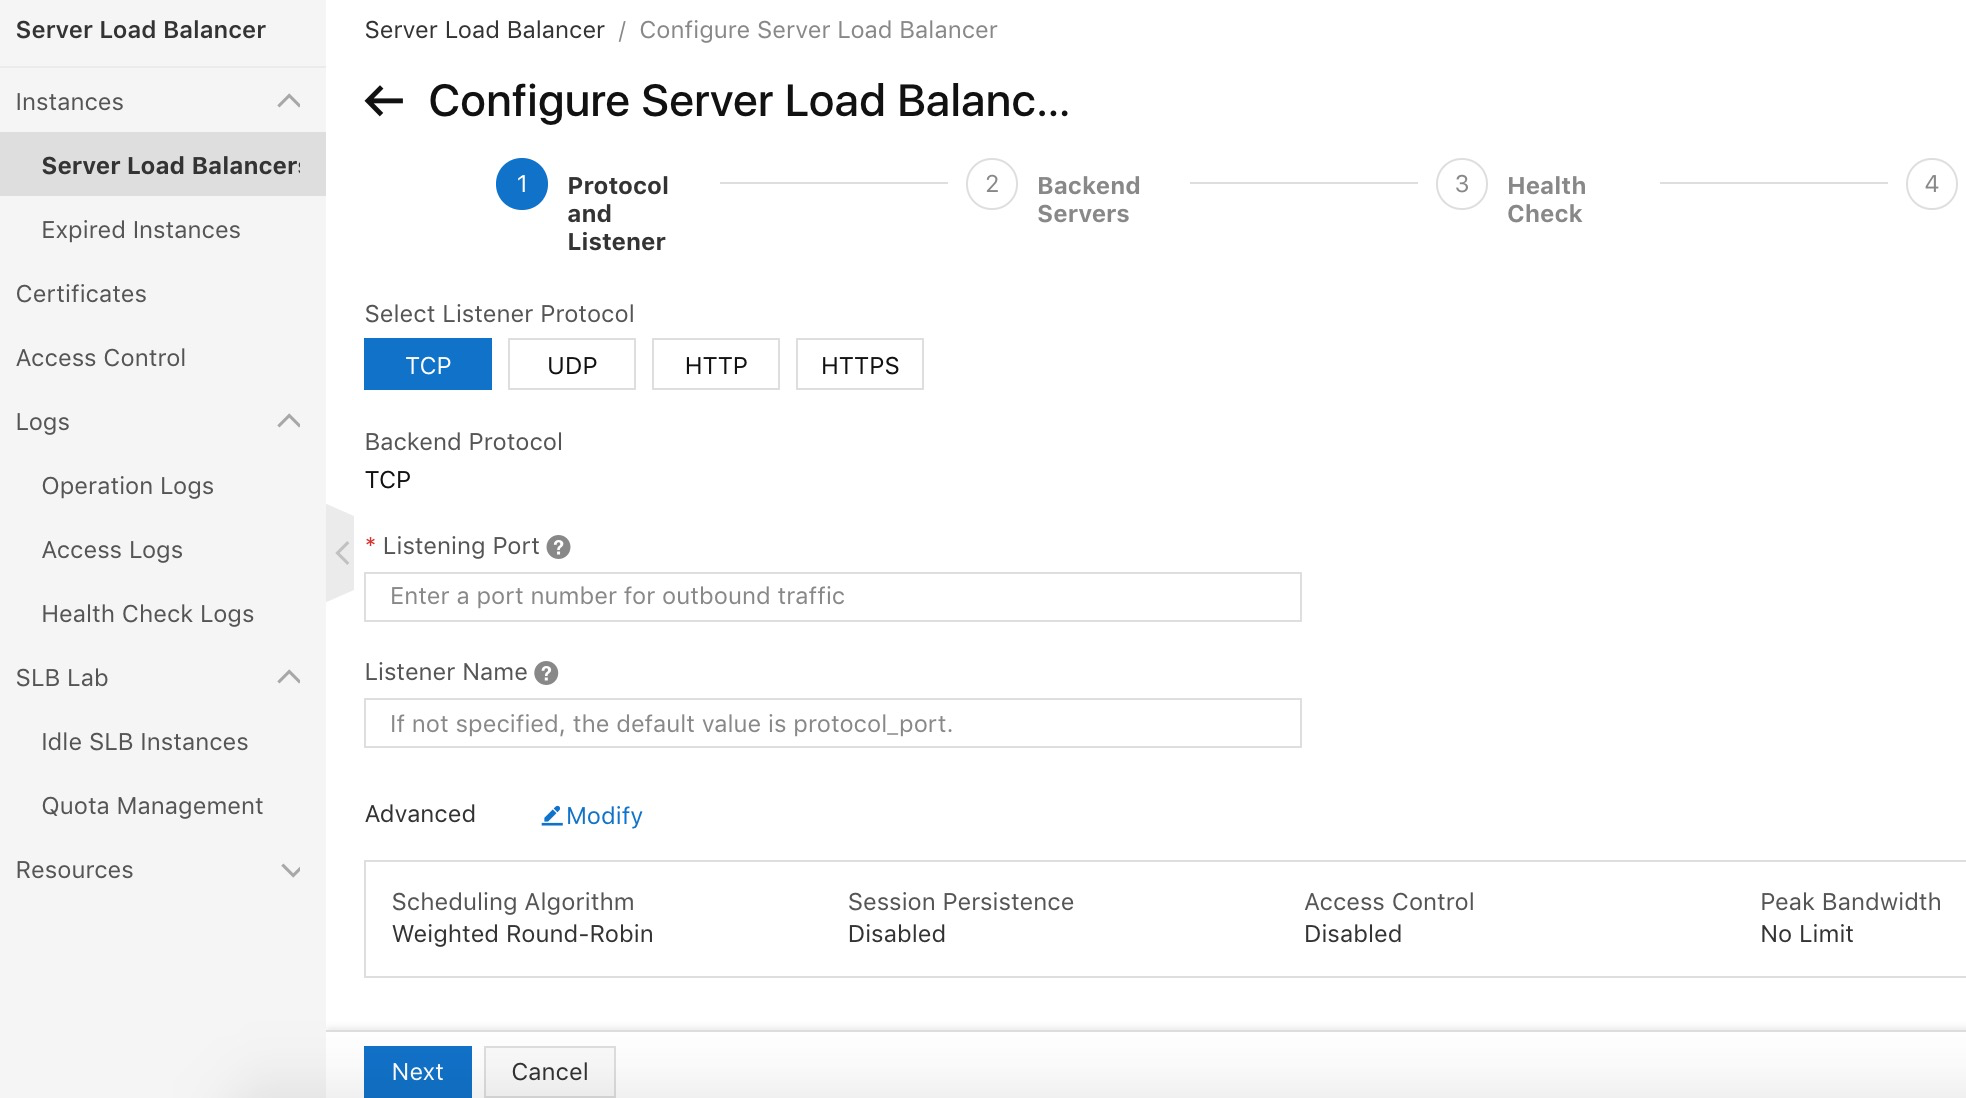
When you have successfully added a listener, click Confirm.
Then add a backend server to the Server Load Balancer:
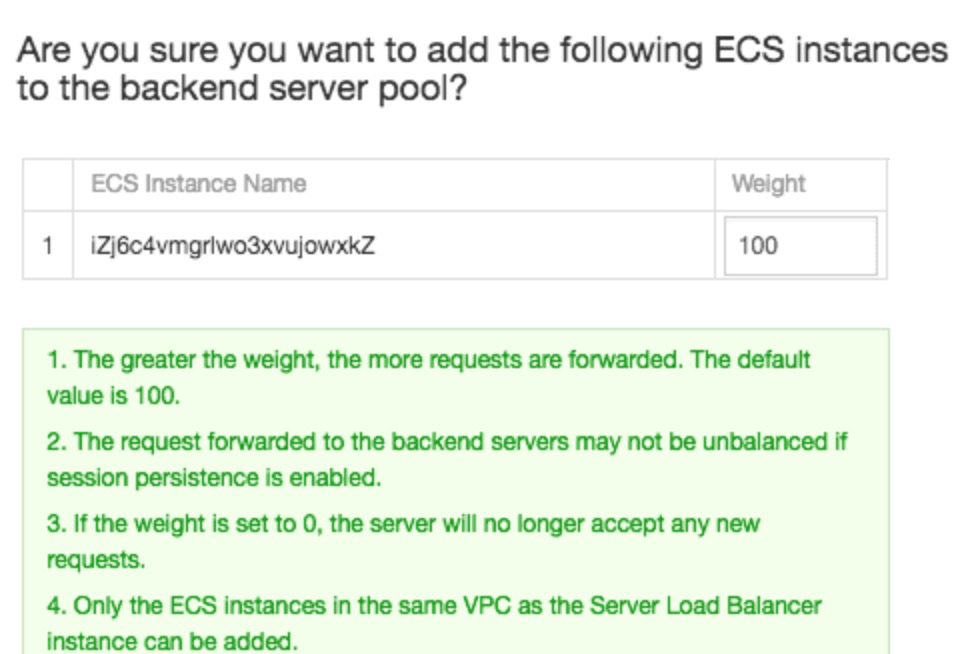
Once done, we need to wait for the consecutive successful health check to start using the load balancer. We will use the public IP of the Server Load Balancer to test it. By default, 20 seconds should be enough for the Server Load Balancer to start delivering content.
Now is the time to create the image of our base WordPress Snapshot:
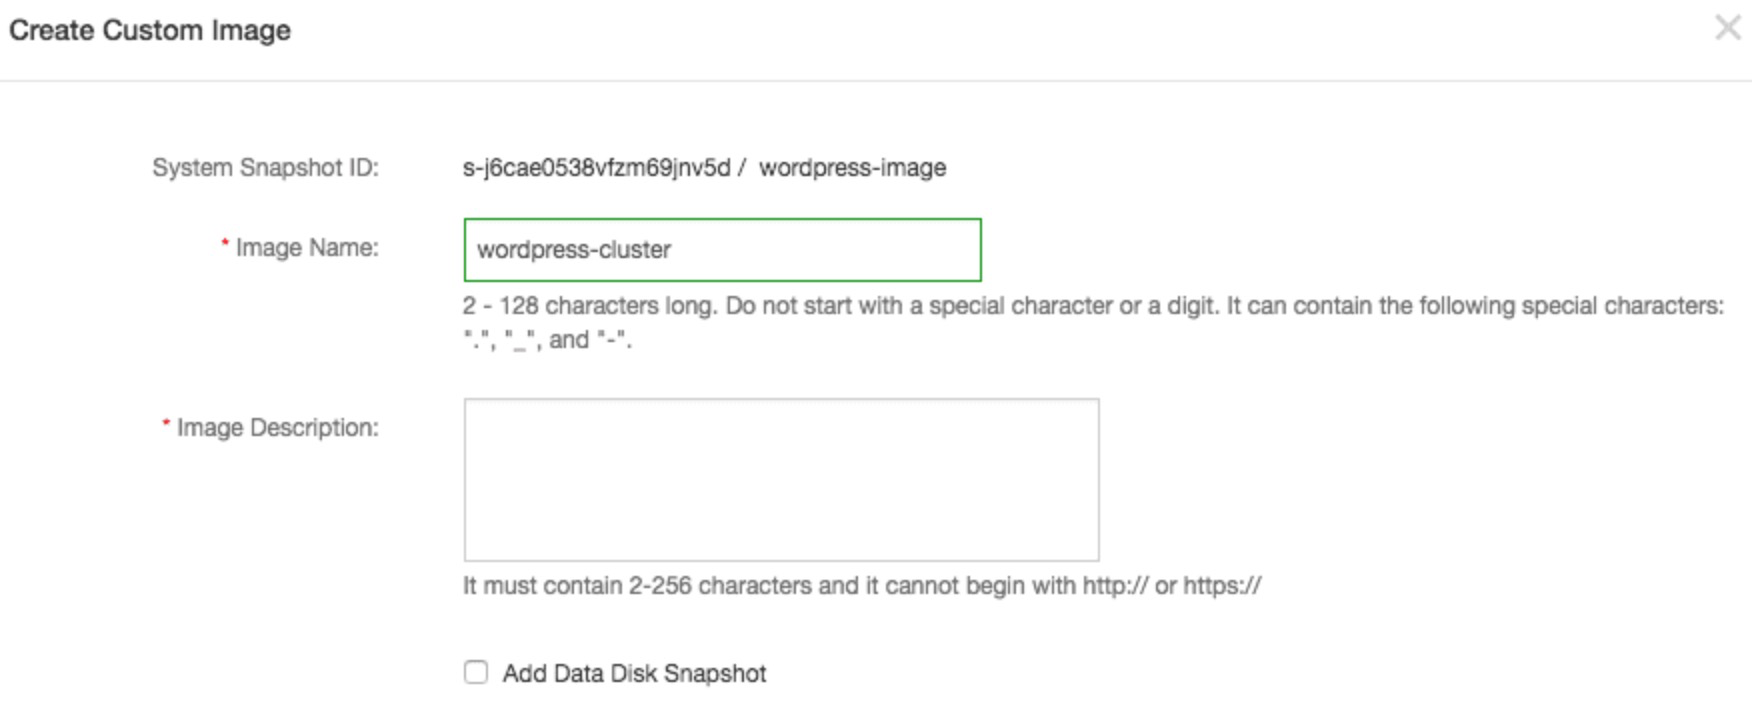
Next create a cluster based on that image that will be used by the Server Load Balancer to auto-scale based on your needs.
By default, the auto-scaling service is not activated. Proceed by selecting auto-scaling on the main menu.
We are now ready to create our first Scaling Group:
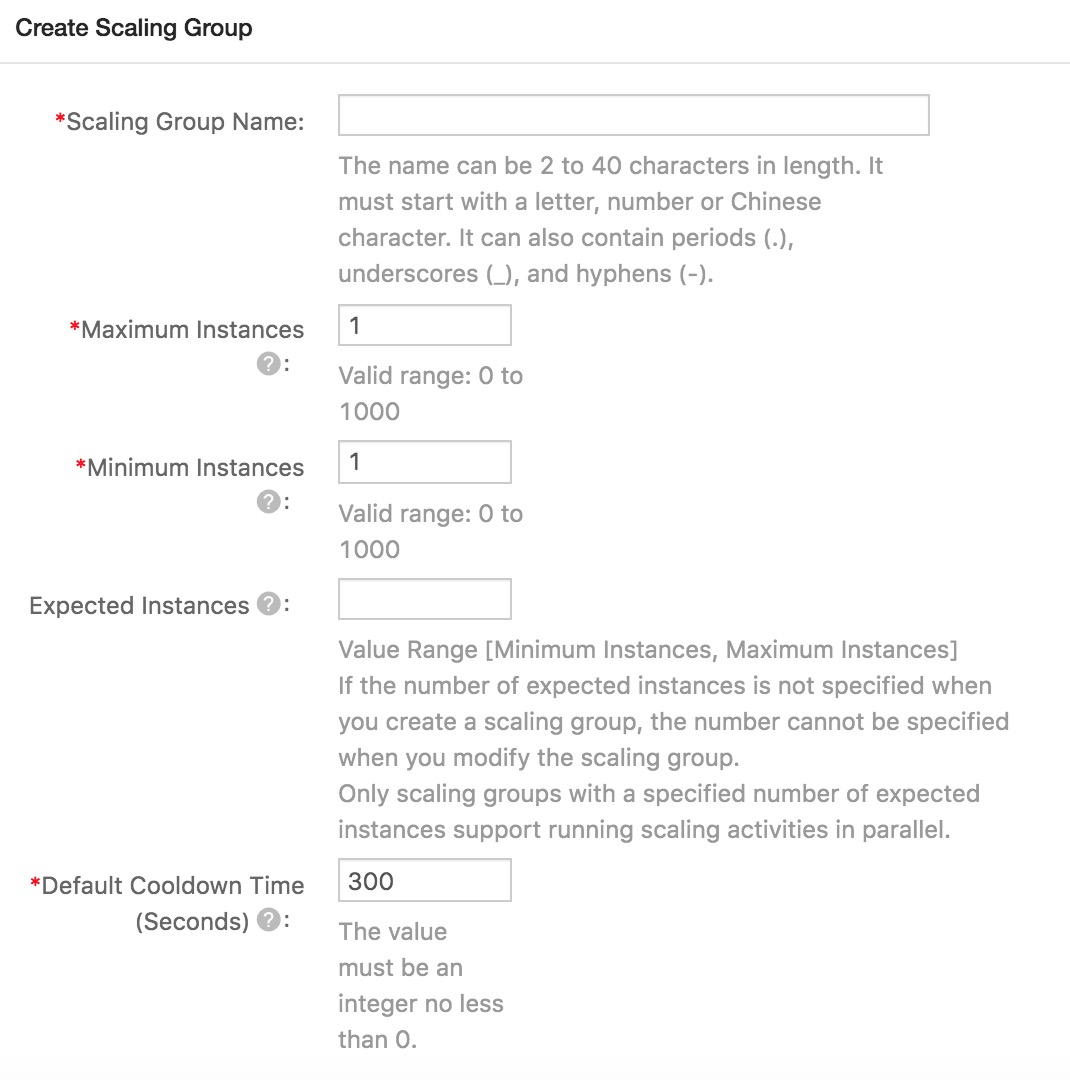
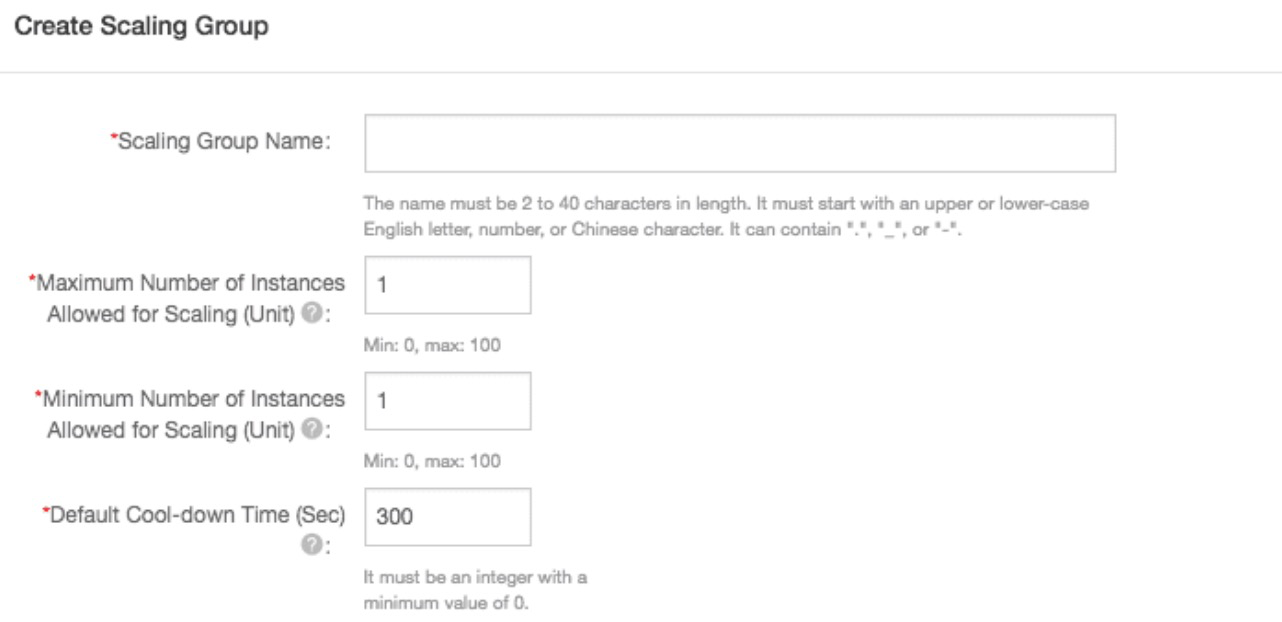
Add your Scaling Group Name and click Submit. You can choose the minimum and maximum number of instances the Scaling Group can use. In this tutorial, we will choose minimum 1 and maximum 2. Default cool down time will be set to 300. Attach your VPC, Server Load Balancer and RDS Database.
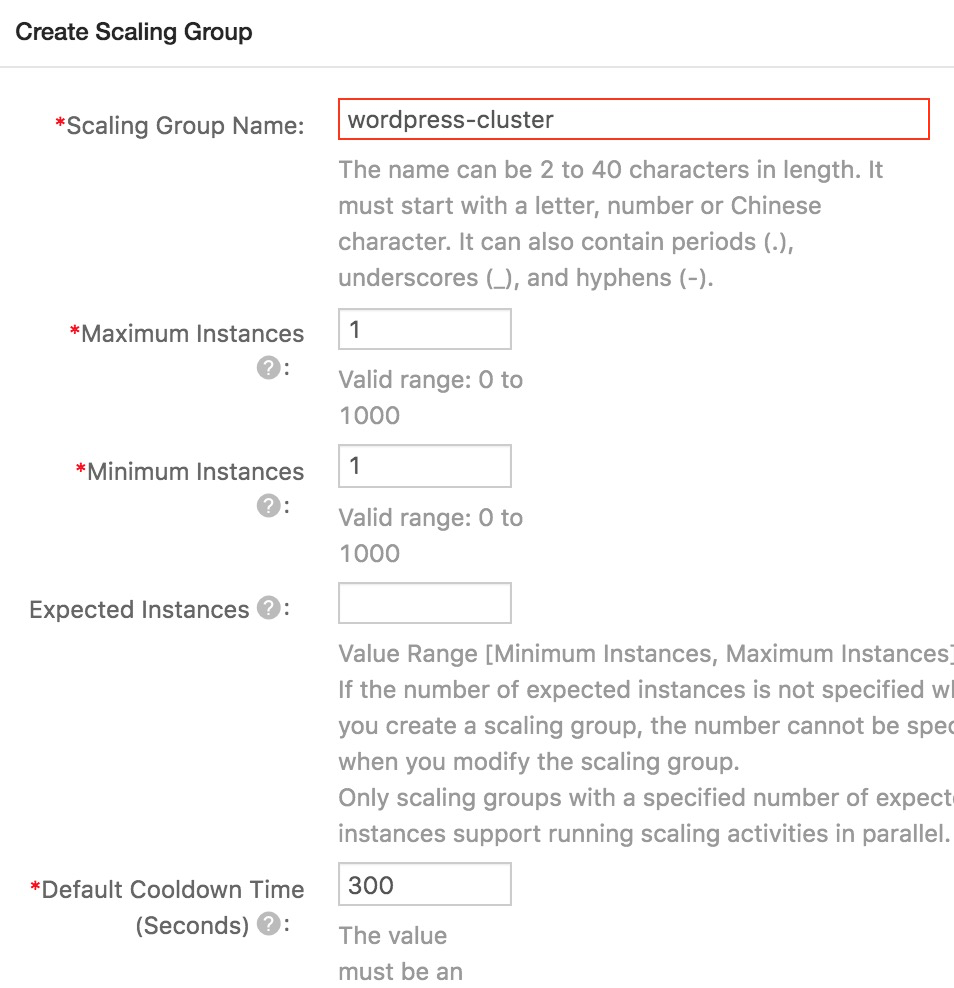
When the Group is successfully created, click "Create Scaling Configuration"
Choose your source ECS name and create a new name, such as wordpress-cluster. Setting the Security Group will allow connections. Then select your previously created Snapshot (User-defined image).
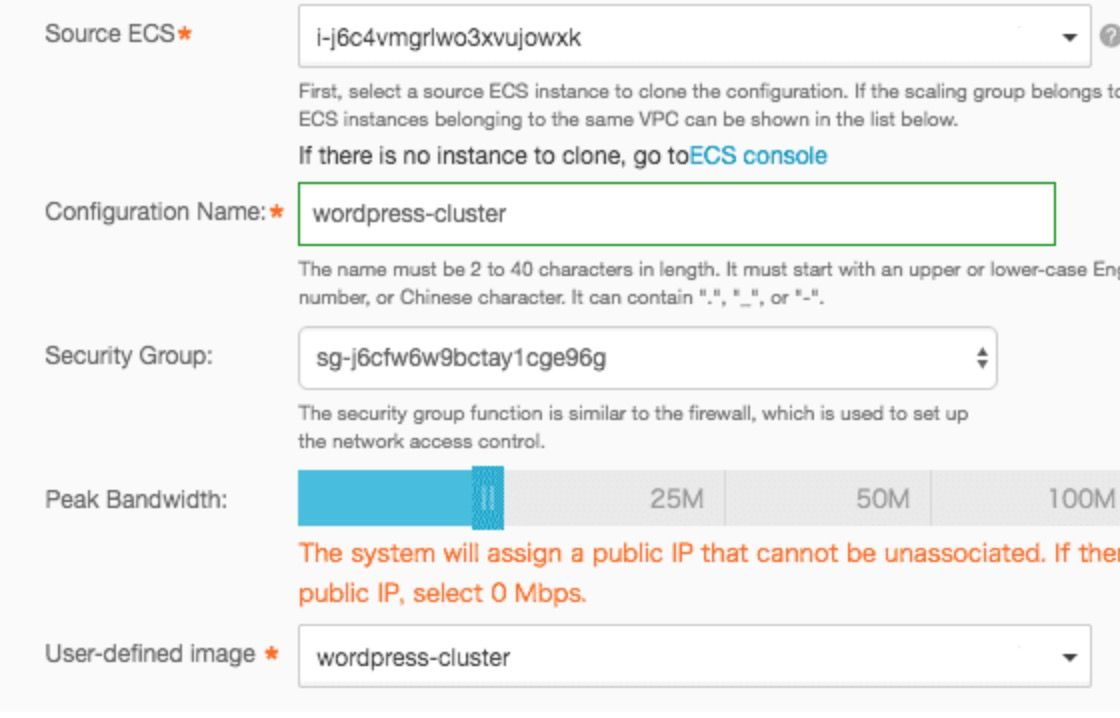
On the next screen, you will be able to review and confirm the settings. Click OK.
You can now see your Auto Scaling Architecture, made up of the SLB, ECS instance(s), and the RDS instance.
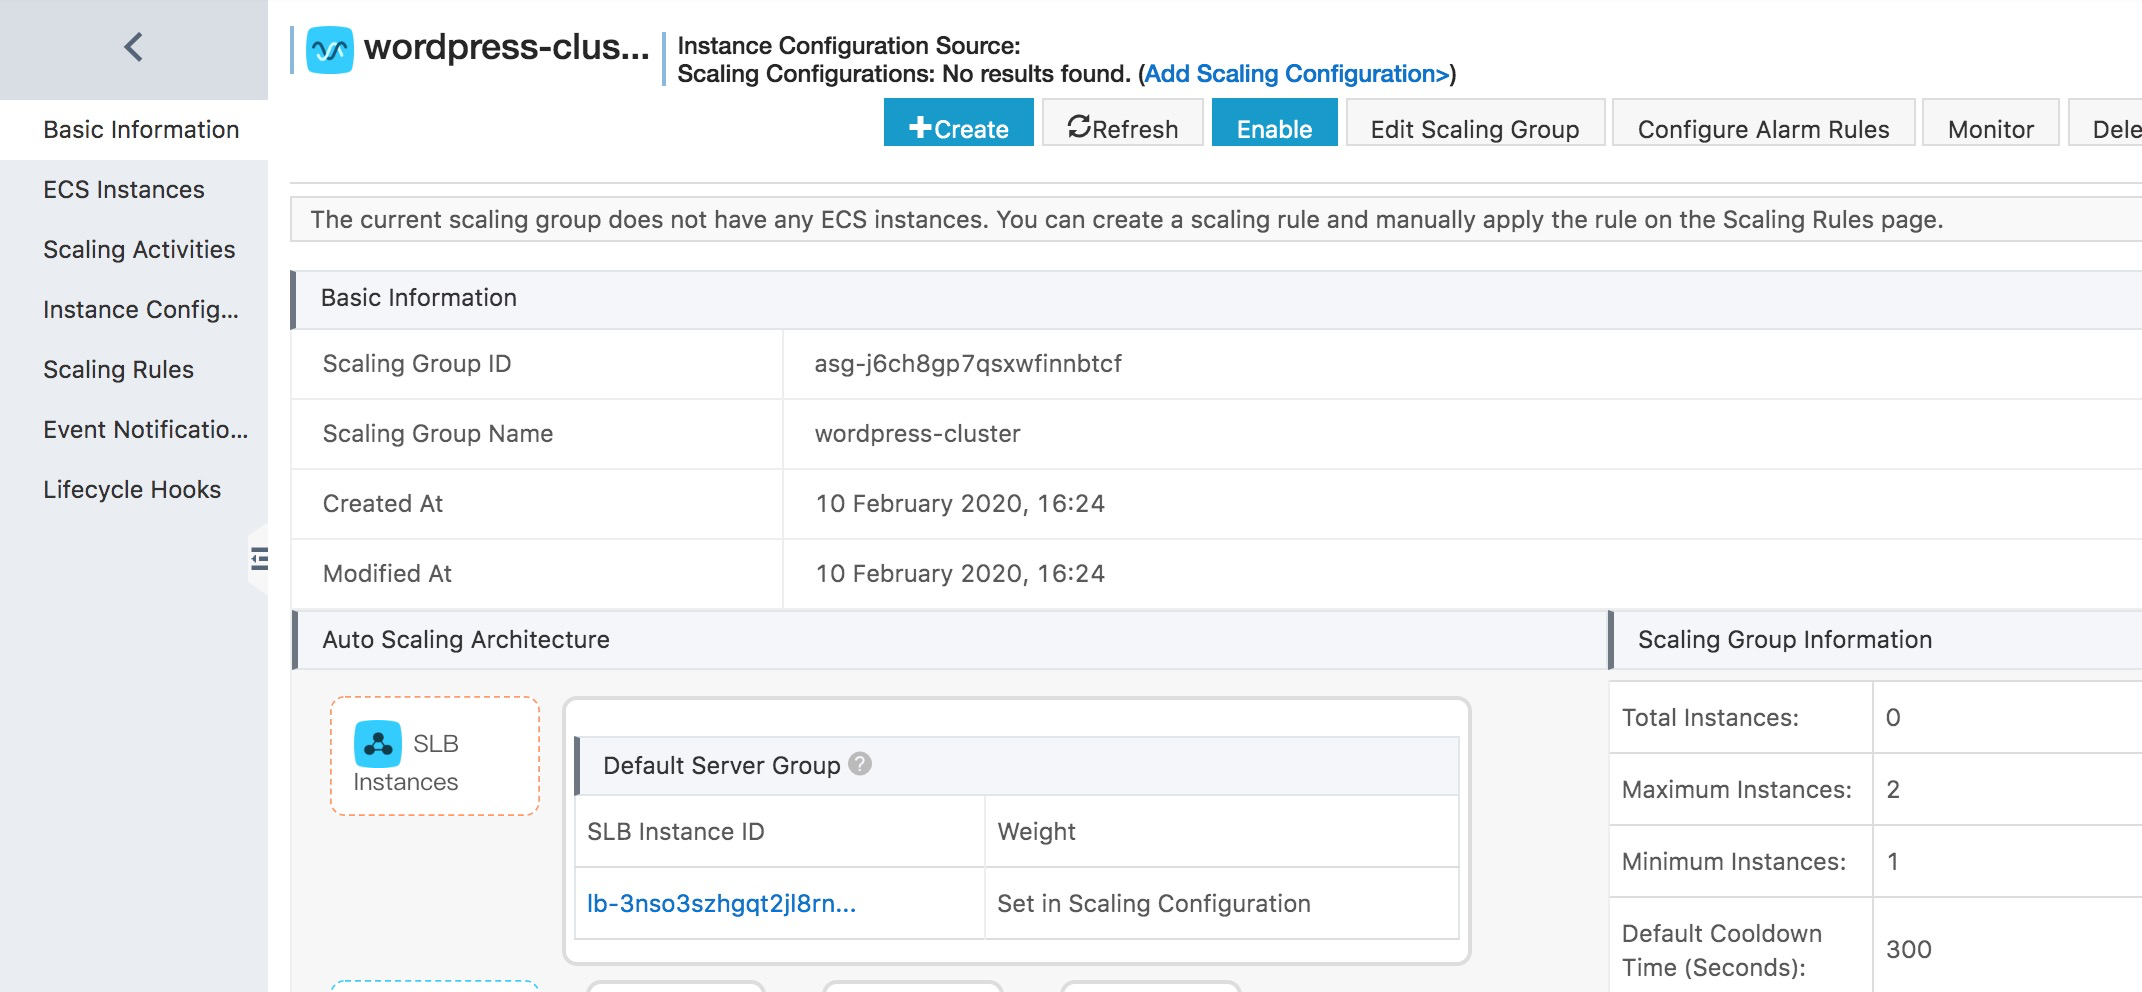
Once complete, we can remove the original machine from the Server Load Balancer, so we can modify the first post from the original machine.

Now you will see both content and media changes directly reflected in the version behind the Server Load Balancer.
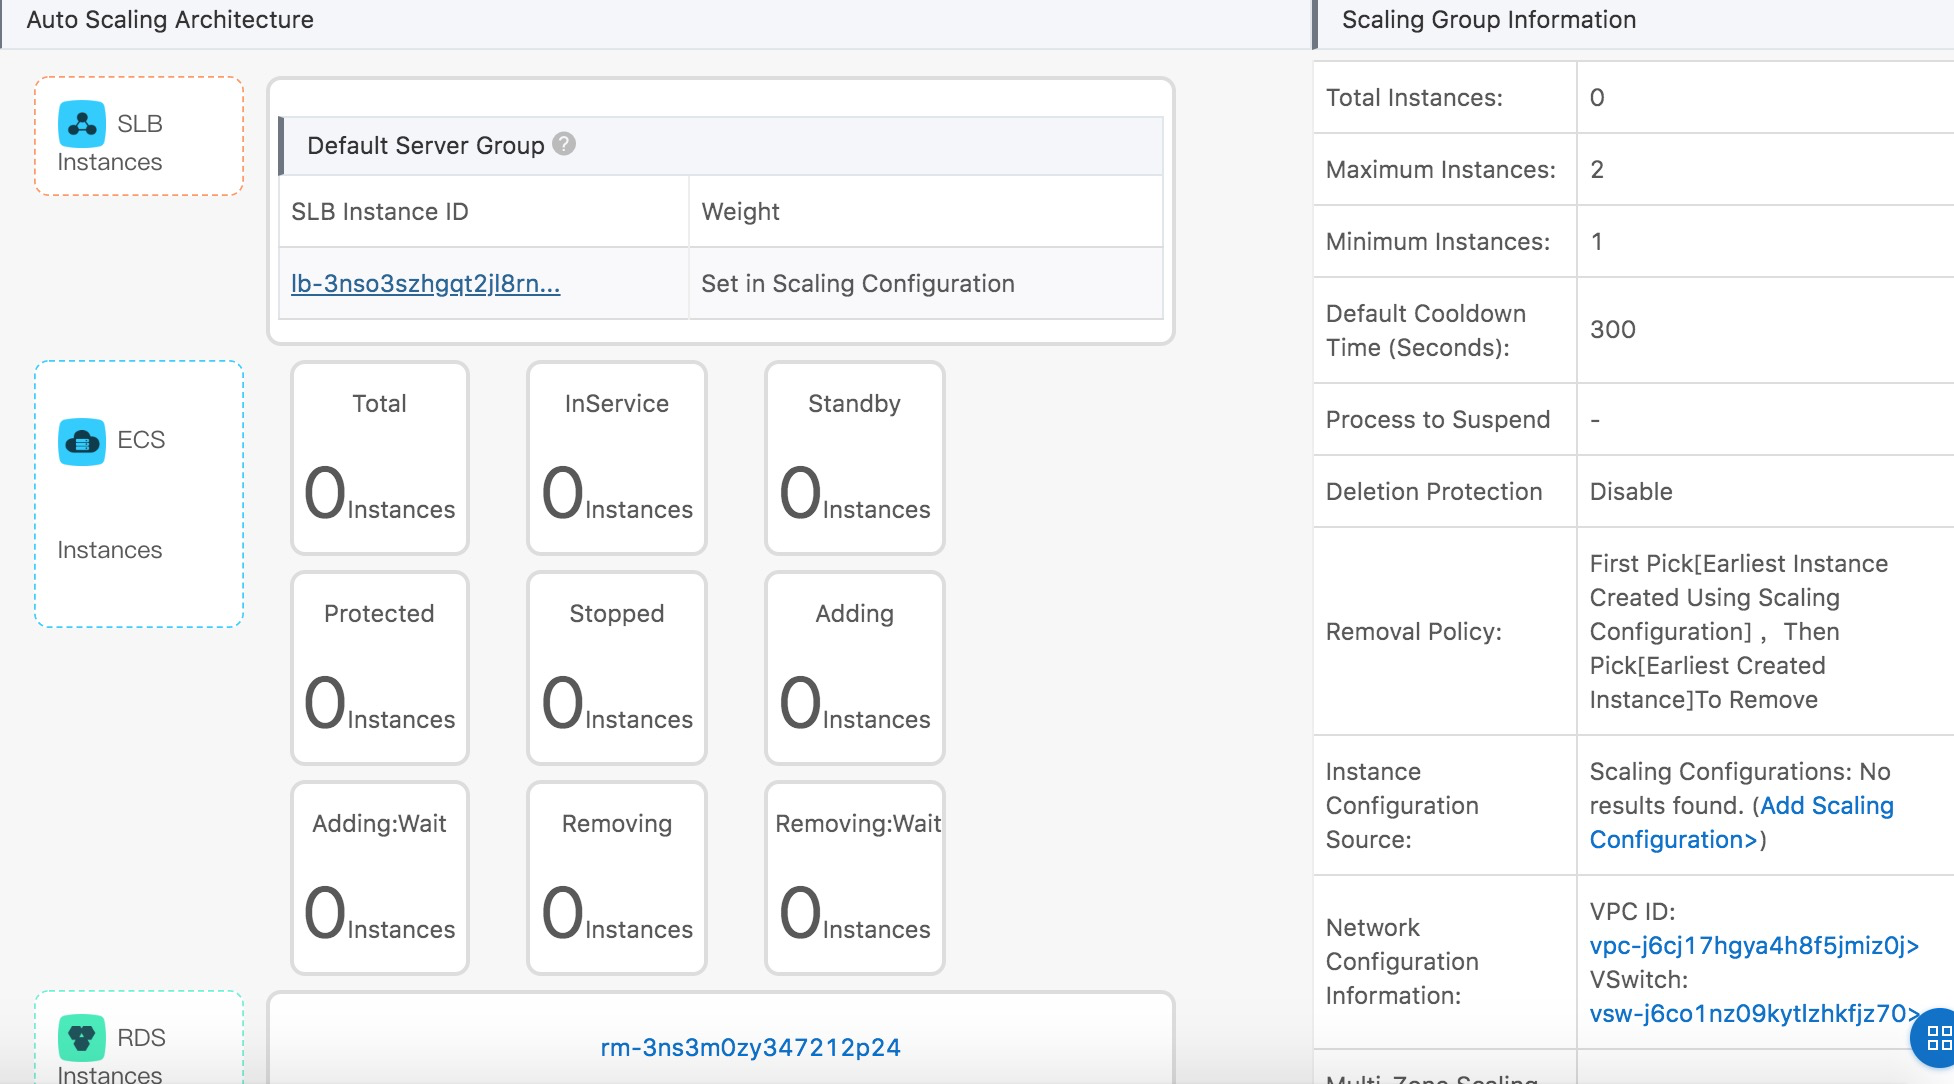
And that's it! You should now have an Alibaba Cloud multi-tier WordPress site that is ready to scale to match demand.
How to Manage Files Visually on Linux with Midnight Commander

2,598 posts | 769 followers
FollowAlibaba Clouder - July 8, 2020
Alibaba Clouder - April 24, 2018
Alibaba Clouder - August 31, 2018
Alibaba Clouder - April 25, 2018
Alibaba Clouder - February 10, 2020
Alibaba Clouder - August 15, 2018

2,598 posts | 769 followers
Follow ECS(Elastic Compute Service)
Elastic and secure virtual cloud servers to cater all your cloud hosting needs.
Learn More ApsaraDB RDS for MySQL
An on-demand database hosting service for MySQL with automated monitoring, backup and disaster recovery capabilities
Learn MoreLearn More
More Posts by Alibaba Clouder