In an earlier tutorial, we looked at how to create a website using Alibaba Cloud. This involved registering a domain name on Alibaba Cloud, signing up for an Alibaba Cloud Web Hosting package, and then using the Alibaba Cloud DNS product to link the two items together. This final step ensured that someone who typed our chosen domain name into their web browser would get to see the pages uploaded to our Web Hosting account.
In this tutorial, we will look at some other features of the Alibaba Cloud domain name registration, Web Hosting and DNS products that you may find useful.
Firstly, we will look at how to "transfer in" a domain name. Then we'll install WordPress and the WooCommerce add-on as an illustration of how to use a Web Hosting site for e-commerce and content management. Then we'll examine some of the advanced Alibaba Cloud DNS settings that can help to improve the performance of a website.
Internet domain names form the basis of a single global database. There are many companies worldwide, known as registrars, who will register a new domain name on your behalf and add it to that single global database.
When you register a domain name, that registration is associated with the registrar through which you made the registration. Use of the name itself belongs to you, and only you can control what happens to it and which website (if any) and email addresses (if any) it points to. To make changes to the domain name, such as changing its Domain Name System (DNS) entries for a website or email, you have to log into the website of the registrar that you originally used.
When the time comes to renew the domain registration (between 1 and 10 years, depending on how long you registered it for), this also needs to be done through the original registrar's website.
Each registrar sets its own pricing for domain name registrations, and these can vary considerably. This is one reason why a website operator might choose different registrars for different names. Also, not every registrar accepts registrations for every available top-level domain. So sometimes the choice of registrar will be governed by which one can provide the top-level name you require. While almost every registrar will be able to register a .com domain for you, this may not be the case for, say, a .cn or a .edu name.
When you create a new website there's no compulsion to purchase the domain name and web hosting from the same company. It can simplify things if you do, because you only need to deal with one company if you need help. Also, you may well get a better deal if you buy everything from the same place. Plus, if everything is in one place it could result in a small decrease in the site's loading speed for your visitors.
It's possible to transfer the ownership of an existing domain registration from one registrar to another, and this is known as "transferring in".
But why bother transferring a domain name registration? It may be that, for historical reasons, your company's collection of domain names (perhaps one for each of its well-known products or brands) was purchased through different registrars and you want to consolidate them into one account with one registrar. Or maybe you're unhappy with the customer service or reliability of your current registrar.
Or maybe you are in the process of moving your web hosting to a new provider such as Alibaba Cloud in order to upgrade from a basic web host package to a full virtual server, and you want to keep everything tidy and efficient by having the domain name registered with Alibaba Cloud too.
One option is to wait for the registration to expire, and then re-register it via Alibaba Cloud. However, this is not recommended because it's possible that someone else could register it before you have a chance to do so.
To transfer an existing current registration from another registrar into Alibaba Cloud, here's what you need to do.
In this example, we have registered my-domain-name.win with another registrar and will transfer it in to Alibaba Cloud.
Incidentally, note that rules dictated by the internet's international governing body state that no domains can be transferred between registrars within the first 60 days of being registered. So, if you registered a domain name less than two months ago you won't be able to transfer it to any other registrar yet.
To perform the transfer, first log into your existing registrar's website and ensure that your contact details, especially your registered email address, are up to date.
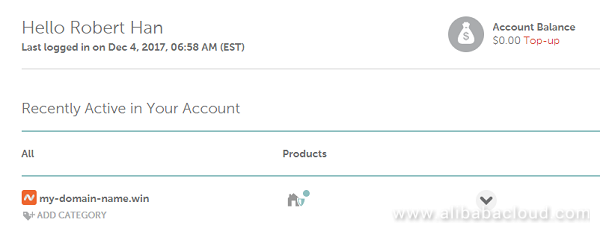
Next, ensure that your domain is unlocked. Most registrars offer something called registrar lock, or domain lock, which helps to prevent unauthorized transfers. To transfer the domain name you need to unlock it. Refer to the help pages on your current registrar's website for details on how to do this.

Next, you'll need to request a transfer authorization code from the current registrar. Again, this should be available via their web control panel page and may be called an authorization code, auth code, an EPP code or a transfer key. The code will be sent to the email account registered as the holder of the registration, which is why it's important that your contact details are correct.
After a short while you should receive an email containing your code:

Note that it's vitally important to keep the authorization code confidential once you receive it. Do not disclose it to anyone. If someone obtains the code before you have completed the transfer, they can use it to transfer your domain name to themselves and direct your website's visitors to anywhere they choose.
Once you have the authorization code, head to Alibaba Cloud's domain name page at https://www.alibabacloud.com/domain and register your domain name again. You'll need to pay the associated fee.
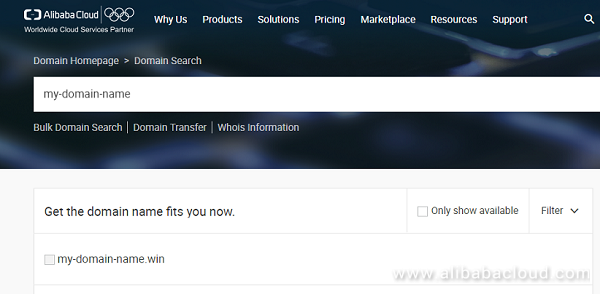
In due course, you will receive an email from Alibaba Cloud confirming your request to transfer in, and asking for your authorization code. Once you have supplied the code and confirmed the email, the transfer will complete.
Alibaba Cloud Web Hosting provides a quick, flexible and cheap way to set up a website on Alibaba Cloud using a shared server platform without the need to create or pay for a dedicated virtual server.
In the previous Web Hosting tutorial, we showed how to use Web Hosting to create a basic site on a shared server, complete with a domain name, and how to upload a single test page to ensure that the site was working correctly.
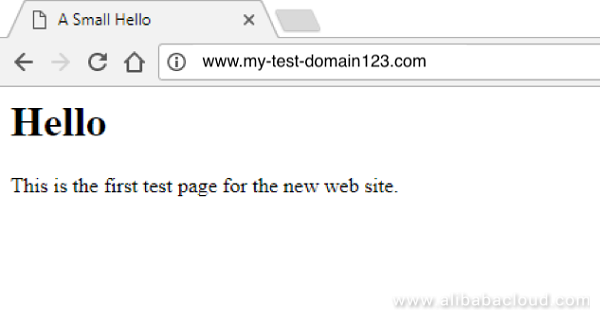
The domain we registered was my-test-domain-123.com and the website at
www.my-test-domain-123.com looked like this:
Instead of merely uploading static pages to an Alibaba Cloud web hosting area it's also possible to install complete web applications. To show you how, we'll install WordPress and then install the WooCommerce e-commerce add-on too.
In order to proceed you'll need an existing Alibaba Cloud Web Hosting package set up.
To start, log into your Alibaba Cloud console. Under Domains & Websites, click on Web Hosting. Locate your Web Hosting package in the list shown, and click the Manage button to the right.
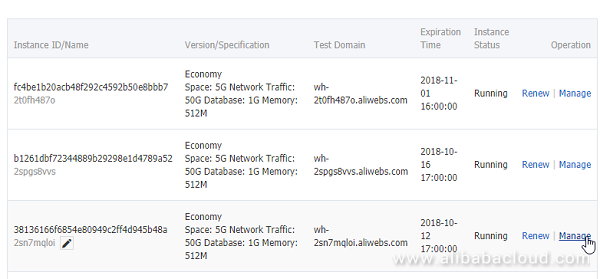
Next, under Environment Settings on the left hand side of the screen, click on Default Homepage Settings and you'll see a screen like this.
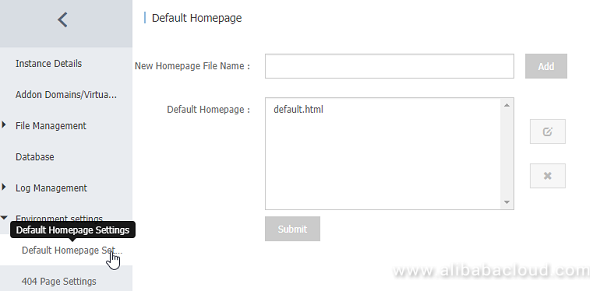
The default WordPress home page in each of its various folders is called index.php so we need to add this name as a default.
Add a new default homepage called index.php to the list. If there are any others, use the X button to delete them until the screen looks like this:
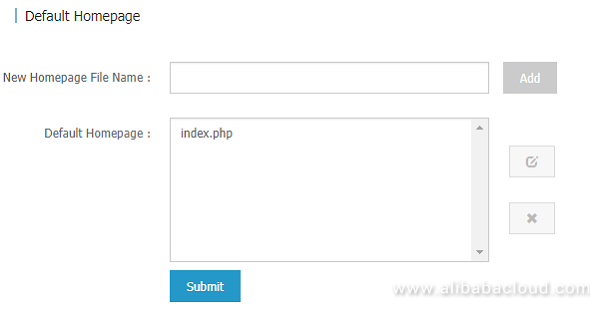
Click on Submit to save the changes.
Next, from your Alibaba Cloud console under Domains and Websites, click on Web Hosting again, and click the Manage button to the right of the Web Hosting package in the list.
You should already have the FTP address, username and password noted down from the previous tutorial or video. You'll need these shortly.
To install WordPress, you will also need the details of the MySQL database that is included free of charge with your web hosting package.
In the Database section of the screen you'll see the database name, username and connection address. Make a note of these. Click on Reset Password, choose a database password, and make a note of that too.
Next, head to the official WordPress site at www.wordpress.org and download the latest version of the software, which will be in a .ZIP file. Assuming you're using a Windows PC, right-click the downloaded file and choose Extract All. You now have a copy of the WordPress software in a folder on your computer, ready to upload to the Web Hosting server. But before you upload it there's one settings file that you need to edit.
Look through the folder that contains the unzipped files (make sure you're not looking in the .ZIP archive itself) and you should see the files like this:
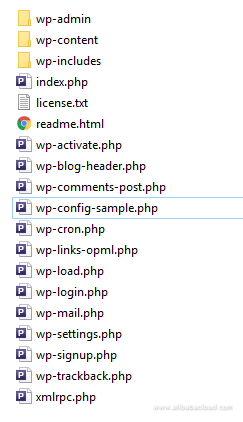
Use a text editor such as Notepad (do not use a word processor such as Microsoft Word or it won't work) to edit the wp-config-sample.php file and locate the database details section:
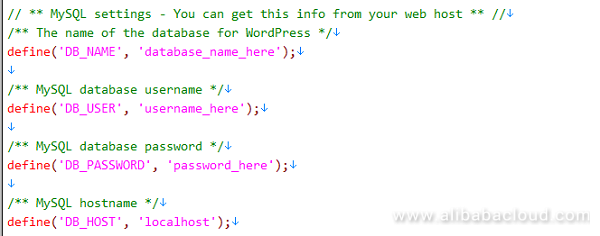
Change database_name_here to the name of the database that you noted earlier.
Change username_here to the database username you noted earlier.
Change password_here to the database password you chose.
Change localhost to the database connection address you noted earlier.
It should now look something like this:
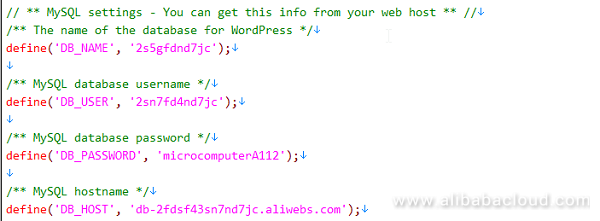
When you have finished, save the file as wp-config.php (note the change in filename). Then delete the wp-config-sample.php file as it is no longer needed.
You are now ready to upload WordPress to your Web Hosting area. So fire up your chosen FTP program and log into the server using the FTP details you noted in the previous tutorial or video.
In this example, we'll use the free FileZilla FTP program and it will look like this once you've connected and logged in:
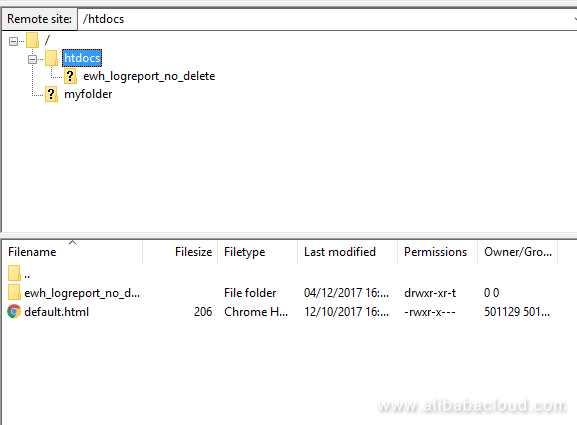
Ensure that you're in the htdocs folder or directory, as that's where you need to store all the files that make up your website.
Delete the original home page you created in the previous tutorial (default.html in this case).
Then upload the entire contents of the WordPress folder on your computer, that you downloaded from the WordPress website, and which contains your edited wp-config-php file.
It will take a few minutes as there are around 1,800 files to upload. When it's finished your FTP program will look something like this:
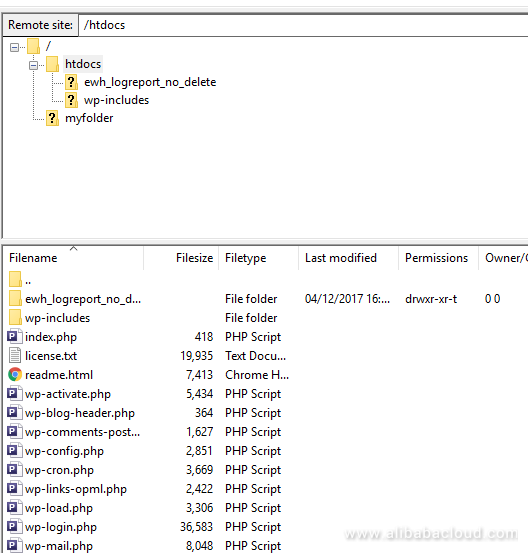
In this example, we have uploaded WordPress to the root of our site. In other words, right into the main htdocs directory. If you prefer, you can make a subfolder and upload WordPress into that.
You can now close your FTP program, and your Alibaba Cloud console if it's still open.
Open a web browser and visit the WordPress installation page on your Web Hosting site, in order to complete the setup process. The URL is the address of your web hosting site which is http://www.my-test-domain-123.com in this example.
To install WordPress, follow the on-screen instructions. When it's finished, log into your site using the username and password you created during the WordPress setup process.
With WordPress installed you can now add the WooCommerce plugin. From the WordPress dashboard click on Plugins and search for WooCommerce (check that the listing says that it is the version by Automattic).
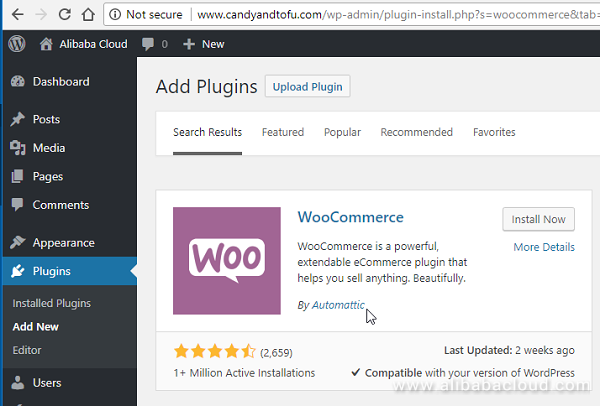
Click on the Install Now button to install it. Then click on the Activate button to activate it.
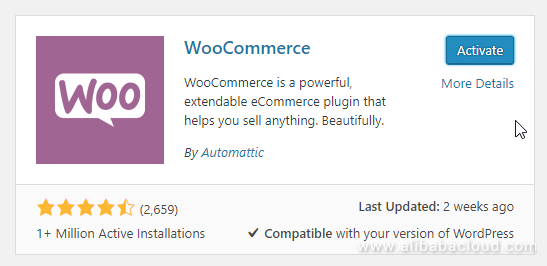
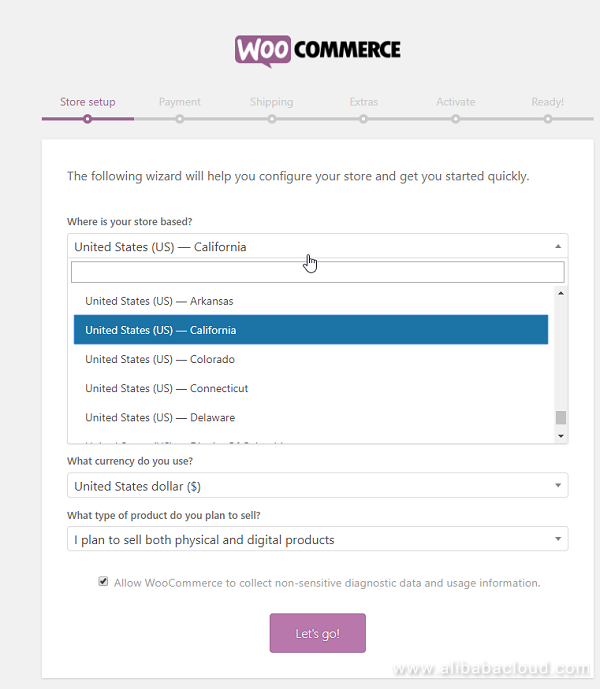
You can the configure WooCommerce as you wish, to set up your collection of products that make up your online store. You can also link it to your online payment provider if you wish.
A website comprises three key technologies, each of which works together to make the site function correctly. Until all three of these are in place the site won't work. And while it's customary for the three to be implemented in the order which follows, in practice it doesn't really matter.
Firstly, there's the domain name, which gives the site a recognizable brand and allows visitors to access it by typing the name into their web browser.
Secondly, there's the web server which stores the actual HTML files and images (and possibly a database too) that make up the site. The web server has an IP address, which is a series of digits, through which it can be accessed.
Thirdly, there are the DNS entries. DNS is the global directory that stores each website domain name and the corresponding IP address of its server. If you didn't set up the DNS entries correctly, or at all, visitors would only be able to access your website by knowing and typing its IP address rather than its name.
Every time you visit a website by typing in its name, your computer first connects to a DNS server in order to find out the IP address of the website's server. It can then connect to the server in order to retrieve the page you asked for.
When you set up an Alibaba Cloud Web Hosting package, the price includes standard Alibaba Cloud DNS so that your visitors will be able to find your site by name. Details of how to set up your DNS entries for Web Hosting were covered in our previous tutorial.
Alibaba Cloud also offers an Advanced DNS system, available for an extra payment, which provides a number of additional features that may be useful, especially on heavily-used websites.
In this section, we will show you how to access those additional features and explain some of the benefits of using them.
It is assumed that you have already set up a Web Hosting product on your Alibaba Cloud account.
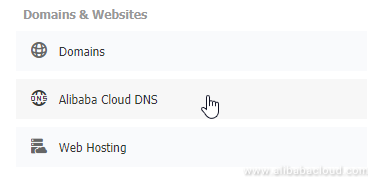
From your main console screen, under Domains and Websites, click on Alibaba Cloud DNS.
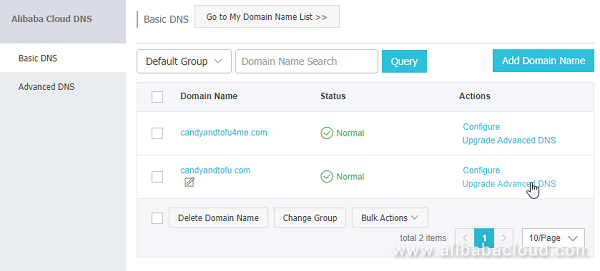
Locate your web hosting package in the list (in this case it's my-test-domain-123.com) and click on the Upgrade Advanced DNS link.
You will see all available options. Let's take a look at what they can do for you and your website.
There are many DNS servers in the world, and they all communicate with each other in order to keep the database updated. For example, the Alibaba Cloud DNS servers will update other servers when new websites are created on Alibaba Cloud. Conversely, other servers will update Alibaba Cloud about new websites on servers other than those belonging to Alibaba Cloud.
That's why it can take a few minutes for DNS changes to take effect. You have to wait for all the world's DNS servers to update their records before you can ensure that everyone will be able to access your site.
By reducing the TTL, or time to live, you can reduce the delay in updating your DNS records. However, unless you frequently update your DNS records for your website, or you want the ability to quickly point your domain name at a new server if there's a problem, you probably won't need to change this setting.
The standard default setting in Alibaba Cloud Basic DNS is 10 minutes. Advanced DNS lets you reduce this to just a matter of seconds.
There are various types of DNS settings, known as records. An "MX" record deals with email rather than websites. It specifies which email server or service should receive incoming email sent to addresses within the particular domain. MX stands for Mail Exchange.
An "A" record (A stands for Address) is the basic type of record which links a server's IP address to a domain name for a website. You can create multiple "A" records to set up multiple subdomain websites. For example, if you own my-test-domain-123.com you might want your main website at www.my-test-domain-123.com, your mobile-friendly site at m.my-test-domain-123.com, and your staff intranet at staff.my-test-domain-123.com. Multiple "A" records would allow you to do this.
If you run a website on multiple servers, each located in different parts of the world, you can use the World Lines feature to automatically ensure that visitors to your site connect to their nearest server. You can specify a location by continent or country, and thus set up rules such as "if the visitor is based in the USA then direct them to the Silicon Valley server, otherwise direct them to the Beijing one".
If you only have one server right now, leave this set to "world".
One way that attackers attack a website is to attempt millions of simultaneous connections to the site from a large number of computers. This can cause the server which provides DNS services to the site to crash, and thus result in the site being unreachable.
The QPS setting stands for Queries Per Second, and uses Alibaba Cloud's protection which is currently used to defend more than 10 million domain names against these so-called DNS query attacks. If it's important that your site is always available, consider using this setting to improve its resilience to attackings.
Select the advanced DNS options you want, and check the price. You can purchase your options for a month or a year.
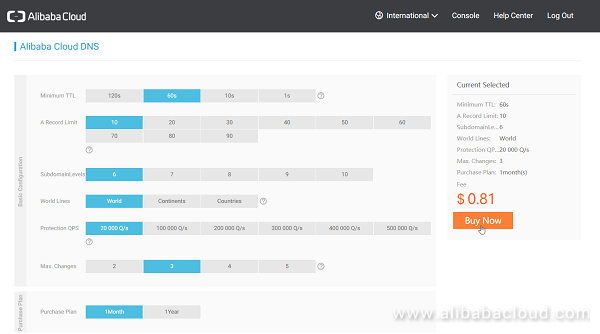
Click on Buy Now, and review your order.
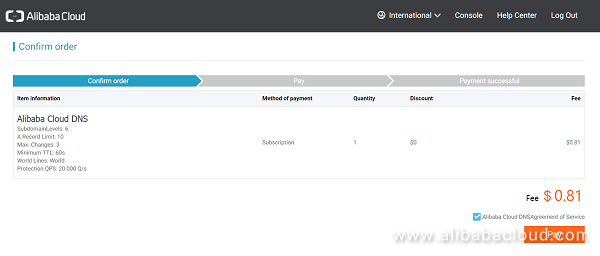
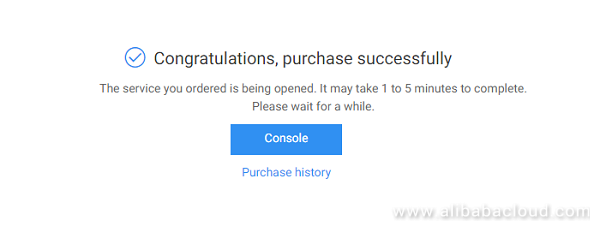
Click on Pay to complete your purchase.
This tutorial has introduced new features and services which complement those discussed in a previous Tutorial covering the Alibaba Cloud Web Hosting product.
We have illustrated how to "transfer in" a domain name to Alibaba Cloud from another provider. We have shown how to set up an e-commerce site on Alibaba Cloud Web Hosting by installing WordPress and WooCommerce. And we have outlined some of the advanced features in Alibaba Cloud's DNS service.
For further information about any of these topics see www.alibabacloud.com/blog.

2,593 posts | 792 followers
FollowAlibaba Clouder - August 14, 2019
Alibaba Clouder - February 10, 2020
Clouders - January 13, 2022
Alibaba Clouder - July 24, 2018
Alibaba Clouder - August 26, 2020
Alibaba Clouder - April 16, 2018

2,593 posts | 792 followers
Follow Web Hosting
Explore how our Web Hosting solutions help small and medium sized companies power their websites and online businesses.
Learn More Domains
Over 20 million domain, free WHOIS privacy protection.
Learn More DNS
DNS
Alibaba Cloud DNS is an authoritative high-availability and secure domain name resolution and management service.
Learn MoreMore Posts by Alibaba Clouder