By Francis Ndungu, Alibaba Cloud Tech Share Author. Tech Share is Alibaba Cloud's incentive program to encourage the sharing of technical knowledge and best practices within the cloud community.
PhpMyAdmin is a web-based Graphical User Interface (GUI) application for administering MySQL and MariaDB database servers. The Open-source software is written in PHP and is widely adopted by developers to run database operations such as creating databases, tables, columns, indexes, permissions and users.
The application also enables users to directly execute SQL statements. Due to its intuitive interface, well documented reading materials and wide range of support from developers, PhpMyAdmin is considered as one of the best and mature Open-source projects.
Its graphical web interface and advanced features such as ability to import and export data in CSV and SQL format makes phpMyAdmin an acceptable tool for managing mission critical database management systems.
While it is accessed over the internet, this opens up a security challenge for developers as the application must be well set up and secured. This forms the basis of this article.
This is a comprehensive tutorial that takes you through the steps of setting up and securing phpMyAdmin on your Elastic Compute Service (ECS) Ubuntu 16.04 server running on Alibaba Cloud.
Before getting started you need to:
Prior to installing phpMyAdmin, you should ensure that Apache web server, MySQL server and PHP packages are installed.
To check whether Apache is installed, run the command below:
$ service apache2 status | grep activeIf Apache is installed and running, you should see the below output:
Active: active (running) since Tue 2018-10-23 00:49:19 EAT; 10h agoIf Apache is not installed, the output will look as follows:
Active: inactive (dead)If this is the case, update the package information index and install Apache using the commands below:
$ sudo apt-get update
$ sudo apt-get install apache2
Press Y and hit Enter when prompted to confirm the installation
The next step is to make sure that MySQL is installed. Just like we did for Apache, you can check the status of MySQL server by running the command below:
$ service mysql status | grep activeYou should have an output similar to the one below if the MySQL server is running:
Active: active (running) since Sun 2018-10-21 10:24:44 UTC; 1 day 21h agoIn case MySQL is not installed, the output will look similar to the text below:
Active: inactive (dead)You can run the command below to install MySQL server in case it is not setup in your ECS instance:
$ sudo apt-get install mysql-serverPress Y and hit Enter when prompted to confirm the installation.
Towards the end of the installation, you will be prompted to enter a root password for the MySQL server. (Don't confuse this with the password for your Ubuntu server).
Remember a default MySQL server installation is not secure and you should run the command below to remove anonymous users, test databases and disable remote root login.
$ sudo mysql_secure_installationRespond with the below answers when prompted to secure your MySQL server.
Enter password for root user: PASSWORD
Setup Validate password Plugin: Y
Password validation policy level: 2
Change password for root: N (unless you want to change the password)
Remove anonymous users: Y
Disallow remote root login: Y
Remove test database: Y
Reload privileges table: Y
You should get a success message at the end of the prompts.
Once you are sure Apache and MySQL servers are working, the next step is to check the status of PHP scripting language with the command below:
$ php -vIn case PHP is installed, you should see at text almost similar to the below text:
PHP 7.0.32-0ubuntu0.16.04.1 (cli) ( NTS )
Copyright (c) 1997-2017 The PHP Group
Zend Engine v3.0.0, Copyright (c) 1998-2017 Zend Technologies
    with Zend OPcache v7.0.32-0ubuntu0.16.04.1, Copyright (c) 1999-2017, by Zend Technologies
If the service is not active, you should get the output below:
The program 'php' can be found in the following packages:
 * php7.0-cli
 * hhvm
Try: apt install <selected package>
In that case, it means you should install PHP in order for phpMyAdmin to work. To do this, run the commands below:
$ sudo apt-get install php libapache2-mod-phpHit Y and press Enter to confirm the installation
PhpMyAdmin requires certain PHP modules to be installed and loaded on the system. We are going to run the command below to install them:
$ sudo apt-get install php-cli php-common php-mbstring php-gd php-intl php-xml php-mysql php-zip php-curl php-xmlrpcPress Y and hit Enter when prompted to confirm the installation.
The default PHP settings may not work well with phpMyAdmin, so we are going to tweak the settings. To do this, open the php.ini file
$ sudo nano /etc/php/7.0/apache2/php.iniRemember to replace 7.0 with the version of your PHP. A quick way to check this value is by running the command below
$ sudo ls -a /etc/phpThe version should be displayed as follows:
. .. 7.0Once you open the PHP configuration file using a text editor, look for the following values
upload_max_filesize =2M
post_max_size=8M
memory_limit=128M
Ensure the value of upload_max_filesize is larger than any database that you want to import via phpMyAdmin.
Also the value of post_max_size should be greater than the value of upload_max_filesize. For instance, you can change the values to:
upload_max_filesize =16M
post_max_size=24M
The memory_limit value also affects file uploading and therefore, this figure should be larger than post_max_size. Since the default value is 128M, this value is rarely changed unless you anticipate to be dealing with databases larger than this value.
Close the php.ini file by pressing CTRL+X, Y and Enter.
Remember to restart Apache web server for the changes to take effect:
$ sudo service apache2 restartOnce we have the right environment on the server, we can go ahead and install phpMyAdmin. The package is available on Ubuntu software repository, so we will install it using the apt command as shown below:
$ sudo apt-get install phpmyadminWhen prompted to continue, press Y and hit Enter.
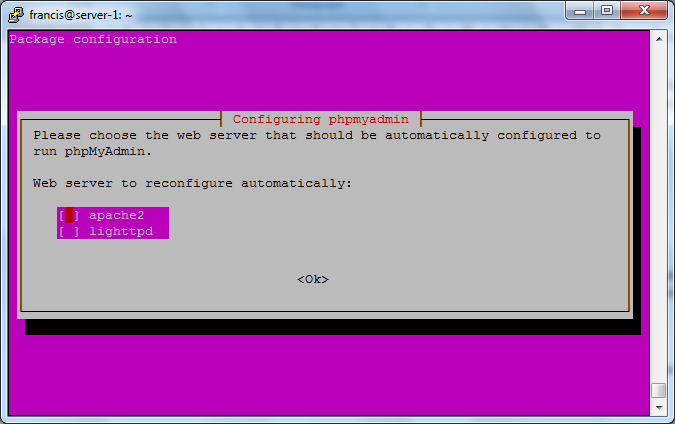
You will be prompted to choose a web server. Choose apache2, press TAB and hit Enter to continue.
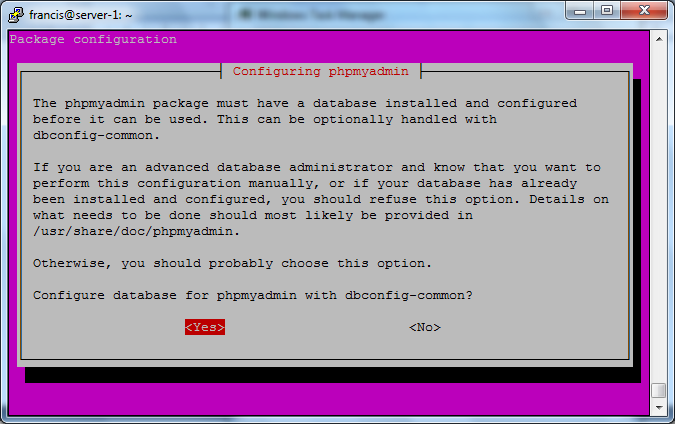
Next, choose Yes and press Enter to configure a database for phpMyAdmin with dbconfig-common as shown below:
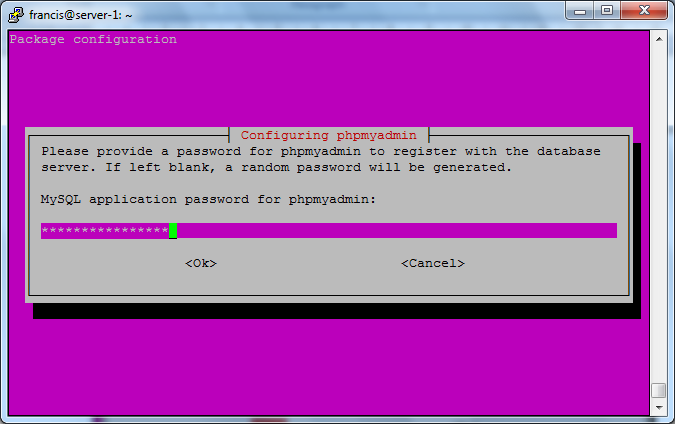
Next, supply a password for phpMyAdmin that will be registered with the database server.
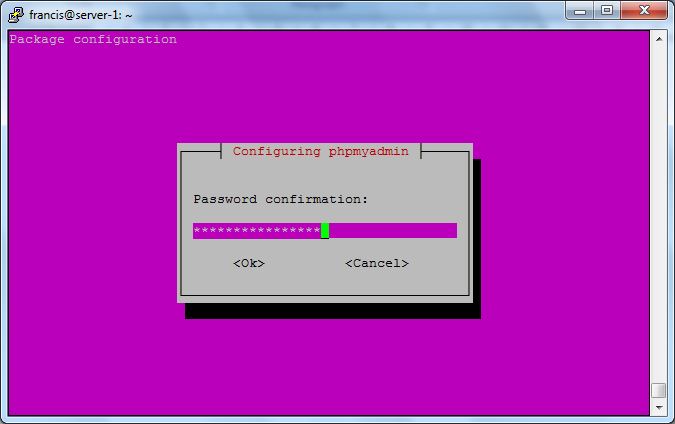
Confirm the value again and hit Enter to proceed:
Next, we are going to create a symbolic link under the /etc/phpmyadmin/apache.conf directory using the commands below:
$ sudo ln -s /etc/phpmyadmin/apache.conf /etc/apache2/conf-available/phpmyadmin.conf
$ sudo a2enconf phpmyadmin.conf
Then, we can restart Apache one more time for the changes to take effect:
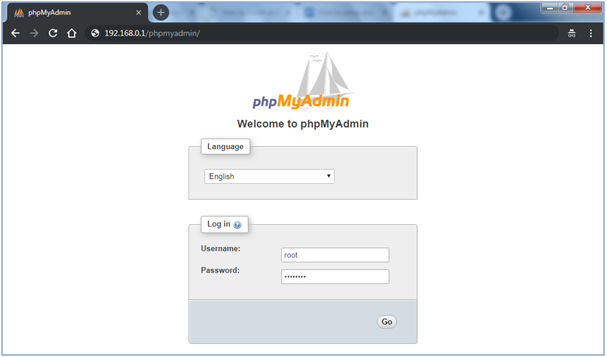
$ sudo service apache2 restartUp to this point, you can visit the below address to login to phpMyAdmin web-based interface. Remember to replace 192.168.0.1 with the correct public IP address of your Ubuntu 16.04 Alibaba Cloud ECS server:
$ 192.168.0.1/phpmyadminEnter the username (e.g. root) and password for your MySQL server to continue.
Once, logged in, You should see a screen similar to the one shown below.
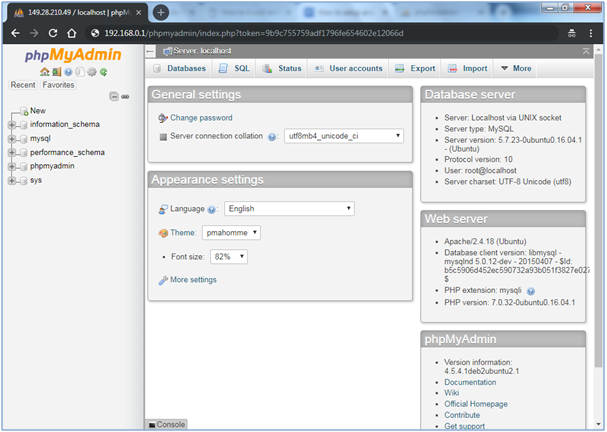
On this screen, you can create a new database, users or even import data from SQL or CSV files.
As mentioned earlier, phpMyAdmin is a web based application. Therefore, anyone with internet access can reach the path of your phpMyAdmin and this is a security risks especially if you have not set very strong passwords for your database users.
Automated bots may try to conduct brute-force attacks and if your passwords are weak, the entire database system may be compromised.
To get around this problem, we can add another layer of security by incorporating Apache basic authentication feature to harden the phpMyAdmin login page. To do this, we will edit Apache to accept .htaccess file.
To do this, open the below file using nano text editor:
$ sudo nano /etc/apache2/conf-available/phpmyadmin.confNext, we need to add the line AllowOverride All insider the </Directory> tags as shown below closing tag
...
<Directory /usr/share/phpmyadmin>
    Options FollowSymLinks
    DirectoryIndex index.php
    AllowOverride All
...
</Directory>
...
Then, we are going to create a .htaccess file and place it under the /usr/share/phpmyadmin path
$ sudo nano /usr/share/phpmyadmin/.htaccessWe are going to paste the below information on the file. We will be using Basic authentication and anyone trying to reach the phpMyAdmin login page will be prompted to enter a username and a password. Only valid-users from the password file located at /etc/phpmyadmin/.htpasswd will be authenticated.
Copy the below text to the password file:
AuthType Basic
AuthName "This page is restricted"
AuthUserFile /etc/phpmyadmin/.htpasswd
Require valid-user
Then save the file by pressing CTRL+X, Y and Enter.
Next, we can populate the password file with a username and password. Assuming you want to use john as your username , run the command below:
$ sudo htpasswd -c /etc/phpmyadmin/.htpasswd johnEnter the password and confirm it when prompted and hit Enter to proceed. You can add more users on the file by running the command again. However, this time, just omit the -c option as shown below:
$ sudo htpasswd /etc/phpmyadmin/.htpasswd doeRestart Apache web server for the changes to take place:
$ sudo systemctl restart apache2If you try to access the phpMyAdmin login page again, you should now be prompted to enter the username and password that you defined in the /etc/phpmyadmin/.htpasswd file as shown below.
Once you are authenticated by Apache, you can then enter your database username and password to proceed with the login.
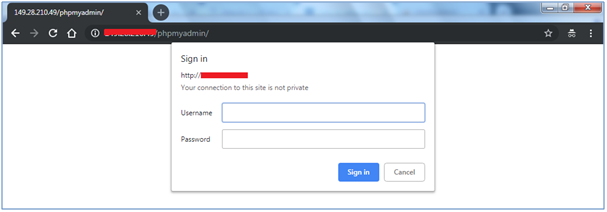
This adds another layer of security to your phpMyAdmin login page because only authorized users will be able to reach the page. This will keep hackers and automated bots away.
That's all when it comes to installing and securing phpMyAdmin on Ubuntu 16.04 with Apache on your Alibaba Cloud ECS instance. Remember to use strong values for the password both when creating database users and when assigning credentials for the authorization page.
If you are new to Alibaba Cloud, you can sign up now get up to $1200 worth in free credit to test over 40 products including ECS instances that support Apache, PHP and MySQL servers.

31 posts | 8 followers
FollowAlibaba Clouder - March 26, 2019
francisndungu - May 29, 2019
Alibaba Clouder - May 9, 2019
Alibaba Clouder - May 7, 2019
Alibaba Clouder - May 10, 2019
Alibaba Clouder - May 22, 2019

31 posts | 8 followers
Follow ApsaraDB RDS for MySQL
An on-demand database hosting service for MySQL with automated monitoring, backup and disaster recovery capabilities
Learn More ApsaraDB RDS for PostgreSQL
An on-demand database hosting service for PostgreSQL with automated monitoring, backup and disaster recovery capabilities
Learn More ApsaraDB RDS for MariaDB
ApsaraDB RDS for MariaDB supports multiple storage engines, including MySQL InnoDB to meet different user requirements.
Learn More ApsaraDB RDS for SQL Server
An on-demand database hosting service for SQL Server with automated monitoring, backup and disaster recovery capabilities
Learn MoreMore Posts by francisndungu
5701290982401952 June 1, 2020 at 3:34 am
Thank you for your help! It is very useful! Have a good day!