By Sajid Qureshi, Alibaba Cloud Tech Share Author. Tech Share is Alibaba Cloud's incentive program to encourage the sharing of technical knowledge and best practices within the cloud community.
Lighttpd is an open source web server, which is designed and optimized for high-performance environments. It is a fast, secure, and flexible web server, making it a perfect alternative for Apache and Nginx. Lighttpd can be used to serve high traffic sites even on a small virtual private servers.
In this guide, we will show you how to install Lighttpd on your Alibaba Cloud Elastic Compute Service (ECS) Ubuntu 16.04 server with PHP and MySQL.
1. You must have Alibaba Cloud Elastic Compute Service (ECS) activated and verified your valid payment method. If you are a new user, you can get a free account in your Alibaba Cloud account. If you don't know about how to set up your ECS instance, you can refer to this tutorial or quick-start guide. Your ECS instance must have at least 1GB RAM and 1 Core processor.
2. A domain name registered from Alibaba Cloud. If you have already registered a domain from Alibaba Cloud or any other host, you can update its domain nameserver records.
3. Root user
We recommend you to install any new packages on a freshly updated server. First of all, upgrade all the available packages using the following command.
apt-get updateOnce the system is updated, you can proceed further to install MySQL and to do so execute the following command.
apt-get -y install mysql-server mysql-clientYou'll be asked to enter MySQL password for root user so, type the password and confirm it by repeating password then hit the enter button.
MySQL is successfully installed so, let's harden the security of it using the following command.
mysql_secure_installationYou'll be asked to enter the root password then hit the enter button. Then you'll be asked some general questions about the database and its user, finish this by typing Y for yes and any other key for no.
MySQL is installed and fully secured now. Next, you will need to install Lighttpd and PHP, here we will install PHP 7.0. Lighttpd is available as an Ubuntu package so we can directly install it using the following command.
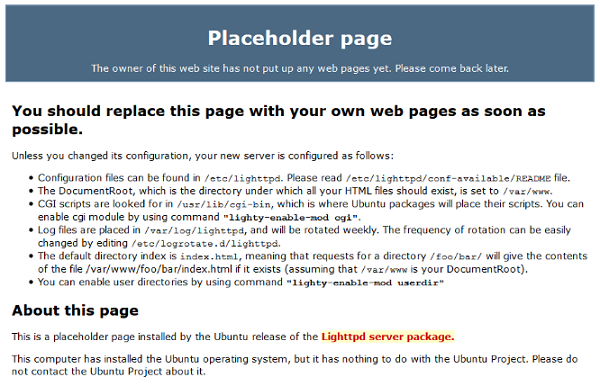
apt-get -y install lighttpdYou can verify this installation by visiting http://YourServerIP through a web browser, and you should see the Lighttpd placeholder page like this:

Next, we will install PHP-FPM using the following command.
apt-get -y install php7.0-fpm php7.0We have installed Lighttpd with all the required packages and now we will have to configure the Lighttpd to work with PHP. First of all, you will need to modify ''php.ini'' file using any text editor.
nano /etc/php/7.0/fpm/php.iniFind and uncomment the line cgi.fix_pathinfo=1: by removing semicolon before the line. Save the file and exit from the text editor.
Next, you'll need to create a backup of the PHP configuration file using the following commands.
cd /etc/lighttpd/conf-available/cp 15-fastcgi-php.conf 15-fastcgi-php.conf.bakNow, modify the original PHP configuration file as follows:
nano 15-fastcgi-php.conf# /usr/share/doc/lighttpd-doc/fastcgi.txt.gz
# http://redmine.lighttpd.net/projects/lighttpd/wiki/Docs:ConfigurationOptions#mod_fastcgi-fastcgi
## Start an FastCGI server for php (needs the php7.0-cgi package)
fastcgi.server += ( ".php" =>
((
"socket" => "/var/run/php/php7.0-fpm.sock",
"broken-scriptfilename" => "enable"
))
)Now, enable the fastcgi configuration using the following commands.
lighttpd-enable-mod fastcgilighttpd-enable-mod fastcgi-phpFinally, reload the Lighttpd using the following command.
service lighttpd force-reloadIf in case you get any local errors then you can use the following commands to remove the errors.
apt-get -y install language-pack-en-basedpkg-reconfigure localesNext, we will test this PHP installation through a web browser. Change your current directory to the document root using the following command.
cd /var/www/htmlNow, you will have to create a small PHP test file called "php.info" using the following command.
nano /var/www/html/info.phpAdd the following content to the file and then save and exit from the editor.
<?php
phpinfo();
?>
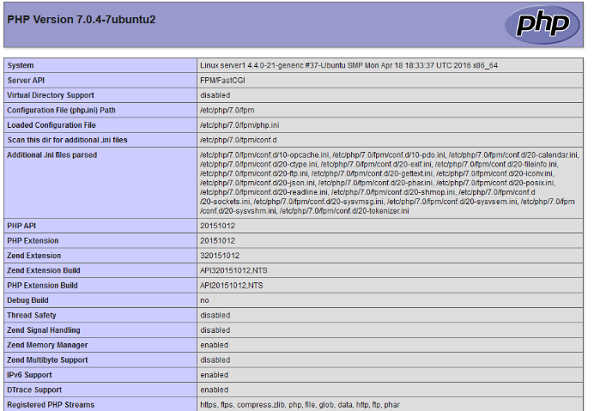
Now, you can test this by visiting http://YourServerIP/info.php through any web browser.
You should see lots of useful details about our PHP installation, such as the installed PHP version.

Now you can see that PHP is working correctly. If you scroll further down, you will see all modules that are already enabled in PHP. MySQL is not listed there which means we don't have MySQL support in PHP yet. We can install the php7.0-mysql package to get MySQL support in PHP. Execute the following command and it'll install the required package with some additional PHP modules which can be useful for your applications.
apt-get -y install php7.0-mysql php7.0-curl php7.0-gd php7.0-intl php-pear php-imagick php7.0-imap php7.0-mcrypt php-memcache php7.0-pspell php7.0-recode php7.0-sqlite3 php7.0-tidy php7.0-xmlrpc php7.0-xsl php7.0-mbstring php-gettextYou can add some compatibility features for software that supports the APC cache by installing APCu is an extension for the PHP. Execute the following command to do so.
apt-get -y install php-apcuFinally, reload the PHP-FPM to apply changes using the following command.
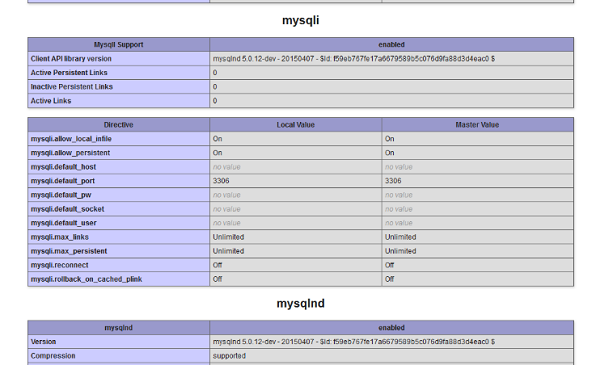
service php7.0-fpm reloadNow, reload the PHP test webpage from the web browser or visit http://YourServerIP/info.php again then scroll down. You should now find lots of new modules there, including the mysqli and mysqlnd module:

phpMyAdmin is a web interface that helps you to manage your MySQL database. You can install phpMyAdmin using the following command.
apt-get -y install phpmyadminYou'll be asked the following questions as below:
Web server to reconfigure automatically: <-- lighttpd
Configure database for phpmyadmin with dbconfig-common? <-- Yes
MySQL application password for phpmyadmin: <-- Press Enter
If in case you get any errors while installing it then you can use the following commands to resolve the errors.
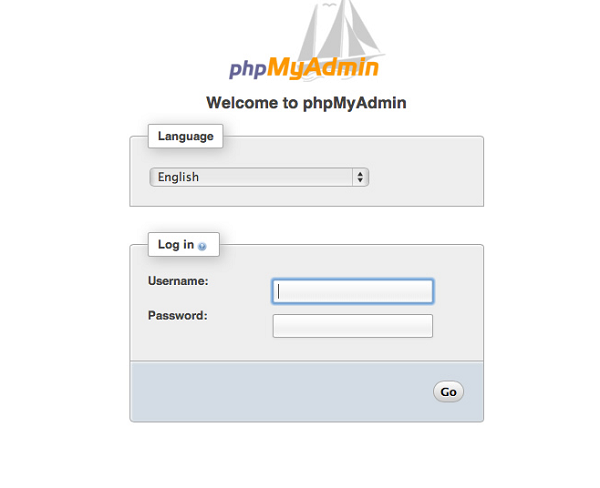
/etc/init.d/lighttpd force-reloadapt-get -y install phpmyadminFinally, you can access phpMyAdmin through any web browser by visiting http://YourServerIP/phpmyadmin/ Replace YourServerIP with your actual one.

The 8th Batch of MVPs Announced – Sharing. Leading. Changing.

2,593 posts | 791 followers
Followfrancisndungu - May 29, 2019
Alibaba Clouder - May 9, 2019
francisndungu - August 3, 2018
Alibaba Clouder - January 27, 2020
Alibaba Clouder - May 7, 2019
Alibaba Clouder - May 22, 2018

2,593 posts | 791 followers
Follow ECS(Elastic Compute Service)
Elastic and secure virtual cloud servers to cater all your cloud hosting needs.
Learn More OSS(Object Storage Service)
An encrypted and secure cloud storage service which stores, processes and accesses massive amounts of data from anywhere in the world
Learn More Marketplace
Marketplace is an online market for users to search and quickly use the software as image for Alibaba Cloud products.
Learn MoreMore Posts by Alibaba Clouder