By Francis Ndungu, Alibaba Cloud Community Blog author.
Pydio is one of the best open-source software for sharing and storing files in the cloud. Competing with software applications like ownCloud and Dropbox, Pydio is great for syncing data with your cloud server, desktop computer and mobile phone. The software allows you to keep your data secure in a cloud server. If you have a virtual private server (VPS) such as an ECS instance from Alibaba Cloud, you can use Pydio while still conforming to your data security policies and user rights management.
In this guide, we will walk you through the steps of installing Pydio on your Alibaba Cloud Elastic Compute Service (ECS) instance running Ubuntu 18.04. Once the installation is complete, users in your organization can log in to save and share files across different Pydio instances.
Before you begin, make sure you have the following:
SSH to your Ubuntu 18.04 server. Then, update the package information index.
$ sudo apt-get updateThen, run the command below to install Apache web server:
$ sudo apt-get -y install apache2You can check if Apache was installed successfully by entering the public/internet IP address or domain name associated with your Alibaba Cloud ECS instance.
http://198.18.0.1If there were no errors with the Apache setup, you should see a page similar to the one shown below:
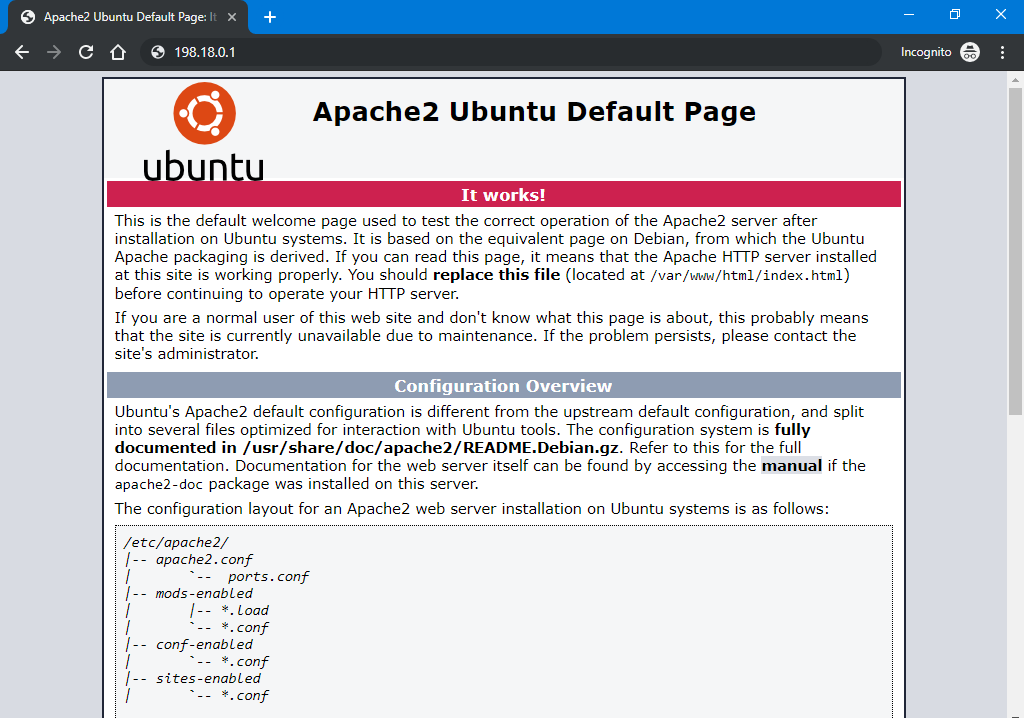
Once, Apache is installed, enable mod_rewrite by running the command below:
$ sudo a2enmod rewriteThen, restart Apache for the changes to be effected.
$ sudo systemctl restart apache2You have setup Apache web server and enabled mod_rewrite, in the next step, you will configure a database for the Pydio software.
Pydio requires a database in order to initialize its structures. So, you need to install MySQL database server by running the command below
$ sudo apt-get -y install mysql-serverThe default MySQL installation is not secure. So, you should run the mysql_secure_installation command to secure it.
$ sudo mysql_secure_installationNext, you will get some prompts, Respond with the values shown below. Remember to replace PASSWORD with a strong value.
Would you like to Setup VALIDATE PASSWORD plugin? [Y/N] Y
Password Validation policy level : 2
New password for root: PASSWORD
Re-enter new password: PASSWORD
Continue with the password provided: Y
Remove anonymous users? [Y/N] Y
Disallow root login remotely? [Y/N] Y
Remove test database and access to it? [Y/N] Y
Reload privilege tables now? [Y/N] Y
Once you have tightened the security of your MySQL server, log in to the database:
$ sudo mysql -uroot -pEnter the root password of your database server and hit Enter to continue. Then, run the following SQL commands one by one to create a database and a privileged user for Pydio software. Replace PASSWORD with a strong value.
mysql > CREATE DATABASE pydio_db DEFAULT CHARACTER SET utf8 COLLATE utf8_unicode_ci;
mysql > GRANT ALL PRIVILEGES ON pydio_db.* TO 'pydio_user'@'localhost' IDENTIFIED BY 'PASSWORD';
mysql > Flush privileges;
mysql > Quit
You have now installed MySQL, secured the server and created a database for Pydio to run. In the next step, you will install PHP and all required extensions needed by Pydio.
Pydio is written in PHP and thus you must install this scripting language in this step. To do this, run the command below:
$ sudo apt-get install -y php libapache2-mod-phpAlso, Pydio relies heavily on some PHP extensions. Run the command below to install all of them in one line:
$ sudo apt-get install -y php-cli php-common php-mbstring php-gd php-intl php-xml php-mysql php-zip php-curl php-xmlrpcTo effect the changes, restart Apache web server.
$ sudo systemctl restart apache2Once you have installed PHP and all the required extensions, you will move over to installing Pydio in the next step.
Pydio software is not available on the default Ubuntu package repository, so you will need to add the package installation information on the sources list. Run the command below.
$ sudo sh -c 'echo "deb https://download.pydio.com/pub/linux/debian/ $(lsb_release -sc) main" >> /etc/apt/sources.list.d/pydio.list'Next, add the pydio GPG key on the system.
$ wget -qO - https://download.pydio.com/pub/linux/debian/key/pubkey | sudo apt-key add -You can now updated the package information index to sync the changes.
$ sudo apt-get updateThen, run the command below to install Pydio on the server;
$ sudo apt-get install -y apt-transport-https pydio pydio-allTowards the end of the installation, you will get a prompt to configure encfs, just hit Enter to continue.
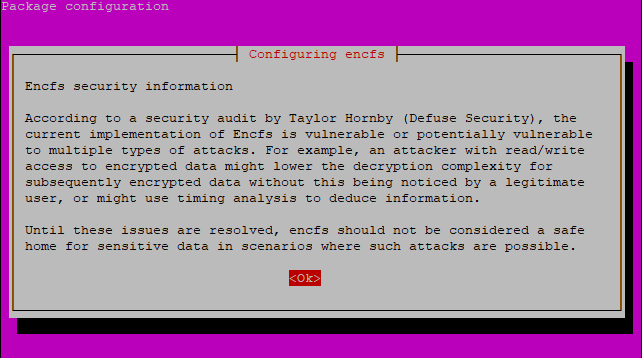
You have now installed the Pydio package on your Ubuntu 18.04 server. You will now go ahead and setup Pydio via a web browser in the following step.
In this step, you will be configuring Pydio on the web interface. You will run a wizard to configure the database that you created earlier and create a user account for accessing Pydio.
Visit the address below on your web browser. Remember to replace 198.18.0.1 with the public/internet IP address associated with your Alibaba Cloud ECS instance or domain name.
http://198.18.0.1/pydioOnce the page loads, click CONTINUE TO PYDIO INSTALLATION.

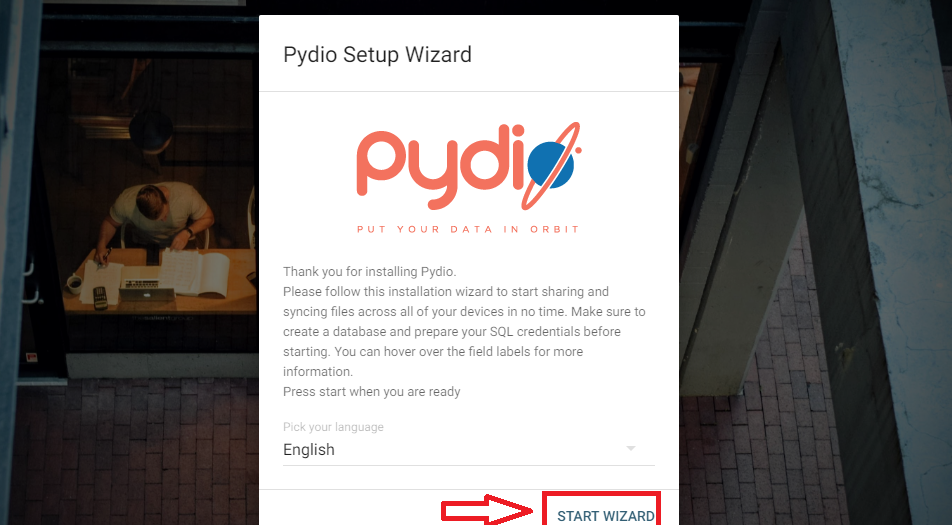
Next, choose your desired language and click START WIZARD.
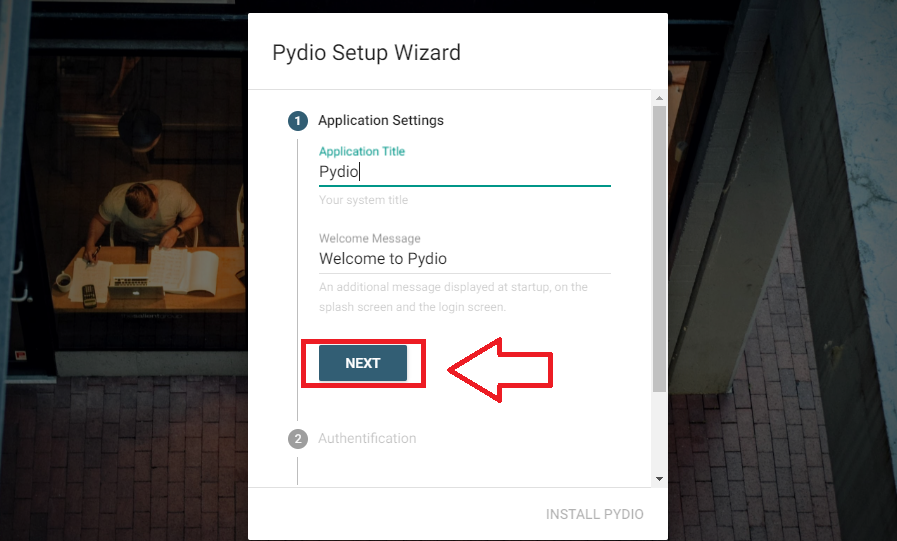
On the next screen, you can define your Pydio application title and welcome message or just leave them intact. Then, click NEXT to continue
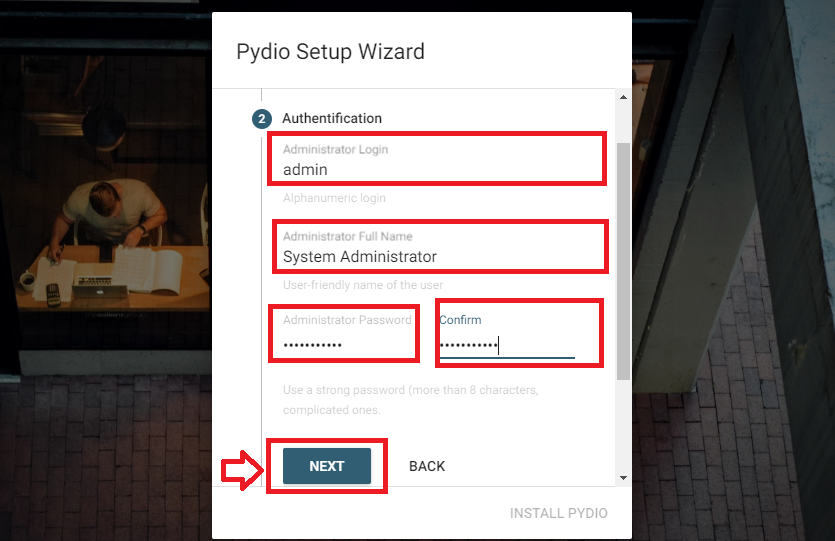
Next, create a user account by entering the username, full names and password and click NEXT.
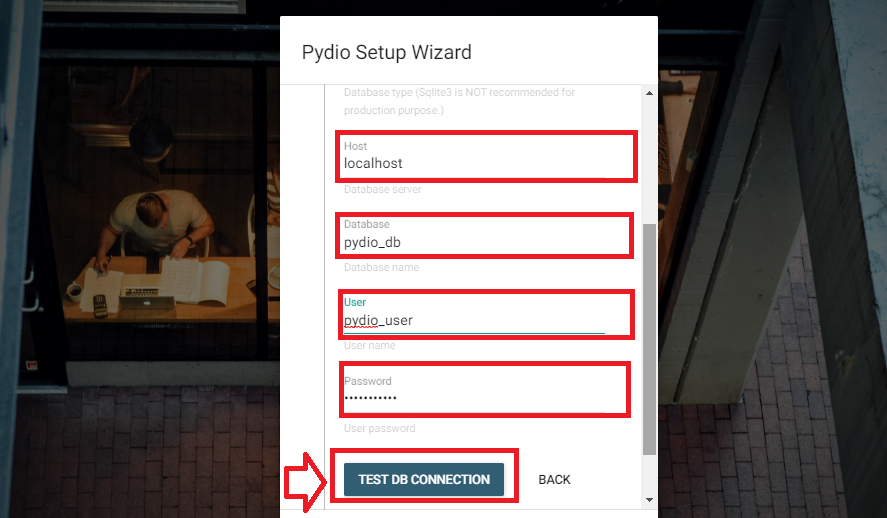
Next, configure a database connection using the database and user that you created earlier and click on TEST DB CONFIGURATION.
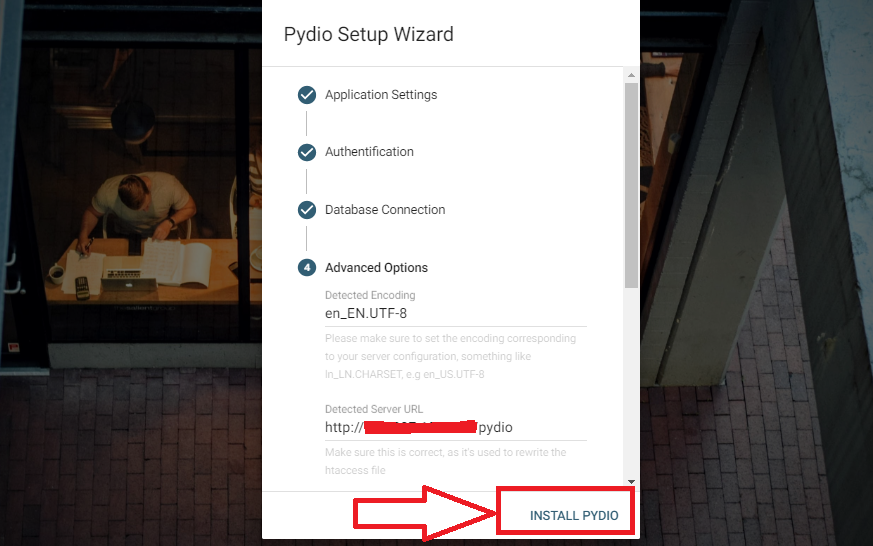
Then, click on INSTALL PYDIO to finalize the installation
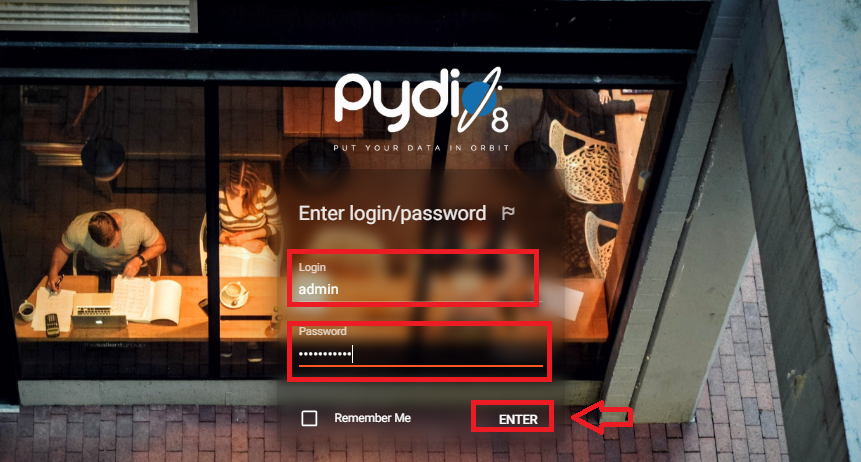
If the installation succeeds, you will be taken to the Pydio login page, use the Pydio user account details that you created above to login
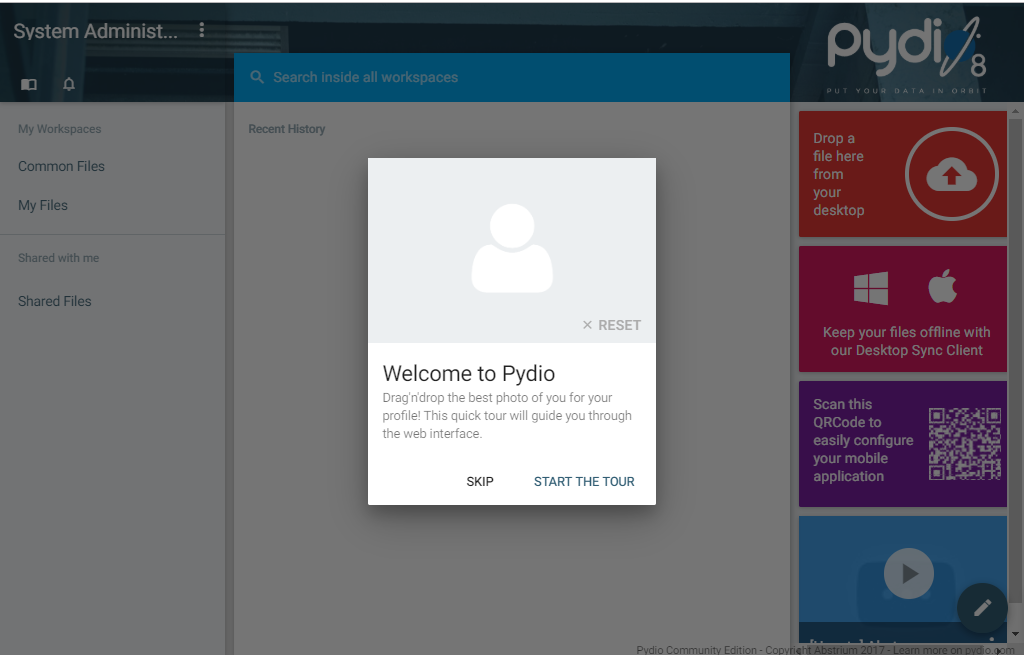
Congratulations. If you were able to log in, you can now access the Pydio dashboard to upload, manage and share your files in the cloud.
In this guide, we took you through the steps for installing Pydio on an ECS instance hosted on Alibaba Cloud. You can use this tutorial to create a cloud infrastructure for storing, securing and sharing your files in the cloud. Remember, if you are new to Alibaba Cloud, you can sign up now and get up to $1200 worth of free credit to test Pydio and other Alibaba cloud products.

31 posts | 8 followers
FollowAlibaba Clouder - February 27, 2019
Alex - June 21, 2019
Alibaba Clouder - April 12, 2019
Alibaba Clouder - September 28, 2018
Alibaba Clouder - October 1, 2018
Alibaba Clouder - April 15, 2019

31 posts | 8 followers
Follow Super App Solution for Telcos
Alibaba Cloud (in partnership with Whale Cloud) helps telcos build an all-in-one telecommunication and digital lifestyle platform based on DingTalk.
Learn More ECS(Elastic Compute Service)
Elastic and secure virtual cloud servers to cater all your cloud hosting needs.
Learn More ECS Bare Metal Instance
An elastic and horizontally scalable high-performance computing service providing the same computing performance as traditional physical servers including physical isolation.
Learn More EMAS Superapp
Build superapps and corresponding ecosystems on a full-stack platform
Learn MoreMore Posts by francisndungu
Start building with 50+ products and up to 12 months usage for Elastic Compute Service
Get Started for Free Get Started for Free