By Francis Ndungu, Alibaba Cloud Community Blog author.
MODX is one of the most promising free and open source Content Management System(CMS) for building and publish stunning websites.
The CMS has a graphical web-based installer and works pretty well with Apache webserver. With support for both PHP and MySQL, MODX has gained a lot of popularity because it is simple to deploy, run and maintain.
MODX can also integrate seamlessly with eCommerce platforms (e.g.Foxy Cart) and hence it is a great CMS for most web applications.
In this guide, we will take you through the steps of installing MODX on Ubuntu 18.04 hosted on Alibaba Cloud Elastic Compute Service. In the end, you will be able to access and experience the power of the free CMS platform built with speed, security, and flexibility.
Before installing MODX on Alibaba Cloud, make sure you have the following:
You will be running MODX on the Apache webserver. So, SSH to your Alibaba Cloud ECS instance and begin by updating the package information index. Then, install the apache2 package.
$ sudo apt-get update
$ sudo apt-get install -y apache2
Next, you are going to change some Apache configurations settings. This change will allow MODX .htaccess file to override some settings on the main Apache configuration file.
To do this, open the /etc/apache2/apache2.conf file using the nano text editor
$ sudo nano /etc/apache2/apache2.confLocate the <Directory /var/www/> entry in the file
<Directory /var/www/>
        Options Indexes FollowSymLinks
        AllowOverride None
        Require all granted
</Directory>
Next, change the value of AllowOverride None to AllowOverride All as shown below.
<Directory /var/www/>
        Options Indexes FollowSymLinks
        AllowOverride All
        Require all granted
</Directory>
Then, restart the Apache webserver for the changes to be effected.
$ sudo systemctl restart apache2Ensure the Apache web server is running by entering the IP address associated with your ECS instance on a web browser. You should see a page similar to the one shown below.
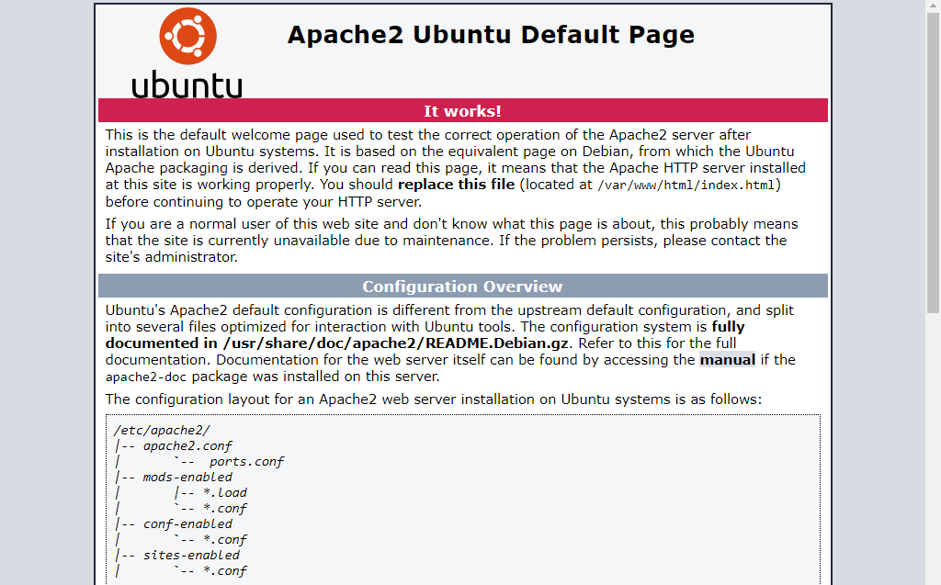
With Apache installed and running, you can now go ahead and install MySQL server and create a database to initialize MODX storage structures.
MODX stores its data in a MySQL database. You are going to install and secure a MySQL server and create a database for the CMS.
Run the command below to install the MySQL server.
$ sudo apt-get install -y mysql-serverNext, issue the command below to secure MySQL.
$ sudo mysql_secure_installationYou should get some prompts similar to the one shown below. Key in the below responses after each prompt and hit Enter to continue.
Would you like to setup VALIDATE PASSWORD plugin? Y
Password Validation Policy: 2
New password: PASSWORD
Re-enter new password: PASSWORD
Continue with the password provided? Y
Remove anonymous users? Y
Disallow root login remotely? Y
Remove test database and access to it? Y
Reload privilege tables now? Y
Next, log in to the MySQL database server that you have just created by entering the command below:
$ sudo mysql -u root -pEnter the root password for the MySQL server and hit Enter to continue. (don't confuse this with the root password of your Alibaba Cloud ECS instance)
When you get the MySQL prompt, type the below SQL commands one by one to create a modx_db database and a user named modx_user. Replace PASSWORD with a strong value.
mysql> CREATE DATABASE modx_db DEFAULT CHARACTER SET utf8 COLLATE utf8_unicode_ci;
mysql>GRANT ALL PRIVILEGES ON modx_db.* TO 'modx_user'@'localhost' IDENTIFIED BY 'PASSWORD';
mysql>FLUSH PRIVILEGES;
mysql>EXIT;
You have now installed MySQL and provisioned a database that MODX will use to allocate its storage structures. Since MODX is written in PHP, you need to install it and ensure the required modules/extensions are in place.
In this step, you are going to install the php package and libapache2-mod-php module that allows the Apache webserver to communicate with PHP.
Run the command below.
$ sudo apt-get install -y php libapache2-mod-phpNext, install some PHP extensions required by MODX to work.
$ sudo apt-get install -y php-cli php-common php-mbstring php-gd php-intl php-xml php-mysql php-zip php-curl php-xmlrpcPHP and its extensions are now ready . You need to restart Apache webserver to pick up the changes before moving over to downloading MODX installation files.
$ sudo systemctl restart apache2The latest software of MODX is maintained on the www.modx.com website. By the time of writing this guide, the newest version was MODX 2.7.2.
To download the MODX zip archive, first navigate to the tmp directory of your system.
$ cd /tmpNext, use the Linux wget command to download the file.
$ sudo wget https://modx.com/download/direct?id=modx-2.7.2-pl.zipInstall the unzip utility. You will use this package to extract the files from the archive that you have just downloaded above.
$ sudo apt-get -y install unzipNext, rename the archive file to a more friendlier name to avoid errors when unzipping.
$ sudo mv direct?id=modx-2.7.2-pl.zip modx_installation.zipYou can now unzip the modx_installation.zip file archive and move it over to the root directory of your website.
$ sudo unzip modx_installation.zip
$ sudo mv modx-2.7.2-pl/* /var/www/html
To ensure that Apache has the right permissions on the /var/www/html directory, run the command below:
$ sudo chown -R www-data:www-data /var/www/htmlBy default, MODX ships with a default ht.access file in the core directory. You are going to copy this file to the same directory and name it .htaccess. The .htaccess file will hold the configurations needed by MODX to functions correctly.
$ sudo cp /var/www/html/core/ht.access /var/www/html/core/.htaccessYou have downloaded and configured the right environment for MODX . You can now follow the next step to install the software via the web interface.
In this step, you will finalize the MODX installation on the web interface. Enter the address below on a browser and remember to replace 192.88.99.1 with the public/private IP address associated with your Alibaba Cloud ECS instance.
http://192.88.99.1/setupYou will see a page similar to the one shown below, choose a Language and click Next.
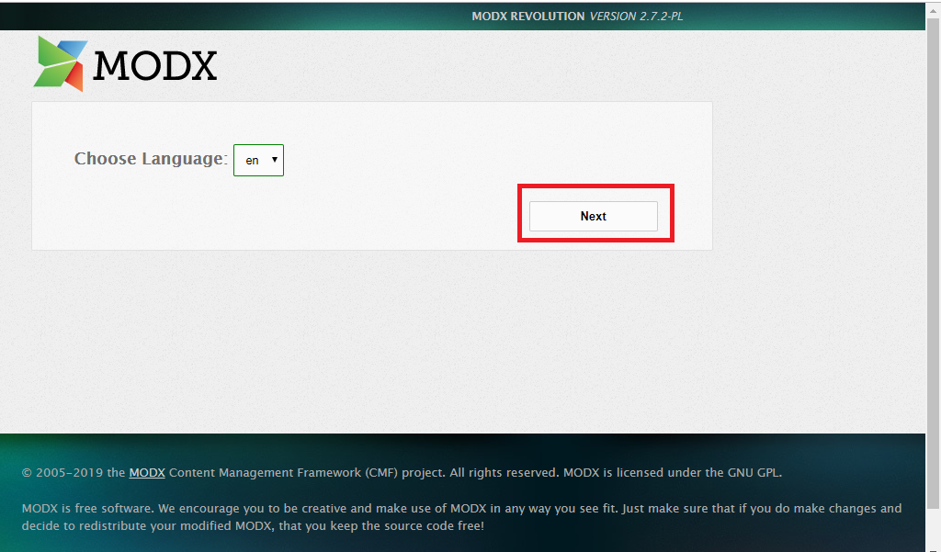
You will then get a welcome message, click Next
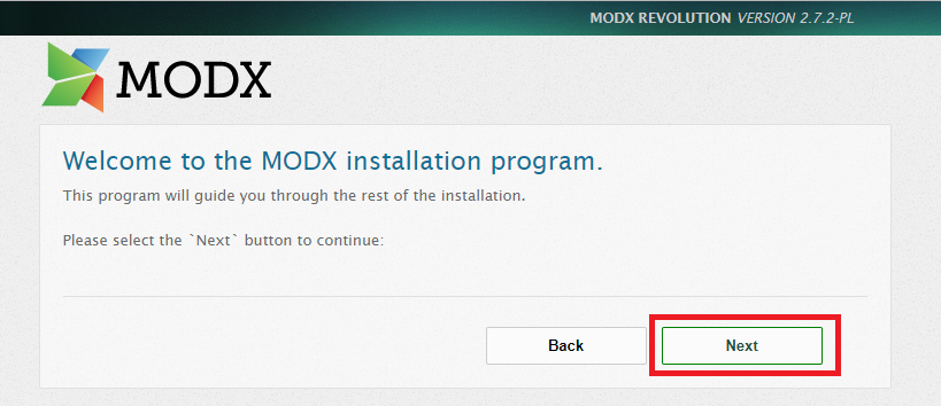
The next step takes you to the Install options screen, leave the configurations intact and hit Next.
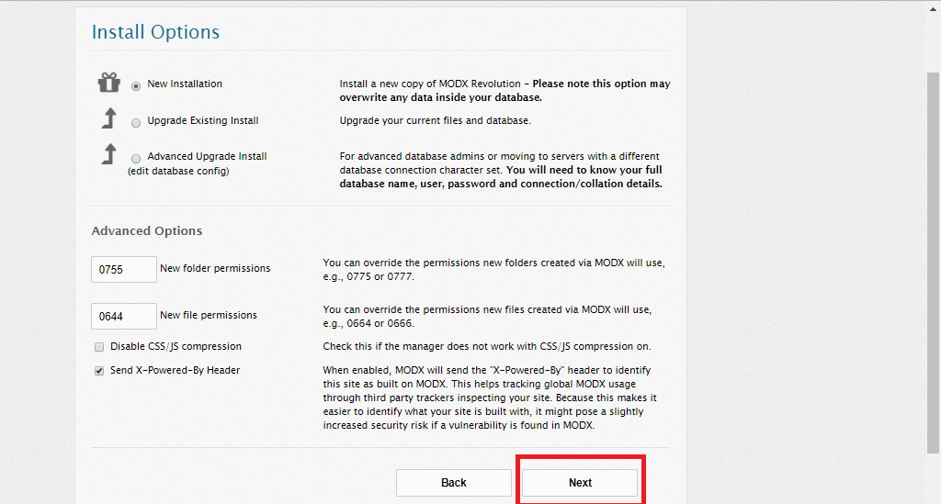
You will be taken to a new screen for configuring the database. Enter the details that you created earlier in step 2. When done, click Test database server connection and view collations. If the connection is successful click Create or test selection of your database.
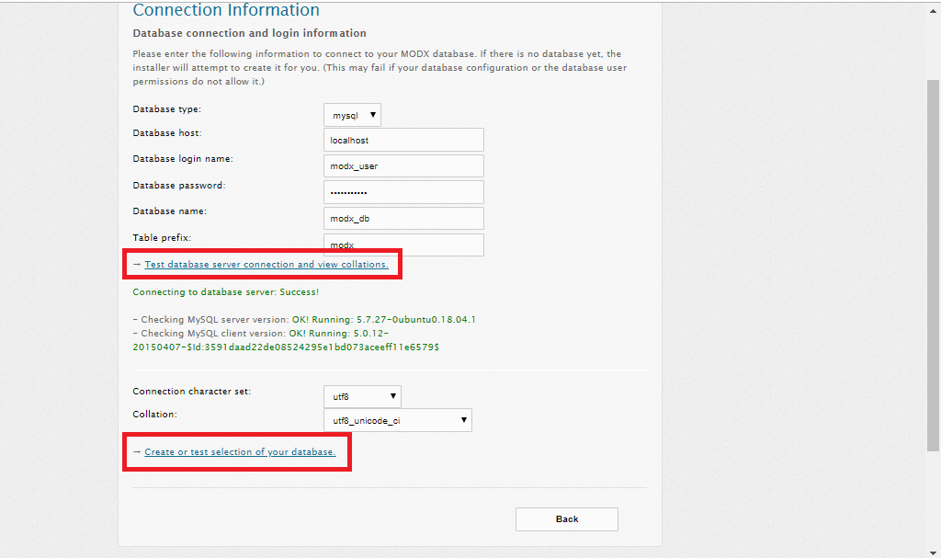
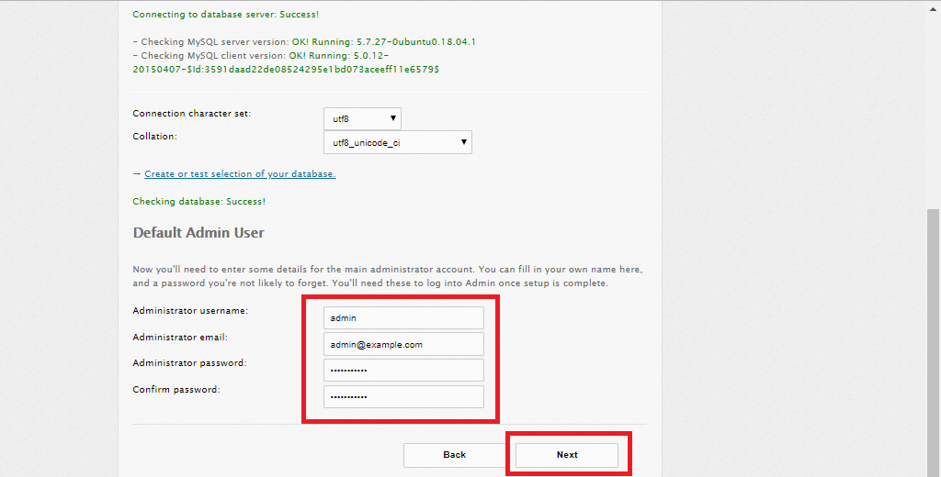
Next, create an admin account for your MODX software. You will use the account details to log in on the frontend of the CMS. Then, click Next.
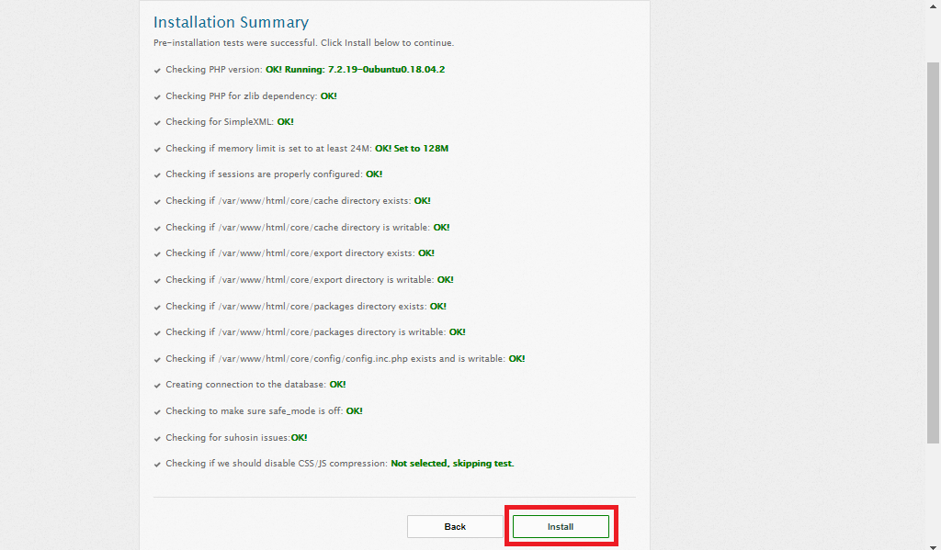
Next, you will see the Installation Summary page, click Install to finalize the setup.
If the installation is successful, you will see a screen similar to the one shown below. Click Next.

Finally, you will get a 'Thank you for installing MODX Revolution' message. Hit Login to navigate to the login screen of the CMS.

Enter your login details on the next screen and click Login to proceed.
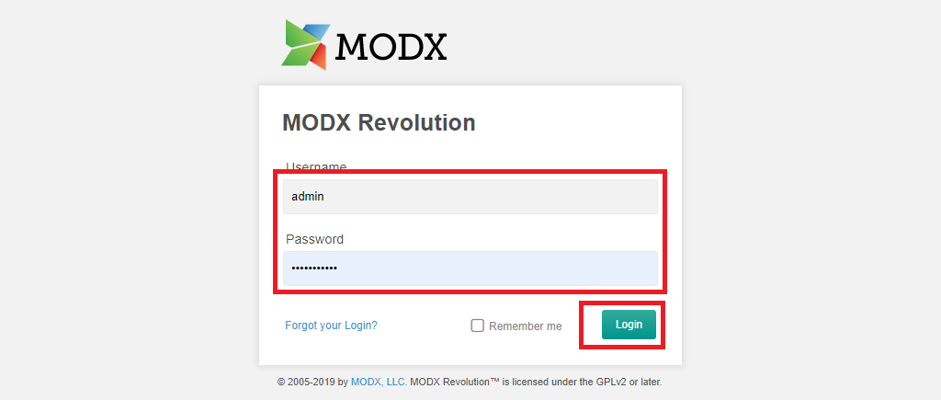
If the logging is successful, you will get a MODX dashboard similar to the one shown below
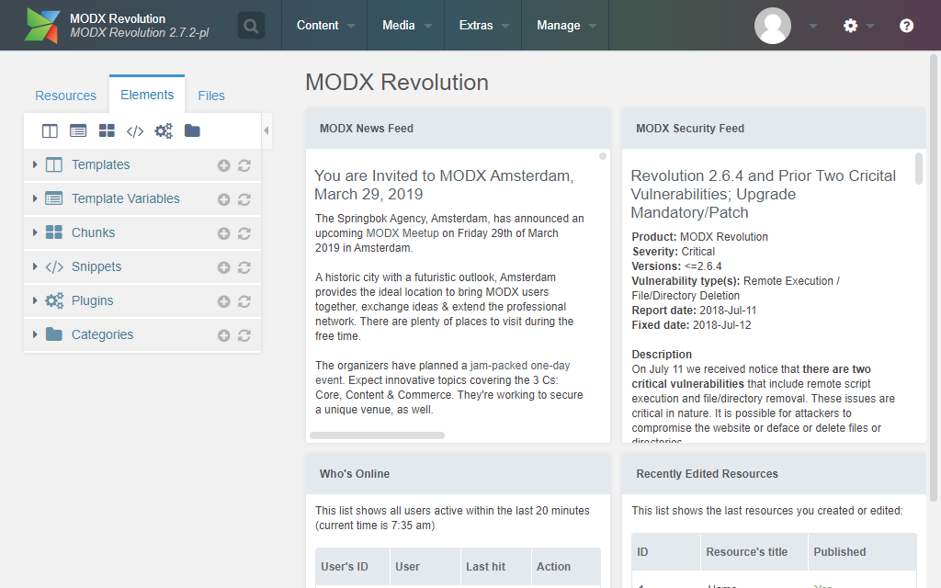
That's all when it comes to setting up MODX CMS. You can now create pages, upload content and publish pages on the MODX dashboard
This guide was a complete walk-through on installing MODX CMS on Ubuntu 18.04 server hosted on Alibaba Cloud ECS instance. Once you are through with the installation, you can read more tutorials on customizing MODX to create your dream website or portal from the official MODX website. Remember, if you don't have an Alibaba Cloud account, sign up now for free!

31 posts | 8 followers
FollowHiteshjethva - March 2, 2020
Hiteshjethva - January 8, 2020
Hiteshjethva - March 2, 2020
Hiteshjethva - January 8, 2020
francisndungu - December 10, 2019
Hiteshjethva - March 2, 2020

31 posts | 8 followers
Follow CloudMonitor
Automate performance monitoring of all your web resources and applications in real-time
Learn More Super App Solution for Telcos
Alibaba Cloud (in partnership with Whale Cloud) helps telcos build an all-in-one telecommunication and digital lifestyle platform based on DingTalk.
Learn More EMAS Superapp
Build superapps and corresponding ecosystems on a full-stack platform
Learn More Mobile Testing
Provides comprehensive quality assurance for the release of your apps.
Learn MoreMore Posts by francisndungu