By Hitesh Jethva, Alibaba Cloud Community Blog author.
Sylius is a free, open source and lightweight content management system that can be used to create your online shop easily. It is built on the Symfony framework and has all the latest tools, libraries and components required for e-commerce business.
In this tutorial, we will learn how to install and configure Sylius on an Alibaba Cloud Elastic Compute Service (ECS) Ubuntu 18.04 server.
Create a new ECS instance and connect to your instance as the root user.
Once you are logged into your Ubuntu 18.04 instance, run the following command to update your base system with the latest available packages.
apt-get update -ySylius runs on web server, written in PHP language and uses MariaDB to store their data. So, you will need to install Apache web server, MariaDB database server, PHP and other required packages to your server. You can install all of them with the following command:
apt-get install apache2 mariadb-server php7.2 libapache2-mod-php7.2 php7.2-common php7.2-mysql php7.2-mbstring php7.2-xmlrpc php7.2-soap php7.2-gd php7.2-xml php7.2-cli php7.2-curl php7.2-intl php7.2-zip unzip wget git curl -yOnce all the packages are installed, you will need to make some changes in php.ini file. You can do this with the following command:
nano /etc/php/7.2/apache2/php.iniMake the following changes:
file_uploads = On
allow_url_fopen = On
memory_limit = 256M
upload_max_filesize = 100M
max_execution_time = 400
date.timezone = Asia/Kolkata
Save and close the file, when you are finished.
Next, start Apache and MariaDB service and enable them to start on boot time with the following command:
systemctl start apache2
systemctl start mariadb
systemctl enable apache2
systemctl enable mariadb
Once you have done, you can proceed to the next step.
By default, MariaDB is not secured. So, you will need to secure it first. You can secure it by running the following command:
mysql_secure_installationThis will set your root password, remove anonymous users, disallow root login remotely and remove the test database as shown below:
    Enter current password for root (enter for none):
    Set root password? [Y/n]: N
    Remove anonymous users? [Y/n]: Y
    Disallow root login remotely? [Y/n]: Y
    Remove test database and access to it? [Y/n]:  Y
    Reload privilege tables now? [Y/n]:  Y
Once the MariaDB server is secured, log in to MariaDB shell with the following command:
mysql -u root -pEnter your root password, then create a database and user for Sylius with the following command:
MariaDB [(none)]> CREATE DATABASE syliusdb
MariaDB [(none)]> CREATE USER 'syliususer'@'localhost' IDENTIFIED BY 'password';
Next, grant all the privileges to the Sylius database with the following command:
MariaDB [(none)]> GRANT ALL ON syliusdb.* TO 'syliususer'@'localhost' IDENTIFIED BY 'password' WITH GRANT OPTION;Next, flush the privileges and exit from the MariaDB shell with the following command:
MariaDB [(none)]> FLUSH PRIVILEGES;
MariaDB [(none)]> QUIT;
Next, restart MariaDB service with the following command:
systemctl restart mariadbNext, check the status of MariaDB service with the following command:
systemctl status mariadbOnce MariaDB is configured, you can proceed to install Composer and Nodejs.
Composer is a package manager for PHP that can be used to install dependencies required by PHP. By default, Composer is not available in the Ubuntu 18.04 default repository.
You can install Composer using the curl command as shown below:
curl -sS https://getcomposer.org/installer | php -- --install-dir=/usr/local/bin --filename=composerOnce the installation has been completed successfully, you should see the following output:
All settings correct for using Composer
Downloading...

Composer (version 1.8.4) successfully installed to: /usr/local/bin/composer
Use it: php /usr/local/bin/composer
Next, You will need to install Nodejs and NPM to your server. By default, Nodejs and NPM is available in the Ubuntu 18.04 default repository. You can install it by just running the following command:
apt-get install nodejs npm -yAll the packages required by Sylius is now installed. It's time to install Sylius.
First, change the directory to /var/www/html with the following command:
cd /var/www/html/Next, create a project for Sylius using the composer as shown below:
composer create-project -s beta sylius/sylius-standard syliusNext, change the directory to sylius and install all the required dependencies using NPM:
cd sylius
npm install
npm run gulp
Next, open .env file and define your database:
nano .envMake the following changes:
DATABASE_URL=mysql://syliususer:password@127.0.0.1/syliusdbSave and close the file. Then, install Sylius with the following command:
bin/console sylius:installOnce Sylius has been installed, start the server with the following command:
php bin/console server:startSylius is now running and listening on port 8000. Next, you will need to configure Apache as a reverse proxy to access Sylius using port 80.
To do so, create a apache virtual host file with the following command:
nano /etc/apache2/sites-available/sylius.confAdd the following lines:
<VirtualHost *:80>

    ServerAdmin admin@example.com
    DocumentRoot /var/www/html/sylius

    ProxyPreserveHost On
    ProxyPass / http://127.0.0.1:8000/
    ProxyPassReverse / http://127.0.0.1:8000/
    ErrorLog ${APACHE_LOG_DIR}/error.log
    CustomLog ${APACHE_LOG_DIR}/access.log combined

</VirtualHost>
Save and close the file. Then, enable Sylius virtual host file and disable default virtual host file with the following command:
a2ensite sylius
a2dissite 000-default
Next, enable Apache proxy and rewrite module with the following command:
a2enmod proxy
a2enmod proxy_http
a2enmod rewrite
Finally, restart Apache web server with the following command:
systemctl restart apache2You can check the status of Apache with the following command:
systemctl status apache2Once your Apache web server is configured properly, you can proceed to access Sylius web interface.
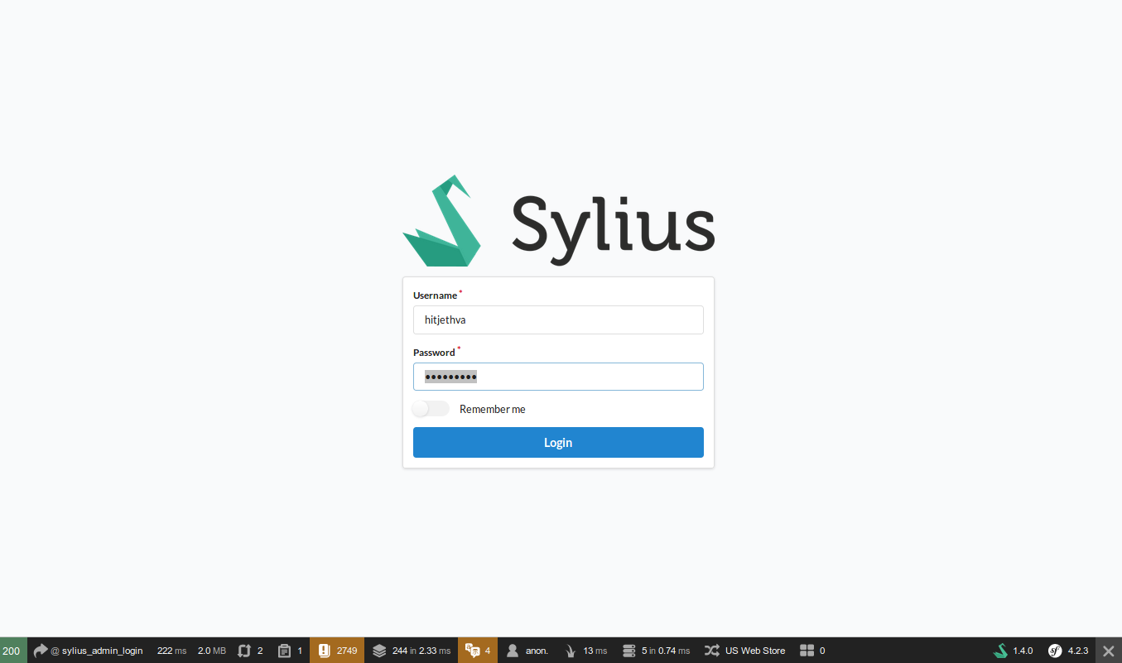
Now, open your web browser and type the URL http://your-server-ip/admin. You will be redirected to the following page:

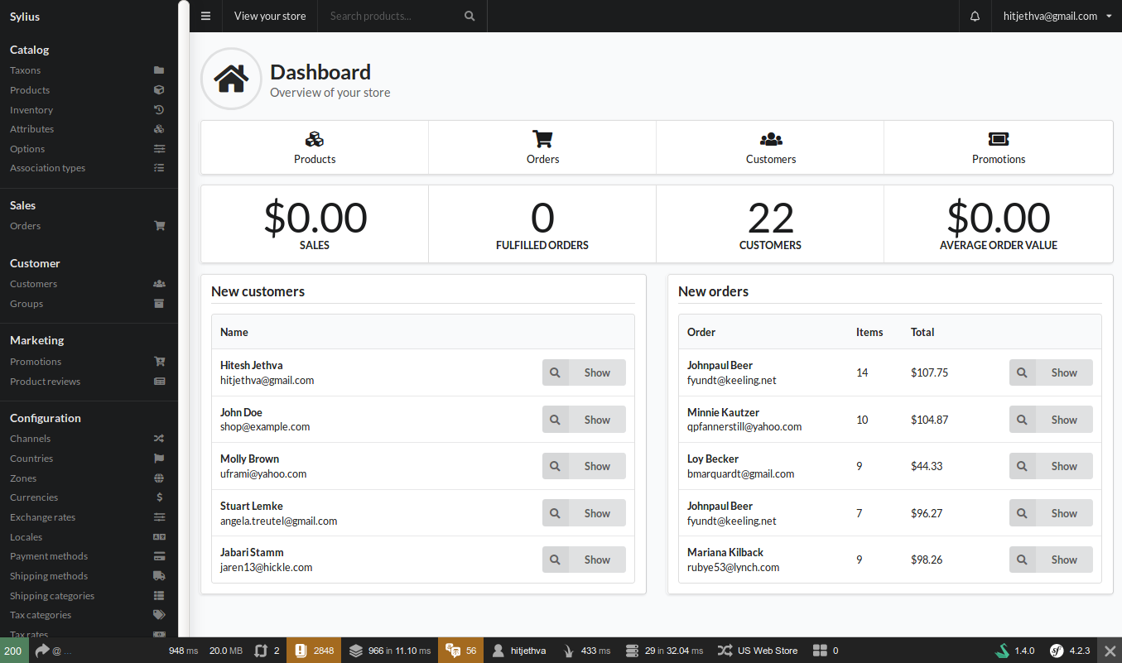
Provide your administrator credential which you have created during installation and click on the Login button. You will be redirected to the Sylius dashboard in the following page:


39 posts | 6 followers
FollowAlibaba Cloud MVP - March 13, 2020
Alibaba Clouder - February 27, 2019
francisndungu - February 24, 2020
Alibaba Clouder - June 3, 2020
Alibaba Clouder - January 27, 2020
Alibaba Clouder - January 27, 2020

39 posts | 6 followers
Follow CloudMonitor
Automate performance monitoring of all your web resources and applications in real-time
Learn More Super App Solution for Telcos
Alibaba Cloud (in partnership with Whale Cloud) helps telcos build an all-in-one telecommunication and digital lifestyle platform based on DingTalk.
Learn More ECS(Elastic Compute Service)
Elastic and secure virtual cloud servers to cater all your cloud hosting needs.
Learn More ECS Bare Metal Instance
An elastic and horizontally scalable high-performance computing service providing the same computing performance as traditional physical servers including physical isolation.
Learn MoreMore Posts by Hiteshjethva