By Sai Sarath Chandra, Alibaba Cloud Community Blog author
Businesses are increasingly embracing digital transformation across industries, and the first step of digital journey calls for prominent online presence. Shifting business online necessitates building and managing websites. However, with the growing volume of digital change, it is challenging to maintain different aspects of the website particularly security, design, vulnerability fixes/updates, customer experience, SEO management, and more. Most of these activities are development-intensive and significantly consume man-hours. However, with the immense popularity of open-source tools, one can always learn and contribute to the community.
This tutorial explores the story of a content management system (CMS) that solves all the issues concerning a website at scale. Camaleon CMS is a modern and robust content management system based on Ruby on Rails. It is an effective alternative to Wordpress in Ruby on Rails. It adapts to any project without the need for programming and gives users more time to manage content instead of programming.
Let's take a look at the different aspects that Camaleon CMS addresses.
Vulnerability
The technology stack for creating a website includes several components and third-party tools. All these tools and components are prone to bugs or security breaches, and maintaining such issues individually may take quite a long time and effort. CMS make sure the fixes are readily available post-issue identification.
Design
The presentation of a website content also ensures audience engagement. Editing content in the code is not the correct approach as this may hamper the design and at the same time is not scalable. CMS addresses this issue using an admin panel that helps the authors to write, edit and schedule the content, while even keeping the security.
Customer Experience
Website chat plays a vital role in driving online conversations. With the help of CMS, different third-party vendors provide multiple add-ons which adds more features to the website.
This tutorial explores how to set up Camaleon CMS on Alibaba Cloud Elastic Compute Service (ECS) with Ubuntu 18.04 (64-bit) system image installed.
If you don't know how to set up ECS instance, refer to this tutorial or a quick-start guide.
Access the ECS instance via Putty using the following details.
IP: ECS Instance Internet IP Address
Port: 22
Username: Root
Password: Provided at run time
For any Linux devices like Macintosh/Ubuntu, log in using SSH as shown below.
ssh root@149.129.ABC.XYZ
The authenticity of host '149.129.ABC.XYZ (149.129.ABC.XYZ)' can't be established.
ECDSA key fingerprint is SHA256:tyuWLYqL7IwGNdvD8e3THTSMyHlNPkMBdCkMf5D/ifw.
Are you sure you want to continue connecting (yes/no)? yes
Warning: Permanently added '149.129.ABC.XYZ' (ECDSA) to the list of known hosts.
root@149.129.ABC.XYZ's password:
Enter the password to proceed.
Welcome to Ubuntu 16.04.4 LTS (GNU/Linux 4.4.0-117-generic x86_64)

 * Documentation:  https://help.ubuntu.com
 * Management:     https://landscape.canonical.com
 * Support:        https://ubuntu.com/advantage

Welcome to Alibaba Cloud Elastic Compute Service!First, let's install Curl to download the packages from several sources. Run the command below to install Curl.
root@CAMALEON:~# sudo apt-get install curl
Next, install Ruby using the Ruby Version Manager (RVM) by implementing the following steps.
Step 1: Get the public key for RVM using the following commands.
root@CAMALEON:~# gpg --keyserver hkp://keys.gnupg.net --recv-keys 409B6B1796C275462A1703113804BB82D39DC0E3 7D2BAF1CF37B13E2069D6956105BD0E739499BDB

gpg: Total number processed: 2
gpg:               imported: 2  (RSA: 2)
Step 2: Install ruby via RVM by executing the below command.
root@CAMALEON:~# \curl -L https://get.rvm.io | bash -s stable –ruby
To start using RVM, either reopen all the shell windows in all the sessions or use the following command to reflect the RVM changes.
root@CAMALEON:~# source /usr/local/rvm/scripts/rvm
Next, run the command below to update the RVM.
root@CAMALEON:~# rvm get stable --autolibs=enable
Now, install the latest version of NodeJS by running the following command.
root@CAMALEON:~# sudo apt-get install nodejs
Before moving ahead, execute the following command to update the RubyGems.
root@CAMALEON:~# gem update –system
Once the system prompts "RubyGems system software updated", install the following packages using the subsequent commands.
root@CAMALEON:~# gem install bundler
Fetching bundler-1.17.2.gem
Successfully installed bundler-1.17.2
1 gem installed
root@CAMALEON:~# gem install nokogiri
Fetching nokogiri-1.9.1.gem
Fetching mini_portile2-2.4.0.gem
Successfully installed mini_portile2-2.4.0
Building native extensions. This could take a while...
Successfully installed nokogiri-1.9.1
2 gems installed
root@CAMALEON:~# gem install rails
root@CAMALEON:~# gem install railties
Successfully installed railties-5.2.2
1 gem installed
Now execute the below command to create a new project using rails.
root@CAMALEON:~# rails new my_project
Change the project directory by running the following command.
root@CAMALEON:~# cd my_project/
Run the command below to create a Gemfile in the project.
root@CAMALEON:~/my_project# sudo nano Gemfile
Now install all the required ruby dependencies by running the following command.
root@CAMALEON:~/my_project# bundle install
Next, add the Camaleon CMS using the below commands. Executing the commands may generate several warnings, let's address and fix all such warnings in the next step.
root@CAMALEON:~/my_project# rails generate camaleon_cms:install

/usr/local/rvm/rubies/ruby-2.5.3/lib/ruby/2.5.0/fileutils.rb:90: warning: already initialized constant FileUtils::VERSION
/usr/local/rvm/gems/ruby-2.5.3/gems/fileutils-1.1.0/lib/fileutils.rb:92: warning: previous definition of VERSION was here
/usr/local/rvm/rubies/ruby-2.5.3/lib/ruby/2.5.0/fileutils.rb:1188: warning: already initialized constant FileUtils::Entry_::S_IF_DOOR
/usr/local/rvm/gems/ruby-2.5.3/gems/fileutils-1.1.0/lib/fileutils.rb:1267: warning: previous definition of S_IF_DOOR was here
create  app/apps/themes/new/views/layouts/_footer.html.erb
create  app/apps/themes/new/views/layouts/_header.html.erb
create  app/apps/themes/new/views/layouts/index.html.erb
create  app/apps/themes/new/views/page.html.erb
create  app/apps/themes/new/views/post.html.erb
create  app/apps/themes/new/views/post_tag.html.erb
create  app/apps/themes/new/views/post_type.html.erb
create  app/apps/themes/new/views/search.html.erb
append  Gemfile
The command rails generate camaleon_cms not just installs the CMS but also makes an entry into the Gemfile.
Camaleon requires the DB set up for a successful installation. The Camaleon CMS team provides the initial scripts as shown in the following two-step process.
Step 1: Execute generate-migrations script with Camaleon CMS to generate the required scripts.
rake camaleon_cms:generate_migrations
Copied migration 20181225192523_create_active_storage_tables.active_storage.rb from active_storage
Copied migration 20181225192524_create_db_structure.cama_contact_form_engine.rb from cama_contact_form_engine
Copied migration 20181225192525_post_table_into_utf8.camaleon_cms_engine.rb from camaleon_cms_engine
Copied migration 20181225192526_rename_column_posts.camaleon_cms_engine.rb from camaleon_cms_engine
Copied migration 20181225192527_add_confirm_token_to_users.camaleon_cms_engine.rb from camaleon_cms_engine
Copied migration 20181225192528_add_feature_to_posts.camaleon_cms_engine.rb from camaleon_cms_engine
Copied migration 20181225192529_move_first_name_of_users.camaleon_cms_engine.rb from camaleon_cms_engine
Copied migration 20181225192530_improve_menus_structure.camaleon_cms_engine.rb from camaleon_cms_engine
Copied migration 20181225192531_add_group_to_custom_field_values.camaleon_cms_engine.rb from camaleon_cms_engine
Copied migration 20181225192532_install_migrated_seo_plugin.camaleon_cms_engine.rb from camaleon_cms_engine
Copied migration 20181225192533_drop_user_relationship_table.camaleon_cms_engine.rb from camaleon_cms_engine
Copied migration 20181225192534_create_media.camaleon_cms_engine.rb from camaleon_cms_engine
Copied migration 20181225192535_adjust_field_length.camaleon_cms_engine.rb from camaleon_cms_engine
Step 2: Next, execute the migration scripts for all the required initial setup.
root@CAMALEON:~/my_project# rake db:migrate
== 20181225192523 CreateActiveStorageTables: migrating ========================
-- create_table(:active_storage_blobs)
   -> 0.0021s
-- create_table(:active_storage_attachments)
   -> 0.0017s
-- change_column("cama_term_taxonomy", :name, :text, {})
   -> 0.0140s
== 20181225192535 AdjustFieldLength: migrated (0.0471s) =======================
Once the setup is done, run the following commands to start the Camaleon server. If everything is set up as per preceding steps, the application starts running on port 3000 of the rails server.
=> Booting Puma
=> Rails 5.2.2 application starting in development
=> Run rails server -h for more startup options
Puma starting in single mode
tcp://0.0.0.0:3000To access the CMS for the initial setup, visit the ECS Internet IP and also make sure that the specific ports are open for this purpose. (For reference: https://<Ecs-internet-ip>:3000)
On gaining access to the IP, the following screen appears in a few seconds.
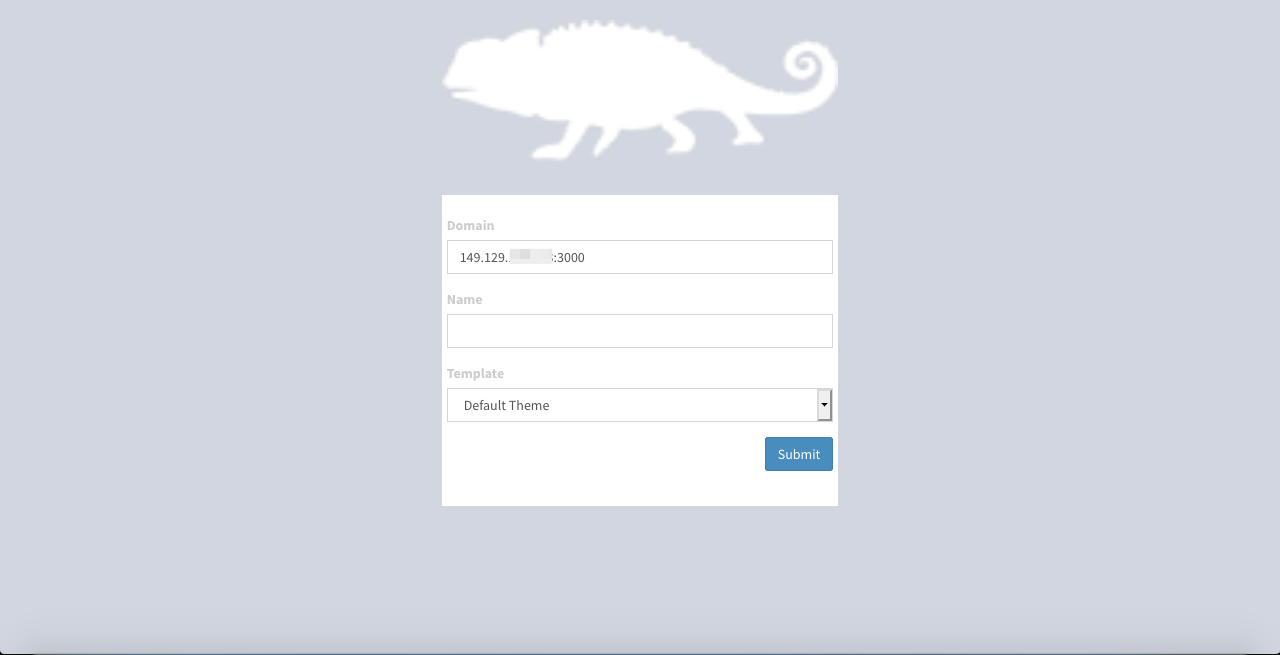
Now, give the site a domain name, select the template and click "Submit". The following page with the message "Your site was created successfully", along with the links pointing to both the front end and the admin panel appears after few minutes.
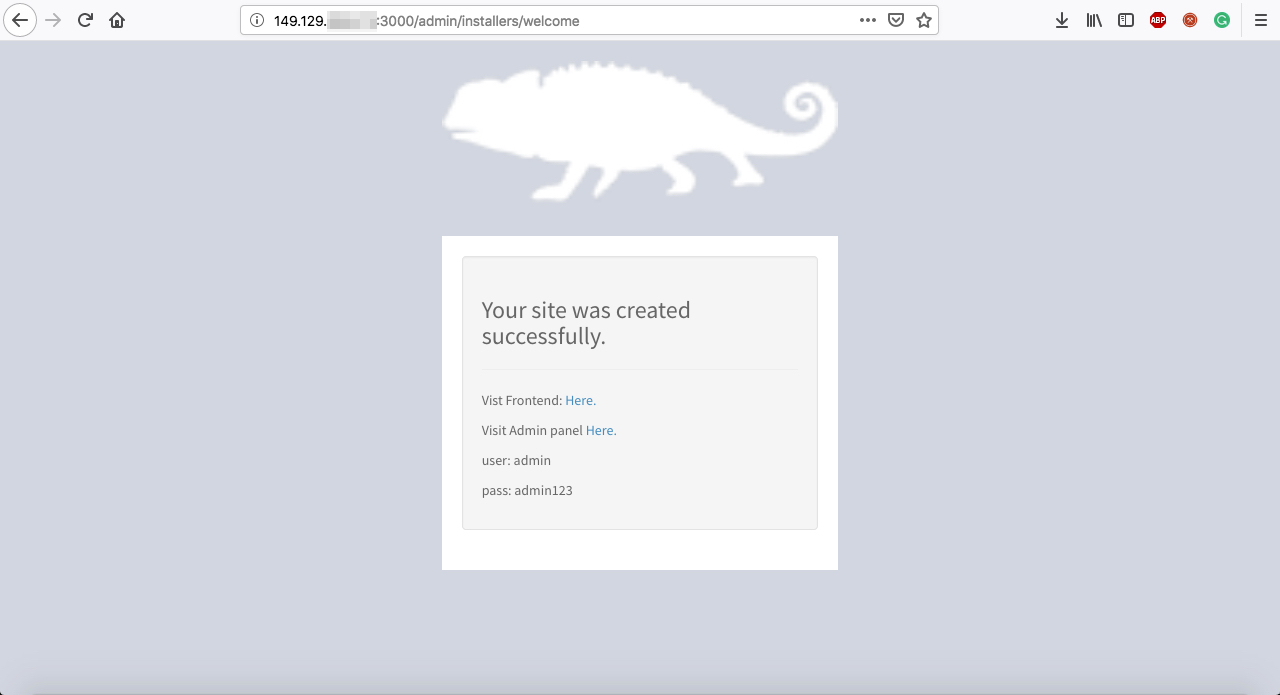
On navigating to the admin panel link, the following login screen shows up.
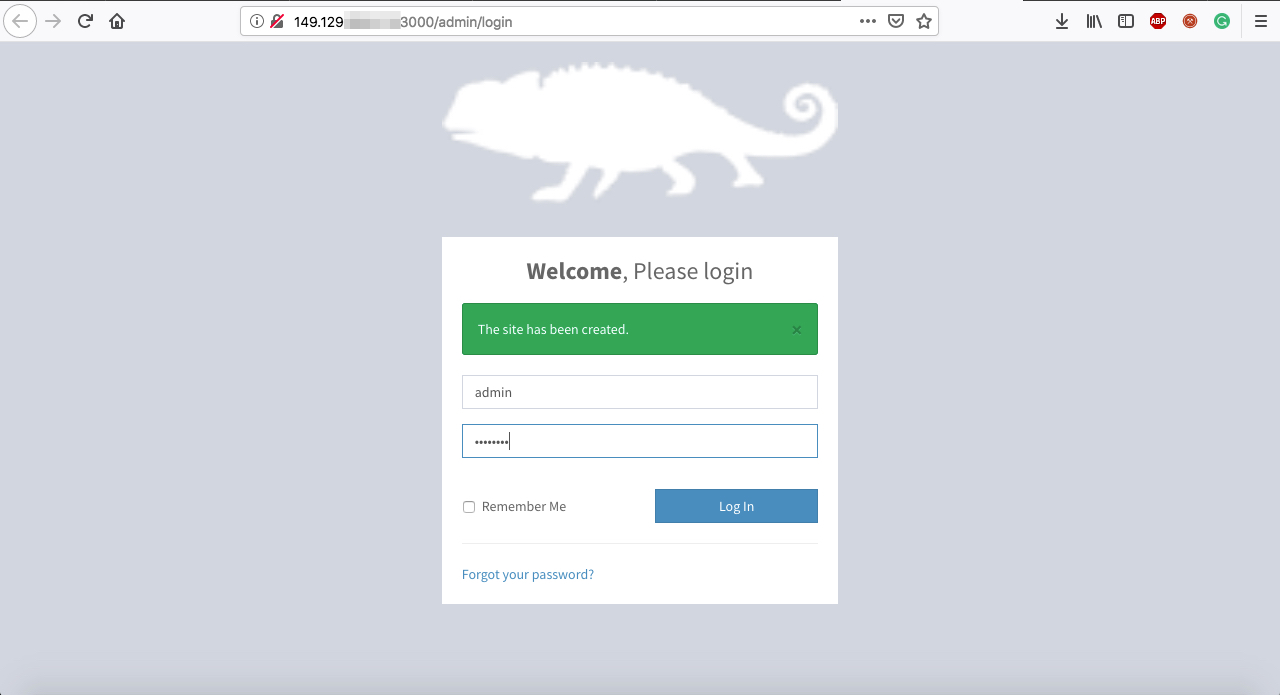
Enter login details to redirect to the Admin Panel as shown below.
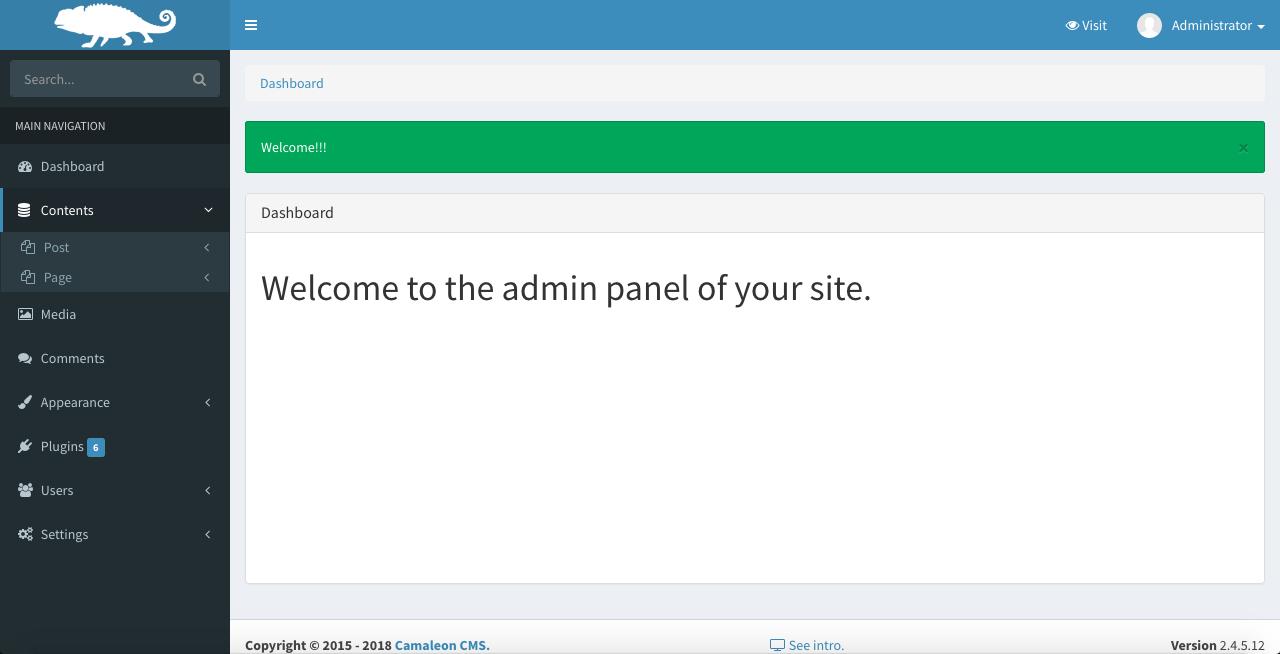
On navigating to the frontend panel, the following bootstrapped post and content on the site appears.
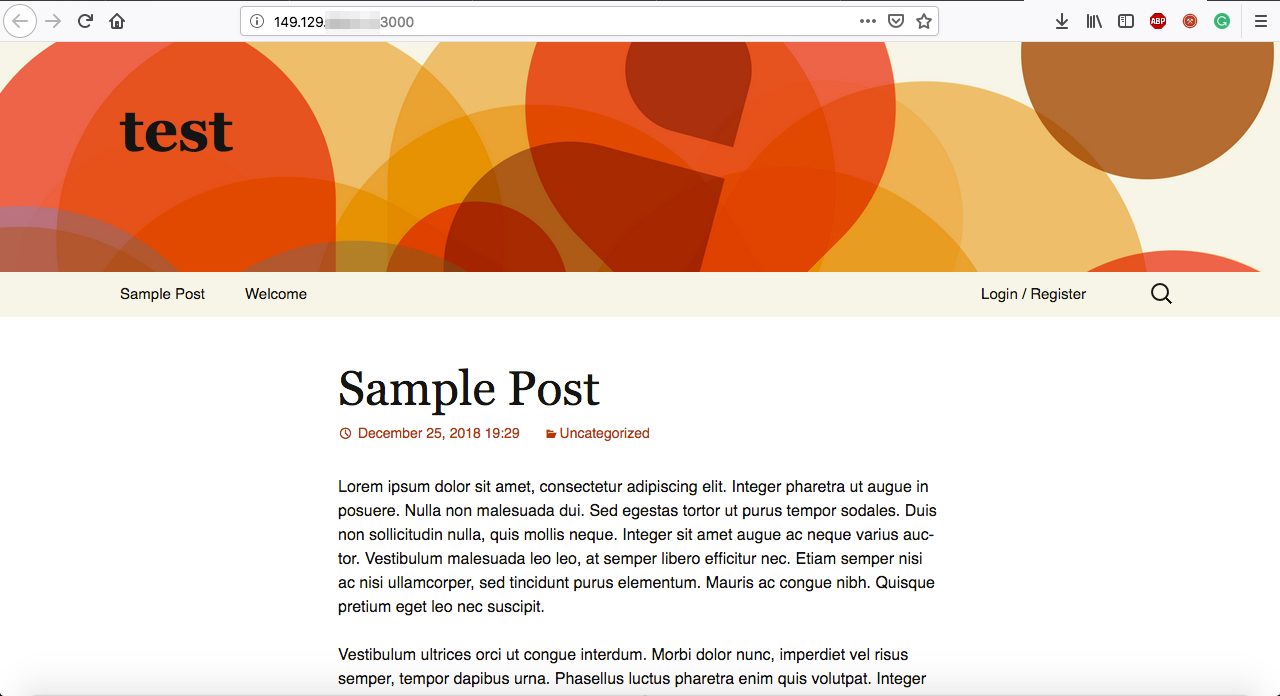
There you go! You have successfully set up the Camaleon CMS on your Alibaba Cloud ECS Ubuntu instance along with testing both the admin and the frontend.

2,593 posts | 792 followers
FollowAlibaba Clouder - June 13, 2019
Alibaba Clouder - August 15, 2019
Alibaba Clouder - August 15, 2019
Alibaba Clouder - August 20, 2018
Alibaba Clouder - November 27, 2019
francisndungu - December 10, 2019

2,593 posts | 792 followers
Follow CloudMonitor
Automate performance monitoring of all your web resources and applications in real-time
Learn More Web Hosting Solution
Explore Web Hosting solutions that can power your personal website or empower your online business.
Learn More ApsaraDB RDS for MySQL
An on-demand database hosting service for MySQL with automated monitoring, backup and disaster recovery capabilities
Learn More ApsaraDB RDS for PostgreSQL
An on-demand database hosting service for PostgreSQL with automated monitoring, backup and disaster recovery capabilities
Learn MoreMore Posts by Alibaba Clouder