By Sai Sarath Chandra, Alibaba Cloud Community Blog author
Magnolia CMS is one of the best content management systems and there are multiple factors that make Magnolia stand out from the rest. Let's take a look at some of its primary features.
1) Magnolia is Java-based
Java is still one of the best programming languages available. As Java is open-source, it ensures quality resources at a reasonable price. Magnolia CMS is not just for maintaining a blog but rather supports companies that need comprehensive websites. Being written in Java helps companies to customize the Magnolia CMS based on their requirements.
2) Magnolia Integration Capabilities
The integration capability may not be a key requirement for an individual using the CMS. However, enterprises primarily look at integration functionality as a key area. An effective CMS must facilitate several types of third-party integrations, including e-Commerce, analytics, marketing, social media, CRM and ERP to fulfill the business demands. Magnolia fixes all such requirements.
3) Out-of-the-Box Security
The main concern with all the CMS products right now is security. Various CMS solutions offer multiple features but without proper security, they may end up being a big headache for any organization. Magnolia implements security at the heart of the system. It differentiates architecture between public and private elements to help in defending different attacks. There are different role-based principles tailored into the system to define who can write, edit, view and publish certain content.
In addition, Magnolia offers an option for automated backup and allows support for on-cloud deployment.
This tutorial explores how to set up Magnolia CMS on Alibaba Cloud Elastic Compute Service (ECS) with Ubuntu 16.04 (64-bit) system image installed.
If you don't know how to set up ECS instance, refer to this tutorial or a quick-start guide.
Access the ECS instance via Putty using the following details.
IP: ECS Instance Internet IP Address
Port: 22
Username: Root
Password: Provided at run time
For any Linux devices like Macintosh/Ubuntu, log in using SSH as shown below.
ssh root@149.129.ABC.XYZ
The authenticity of host '149.129.ABC.XYZ (149.129.ABC.XYZ)' can't be established.
ECDSA key fingerprint is SHA256:tyuWLYqL7IwGNdvD8e3THTSMyHlNPkMBdCkMf5D/ifw.
Are you sure you want to continue connecting (yes/no)? yes
Warning: Permanently added '149.129.ABC.XYZ' (ECDSA) to the list of known hosts.
root@149.129.ABC.XYZ's password:
Enter the password to proceed.
Welcome to Ubuntu 16.04.4 LTS (GNU/Linux 4.4.0-117-generic x86_64)

 * Documentation:  https://help.ubuntu.com
 * Management:     https://landscape.canonical.com
 * Support:        https://ubuntu.com/advantage

Welcome to Alibaba Cloud Elastic Compute Service!Let's start by creating a user for Magnolia using the following commands.
root@MAGNOLIA:~# adduser magnoliaadmin
perl: warning: Setting locale failed.
perl: warning: Please check that your locale settings:
LANGUAGE = (unset),
LC_ALL = (unset),
LC_CTYPE = "UTF-8",
LANG = "en_US.UTF-8"
are supported and installed on your system.
perl: warning: Falling back to a fallback locale ("en_US.UTF-8").
Adding user `magnoliaadmin' ...
Adding new group `magnoliaadmin' (1000) ...
Adding new user `magnoliaadmin' (1000) with group `magnoliaadmin' ...
Creating home directory `/home/magnoliaadmin' ...
Copying files from `/etc/skel' ...
Enter new UNIX password:
Retype new UNIX password:
passwd: password updated successfully
Changing the user information for magnoliaadmin
Enter the new value, or press ENTER for the default
Full Name []: Magnolia User
Room Number []:
Work Phone []:
Home Phone []:
Other []:
Is the information correct? [Y/n] Y
Run the following commands to grant the user various sudo permissions.
root@MAGNOLIA:~# usermod -aG sudo magnoliaadmin
root@MAGNOLIA:~# su - magnoliaadmin
Use sudo <command> to run a command as administrator (user "root"). Also, refer to man sudo_root for more details.
Verify the admin permission by executing the below commands.
magnoliaadmin@MAGNOLIA:~$ sudo ls -la /home/magnoliaadmin/
[sudo] password for magnoliaadmin:
total 20
drwxr-xr-x 2 magnoliaadmin magnoliaadmin 4096 Dec 23 11:15 .
drwxr-xr-x 3 root          root          4096 Dec 23 11:13 ..
-rw-r--r-- 1 magnoliaadmin magnoliaadmin  220 Dec 23 11:13 .bash_logout
-rw-r--r-- 1 magnoliaadmin magnoliaadmin 3771 Dec 23 11:13 .bashrc
-rw-r--r-- 1 magnoliaadmin magnoliaadmin  655 Dec 23 11:13 .profile
-rw-r--r-- 1 magnoliaadmin magnoliaadmin    0 Dec 23 11:15 .sudo_as_admin_successful
Now log in as a superuser using the following commands.
magnoliaadmin@MAGNOLIA:~$ sudo su
root@MAGNOLIA:/home/magnoliaadmin#
Trail license from the Magnolia website to set up the latest Magnolia release. Download the enterprise by running the following command.
root@MAGNOLIA:/home/magnoliaadmin# wget https://files.magnolia-cms.com/magnolia-enterprise-bundle-latest.zipNow run the command below to install Unzip for extracting the package.
root@MAGNOLIA:/home/magnoliaadmin# apt install unzip Extract the downloaded Magnolia package in a current folder. Since it is a very large package, extraction may take several minutes.
root@MAGNOLIA:/home/magnoliaadmin# unzip magnolia-enterprise-bundle-latest.zipNext, set up Java as the entire Magnolia is written in Java. First, download the OpenJDK.
root@MAGNOLIA:/home/magnoliaadmin# wget https://download.java.net/java/GA/jdk10/10.0.2/19aef61b38124481863b1413dce1855f/13/openjdk-10.0.2_linux-x64_bin.tar.gzThen untar the package using the following command.
root@MAGNOLIA:/home/magnoliaadmin# tar xvf openjdk-10.0.2_linux-x64_bin.tar.gzNow, execute the following command to move the entire package into the bin folder.
root@MAGNOLIA:/home/magnoliaadmin# tar xvf openjdk-10.0.2_linux-x64_bin.tar.gzRun the following commands to update Java and Javac onto the path.
root@MAGNOLIA:/home/magnoliaadmin# update-alternatives --install /usr/bin/java java /usr/lib/jvm/openjdk-10.0.2_linux-x64/jdk-10.0.2/bin/java 1
update-alternatives: using /usr/lib/jvm/openjdk-10.0.2_linux-x64/jdk-10.0.2/bin/java to provide /usr/bin/java (java) in auto mode
root@MAGNOLIA:/home/magnoliaadmin# update-alternatives --install /usr/bin/javac javac /usr/lib/jvm/openjdk-10.0.2_linux-x64/jdk-10.0.2/bin/javac 1
update-alternatives: using /usr/lib/jvm/openjdk-10.0.2_linux-x64/jdk-10.0.2/bin/javac to provide /usr/bin/javac (javac) in auto mode
Execute the following commands to check whether there are any additional configurations.
root@MAGNOLIA:/home/magnoliaadmin# update-alternatives --config java
There is only one alternative in link group java (providing /usr/bin/java): /usr/lib/jvm/openjdk-10.0.2_linux-x64/jdk-10.0.2/bin/java
Nothing to configure.
root@MAGNOLIA:/home/magnoliaadmin# update-alternatives --config javac
There is only one alternative in link group javac (providing /usr/bin/javac): /usr/lib/jvm/openjdk-10.0.2_linux-x64/jdk-10.0.2/bin/javac
Nothing to configure.
Now, verify the installation as shown below.
root@MAGNOLIA:/home/magnoliaadmin# java --version
openjdk 10.0.2 2018-07-17
OpenJDK Runtime Environment 18.3 (build 10.0.2+13)
OpenJDK 64-Bit Server VM 18.3 (build 10.0.2+13, mixed mode)
Magnolia is very easy to configure and start. To start Magnolia, navigate to the Magnolia root folder, find the magnolia_control.sh under the tomcat server, and execute it by running the following command.
root@MAGNOLIA:/home/magnoliaadmin# magnolia-enterprise-6.0/apache-tomcat-9.0.10/bin/magnolia_control.sh startThe following ASCII art appears on the console screen.

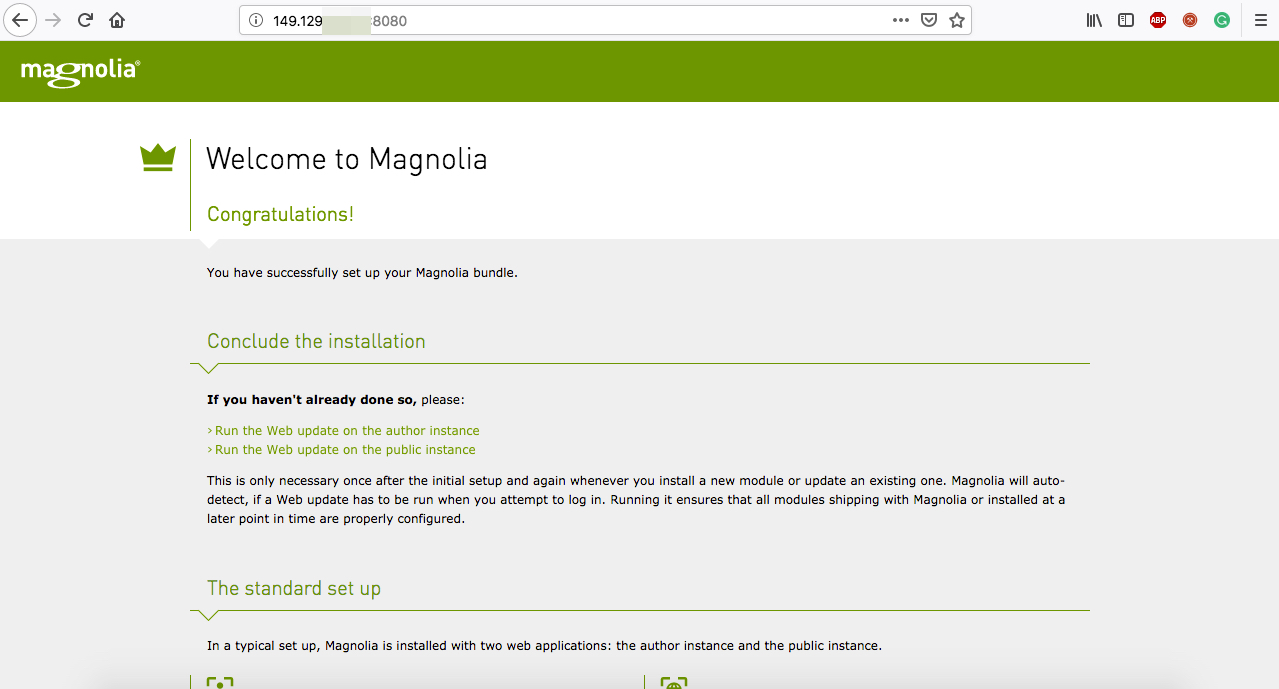
Once the phrase "Tomcat started" reflects in the command window, continue the rest of the installation in the browser. The magnoliaAuthor is available at https://<ECS-Internet_IP>:8080/.
The below screen reflects on the successful installation and setup. There are two instances available in the standard setup, Author and the Public instance.
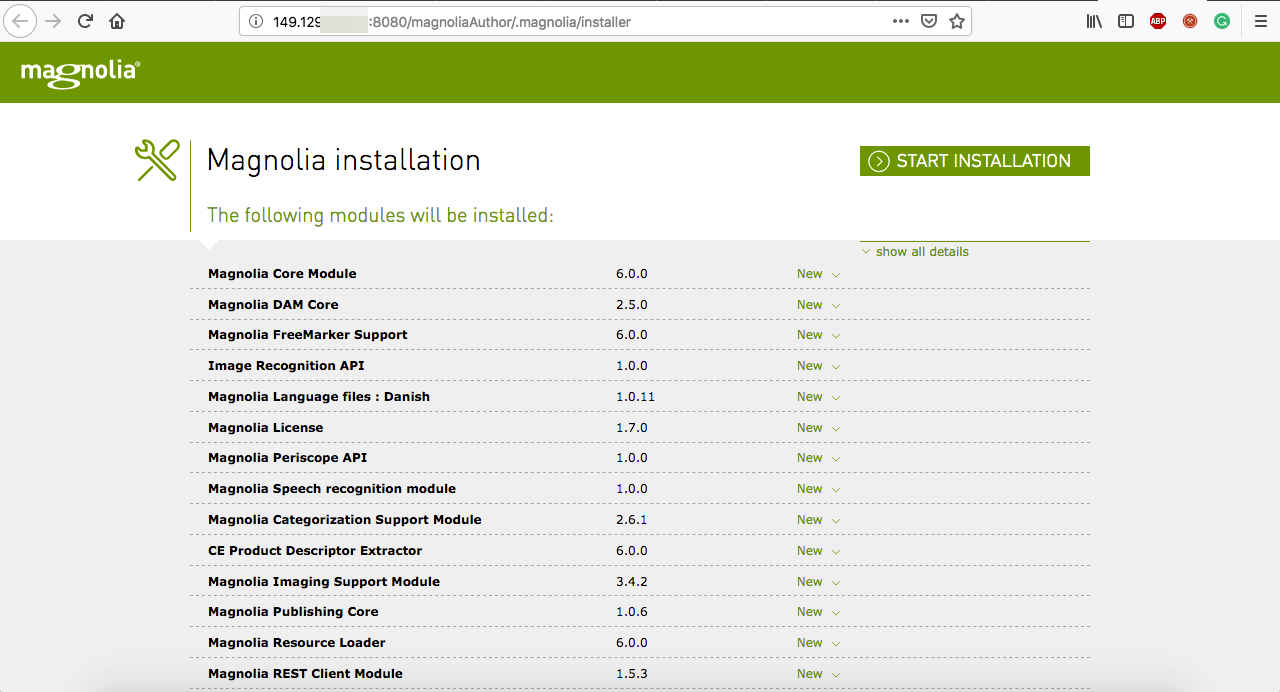
First, let's continue the installation on the Author Instance by clicking on the "Start Installation" button.
There is a long list of modules available for installation that may take several minutes to complete.
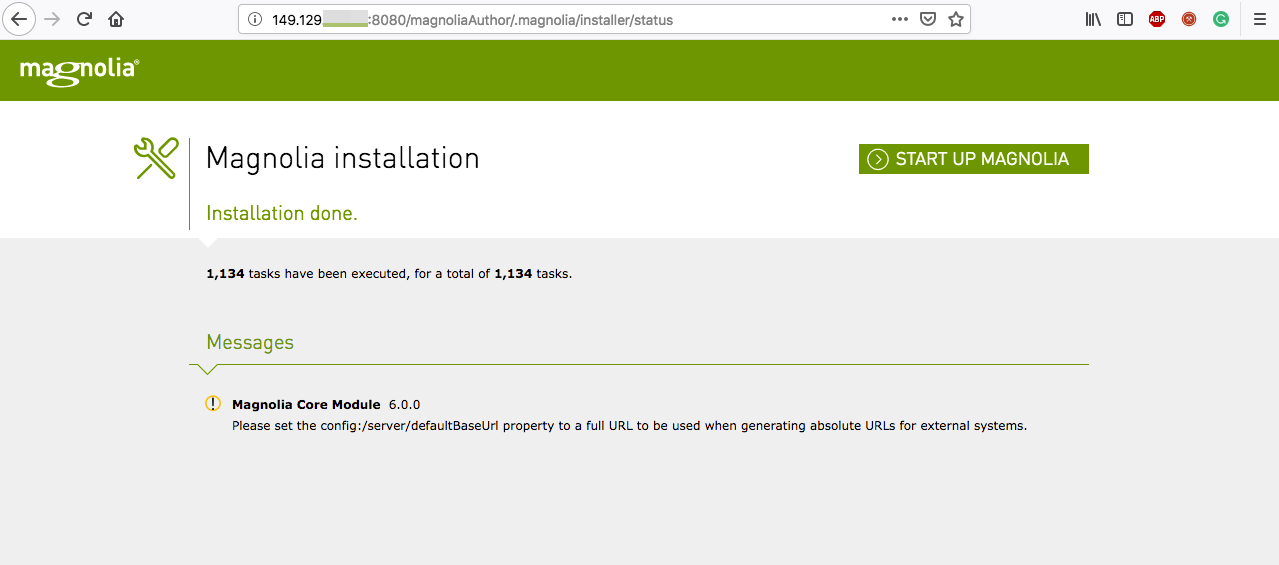
The following snapshot shows the installation progress and confirmation.
Next, set up the magnoliaPublic instance. This installer also runs on the same port but the URL is different. It might ask for the license key to complete installation.
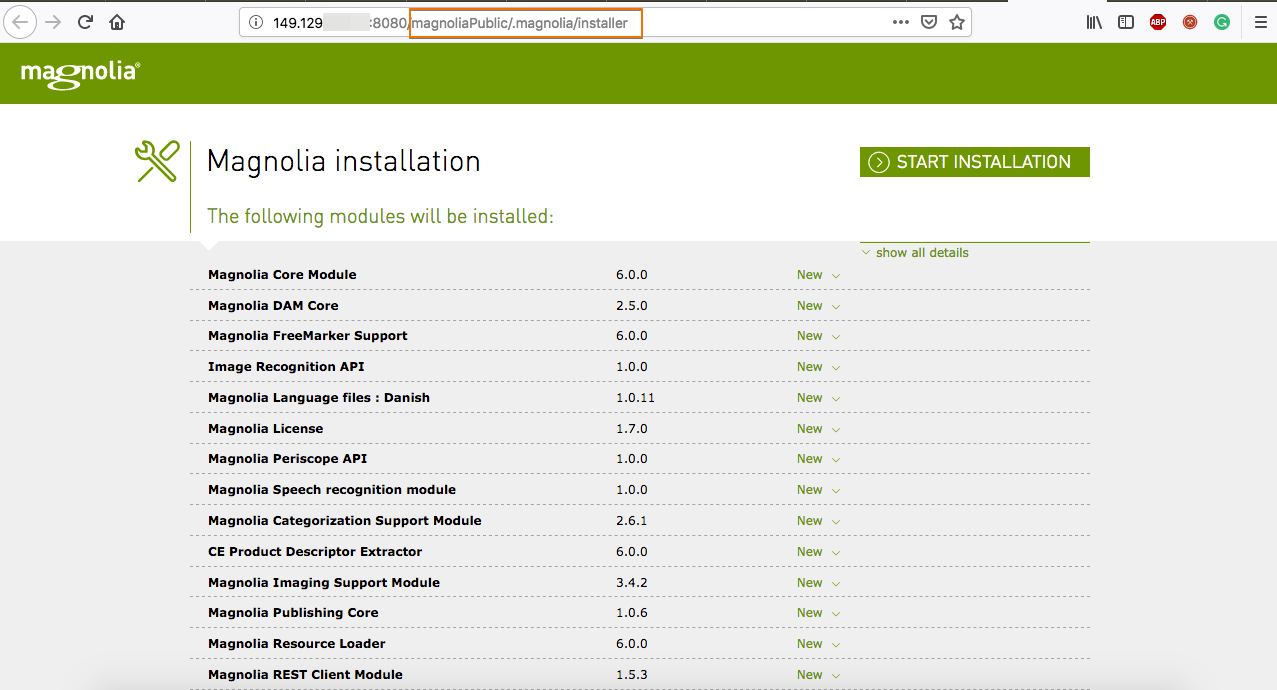
Obtain the same from the Magnolia website as an enterprise trail. Use the key and the email ID to proceed with the installation.
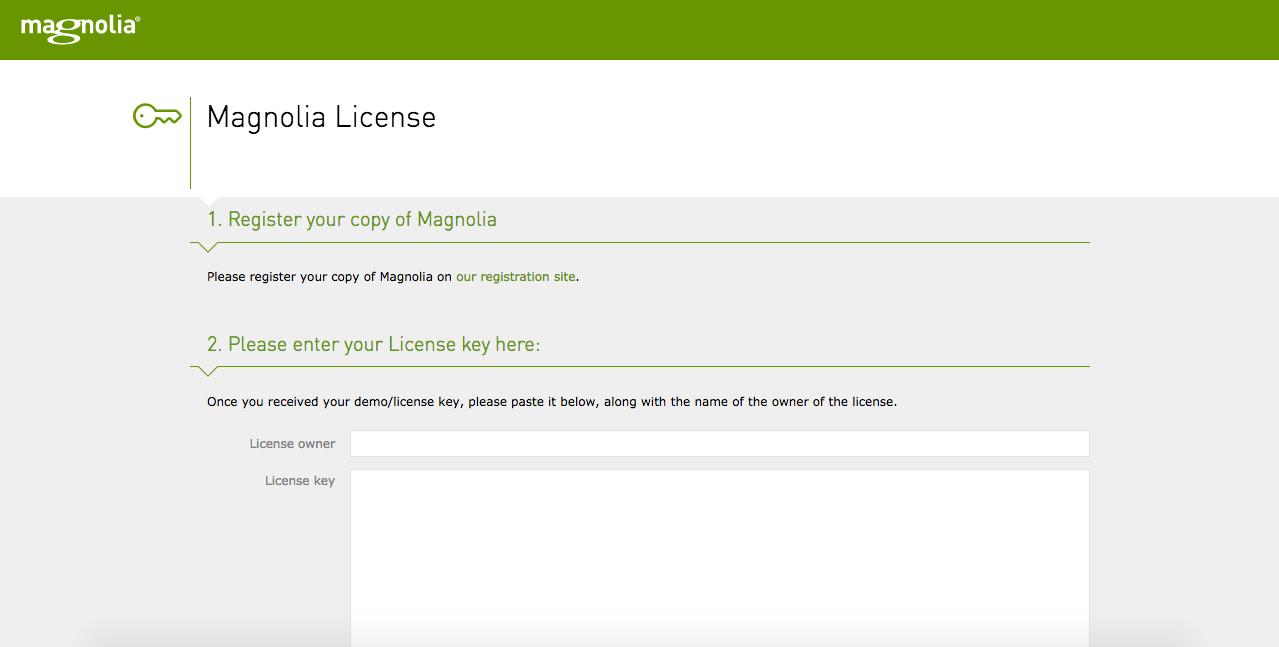
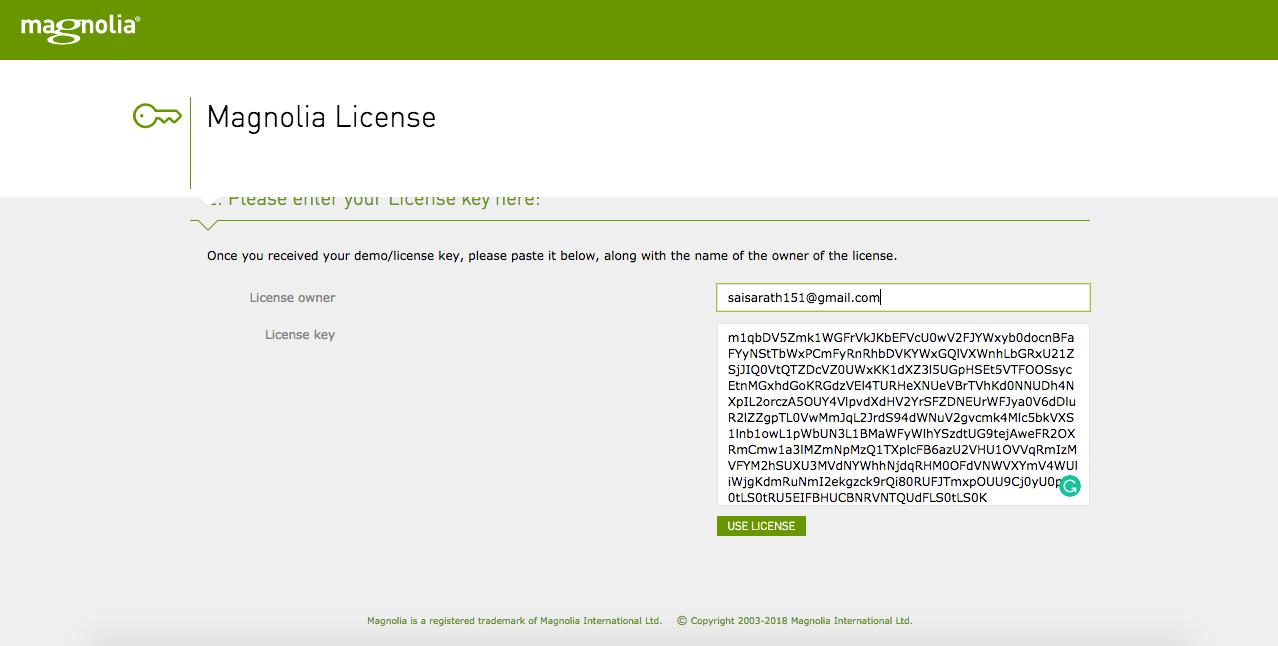
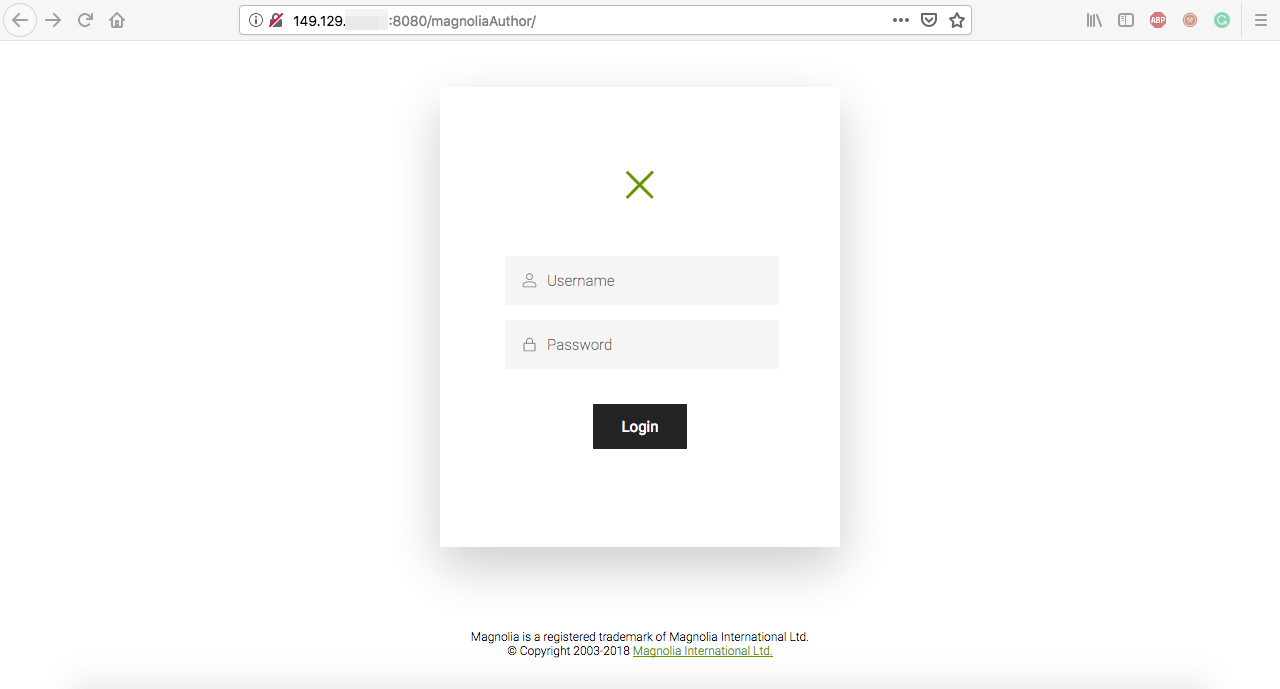
After successful installation, the login screen appears to provide access to the magnoliaAuthor.
There is also a travel website deployed as a sample to play around. Access the sample site on the Magnolia public instance.

There you go! You have successfully set up the Magnolia CMS on your Alibaba Cloud ECS Ubuntu Instance.

2,598 posts | 769 followers
FollowAlibaba Clouder - April 23, 2019
Alibaba Clouder - May 22, 2018
Alibaba Clouder - May 22, 2018
Alibaba Clouder - January 15, 2019
Alibaba Clouder - February 27, 2019
Alibaba Clouder - April 26, 2019

2,598 posts | 769 followers
Follow Secure Content Delivery Solution
Accelerate static and dynamic web content in a fast, reliable, and safe way using Secure DCDN (Dynamic Route for CDN)
Learn More CloudMonitor
Automate performance monitoring of all your web resources and applications in real-time
Learn More Personalized Content Recommendation Solution
Help media companies build a discovery service for their customers to find the most appropriate content.
Learn More Web Hosting Solution
Explore Web Hosting solutions that can power your personal website or empower your online business.
Learn MoreMore Posts by Alibaba Clouder