By Hitesh Jethva, Alibaba Cloud Community Blog author.
Subversion is a free, open-source control system that can be used to keep track of source file and documents. Subversion allows you to track the changes you have made to a file and also roll back to a previous version of file if an issue occurs. Subversion comes with mod_dav_svn, which is an Apache module that allows you to access and manage the Subversion repository through a web-based interface. With Subversion, you can easily make any changes, add or delete a file or folder and commit these changes to the Subversion repository. Besides all of this, Subversion also allows users to access the repository from different computers and allows them to modify and manage the same set of data from their respective location.
In this tutorial, you will learn how to install and configure Apache Subversion on an Alibaba Cloud Elastic Compute Service (ECS) that is installed with Ubuntu 16.04. You will also learn how to install and setup repository using the RabbitVCS Subversion client.
For this tutorial, you will need the following items:
For reference on how to complete these prerequisites, you can refer to create a new ECS instance and connect to your instance. Next, once you are logged in to your ECS instance, make sure to run the apt-get update -y command to update your base system with the latest available packages.
First, you will need to install Apache web server to your system. You can install it with the following command:
apt-get install apache2 apache2-utils -yOnce the Apache web server is installed, start Apache service and enable it to start on boot time with the following commands:
systemctl start apache2
systemctl enable apache2
Next, install Apache Subversion by running the following command:
apt-get install subversion subversion-tools libapache2-mod-svn libapache2-svn -yFirst, you will need to create a directory for Subversion repository. You can create it with the mkdir /opt/svn command. Next, create the repository called svnrepo inside /opt/svn directory with the following command:
svnadmin create /opt/svn/svnrepoThen give proper permission to the repository with the following command:
chown -R www-data:www-data /opt/svn/svnrepoNext, you will need to configure Apache virtual host file for svn repository. You can do this with the nano /etc/apache2/mods-enabled/dav_svn.conf command. After which, you want to add the following lines:
<Location /svn>
 DAV svn
 SVNParentPath /opt/svn
 AuthType Basic
 AuthName "Subversion Repository"
 AuthUserFile /etc/apache2/svn.passwd
 Require valid-user
</Location>
Save and close the file. Then, create a password file for user (hitesh) with the following command:
htpasswd -cm /etc/apache2/svn.passwd hiteshProvide your passwords.
New password:
Re-type new password:
Adding password for user hitesh
Next, enable required Apache modules and restart Apache service with the following command:
a2enmod dav
a2enmod dav_svn
systemctl restart apache2Apache Subversion is now installed, so now it's time to test it from the remote system using the web browser.
Now, log in to your ECS instance installed with Ubuntu 16.04 Desktop version, open your web browser and type the address http://192.168.0.102/svn/svnrepo. You will be redirected to the following page:
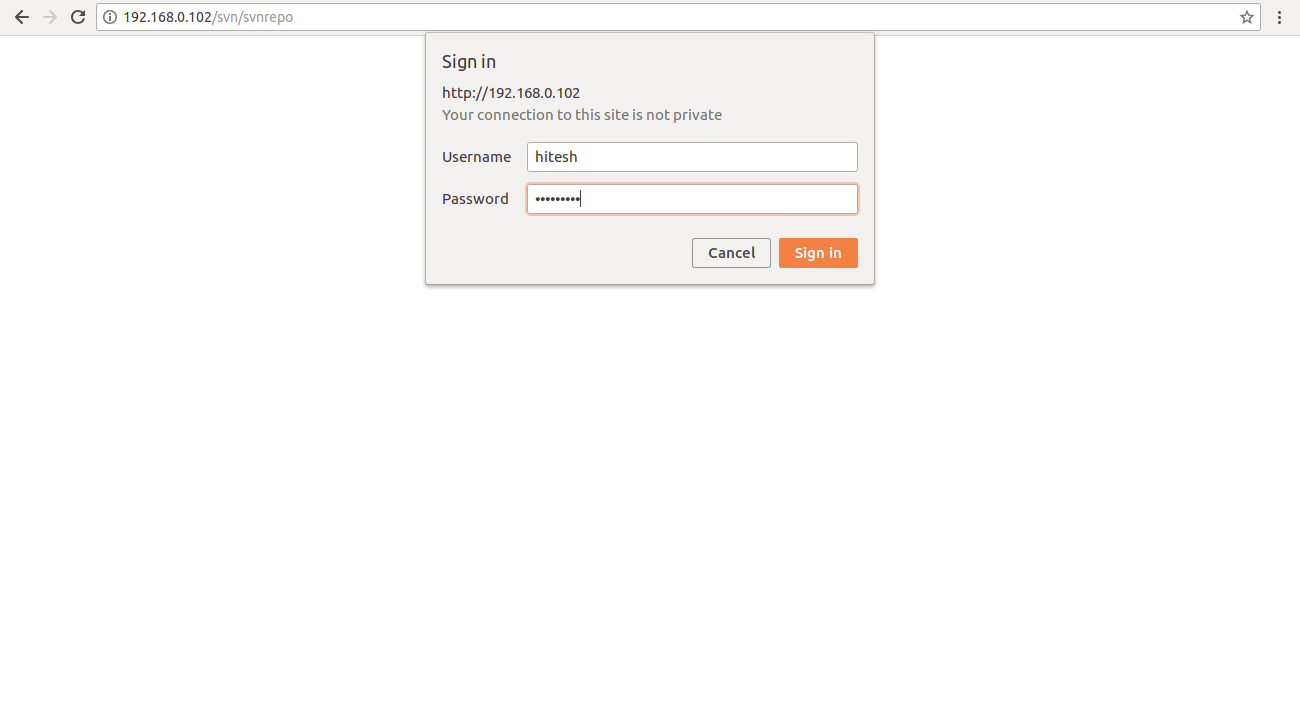
Now, provide your username and password, then click on Sign in button. You should see your repository in the following page:
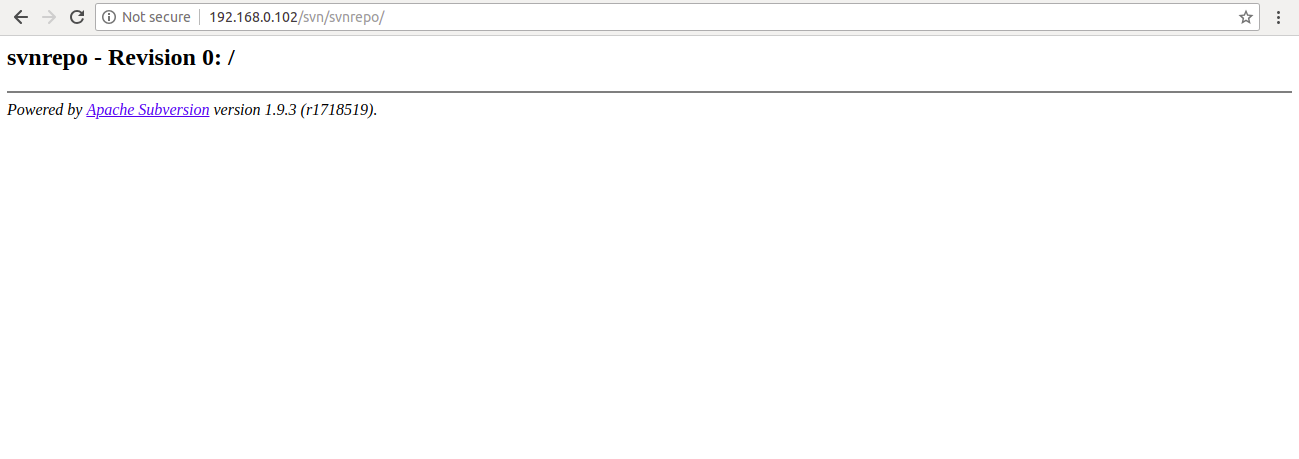
Next, create a directory called svnlocalrepo on the remote system (Ubuntu 16.04 desktop) with the mkdir svnlocalrepo command, and then check out your repository on svnlocalrepo with the following command:
svn checkout http://192.168.0.102/svn/svnrepo --username hitesh svnlocalrepo/You will be prompt to provide password for hitesh as shown below:
Authentication realm: <http://192.168.0.102:80> Subversion Repository
Password for 'hitesh': *********
Provide your password and press the Enter button. You should see the following output:
-----------------------------------------------------------------------
ATTENTION!  Your password for authentication realm:

   <http://192.168.0.102:80> Subversion Repository

can only be stored to disk unencrypted!  You are advised to configure
your system so that Subversion can store passwords encrypted, if
possible.  See the documentation for details.

You can avoid future appearances of this warning by setting the value
of the 'store-plaintext-passwords' option to either 'yes' or 'no' in
'/root/.subversion/servers'.
-----------------------------------------------------------------------
Store password unencrypted (yes/no)? yes
Checked out revision 0.
Next, change the directory to the svnlocalrepo and create some directory and files with the following command:
cd svnlocalrepo
mkdir testdir
touch testfile1.txt
touch testfile2.txt
Next, add the above created files and directory with the svn add testdir testfile1.txt testfile2.txt command. You will have the following output:
A         testdir
A         testfile1.txt
A         testfile2.txt
Next, commit the added file with the commit message with the svn commit -m 'My First Commit' command. You should see the following output:
Adding         testdir
Adding         testfile1.txt
Adding         testfile2.txt
Transmitting file data ..done
Committing transaction...
Committed revision 1.
Now, open your web browser and access your repository. You should see the newly added files and directory in the following image:
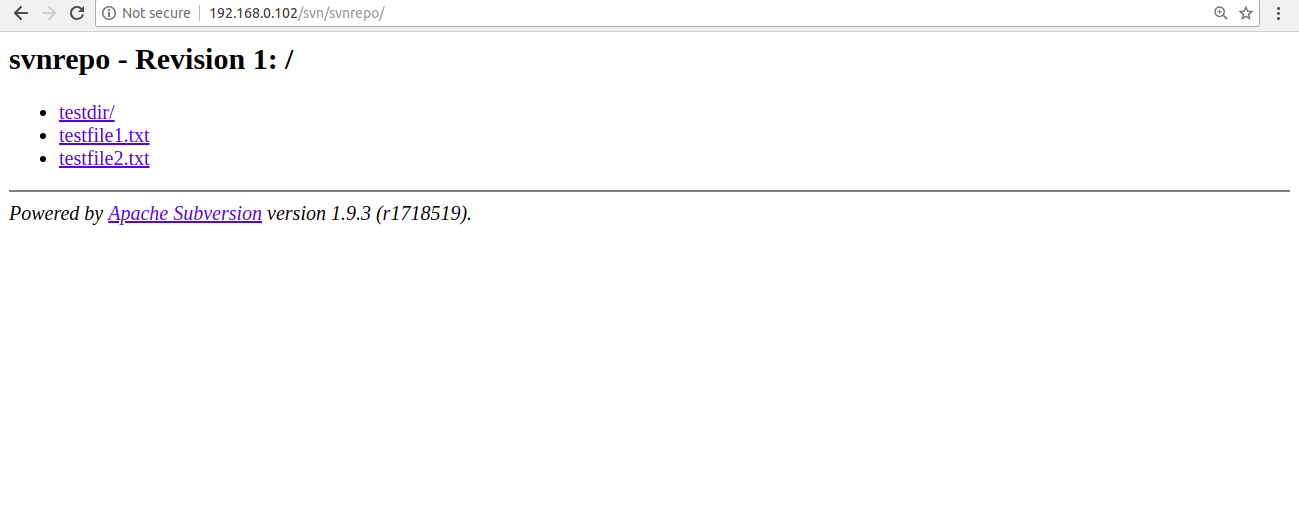
Apache Subversion is now installed and working. It's time to install Subversion client (RabbitVCS) on Ubuntu 16.04 Desktop instance and connect it to Apache Subversion.
RabbitVCS is a simple and easy to use graphical front-end for version control systems. You can integrate it into file managers to provide file context menu access to version control repositories. By default, RabbitVCS is not available in the Ubuntu 16.04 desktop default repository. So you will need to add the repository for that to your system.
You can add it with the following command:
add-apt-repository ppa:rabbitvcs/ppaOnce the repository is added, update the repository and install RabbitVCS with the following command:
apt-get install rabbitvcs-nautilus3 rabbitvcs-gedit rabbitvcs-cli rabbitvcs-core -yNext, open your Documents directory from Filemanager, right click under Documents directory. You should see the following image:
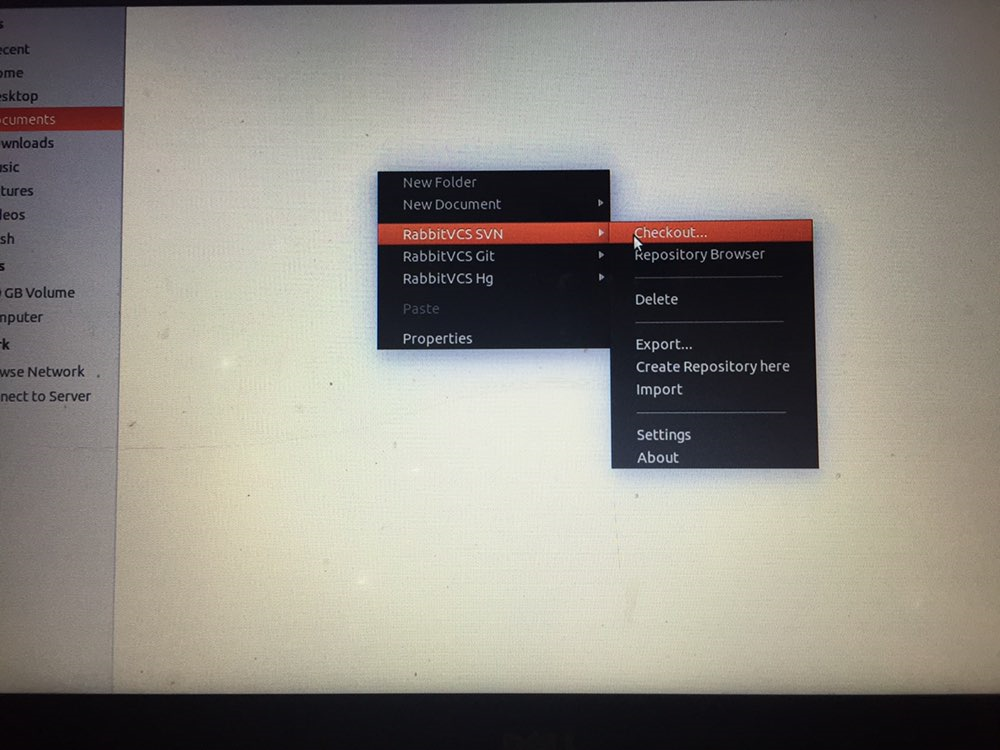
Now, click on the RabbitVCS SVN > Checkout. You should see the following page:
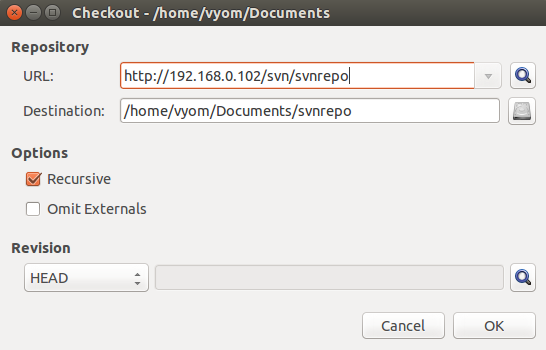
Now, provide your Subversion repository web address and Destination directory. Then, click on the OK button. You should see the following page:
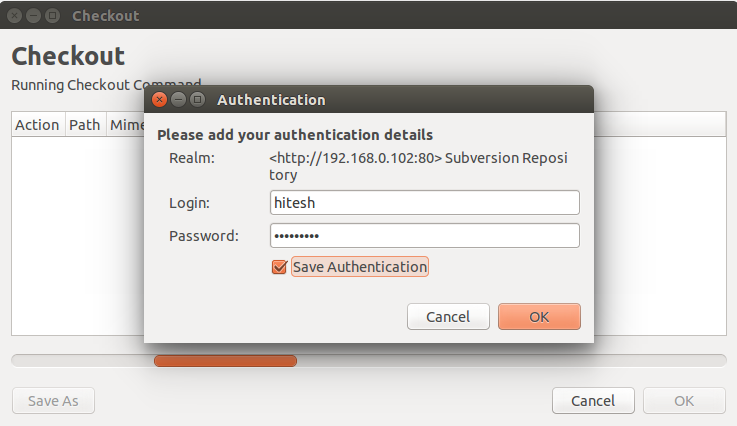
Now, provide your username and password. Then, click on the OK button. Once the repository is check out, you should see the output in the following image:
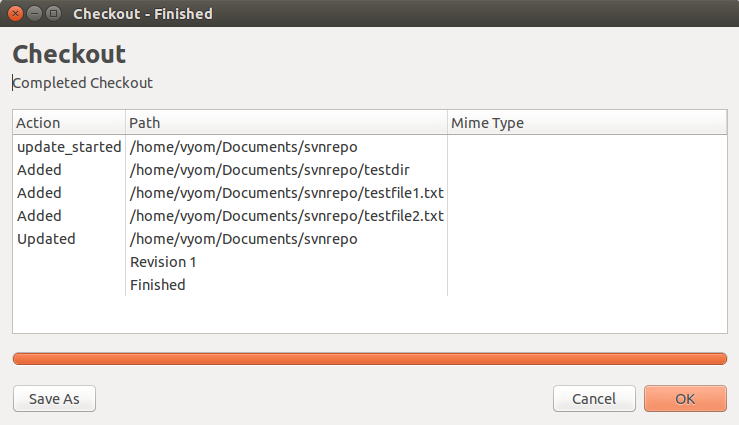
Now, click on the OK button. You should see the svnrepo in the following page:

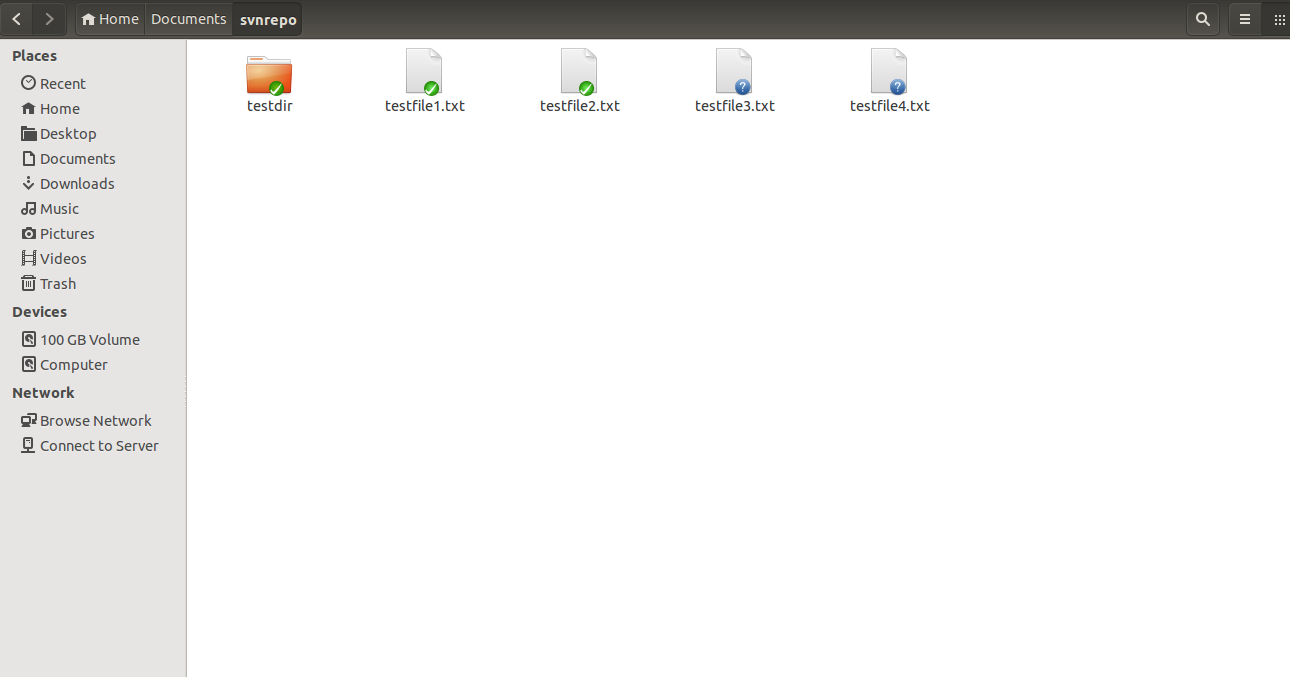
Now, click on the svnrepo directory and create two other files testfile3.txt and testfile4.txt. You should see the following image:
Now, right click inside svnrepo directory. You should see the following image:
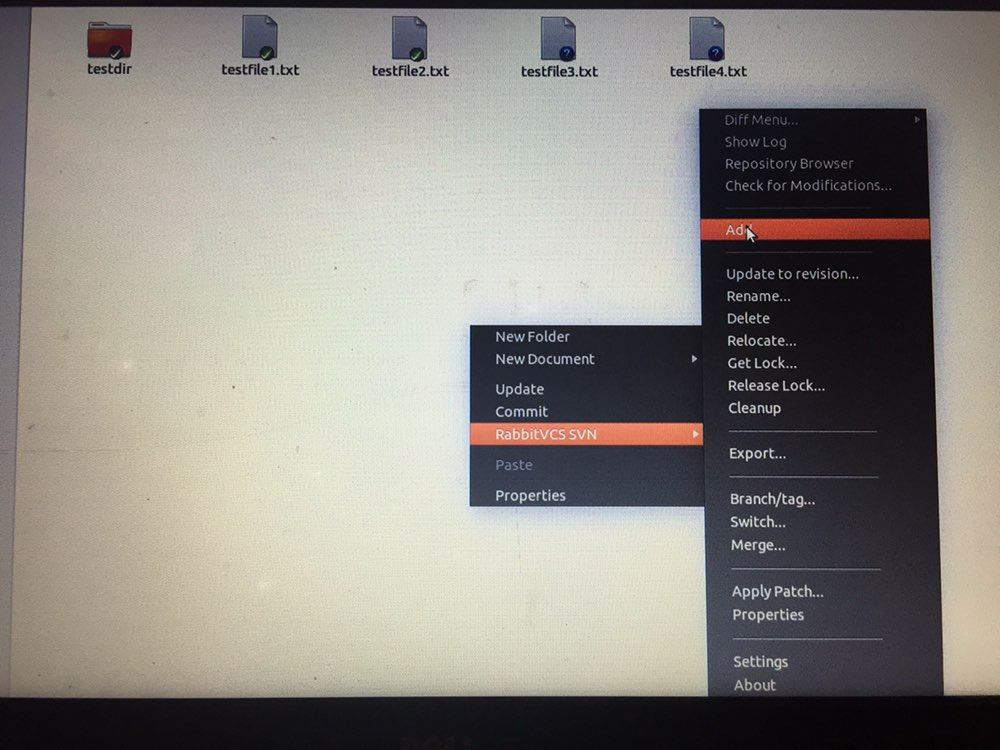
Now, click on the RabbitVCS SVN > add button. You should see the following image:
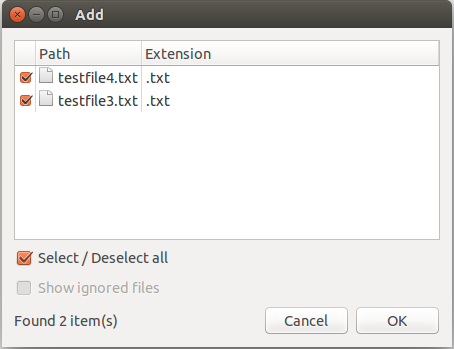
Now, select both files and click on the OK button. Once the files are added to the repository. You should see the following page:
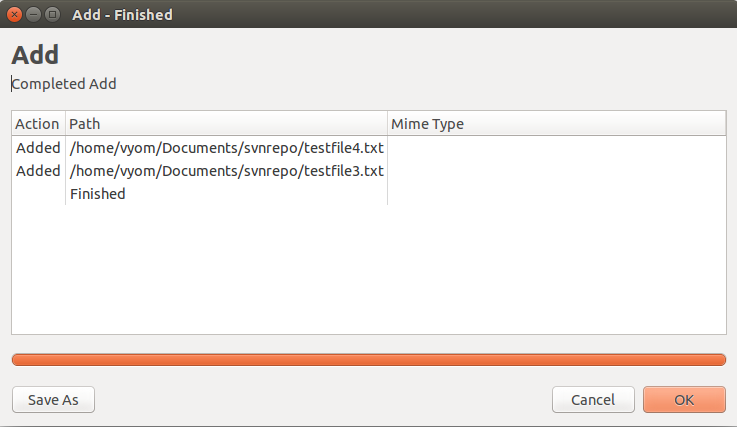
Now, press OK button to completed the process.
Next, right click inside svnrepo directory. You should see the following page:
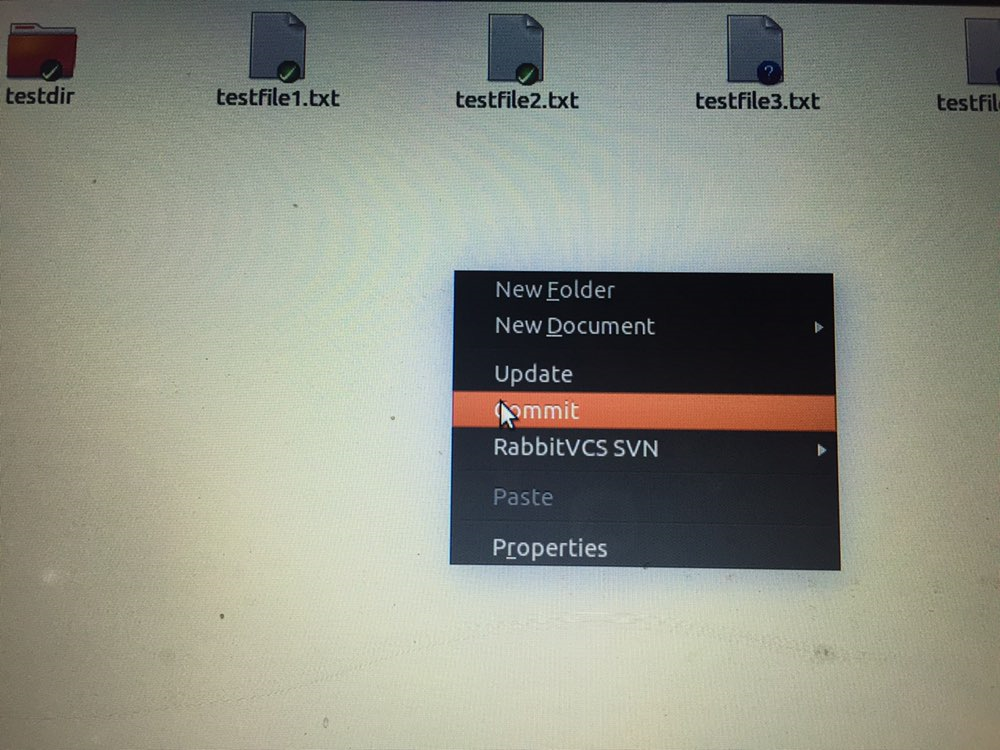
Now, click on the Commit button. You should see the following page:
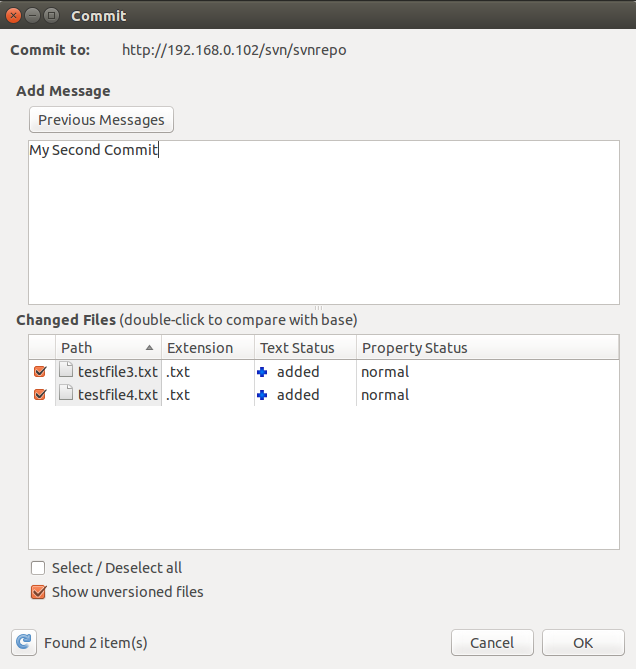
Now, type your Commit message and click on the OK button. Once the Commit completed successfully. You should see the output in the following page:
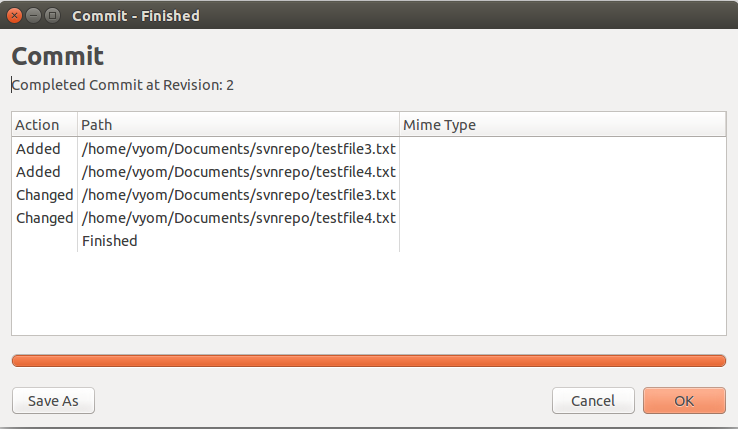
Now, click on the OK button to finish the process.
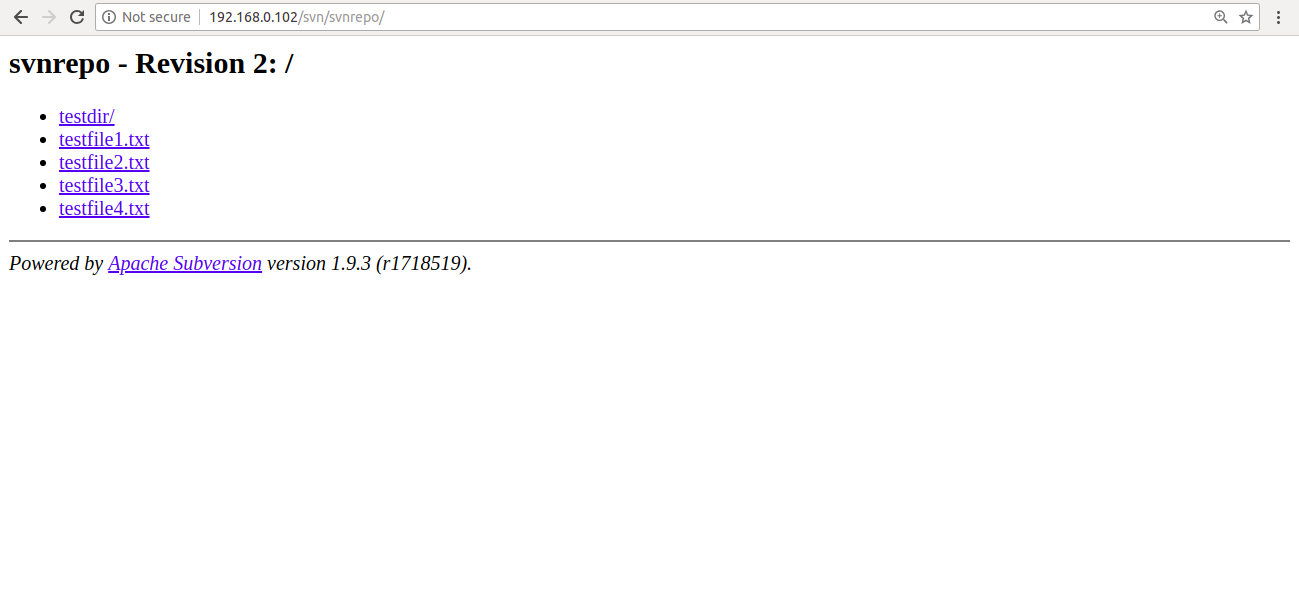
Next, open your web browser and access the Subversion repository. You should see the newly added files in the following page:

2,593 posts | 793 followers
FollowSajid Qureshi - August 8, 2018
digoal - June 28, 2021
Alibaba Cloud Community - January 10, 2024
Alibaba Clouder - July 5, 2019
Alibaba Cloud Community - December 4, 2023
Alibaba Clouder - August 26, 2019

2,593 posts | 793 followers
Follow ECS(Elastic Compute Service)
Elastic and secure virtual cloud servers to cater all your cloud hosting needs.
Learn MoreLearn More
 OSS(Object Storage Service)
An encrypted and secure cloud storage service which stores, processes and accesses massive amounts of data from anywhere in the world
Learn MoreMore Posts by Alibaba Clouder