By Arslan Ud Din Shafiq, Alibaba Cloud Tech Share Author. Tech Share is Alibaba Cloud's incentive program to encourage the sharing of technical kledge and best practices within the cloud community.
Turtl server is open source storage service that focuses on privacy. Turtl stores your password and creates a cryptographic key and uses this key for encryption of your data before storing it anywhere on your device or on server. This means the data can be ready by only you or by the people chosen by you for sharing of data.
In this tutorial, I will be installing and setting up Turtl Server on Alibaba Cloud Elastic Compute Service (ECS) with Ubuntu 16.04 installed.
Before proceeding with installation of any kind of package, use the following command to update your Ubuntu system. To execute this command, remember to login from non-root user with sudo privileges.
# sudo apt update && sudo apt upgradeYou will need to install git on your server. To install Git execute the command below.
# sudo apt-get install git(Optional) Execute the commands below to configure Git by providing your name and valid email address so that commit messages may contain your correct information.
# git config --global user.name "Aareez"
# git config --global user.email "xyz@example.com"
Install curl on your server.
# sudo apt-get install curlInstall libtool on your server.
# sudo apt-get install libtoolYou will need to install subversion on your server. To install subversion execute the command.
# sudo apt-get install subversionInstall make on your server.
# sudo apt-get install makeInstall automake on your server.
# sudo apt-get install automakeTo install Libuv, you will need to download the Libuv package from its official repository.
# wget https://dist.libuv.org/dist/v1.13.0/libuv-v1.13.0.tar.gz Extract the files from downloaded archived directory.
# tar -xvf libuv-v1.13.0.tar.gzRemove the downloaded archived directory.
# rm libuv-v1.13.0.tar.gzNavigate to extracted directory using command below.
# cd libuv-v1.13.0Execute the following commands to build, compile and install libuv.
# sudo sh autogen.sh
# sudo ./configure
# sudo make
# sudo make install
# sudo ldconfigYou will need to install JSON database "RethinkDB", Turtl will do settings automatically. To install RethinkDB, follow the steps below.
Add RethinkDB package in your repositories for installation by executing the following command.
# source /etc/lsb-release && echo "deb http://download.rethinkdb.com/apt $xenial main" | sudo tee /etc/apt/sources.list.d/rethinkdb.listVerify publisher key.
# wget -qO- https://download.rethinkdb.com/apt/pubkey.gpg | sudo apt-key add -You will need to add link to your source for adding your Ubuntu version. A text file will open, copy the text below and paste in it and save the changes.
# sudo nano /etc/apt/sources.list.d/rethinkdb.listdeb http://download.rethinkdb.com/apt xenial mainUpdate your system by executing the command below.
# sudo apt-get updateExecute the following command to install rethinkdb.
# sudo apt-get install rethinkdbRename the default.conf.sample file to default.conf
# sudo mv /etc/rethinkdb/default.conf.sample /etc/rethinkdb/default.confExecute the following command to restart rethinkdb.
# sudo systemctl restart rethinkdb.serviceAs Turtl is written in Common Lips, you will need to install Clozure Common Lisp. To install it, follow the steps below.
Execute the following command to install it.
# svn co http://svn.clozure.com/publicsvn/openmcl/release/1.11/linuxx86/ccl Execute the following commands to check if CCL has been installed successfully.
# cd ccl
# svn update
Execute the following commands to move ccl to bin, so that ccl can run from command line.
# cd ..
# sudo cp -r ccl/ /usr/local/src
# sudo cp /usr/local/src/ccl/scripts/ccl64 /usr/local/bin
You can launch Lisp environment by executing following command.
# ccl64
# (quit) Turtl will load its dependencies through QuickLisp and ASDF builds Lisp software. To install these, follow the steps below.
Download quicklisp by using the commands below.
# cd ~
# wget https://beta.quicklisp.org/quicklisp.lisp
# ccl64 --load quicklisp.lisp
Execute the following command to install quicklisp.
# (quicklisp-quickstart:install)Add QuickLisp to your init file.
# (ql:add-to-init-file)Execute the command below to quit from CCL.
# (quit) Download ASDF by executing command below.
# wget https://common-lisp.net/project/asdf/asdf.lispExecute the following commands to load and install asdf.lisp in CCL environment.
# ccl64 --load quicklisp.lisp
# (load (compile-file "asdf.lisp"))
# (quit)Clone Turtl from Github by executing the following command.
# git clone https://github.com/turtl/api.git Navigate to downloaded directory api and create file named launch.lisp. To do so, execute the commands below.
# cd api
# touch launch.lisp
# nano launch.lisp
Copy and paste the following text in the opened file and save the file.
(pushnew "./" asdf:*central-registry* :test #'equal)
(load "start")
Clone Turtl dependencies in /home/quicklisp/local-projects by executing commands below.
# cd ~/quicklisp/local-projects
# echo "https://github.com/orthecreedence/cl-hash-util https://github.com/orthecreedence/cl-async https://github.com/orthecreedence/cffi https://github.com/orthecreedence/wookie https://github.com/orthecreedence/cl-rethinkdb https://github.com/orthecreedence/cl-libuv https://github.com/orthecreedence/drakma-async https://github.com/Inaimathi/cl-cwd.git" > dependencies.txt
# for repo in `cat dependencies.txt`; do `git clone $repo`; done
Create .ccl-init.lisp by executing command below and copy-paste the following text and save the file.
# sudo nano /home/.ccl-init.lisp(cwd "/home/turtl/api")
(load "/home/turtl/api/launch")Create default Turtl configuration file by executing the command below.
# sudo cp api/config/config.default.lisp api/config/config.lispIf you want to connect to your Alibaba Cloud ECS instance from a mobile or desktop client, you will need to edit the following text in configuration file. Remember to replace IP address in below text with your ECS IP address.
# sudo nano api/config/config.lispExecute the following command, it will automatically start Turtl server.
# ccl64If you have activated firewalls, you will have to define a rule in Alibaba Cloud security group for your cloud server to add exception for port 80/tcp and 443/tcp. You can enable these ports while creating ECS instance, but in case if you have forgotten to unblock these ports, you can follow the procedure in this guide: https://www.alibabacloud.com/help/doc-detail/25471.htm
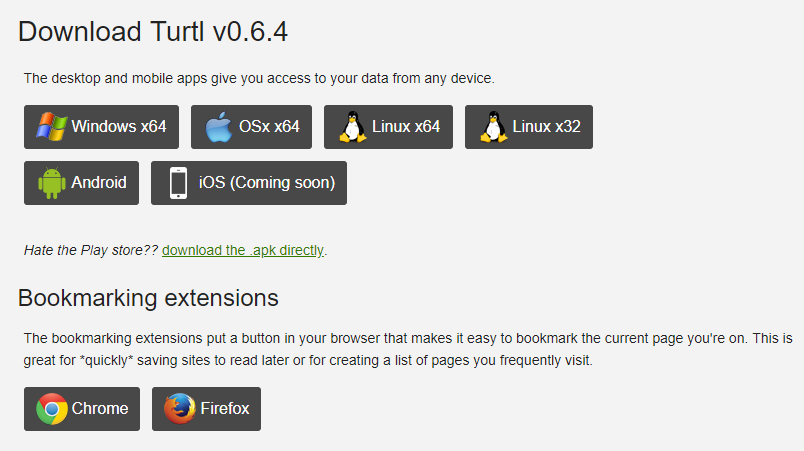
You will need to download Turtl Client app from its official website. It is available for Windows, macOSx, Linux and Android.

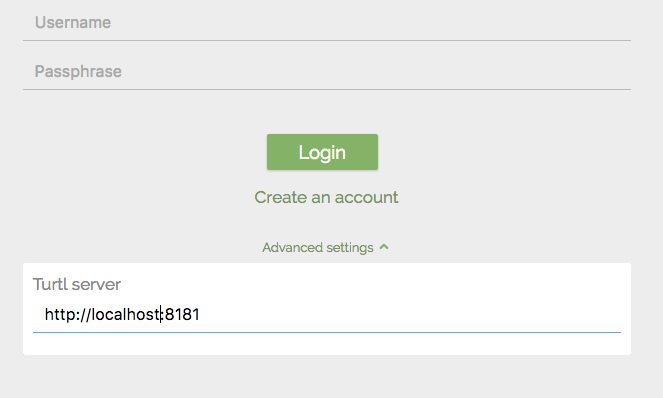
You will need to put your domain name or Alibaba Cloud IP address or if you are using app locally on your server, you can use localhost:8181 and create your username.

Your installation of Turtl on Alibaba Cloud ECS is now complete!

2,599 posts | 762 followers
FollowAlibaba Clouder - July 5, 2019
Alibaba Clouder - July 5, 2019
Alibaba Clouder - May 21, 2018
Alibaba Clouder - April 26, 2019
francisndungu - August 3, 2018
Alibaba Clouder - January 17, 2019

2,599 posts | 762 followers
Follow Web Hosting Solution
Explore Web Hosting solutions that can power your personal website or empower your online business.
Learn More Security Solution
Alibaba Cloud is committed to safeguarding the cloud security for every business.
Learn More Storage Capacity Unit
Plan and optimize your storage budget with flexible storage services
Learn More Web Hosting
Explore how our Web Hosting solutions help small and medium sized companies power their websites and online businesses.
Learn MoreMore Posts by Alibaba Clouder