By Francis Ndungu, Alibaba Cloud Tech Share Author. Tech Share is Alibaba Cloud's incentive program to encourage the sharing of technical knowledge and best practices within the cloud community.
MySQL is one of the most popular open source database management systems. It is widely used in websites and web applications to store data. Irrespective of its extensive use and acceptance by developers, MySQL requires backups when deployed in a production environment.
Backups are important for restoring data in case it is deleted or overwritten by mistake. When using MySQL server from Alibaba Cloud, you must consider data protection using backups and make it an essential part of your system or website even when the possibility of a database crash seems unlikely.
In this guide, we will discuss how you can back up your MySQL database from an Alibaba Cloud Elastic Compute Service (ECS) instance running Ubuntu 16.04 either manually or by using automated scripts.
MySQL has a nice command line utility that creates logical backups called 'mysqldump'. The tool reproduces your MySQL table structure and data without copying the actual data files and outputs the content to a file.
Logical backups are created in a format that contains essential SQL commands for recreating the database from scratch when a database needs to be restored. Thus, they give database administrators the flexibility of examining and editing table definitions before restoring data in a server if necessary.
Backups taken via the 'mysqldump' client may take a substantial amount of time to be restored but this option is great for small and medium-sized databases.
To use 'mysqldump' tool, follow the syntax codes below:
For the sake of clarity, we will use two databases; 'sample_db_1' and 'sample_db_1'. We will also use 'james' as the MySQL user in all examples. Each sample database contains two tables ('table_1' and 'table_2').
Backing up a single MySQL table
$ mysqldump [options] db_name [tbl_name ...] > backup_file_name.sqlExample
$ mysqldump -u james -p sample_db_1 table_1 > backup_file_name.sqlBacking up a Single MySQL Database
$ mysqldump [options] --databases db_name ... > backup_file_name.sqlExample
$ mysqldump -u james -p --databases sample_db_1> backup_file_name.sqlBacking up All MySQL databases
$ mysqldump [options] --all-databases > backup_file_name.sqlExample
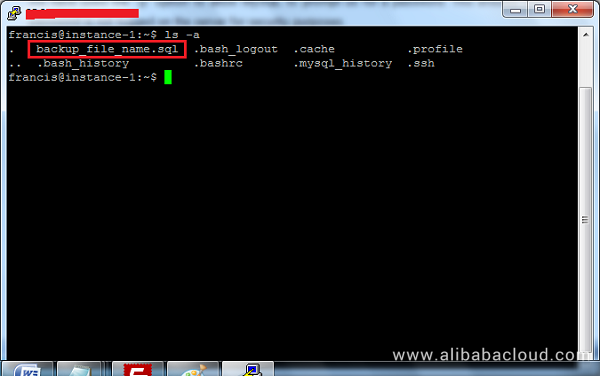
$ mysqldump -u james -p --all-databases > backup_file_name.sqlIn the above examples, the output of the mysqldump command is directed to a file name 'backup_file_name.sql'.
To check if the backup was created successfully, use the command below to list the files:
$ ls -a
We have used the '-p' option to allow MySQL to prompt us for a password. This ensures that our password is not logged on the server for security purposes.
You can restore any MySQL database created using mysqldump command using the syntax below:
$ mysql -u username -p database_name < backup_file_name.sqlExample
$ mysql -u james -p sample_db_1 < backup_file_name.sqlRemember to enter your password when prompted to do so.
In the above examples, we just used an arbitrary file name to store our MySQL backups. A more professional and convenient way is to append the date on the file name.
This will help you to easily manage your backups in a chronological order and restore the most recent backup in case the MySQL server crashes:
Also, it is advisable to include the name of the database on the filename. For instance, to backup our 'sample_db_1' database we will use the syntax below:
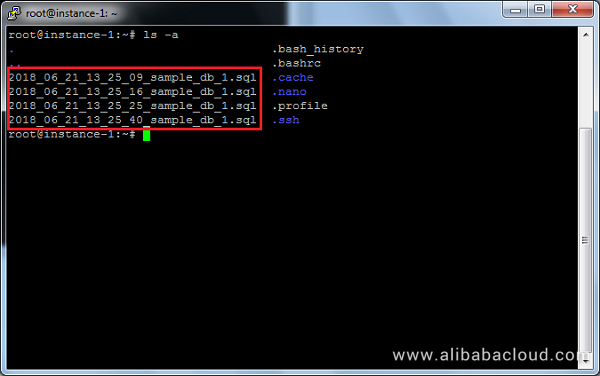
$ mysqldump -u james -p --databases sample_db_1> $(date "+%Y_%m_%d_%H_%M_%S")_sample_db_1.sqlRun the command below to confirm the changes:
$ ls –aOutput

As you can see in the output above, our backup file name contains the year, month, day of the month and time.
Logical MySQL backups using mysqldump only works when a database server is up and running. Also, mysqldump utility can be slow for large databases.
So in case you are managing a bulky database or you can't access a MySQL server, taking physical backups is the ideal choice.
To perform a physical MySQL backup, you will simply copy all files under the data directory usually on the path /var/lib/mysql/.
Note: You will need to be logged in as a root user to perform the steps below.
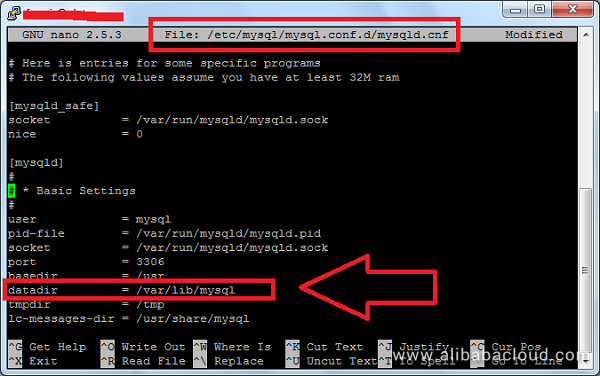
For accuracy purposes, use a nano editor to examine the content of MySQL configuration files:
$ nano /etc/mysql/my.cnf
$ nano /etc/mysql/mysql.conf.d/mysqld.cnf
$ nano /etc/my.cnf
You should check the value of the datadir directive as shown below:

Next, create a backup directory that will hold the database files using the command below:
$ mkdir /var/mysql_backupsThen, use the cp commands to recursively copy the database files to our target backup directory. Before you do this, you need to stop MySQL server if it is already running:
$ systemctl stop mysql$ cp -R /var/lib/mysql/* /var/mysql_backupsWhen restoring your data files back to MySQL, it is a good idea to rename the current MySQL directory with a different name. Before you do this, make sure MySQL service is stopped.
$ systemctl stop mysql
$ mv /var/lib/mysql /var/lib/mysql-old
Then you need to recreate the directory /var/lib/mysql one more time using the command below.
$ mkdir /var/lib/mysqlThen, copy all backup files to the folder /var/lib/mysql
$ cp -R /var/mysql_backups/* /var/lib/mysqlAssign the right ownership of the directory by typing the command below:
$ chown -R mysql:mysql /var/lib/mysqlRestart MySQL and your backup should be up and running
$ systemctl restart mysqlManual MySQL backups are very convenient when you want to take a quick snapshot of your databases. However, this can be a tedious process on a production environment.
Luckily, you can use a utility called automysqlbackup to handle MySQL backups automatically. The tool organizes all backups under the directory /var/lib/automysqlbackup for faster data restoration.
To install automysqlbackup, run the command below as the root user:
$ apt-get install automysqlbackupTo manually take a backup, run the command below and make sure MySQL server is started:
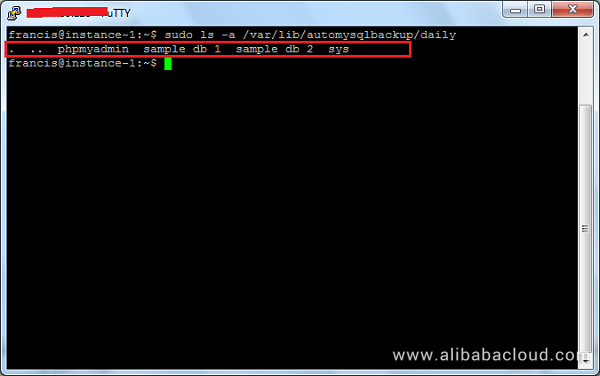
$ automysqlbackupTo confirm if the backup was taken successfully, run the command below:
$ ls -a /var/lib/automysqlbackup/daily
You can edit the automysqlbackup utility configuration file by running the command below:
$ nano /etc/default/automysqlbackupHowever, the utility will create database backups every day, week and month for all databases in your server. You should rest assured that the tool will provide a better way of managing your backups without doing it manually.
In this guide, we have showed you how to create logical and physical backups from your MySQL server hosted on Alibaba Cloud Elastic Compute Service (ECS). We have also outlined the basic steps for running an automated backup using automysqlbackup utility. Running backups on your MySQL server hosted on Alibaba Cloud is the first step towards securing your data in case a disaster strikes your server.

31 posts | 8 followers
Followfrancisndungu - August 3, 2018
Alibaba Clouder - February 13, 2019
Alibaba Clouder - July 1, 2019
Alibaba Clouder - August 16, 2019
Alibaba Clouder - February 13, 2019
Alibaba Clouder - August 2, 2018

31 posts | 8 followers
Follow PolarDB for MySQL
Alibaba Cloud PolarDB for MySQL is a cloud-native relational database service 100% compatible with MySQL.
Learn More Database Backup
A reliable, cost-efficient backup service for continuous data protection.
Learn More ECS(Elastic Compute Service)
Elastic and secure virtual cloud servers to cater all your cloud hosting needs.
Learn More Database Migration Solution
Migrating to fully managed cloud databases brings a host of benefits including scalability, reliability, and cost efficiency.
Learn MoreMore Posts by francisndungu
Raja_KT February 9, 2019 at 6:00 am
Good one. I think DBS will give lots of features like encryption at phase, type of backup, time,validation precheck screen....