By Priyankaa Arunachalam, Alibaba Cloud Community Blog author.
As we are taking a look at various ways of making Big Data Analytics more productive and efficient with better cluster management and easy-to-use interfaces. In this article, we will continue to walk through HUE, or Hadoop User Experience, discussing its several features and how you can make the best out of the interface and all of its features. In the previous article, Diving into Big Data: Hadoop User Experience, we started to look at how you can access Hue and what are some prerequisites needed for accessing Hadoop components using Hue. In this article, we will specifically focus on making the file operations easier with Hue, as well as the usage of editors, how to create workflows and scheduling them using Hue.
In addition to the scenario of creating directories and uploading files which we saw in our previous article, we also have additional features to be explored. The File Browser lets you perform more advanced file operations like the following:
Let's take a look at the above mentioned functions using File Browser.
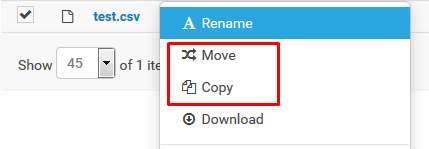
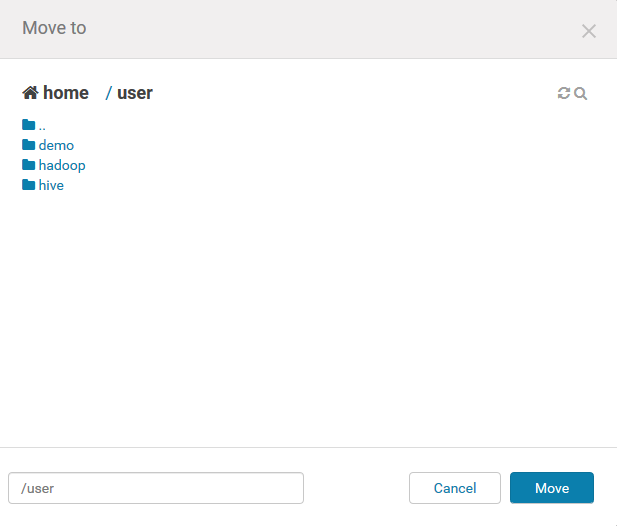
Changing the permissions of various directories and files is performed quite often by the developers to write a file into a folder or change the contents of a file. You can make these common operations simpler, thus allowing you to make your job more efficient. To do so, right click on a file and choose Change Permissions from the drop-down menu. On the wizard that follows, provide the required permissions and click Submit.
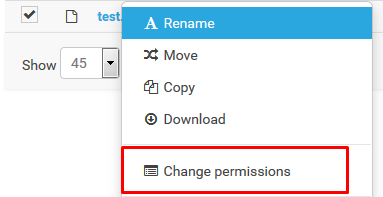
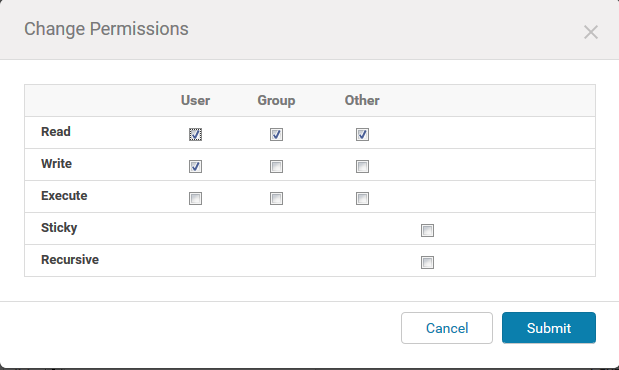
The Replication factor is a key parameter in the Big Data analytics. We saw this term and its usage in our previous articles in this series. Earlier, we set up a common replication factor for all the files in HDFS using the Alibaba E-MapReduce console. However, through using Hue, you can edit the replication factor of individual files. Similarly, right click and choose Set Replication from the drop-down menu and provide a replication factor as required.

One another important concept of file handling is compression. We went through various compression techniques and their uses in our previous article, Diving into Big Data: Data Interpretation . Compressing a file is also made easier here. Right click on a file, choose Compress and give an archive name with the extension at the end of the file name. Once done, click Compress, which will compress the file as mentioned.

Two other major features to look at are the editors and the scheduler.
On logging in to Hue, the default screen which you see will be the Hue 4 interface. For people who are not familiar with this newer version of the interface, they can switch to the Hue 3 interface.
To make use of these features, click on dropdown of Query on the Hue Interface as shown below:

The editor is similar to the Zeppelin notebooks in that you can carry out with any programming language you are used to and comfortable with. This is where you can use various shells for programming and save the queries for later use. Clicking Editor will direct you to several options, including PySpark, SparkSql, and Pig, so on.
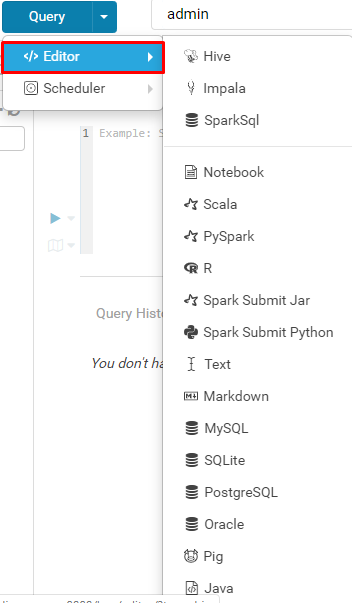
Let's choose Pyspark and try out with the same code which we used before in Data Preparation.
Trying out with spark sessions directly will lead you to the following error if you do not have Livy server up and running.
HTTPConnectionPool (host='localhost', port=8998): Max retries exceeded with url: /sessions (Caused by NewConnectionError ('<requests.packages.urllib3.connection.HTTPConnection object at 0x7fc7168d8550>: Failed to establish a new connection: [Errno 111] Connection refused',))Let's quickly add the service Livy to resolve this issue. We have seen how to add services using E-MapReduce console in our previous article, Diving into Big Data: EMR Cluster Management .
Click Add service and choose Livy from the list of options. This will prompt you to add Zookeeper too because Livy is dependent on Zookeeper. With that said, select both Livy and Zookeeper from the list of services and click ok.
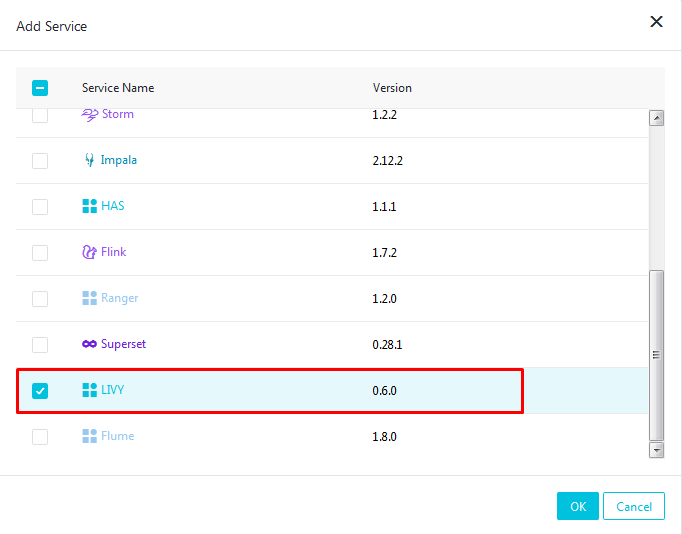
It might take two to three minutes for the services are getting initiated. Once the status of both these services is normal, you will be all set to start on Spark notebooks.
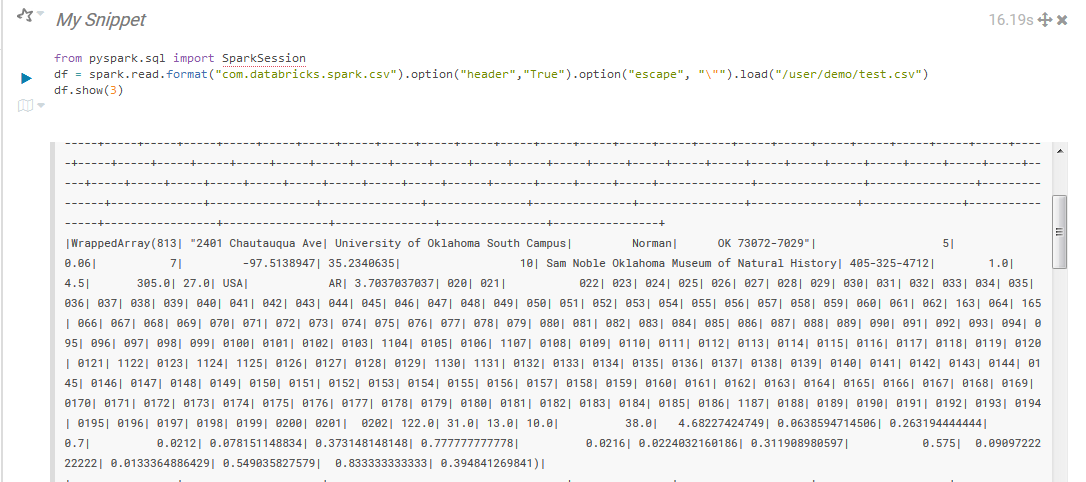
Consider this. Let's read the file with spark that we uploaded as follows:
from pyspark.sql import SparkSession
df = spark.read.format("com.databricks.spark.csv").option("header","True").option("escape", "\"").load("/user/demo.test.csv")
df.show(3)
Once done with the code, click on the run icon to the left of the snippet to run the code. This will show a result similar to the one given below:
As said earlier, for people who are comfortable with the previous version, I recommend that you switch to Hue 3 by clicking Switch to Hue 3 on the top right of the web interface. In this tutorial, we are using the Hue 3 interface.
On the Hue 3 interface, navigate to notebooks. Click on the Add symbol and choose PySpark from the options that pop up.

Now proceed with the same spark code and run the code. Similarly, we can use various editors and save them to create workflows and make things productive.
The next important feature is the Scheduler. HUE lets you build workflows and then schedule them to run automatically on a timely basis. One can monitor the progress and logs of the jobs in the interface and also pause or stop the jobs if needed.
To create a workflow, click on the Query drop-down menu and choose Scheduler > Workflow. This will lead to the Oozie Editor page. Apache Oozie is a well-known workflow scheduler system that runs workflows consisting of the Hadoop jobs. Here, you will build a pipeline consisting of different programs in the order you require and run them in a scheduled fashion. For example, create different programs like Pig and Spark in the Editor and save them, and then add them to your workflow and schedule them to automate the jobs. Despite of the tedious process of defining workflows in codes, HUE makes it simple with a drag and drop environment using Oozie Editor.
The Oozie Editor application allows you to define and run a workflow, coordinator and bundle applications.
In the Workflow Editor you can easily perform operations on the nodes of Oozie.
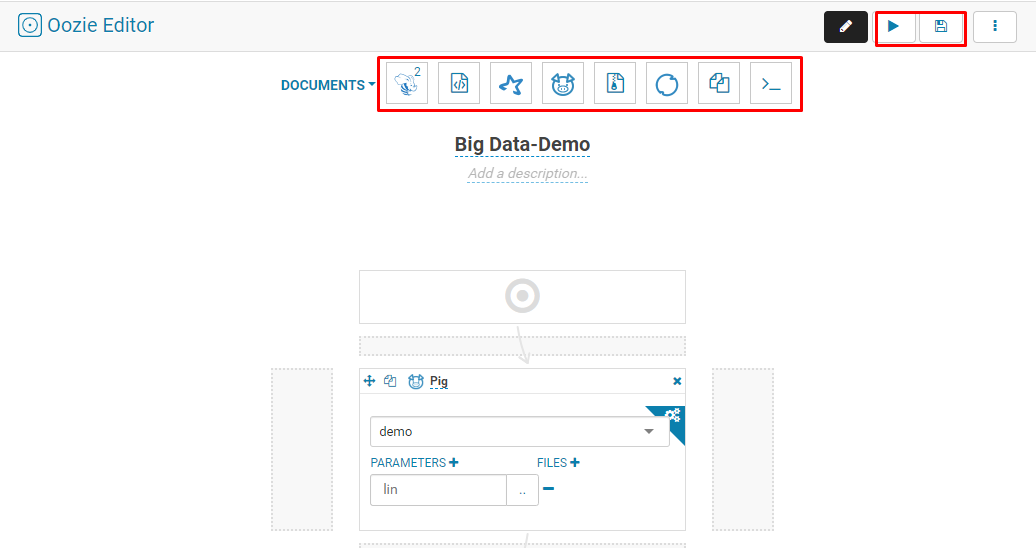
You can just drag and drop the action nodes in the Workflow Editor. Just give a name and description to the workflow as shown below. You can see various action icons where you have the corresponding set of saved queries
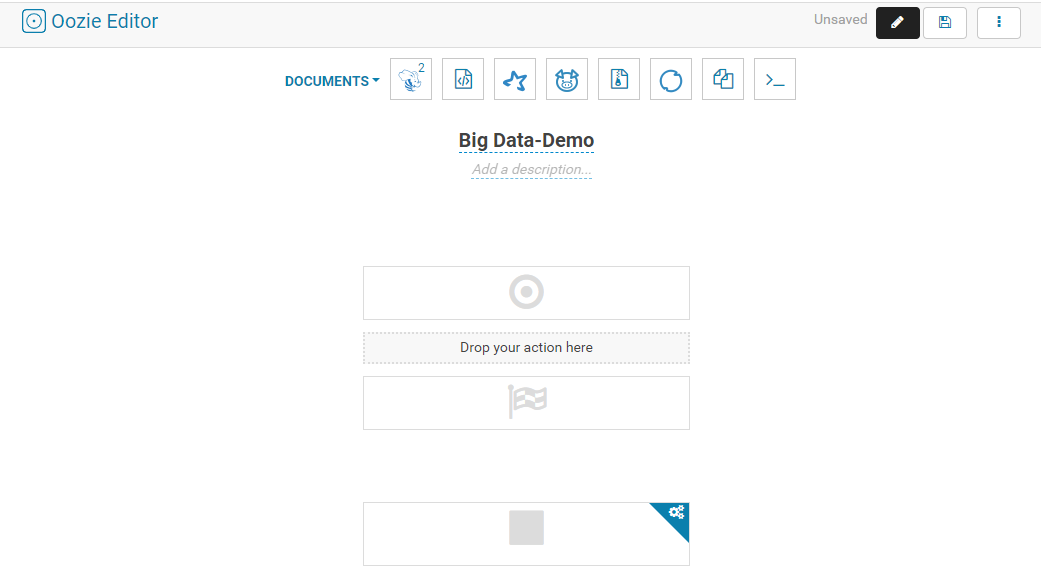
For example, add actions to the workflow by clicking and dropping the action on the workflow.
Soon you will have the corresponding wizard popped up, where you can search for the document which you need to add to the workflow. Here I will select demo on the Pig wizard, and then click Add.

The Edit Node screen displays. Each action in a workflow must have a unique name which will be easy to add them up to the workflows. The action is opened in the Edit Node screen. Once you edit the action properties, click done. Now the action will be added to the end of the workflow. You can delete an action by clicking the Trash button. To change the position of an action, left-click and drag an action to a new location.
The control nodes help in creating a fork, and they can be joined by dropping an action on top of another action. All of this can be helpful in that it removes a fork and join by dragging a forked action and dropping it above the fork.
Among all of this, a fork is used when there is a need to run multiple jobs in parallel. Not just in cases where you have to run jobs in parallel, but a fork and a join is also used in cases where you have to run multiple independent jobs. This helps in proper utilization of the cluster. Whenever you use a fork, a join must be used as an end node, and hence for each fork there should be a join. For example, when using a fork, you can create two tables at the same time by running them in parallel, and then you can convert one of the forks to a decision by clicking the Fork button. After you have finished setting all the parameters and settings, save the workflow and run your scheduler.
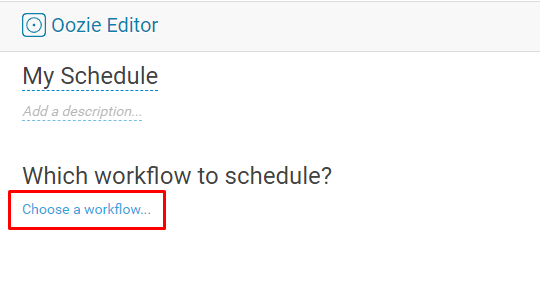
We can also schedule workflows, so that workflows don't need to be run manually each and every time. To schedule a workflow, click on Query dropdown and choose schedule under the scheduler option. This leads to the Oozie editor page with the scheduling options. Provide a name and a description, then click Choose a workflow to select the workflow to be scheduled.
In the workflow box that follows, select the workflow you created. Soon after, you will be popped up with various options like the date and times to scheduled, as well as the time zone settings, among other things. See the image below for reference.
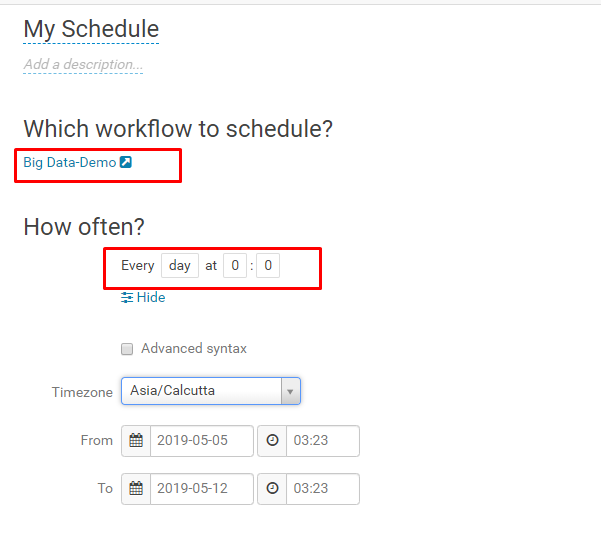
Once you're done with the schedules and parameters, click Save.
By reading through both this article and the previous one, you have gained a general understanding of HUE and several of its features. You also understand how HUE can help you navigate around with the Hadoop ecosystem. If you got at least one thing from these two blogs, then you know that, if you are not used to using command line interfaces or what a simpler way to interface with Hadoop and big data, the interface provided by HUE can be a helpful alternative.

2,598 posts | 770 followers
FollowAlibaba Clouder - September 27, 2019
Alibaba Clouder - July 20, 2020
Alibaba Clouder - September 2, 2019
Alibaba Clouder - September 3, 2019
Alibaba Clouder - September 2, 2019
Alibaba Clouder - March 4, 2021

2,598 posts | 770 followers
Follow MaxCompute
Conduct large-scale data warehousing with MaxCompute
Learn More DataWorks
A secure environment for offline data development, with powerful Open APIs, to create an ecosystem for redevelopment.
Learn More E-MapReduce Service
A Big Data service that uses Apache Hadoop and Spark to process and analyze data
Learn MoreMore Posts by Alibaba Clouder
Start building with 50+ products and up to 12 months usage for Elastic Compute Service
Get Started for Free Get Started for Free