By Daniel Shotonwa, Alibaba Cloud Community Blog author
In this article, I'm going to show you how you can build an API with GraphQL and Rails on Alibaba Cloud that will send todos from a database through the use of queries. Well, before we begin, let's clear up some things so that we're all on the same page.
Source: fiver.com.
First of all, as you should already know - especially given the fact that you clicked on in here in the first place - Rails is a very popular framework for creating web applications in a short amount of time. Today, developers tend to like to separate the processes and mechanisms of their application through creating APIs for the backend and uses a library or two of their choice. We'll be following this trend ourselves!
Next, as probably, again, a good share of you know, there's also GraphQL. As for what exactly it is, this definition from https://graphql.org/ explains it pretty well:
GraphQL is a query language for APIs and a runtime for fulfilling those queries with your existing data. GraphQL provides a complete and understandable description of the data in your API, gives clients the power to ask for exactly what they need and nothing more, makes it easier to evolve APIs over time, and enables powerful developer tools.
Besides using GraphOL and Rails, we will also deploy our application using an Elastic Compute Service (ECS) instance installed with Ubuntu 16.04 in this tutorial. So, make sure that you have signed up with an Alibaba Cloud account before preceding any further.
Before we begin, make sure that your ECS instance is already set up, so that we can go straight to deploying our application. If you've hadn't set up things yet, try checking out Alibaba Cloud's relevant documentation for an easy way to get it all set up.
Next, also make sure you are using ruby version 2.2 or later, and rails version 5 or later installed on your local machine.
If your ruby version is not up to date, you can update with a ruby version manager such as rvm or rbenv. Also, to update your ruby version, you can call one of the corresponding commands below.
    $ rvm install "ruby-2.4.6"
    or
    $ rbenv install 2.4.6
Alternatively, you can update rails by running
$ gem update railsAnd...that's all you need! You're now ready to start building a simple GraphQL API with Rails.
As part of this tutorial, you are also expected to have the following tools:
To do that, run rails in the command line to create all the files and folders we need for a basic Rails application using Postgres database.
$ rails new todo-app `--database=postgresql`
$ cd todo-appWhile you're in there, let's also To create a graphql application with Rails, we will need to add a gem called graphql. Then, add this gem to your Gemfile.
You can do so with the gem 'graphql' command. Then, install the gem by running the $ bundle install command. After this, gem should be installed. Then, to create all files and folders needed for a GraphQL API, run the following command:
$ rails generate graphql:installRunning this will add graphiql-rails gem to your Gemfile. This gem will allow us to interact with the API.
To connect our application to the Postgres database, go to the config/database.yml file and add your Postgres username and password to both test environment and development environment.
    development:
      <<: *default
      database: todo_app_development
      username: YOUR_POSTGRES_USERNAME
      password: YOUR_POSTGRES_PASSWORD

    test:
      <<: *default
      database: todo_app_development
      username: YOUR_POSTGRES_USERNAME
      password: YOUR_POSTGRES_PASSWORD
Create the database by running the $ rails db:create command, and then run the server with the $ rails server command.
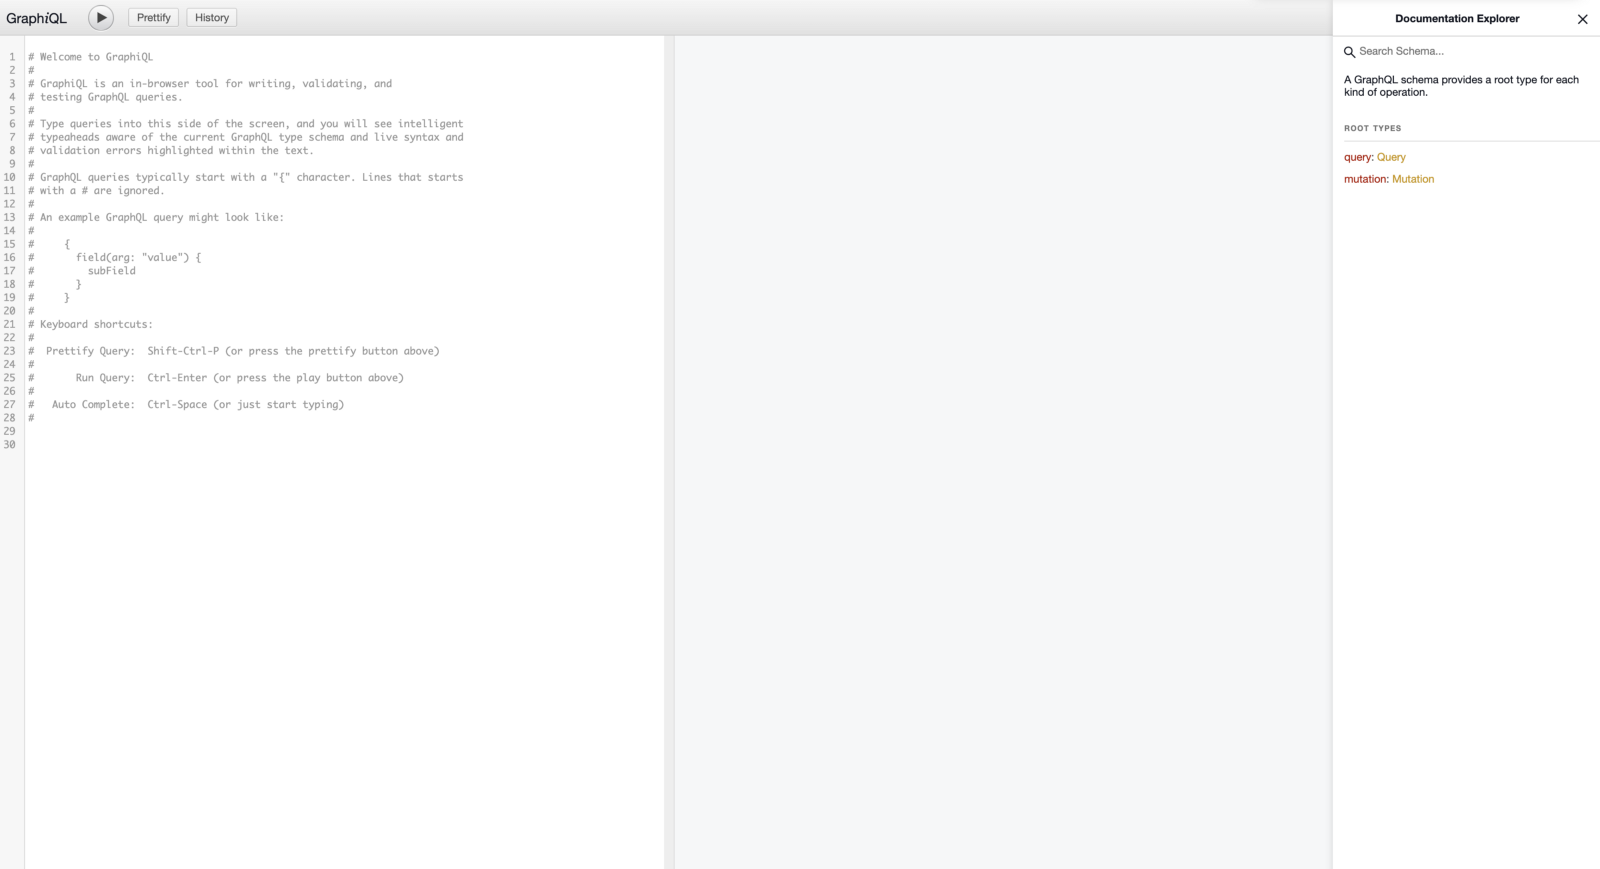
Visit this route localhost:3000/graphiql and you should see a graphql client which can be used to place a request to our graphql server.
For this todo application, we will create a todos table that has two fields: title and description. Create the model by running:
$ rails generate model Todo title:string description:textYou can validate the title and the description field by making sure it is always specified before entering the database. Navigate to models/todos.rb and add rails validation.
    class Todo < ApplicationRecord
        validates :title, presence: true
        validates :description, presence: true
    end
Run migration by running the $ rails db:migratecommand, and then add some data into our database by running rails console using:
    $ rails console

    >- Todo.create(title: 'Sample title', description: 'Sample Description')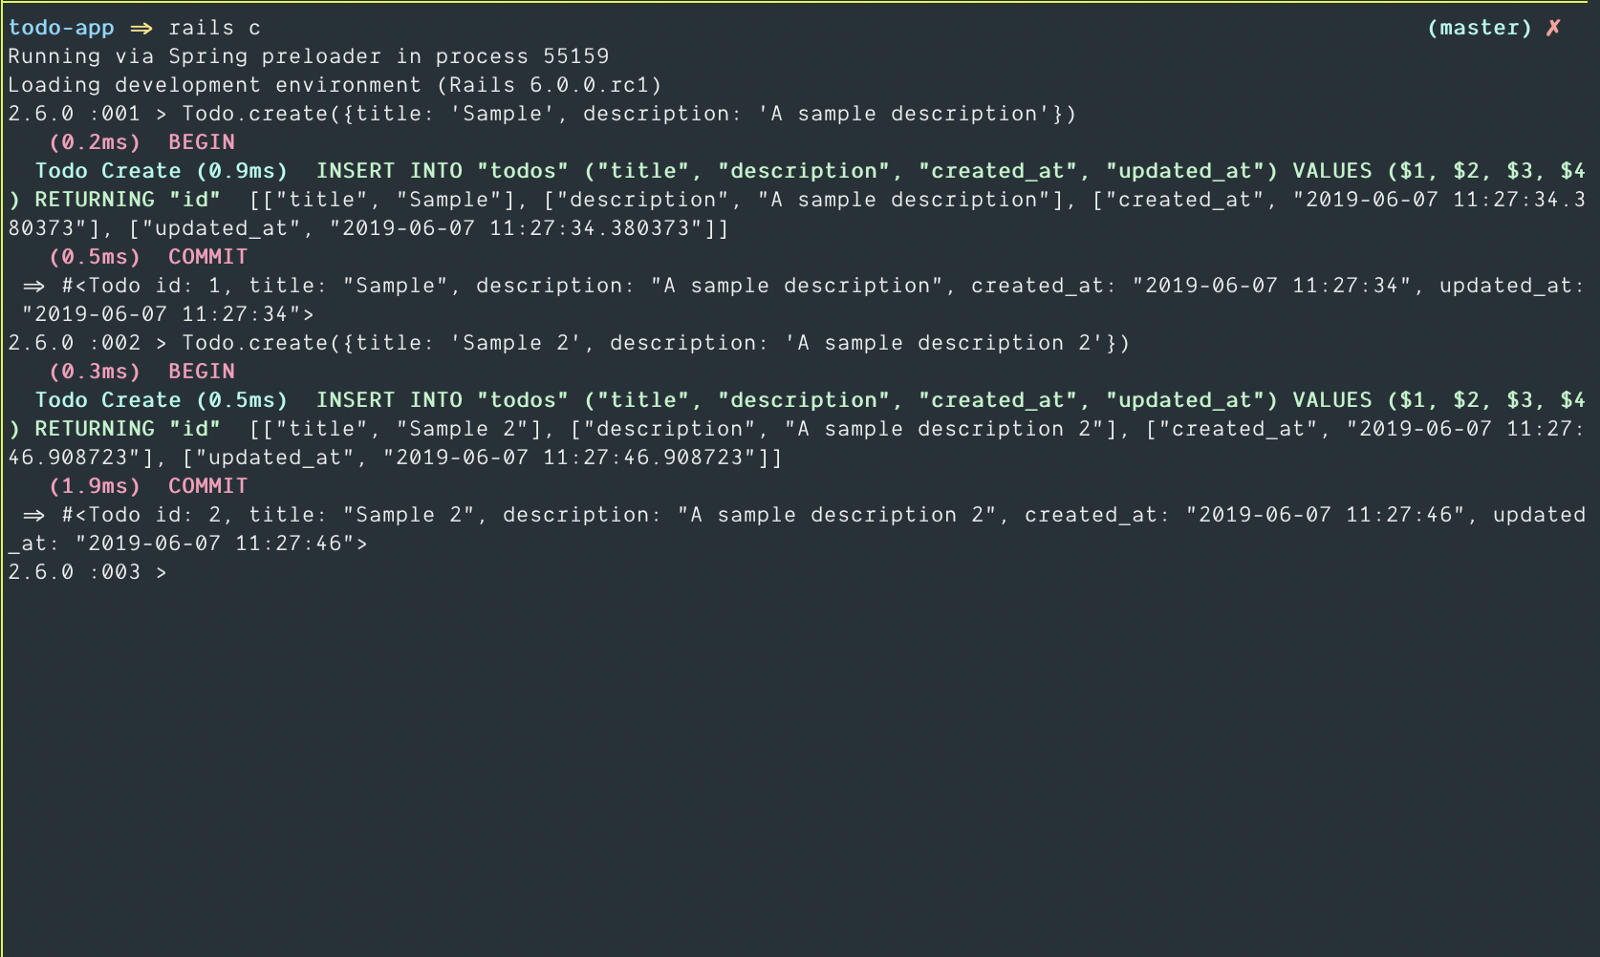
GraphQL schema has three special _root types_, these are called Query, Mutation and Subscription
GET call in Rest APIs.POST, PUT and DELETE operations in REST APIs.So now let's create our first query to get all todos from the database. Create a new type for todos by creating a new file: app/graphql/types/todo_type.rb.
    #app/graphql/types/todo_type.rb

    module Types
      class TodoType < Types::BaseObject
        field :title, String, null: false
        field :description, String, null: false
      end
    end
It inherits from BaseObject, checkout out app/graphql/types/base_object.rb. It inherits from Graphql schema type instead of writing GraphQL::Schema::Object, just inheriting from BaseObject gives us all attributes needed to create an object Schema.
The next step is to create a query type that will be used to get all todos. Go to app/graphql/types/query_type.rb. Add a new field to the query type. :all_todos to get all our todos.
    # app/graphql/types/query_type

    field :all_todos, [TodoType], null: false,
        description: "Returns all todos"
    def all_todos
        Todo.all
    end
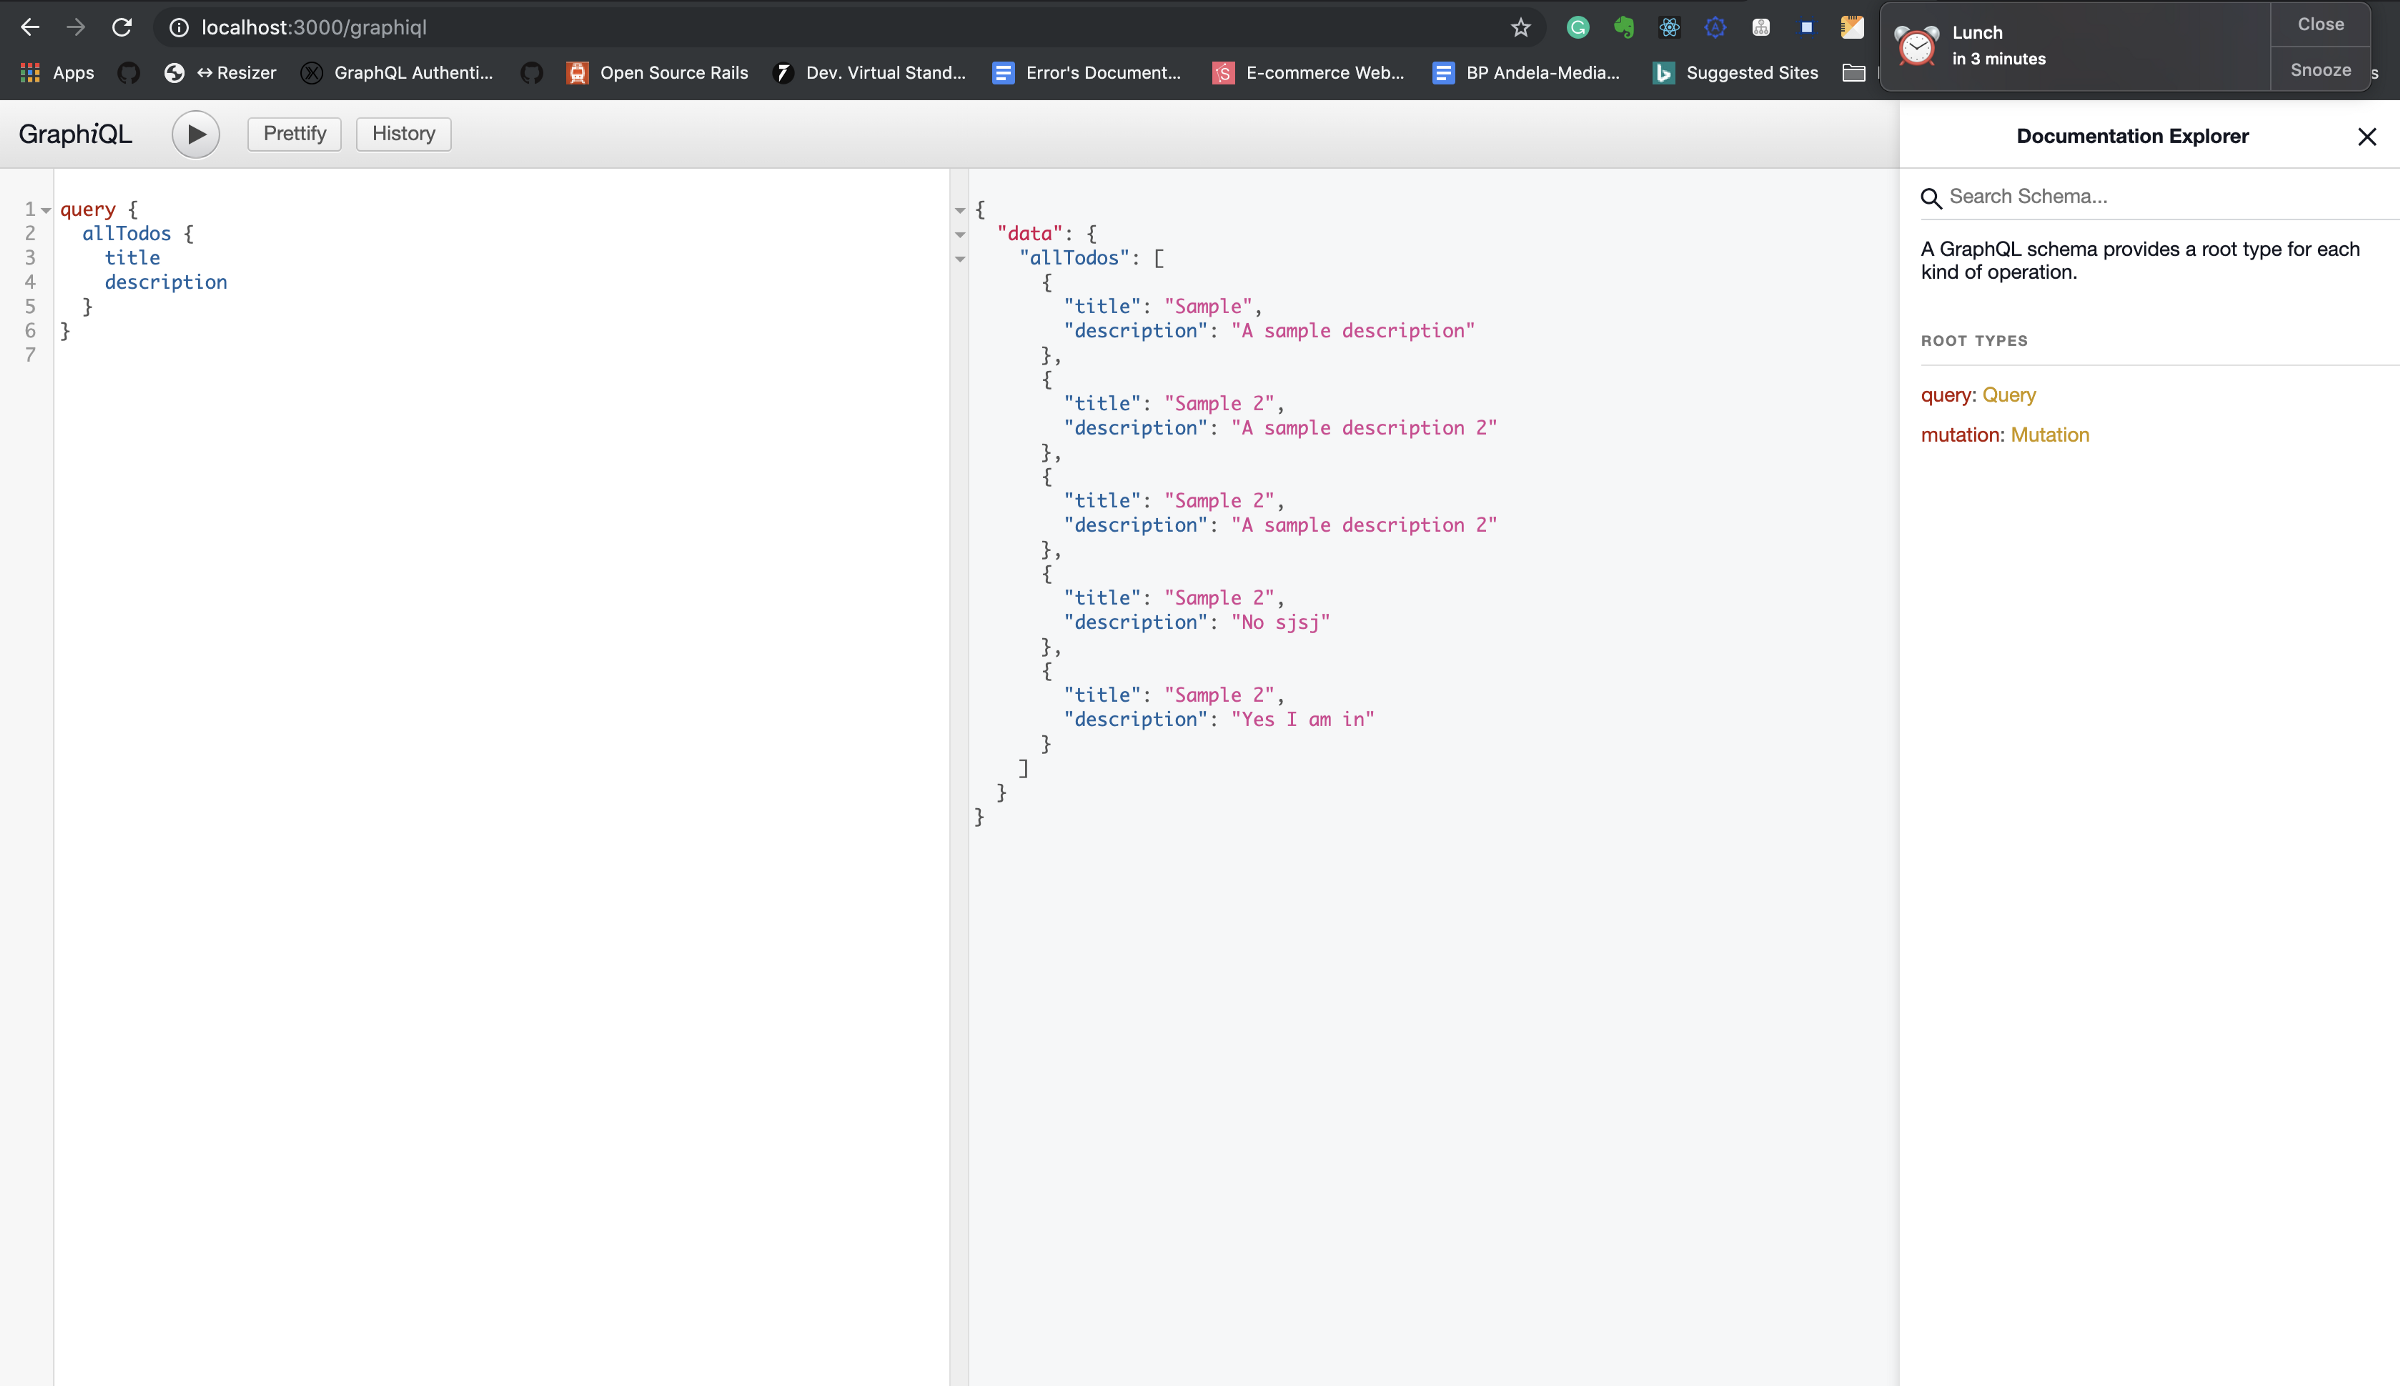
The [TodoType] part is added because we are expecting a list of todos. Now, head over to the browser and write a query like this:
    query {
      allTodos {
        title
        description
      }
    }
With this, it will return all the todos in the database, we can choose to skip the title and ask for the description and vice-versa.
The next step is to add a mutation to create todos. Before that, let's create a BaseMutation class that inherits from GraphQL::Schema::Mutation. This will enable us to inherit from BaseMutation going forward.
Next, create a new file called base_mutation.rb in the apps/graphql/mutations folder, and add this code:
       # app/graphql/mutations/base_mutation.rb
        module Mutations
          class BaseMutation < GraphQL::Schema::Mutation
            null false
          end
        end
Now, let's create a mutation to add todo. To do this, we will create a file called add_todo.rb in the mutations folder and add this code.
    #app/graphql/mutations/add_todo.rb
    module Mutations
      class AddTodo < BaseMutation
        argument :title, String, required: true
        argument :description, String, required: true

        type Types::TodoType

        def resolve(title: nil, description: nil)
          Todo.create!(title: title, description: description)
        rescue ActiveRecord::RecordInvalid => e
          GraphQL::ExecutionError.new(e.record.errors.full_messages.
    join(','))
        end
      end
    end
This code add AddTodo mutation specifying the argument needed and the type that will be returned.
There is a rescue block in the mutation code. GraphQL in rails has an error handling block which is GraphQL::Execution.new(error_messages).
Add the created mutation to mutation type so it will be accessible to the client.
# app/graphql/types/mutation_type.rb
module Types
  class MutationType < Types::BaseObject
     field :add_todo, mutation: Mutations::AddTodo
  end
end
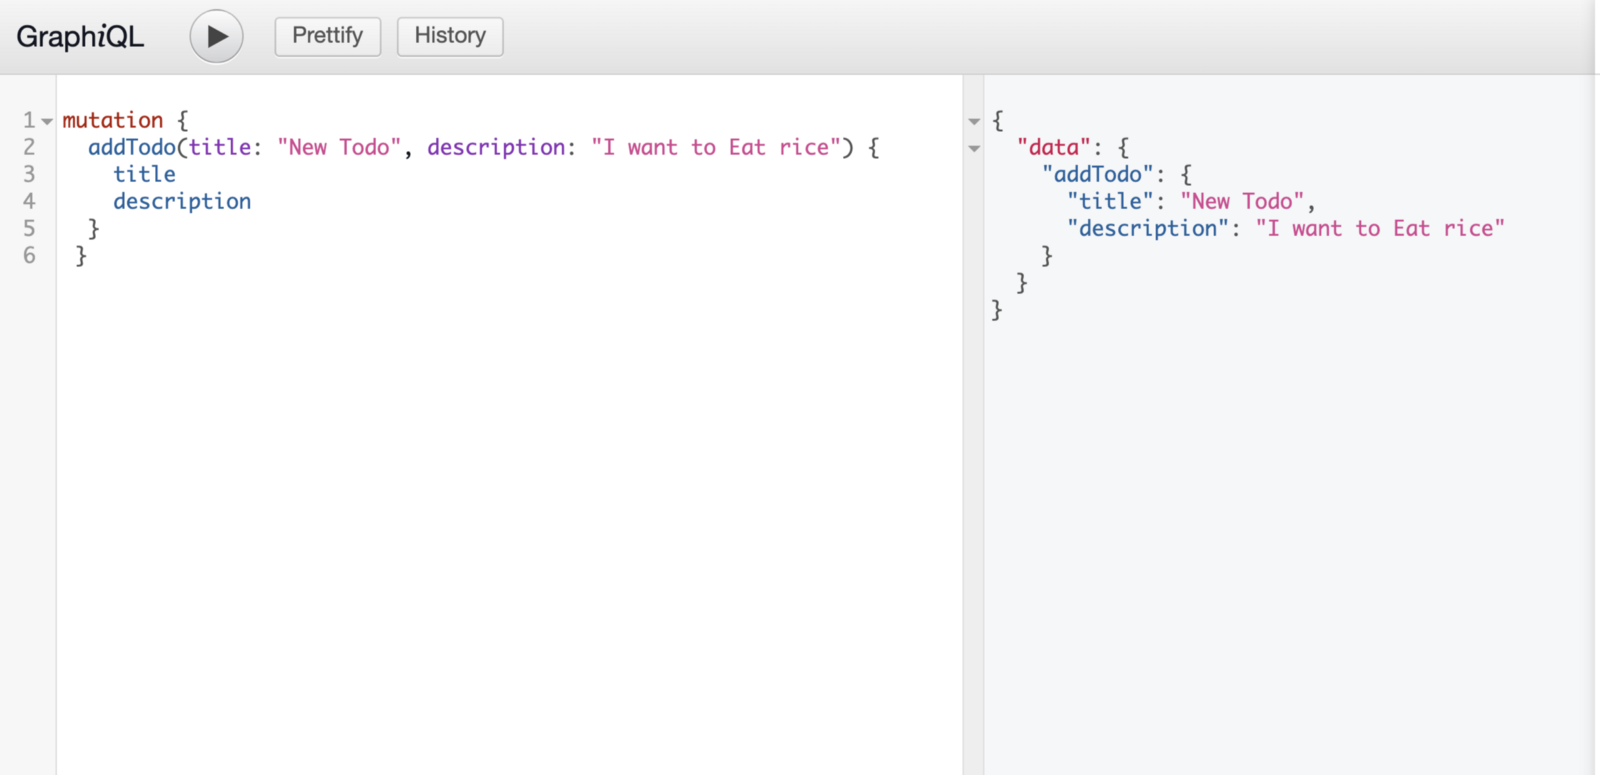
Test it on your browser by creating some todos using this query.
mutation {
  addTodo(title: "New Todo", description: "I will eat rice") {
    title
    description
  }
 }
We are going to deploy our GraphQL API using an Alibaba ECS Instance, which you should have already. Follow this tutorial for an easy way to deploy our Rails application using Passenger and Nginx.
And with it deployed. We have now created some todos and also know how to get todos from our database through the use of queries. I will be writing another article for performing authorization and authentication to ensure a user can log in, delete and also update their todos.
Don't have an Alibaba Cloud account? Sign up for an account and try over 40 products for free worth up to $1200. Get Started with Alibaba Cloud to learn more.

2,593 posts | 792 followers
FollowAlibaba Clouder - March 8, 2019
Alibaba Clouder - November 16, 2018
Alibaba Clouder - May 23, 2018
Alibaba Cloud Native Community - September 17, 2025
Alibaba Clouder - January 27, 2020
Alibaba Clouder - November 28, 2017

2,593 posts | 792 followers
Follow ECS(Elastic Compute Service)
Elastic and secure virtual cloud servers to cater all your cloud hosting needs.
Learn MoreLearn More
 API Gateway
API Gateway provides you with high-performance and high-availability API hosting services to deploy and release your APIs on Alibaba Cloud products.
Learn MoreMore Posts by Alibaba Clouder