This topic describes how to deploy a model as a service at a scheduled time.
Background information
You can use one of the following methods to deploy an Elastic Algorithm Service (EAS) service at a scheduled time.
Method 1: Use the Update EAS Service component provided by Designer
In Machine Learning Designer, you can use the Update EAS Service component to update a deployed EAS service.
Method 2: Manually deploy the service in DataWorks
You can use EAS of Machine Learning Platform for AI (PAI) and DataWorks together to deploy an EAS service at a scheduled time.
Prerequisites
Method 1
The model to be updated is stored in an Object Storage Service (OSS) bucket.
Method 2
An exclusive resource group for scheduling is purchased in DataWorks. For more information, see Use an exclusive resource group for scheduling.
PAI is activated. For more information, see Activate PAI and create a default workspace.
The model is trained and then saved to a specific path. For more information, see Use DataWorks tasks to schedule pipelines in Machine Learning Designer.
If you use a RAM user to configure scheduled service deployment, you need to grant the RAM user permissions on DataWorks and EAS. For more information, see Use a RAM user to log on to the DataWorks console and use DataWorks and Grant the permissions that are required to use EAS.
Limits
Method 2
Only exclusive resource groups for scheduling in DataWorks can be used for scheduled service deployment. Shared resource groups are not supported.
Method 1: Use the Update EAS Service component provided by Designer
Step 1: Create a Designer workflow
If your model is trained by using a Designer workflow, you can directly connect the output port of the model training component to the Update EAS Service component. For more information, see Periodically update online model services.
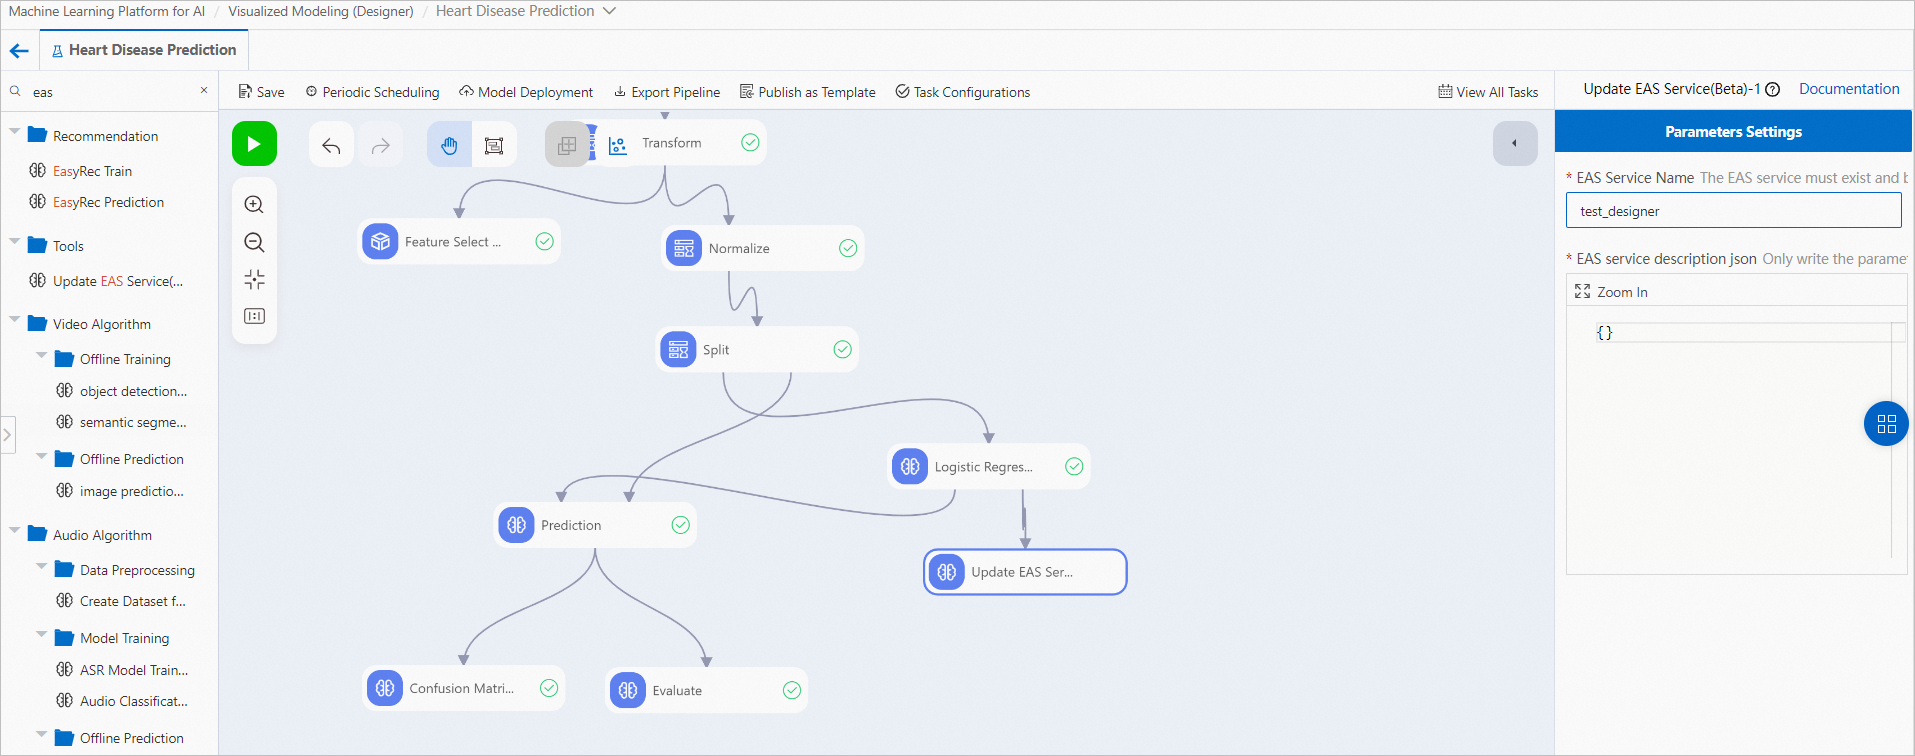
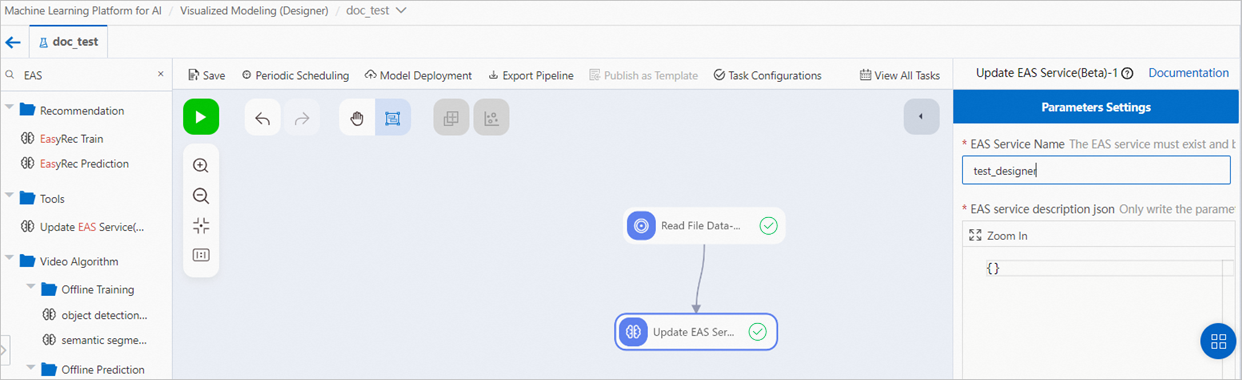
If your model is not trained by using Designer but the model is stored in an OSS bucket, you can create an empty workflow for the model. For more information, see Create a custom workflow. After you create the workflow, refer to the following figure, drag and drop the Read OSS Data and Update EAS Service components, and connect the components. Then, set the OSS Data Path parameter of the Read OSS Data component to the OSS path of the model.
If your model is retrieved from a specified OSS path at a specified time, you can add global variables to the workflow.
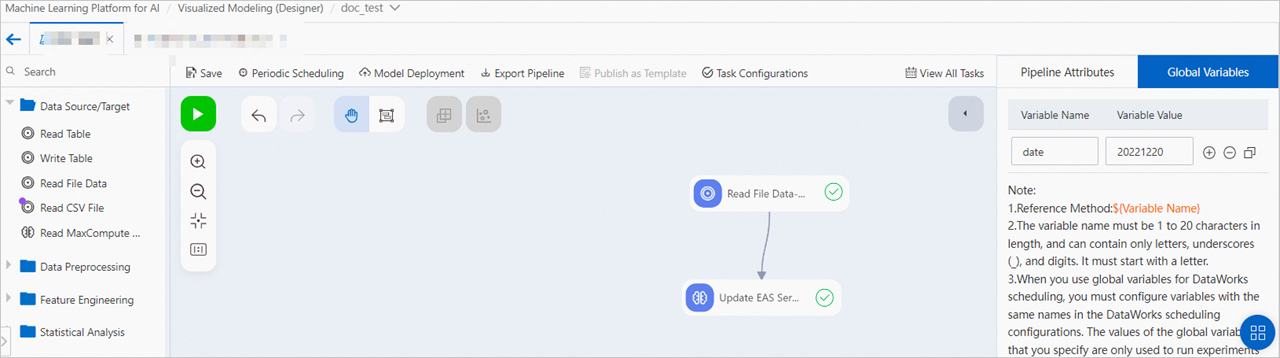 Then, reference the global variables in the Read OSS Data component to specify the model path. Example:
 oss://examplebucket.oss-cn-shanghai-internal.aliyuncs.com/${date}/heart.pmml.NoteYou can use the OSS path selector on the page to select a valid model path, and then replace the elements that are related to the time variables in the path with global variables. This simplifies the input configurations such as the endpoint setting.
Step 2: Deploy the workflow in DataWorks
Refer to Use DataWorks tasks to schedule pipelines in Machine Learning Designer and deploy the preceding workflow as a scheduled node in DataWorks by using one-click deployment.
If you want to reference the Designer global variables that you added in Step 1, refer to Global variable and replace the global variables in the scheduling configuration of the node with the required system variables. 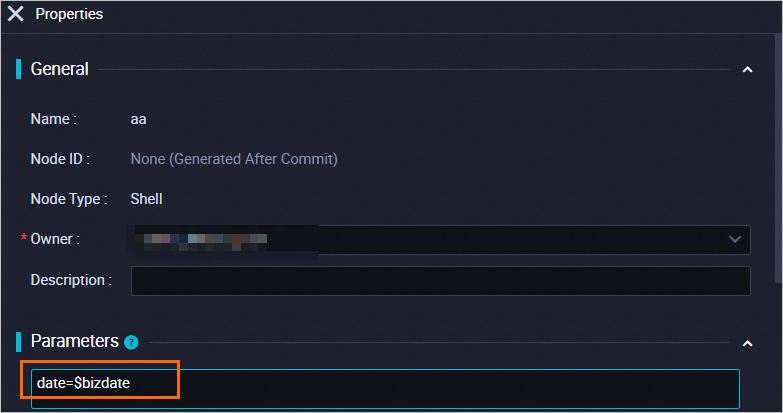
Step 3: View the historical versions of the periodically updated model service
To view the historical versions of the periodically updated model service, perform the following steps:
Log on to the PAI console. Select a region and workspace. Then, click Enter Elastic Algorithm Service (EAS).
In the left-side navigation pane, click Workspaces. On the Workspaces page, click the name of the workspace to which the model service you want to view belongs.
Perform the steps in the following figure to view all historical versions of the periodically updated model service.

Method 2: Manually deploy the service in DataWorks
Step 1: Create an exclusive resource group for scheduling
Log on to the DataWorks console.
In the left-side navigation pane, click Resource Group. On the Resource Groups page, create an exclusive resource group for scheduling. For information about the parameters, see Use an exclusive resource group for scheduling.
Step 2: Associate the exclusive resource group with a workspace
You must associate an exclusive resource group for scheduling with a workspace before you can select the resource group in the workspace.
On the Resource Group List page, click the Exclusive Resource Group tab. Find the target resource group and click Attach Workspace.
On the Attach Workspace page, find the workspace to which you want to attach the exclusive resource group, and then click Attach.
Step 3: Create a workflow
Log on to the DataWorks console. In the top navigation bar, select the desired region. In the left-side navigation pane, choose . On the page that appears, select the desired workspace from the drop-down list and click Go to Data Development.
On the DataStudio page, move the pointer over the
 icon and select Create Workflow.
 In the Create Workflow dialog box, configure Workflow Name and Description.
Click Create.
On the configuration tab of the workflow, choose .
In the Create Node dialog box, enter Deployment in the Name field.
Click OK.
Step 4: Deploy the model as an initial model service
In scheduled service deployment, online model services are updated from initial model services. Therefore, the model must be deployed as an initial model service before you perform the scheduled service deployment. If the initial model service already exists, go to Step 5.
Modify the deployment script.
On the tab of the workflow, double-click the created Shell node. In this example, double-click the Deployment node.
On the tab of the Shell node, enter the following commands:
# Compile the service deployment description file. cat << EOF > echo.json { "name": "yourModelName", "generate_token": "true", "model_path": "yourModelAdress", "processor": "yourProcessorType", "metadata": { "instance": 1, # Change the number of instances as needed. "cpu": 2 # Change the number of vCPUs as needed. "memory": 4000 } } EOF # Run the deployment command. /home/admin/usertools/tools/eascmd64 -i <yourAccessKeyID> -k <yourAccessKeySecret> -e pai-eas.cn-shanghai.aliyuncs.com create echo.jsonImportantIf your exclusive resource group was created before August 10, 2022, replace
/home/admin/usertools/tools/eascmd64 ***with/home/admin/usertools/tools/eascmd ***in Line 16 of the preceding command.The echo.json is the JSON file that describes the service information, such as the path of the model and the required resources. You can set the following parameters based on your business requirements:
name: the name of a model service. The name uniquely identifies a model service. Service names must be unique within a region. We recommend that you name model services based on the actual business for which the model services are used.
model_path: the path where the trained model is stored. You can specify an HTTP URL or an OSS path.
If you set this parameter to an HTTP URL, the files must be in TAR, GZ, BZ2, or ZIP format. If you set this parameter to an OSS path, you can specify the path of a compressed package or a directory. To use an OSS path, you must specify the endpoint of OSS by adding the line of code
"oss_endpoint":"oss-cn-beijing.aliyuncs.com"to the preceding service deployment description file. You can change the region in the code as needed.NoteIf you use OSS to store models, you must grant PAI the permissions to access OSS. For more information, see Grant PAI the permissions to access OSS.
processor: the type of the processor.
metadata: the metadata of the service, which can be modified as needed. For more information about the fields, see Run commands to use the EASCMD client.
yourAccessKeyID: the AccessKey ID. For information about how to obtain an AccessKey pair, see How do I obtain an AccessKey pair?.
yourAccessKeySecret: the AccessKey secret. For information about how to obtain an AccessKey pair, see How do I obtain an AccessKey pair?
Endpoint: the endpoint of PAI in a specified region. You must set the Endpoint parameter that follows
-ein the preceding deployment command. The following table lists the regions and their endpoints.Region
Endpoint
China (Shanghai)
pai-eas.cn-shanghai.aliyuncs.com
China (Beijing)
pai-eas.cn-beijing.aliyuncs.com
China (Hangzhou)
pai-eas.cn-hangzhou.aliyuncs.com
China (Shenzhen)
pai-eas.cn-shenzhen.aliyuncs.com
China (Hong Kong)
pai-eas.cn-hongkong.aliyuncs.com
Singapore
pai-eas.ap-southeast-1.aliyuncs.com
Indonesia (Jakarta)
pai-eas.ap-southeast-5.aliyuncs.com
Germany (Frankfurt)
pai-eas.eu-central-1.aliyuncs.com
Run the script.
On the tab of the Shell node, click the
 icon.
icon. In the Warning message, click Continue to Run.
In the Runtime Parameters dialog box, set the Resource Group parameter to the created exclusive resource group for scheduling.
Click OK.
After the code is executed, an online model service is generated. You can perform the following steps to view the model service in the PAI console.
Optional. View deployed model services.
Log on to the PAI console. Select a region and a workspace. Then, click Enter Elastic Algorithm Service (EAS).
On the Elastic Algorithm Service (EAS) page, view the deployed model service.
In subsequent steps, more service versions will be added to the model service to implement scheduled model deployment.
Step 5: Modify the scheduled deployment script
Modify the code of the Shell node in Step 4, which is shown in the following sample code. If you have finished Step 4, retain the first 14 lines of code. If you have not performed Step 4, you must change the parameter values in the first 14 lines of code as needed.
# Compile the service deployment description file. cat << EOF > echo.json { "name": "yourModelName", "generate_token": "true", "model_path": "yourModelAdress", "processor": "yourProcessorType", "metadata": { "instance": 1, "cpu": 2, "memory": 4000 } } EOF # Code in Line 14. # Update and deploy the model. For each scheduled deployment, a new version of the model service is added as the latest online service version. /home/admin/usertools/tools/eascmd64 -i <yourAccessKeyID> -k <yourAccessKeySecret> -e pai-eas.cn-shanghai.aliyuncs.com modify <yourModelName> -s echo.json # Define the logic for testing the service. # If the service encounters an error during the test, run the following command to roll back the model service: #/home/admin/usertools/tools/eascmd64 -i <yourAccessKeyID> -k <yourAccessKeySecret> -e pai-eas.cn-shanghai.aliyuncs.com version -f <The name of the model to be rolled back> 1ImportantIf your exclusive resource group for scheduling was created before August 10, 2022, replace
/home/admin/usertools/tools/eascmd64 ***with/home/admin/usertools/tools/eascmd ***in Line 16 and Line 19.For more information about the parameters, see Step 4: Deploy the model as an initial model service.
Step 6: Perform scheduled deployment
Configure scheduling properties and commit the Shell node.
On the Shell node tab, click the Properties tab in the right-side pane.
In the Properties panel, set the Recurrence parameter in the Schedule section.
In the Dependencies section, click Add Root Node next to the Parent Nodes field.
Configure scheduling dependencies. For more information, see Configure same-cycle scheduling dependencies.
Click the
 icon on the tab of the Shell node to save the configurations.
 Click the
 icon on the tab of the Shell node to commit the Shell node.
View the instances of the Shell node.
On the Shell node tab, click Operation Center in the upper-right corner.
On the Operation Center page, choose Cycle Task Maintenance > Cycle Instance.
On the instance list page, view the scheduled time for automatic service deployment in the Schedule column.
Click More in the Actions column and select View Runtime Log to view operational logs of each scheduled deployment.
View the model service deployed at a specific scheduled time.
Log on to the PAI console. Select a region and a workspace. Then, click Enter Elastic Algorithm Service (EAS).
Perform the steps in the following figure to view all historical versions of the periodically updated model service.