This topic explains how to use the scheduling center feature, guiding you through the creation, viewing, and management of scheduling groups.
Feature introduction
The scheduling center feature facilitates the automatic initiation and dynamic throttling of migration tasks. It allows you to add migration tasks to scheduling groups and execute them according to custom scheduling rules.
Typically, the following steps are involved when using the scheduling center:
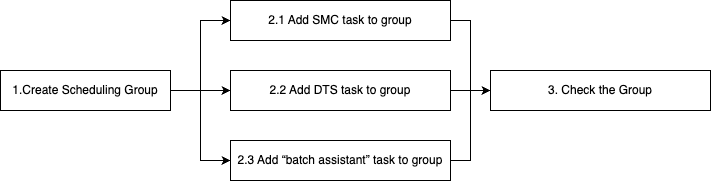
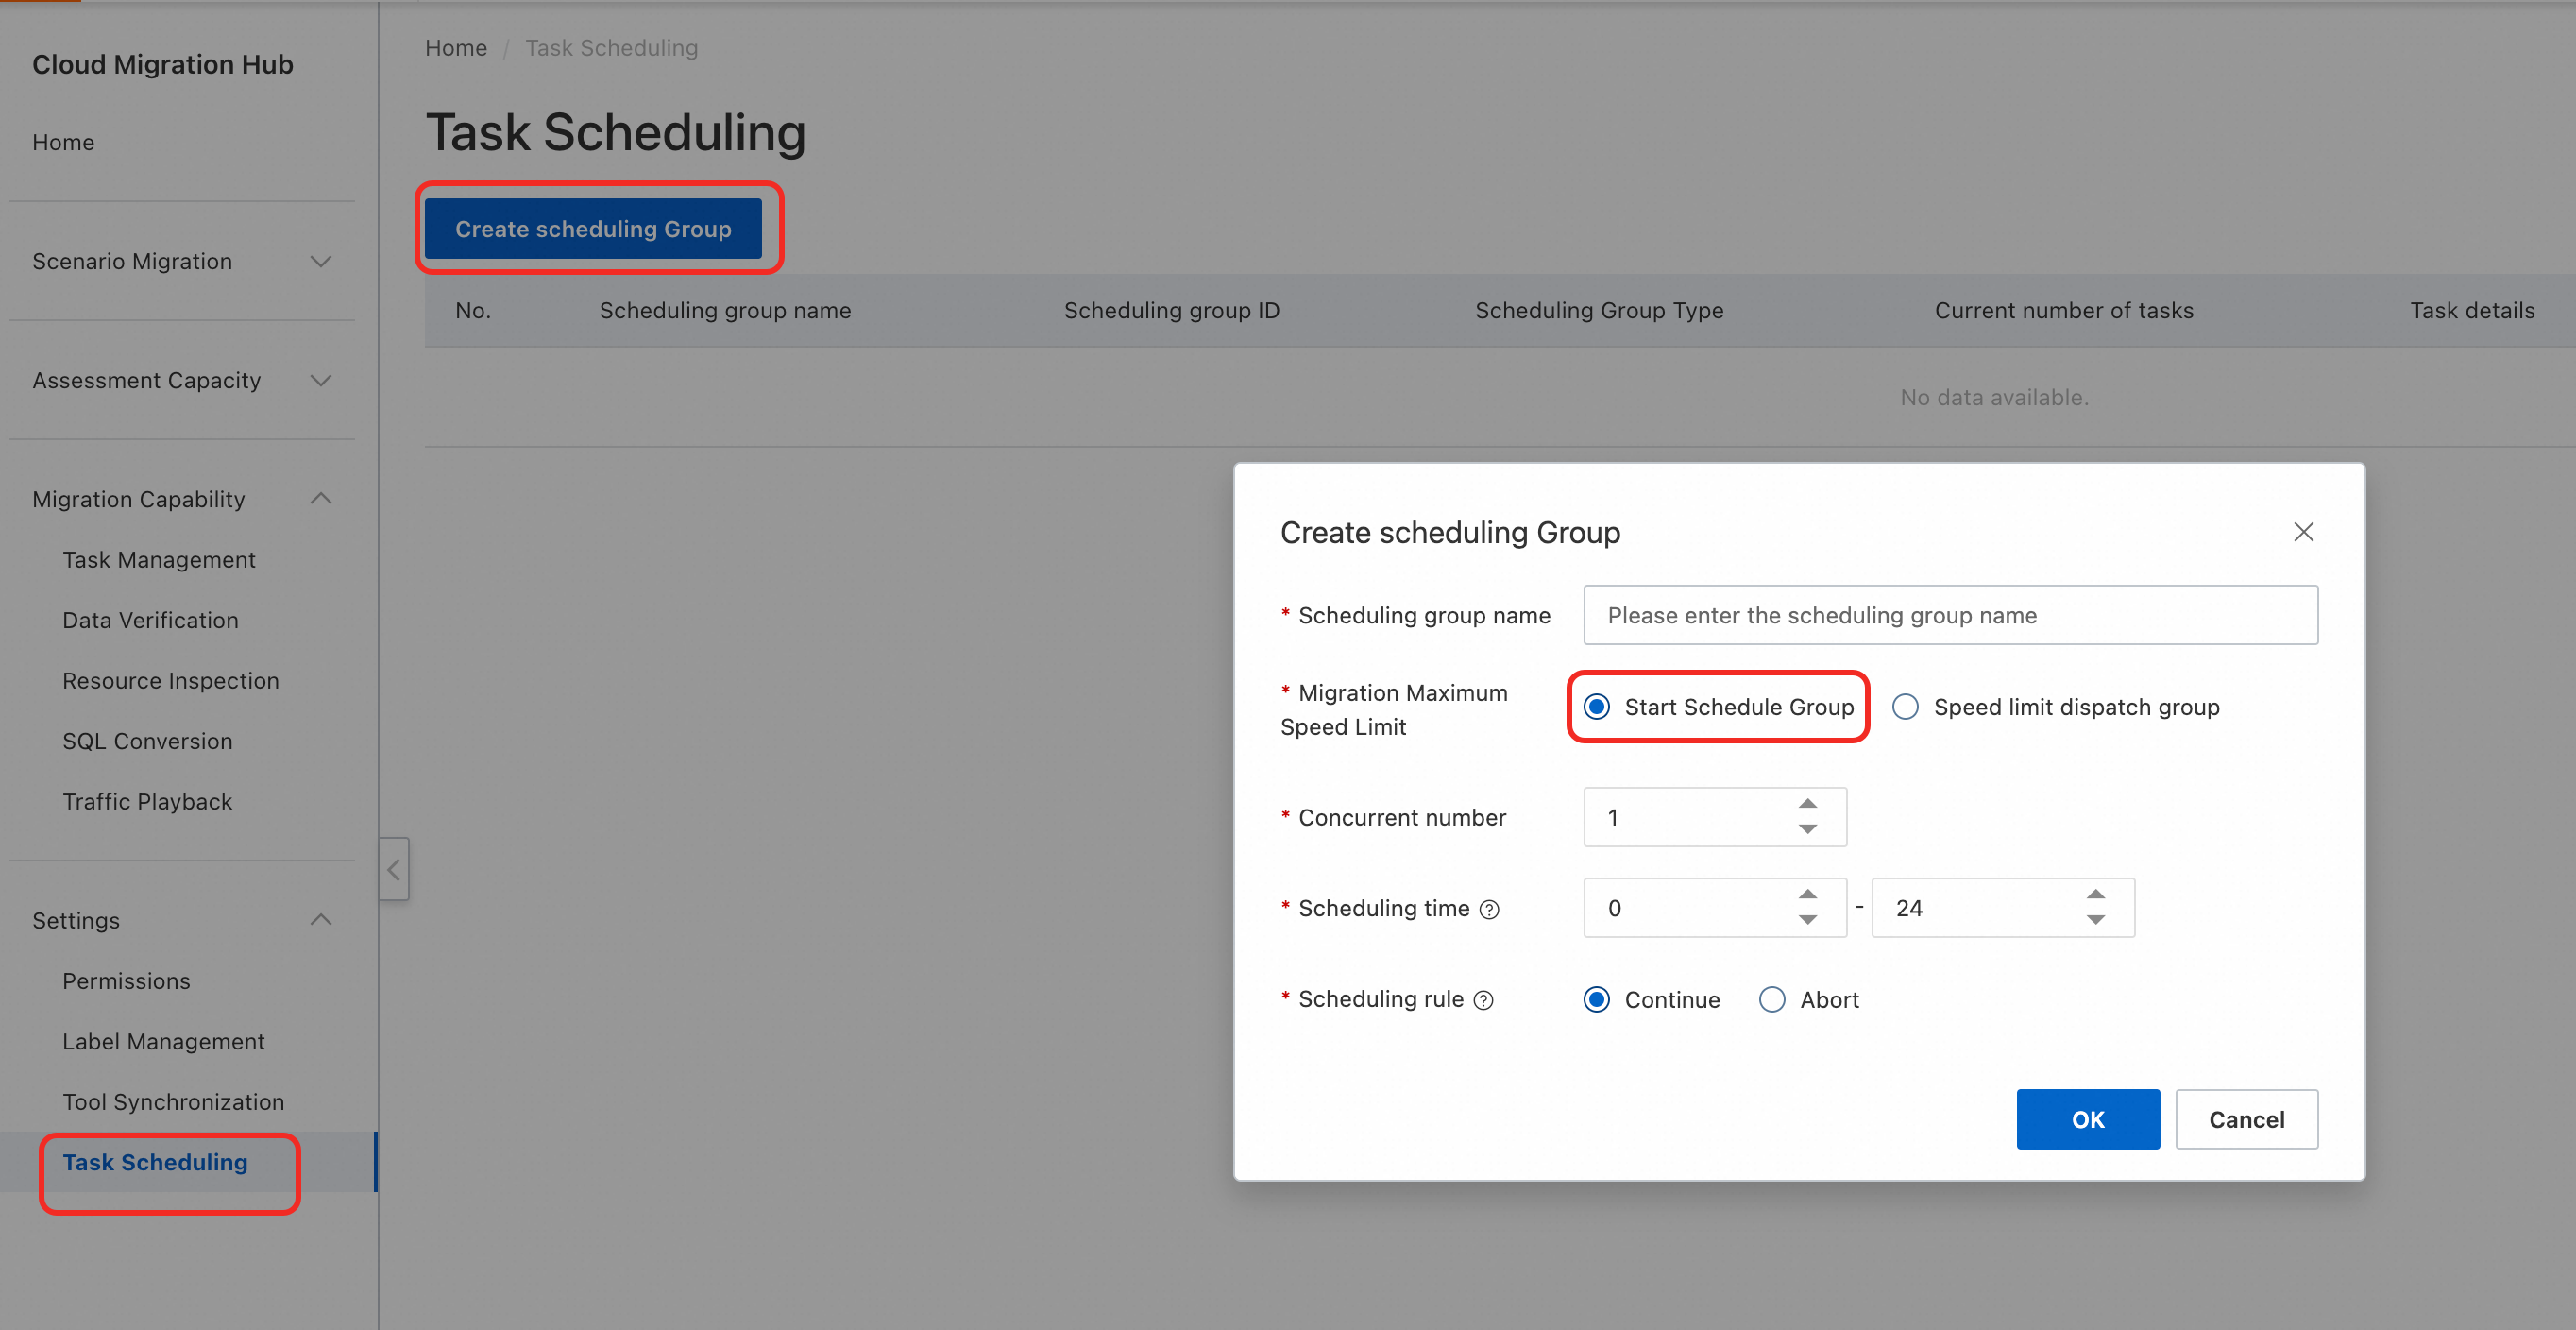
Create and start a scheduling group
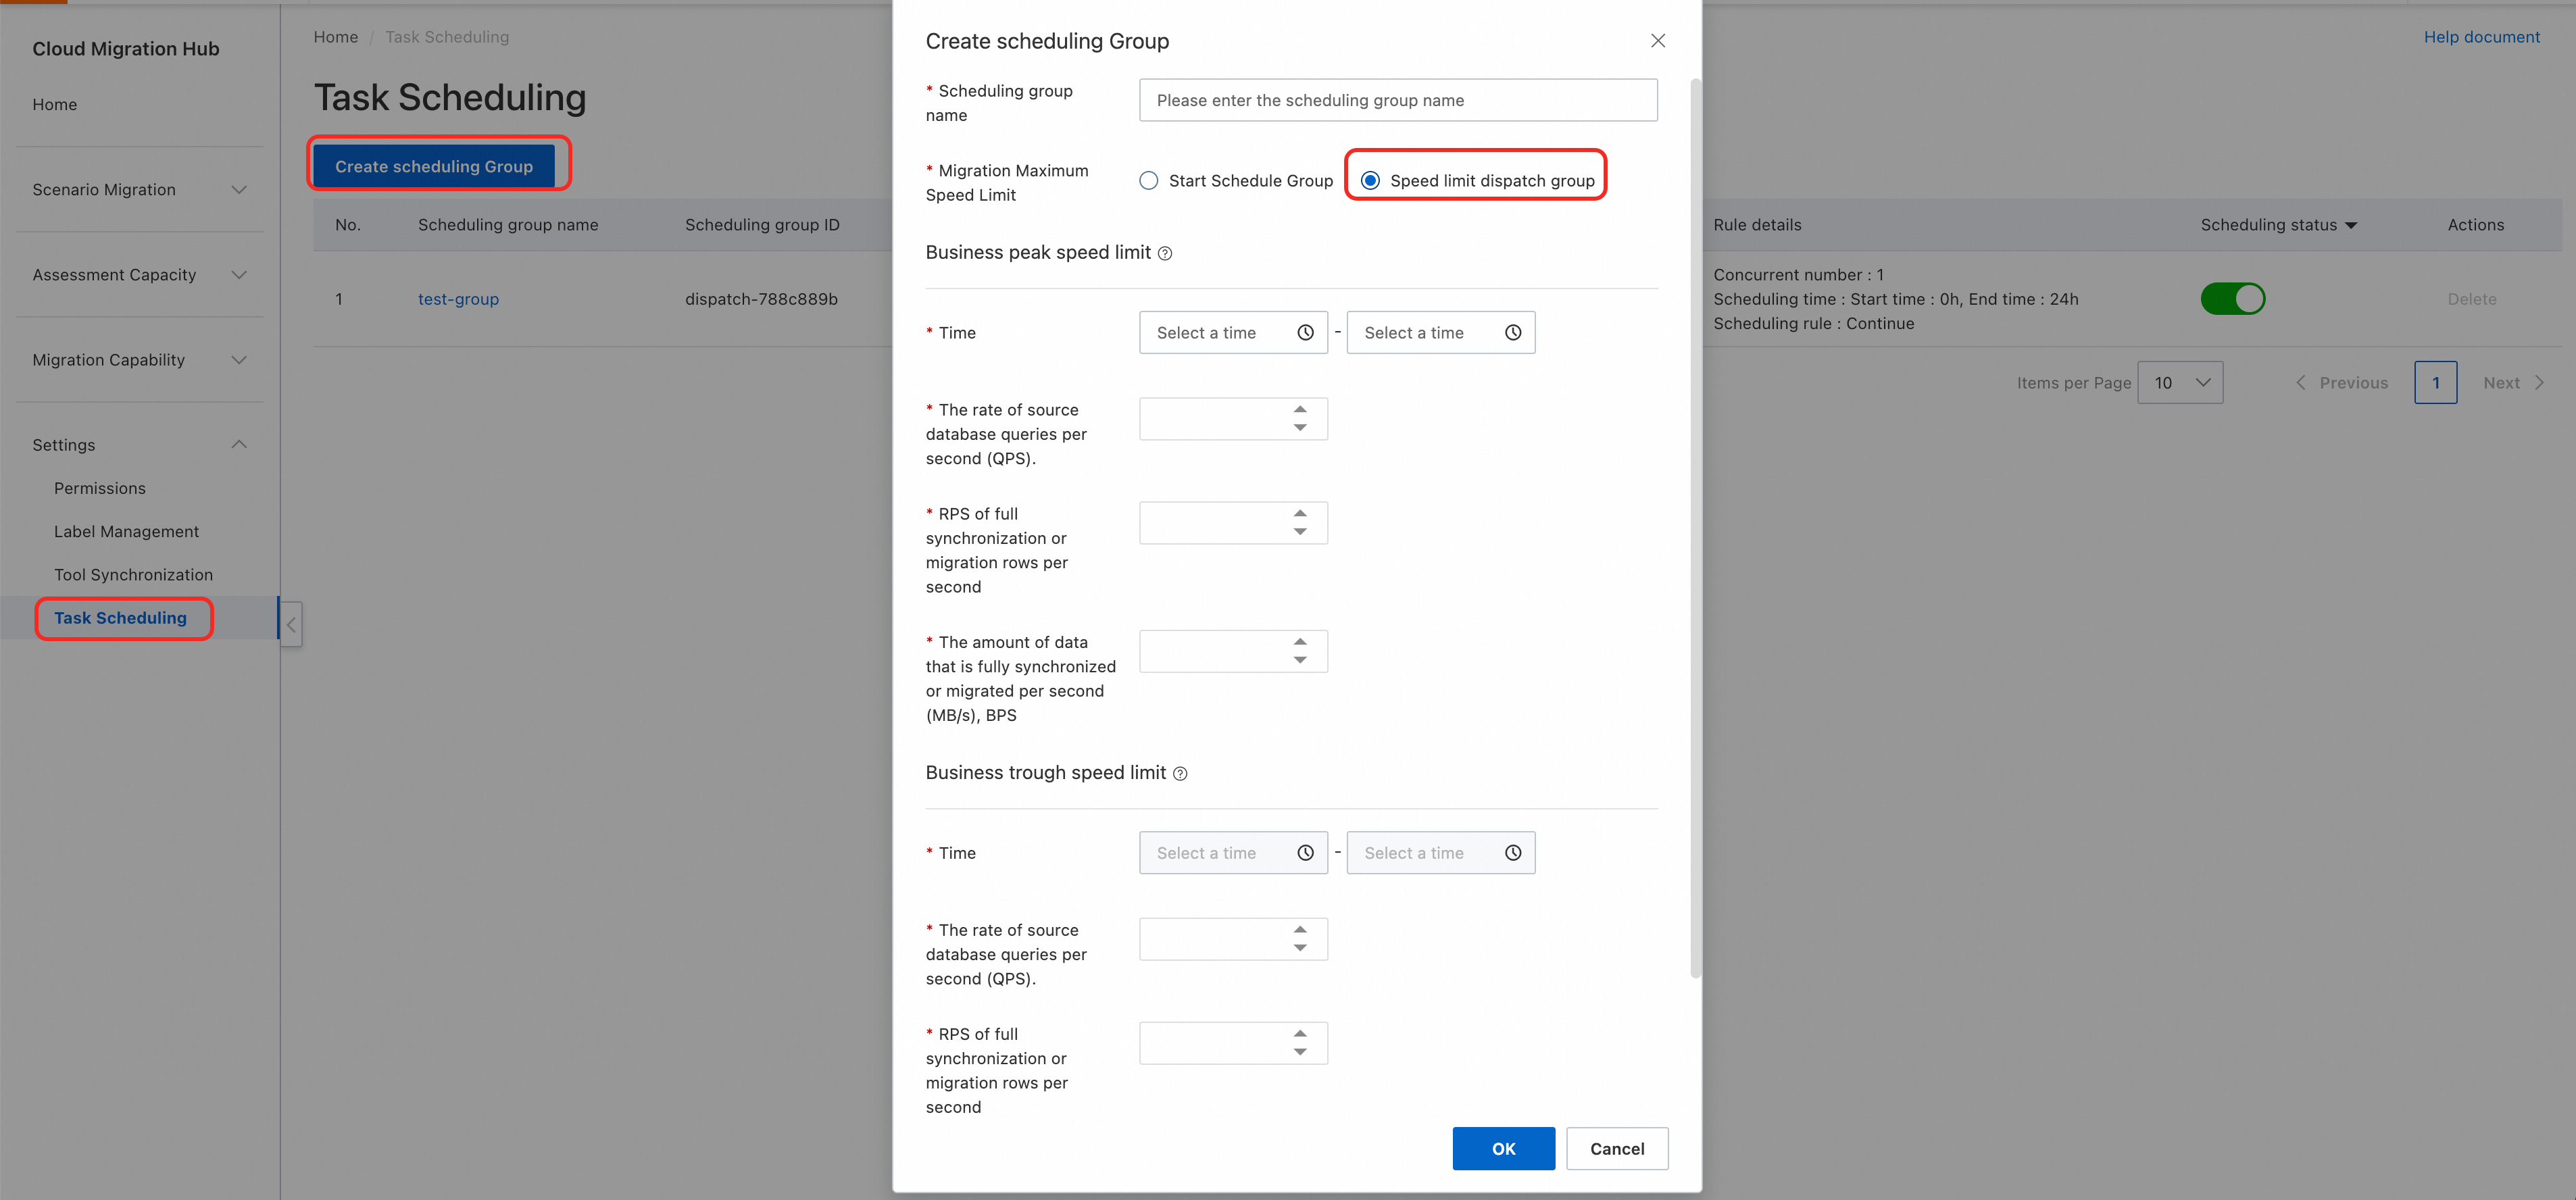
On the Cloud Migration Center page, click Settings > Task Scheduling > Create Scheduling Group. In the pop-up window, enter the scheduling group configuration information (for detailed explanations of the configuration information fields, see Scheduling Center Field Description). Then click Submit.
Use and start a scheduling group
You can add tasks to a scheduling group through three entry points:
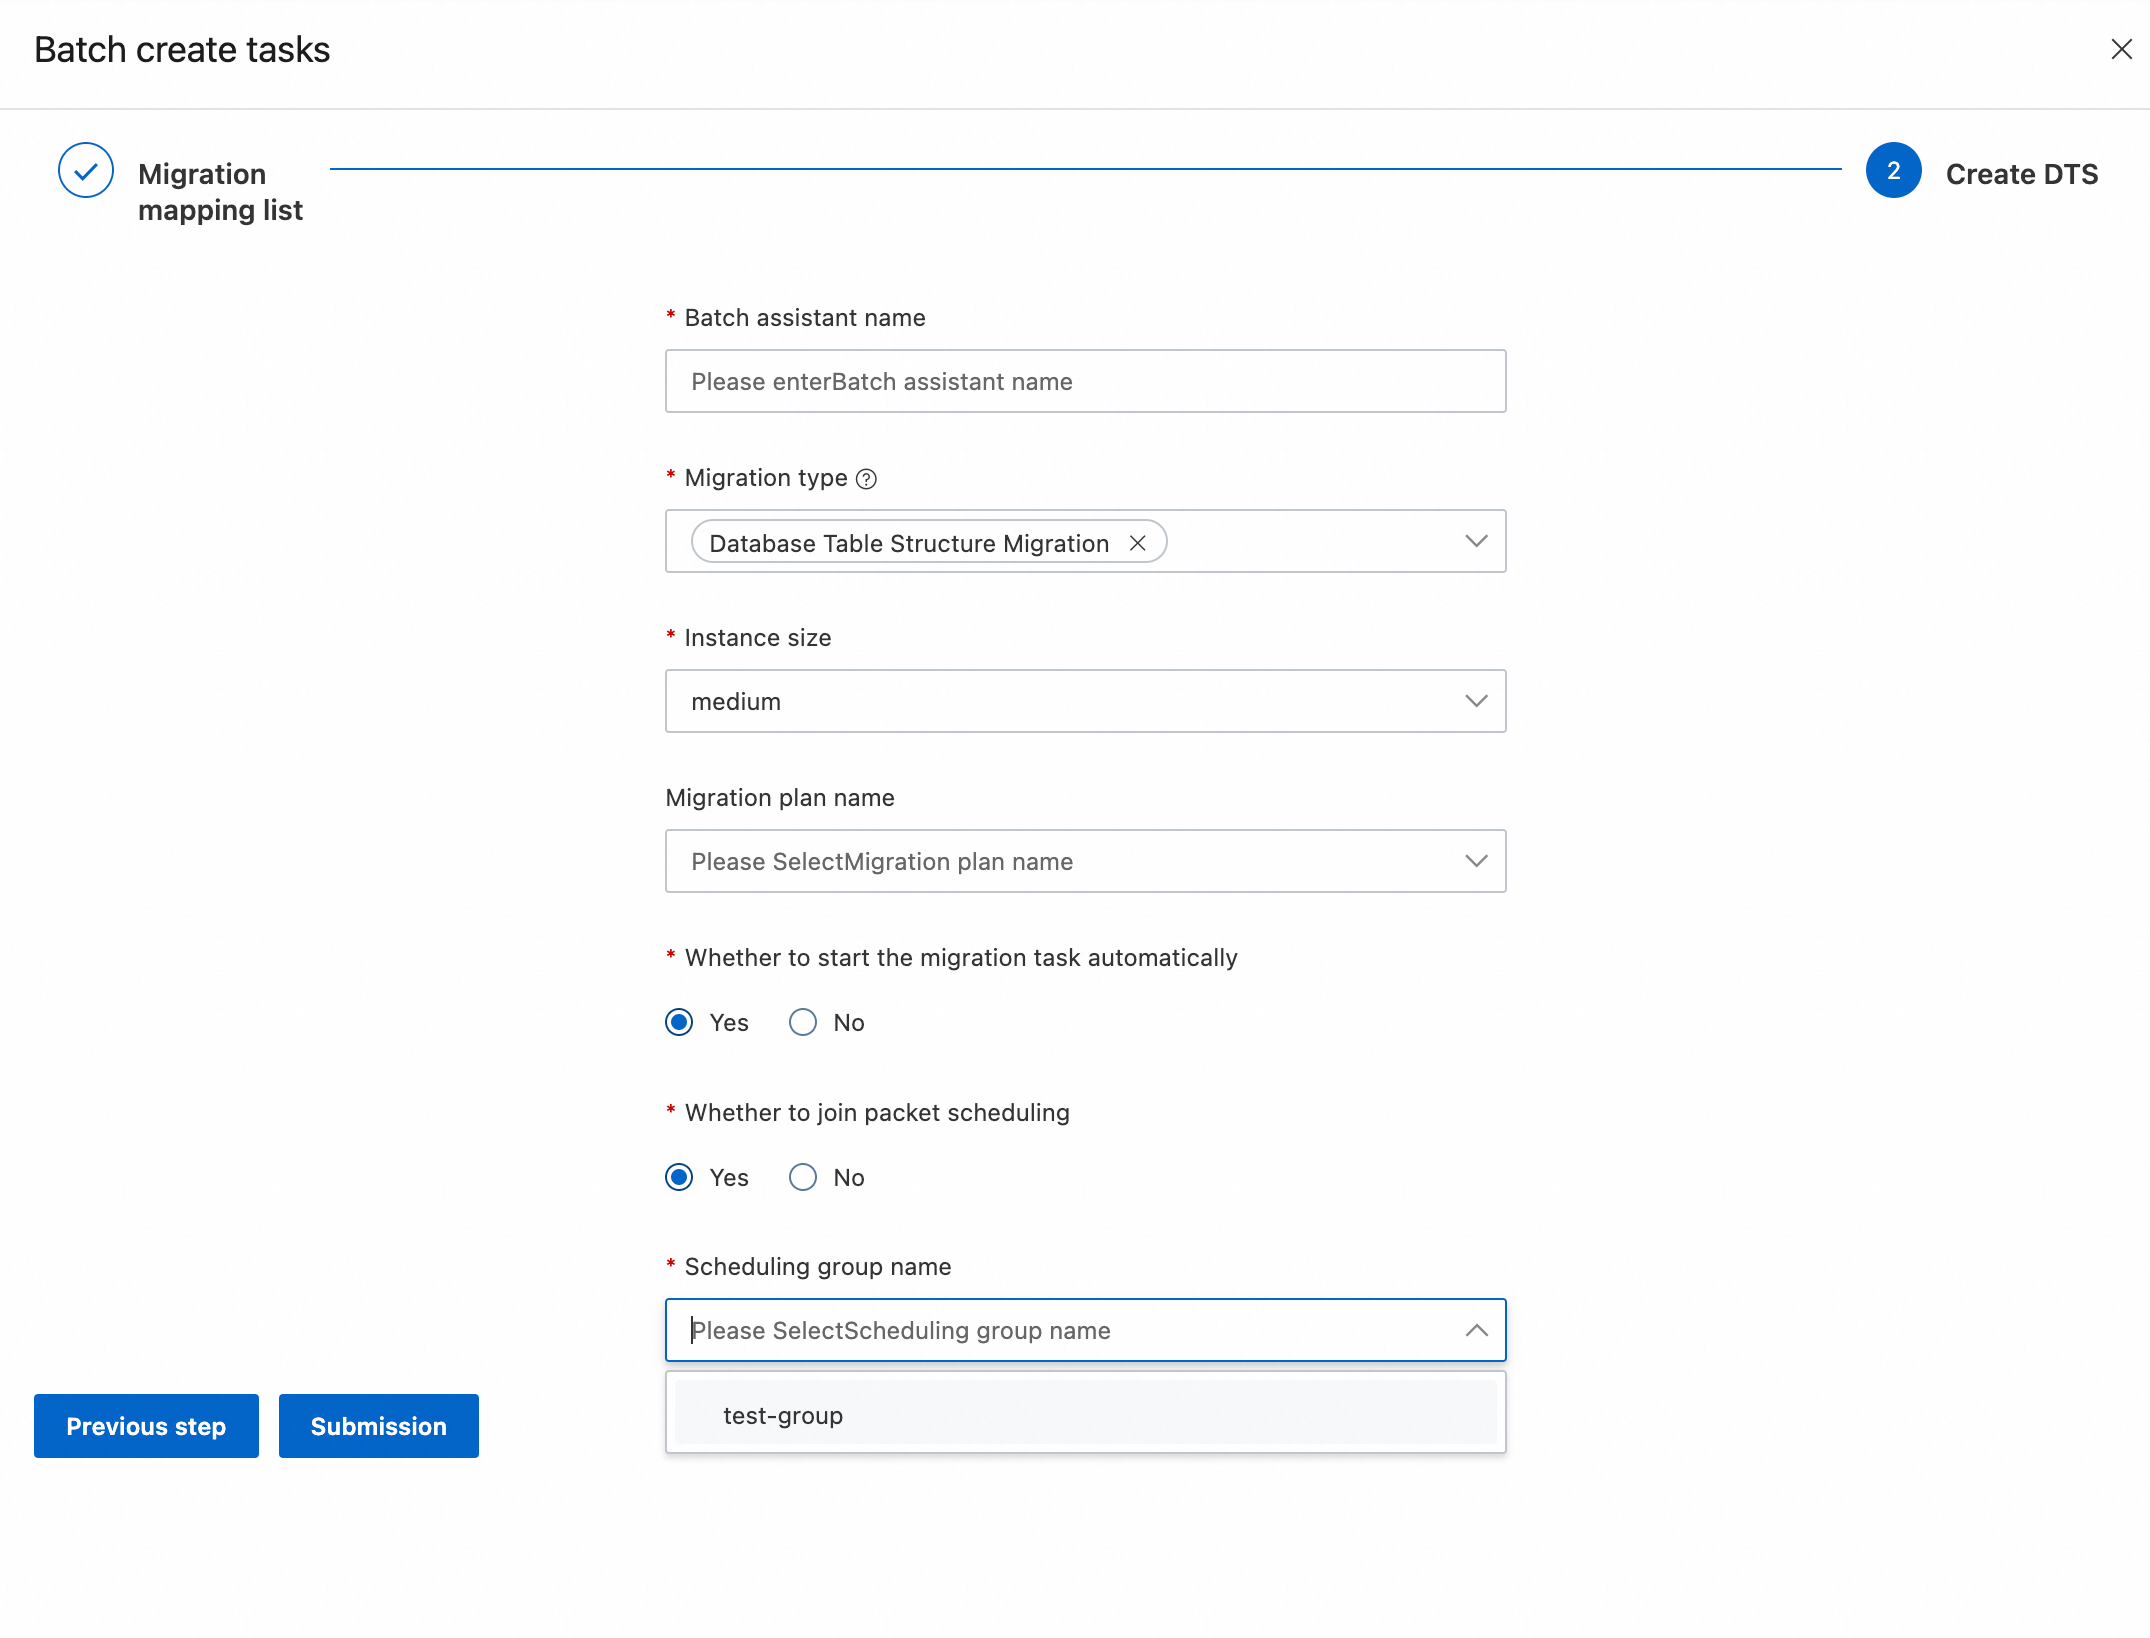
1. Add tasks to a scheduling group from the batch assistant (Batch Assistant)
On the Cloud Migration Center page, click Migration -> Batch Assistant. When creating a migration task, select Yes for Join Group Scheduling. The system will display all enabled scheduling groups. Select the desired group and click Submit.
2. Add tasks to a scheduling group from creating an SMC migration task (Create SMC migration task)
When creating an SMC migration task, select Yes for Join Group Scheduling. The system will display all enabled scheduling groups. Select the desired group and click Submit.

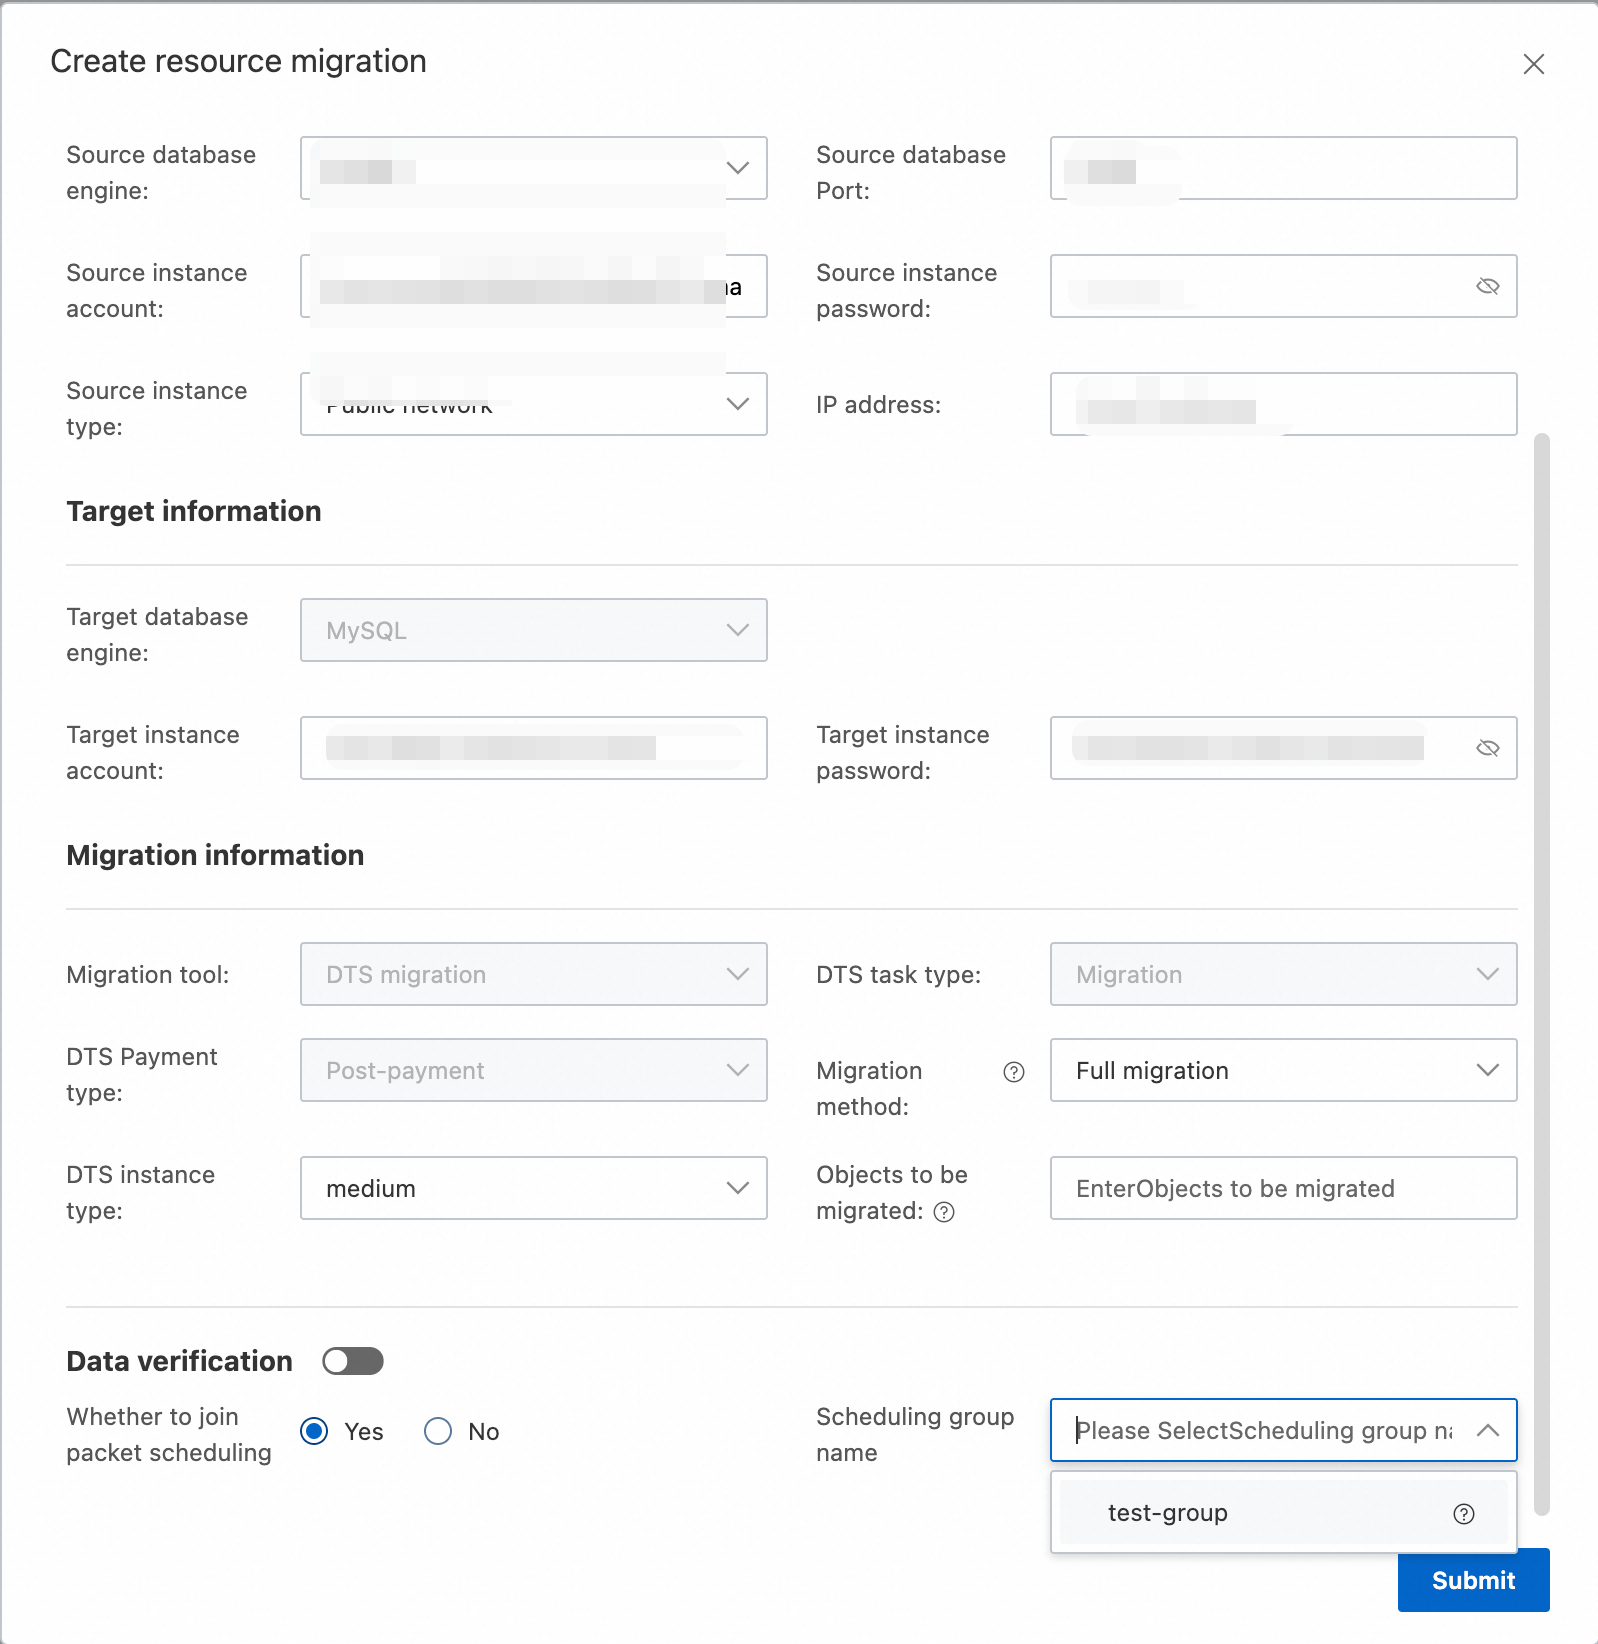
3. Add tasks to a scheduling group from DTS migration (Create DTS task to migrate database instance)
When creating a DTS task to migrate a database instance, select Yes for Join Group Scheduling. The system will display all enabled scheduling groups. Select the desired group and click Submit.
Create a throttling scheduling group
On the Cloud Migration Center page, click Migration -> Scheduling Center -> Create Scheduling Group. Enter the required configuration information in the pop-up window (for a detailed explanation of the configuration fields, see the page description) and click Submit.
Use a throttling scheduling group
On the Scheduling Center page, click the Add Task button next to the throttling scheduling group. A pop-up window will show the details of the DTS tasks eligible for throttling. Select the task you want to throttle and click OK to attach it. Confirm

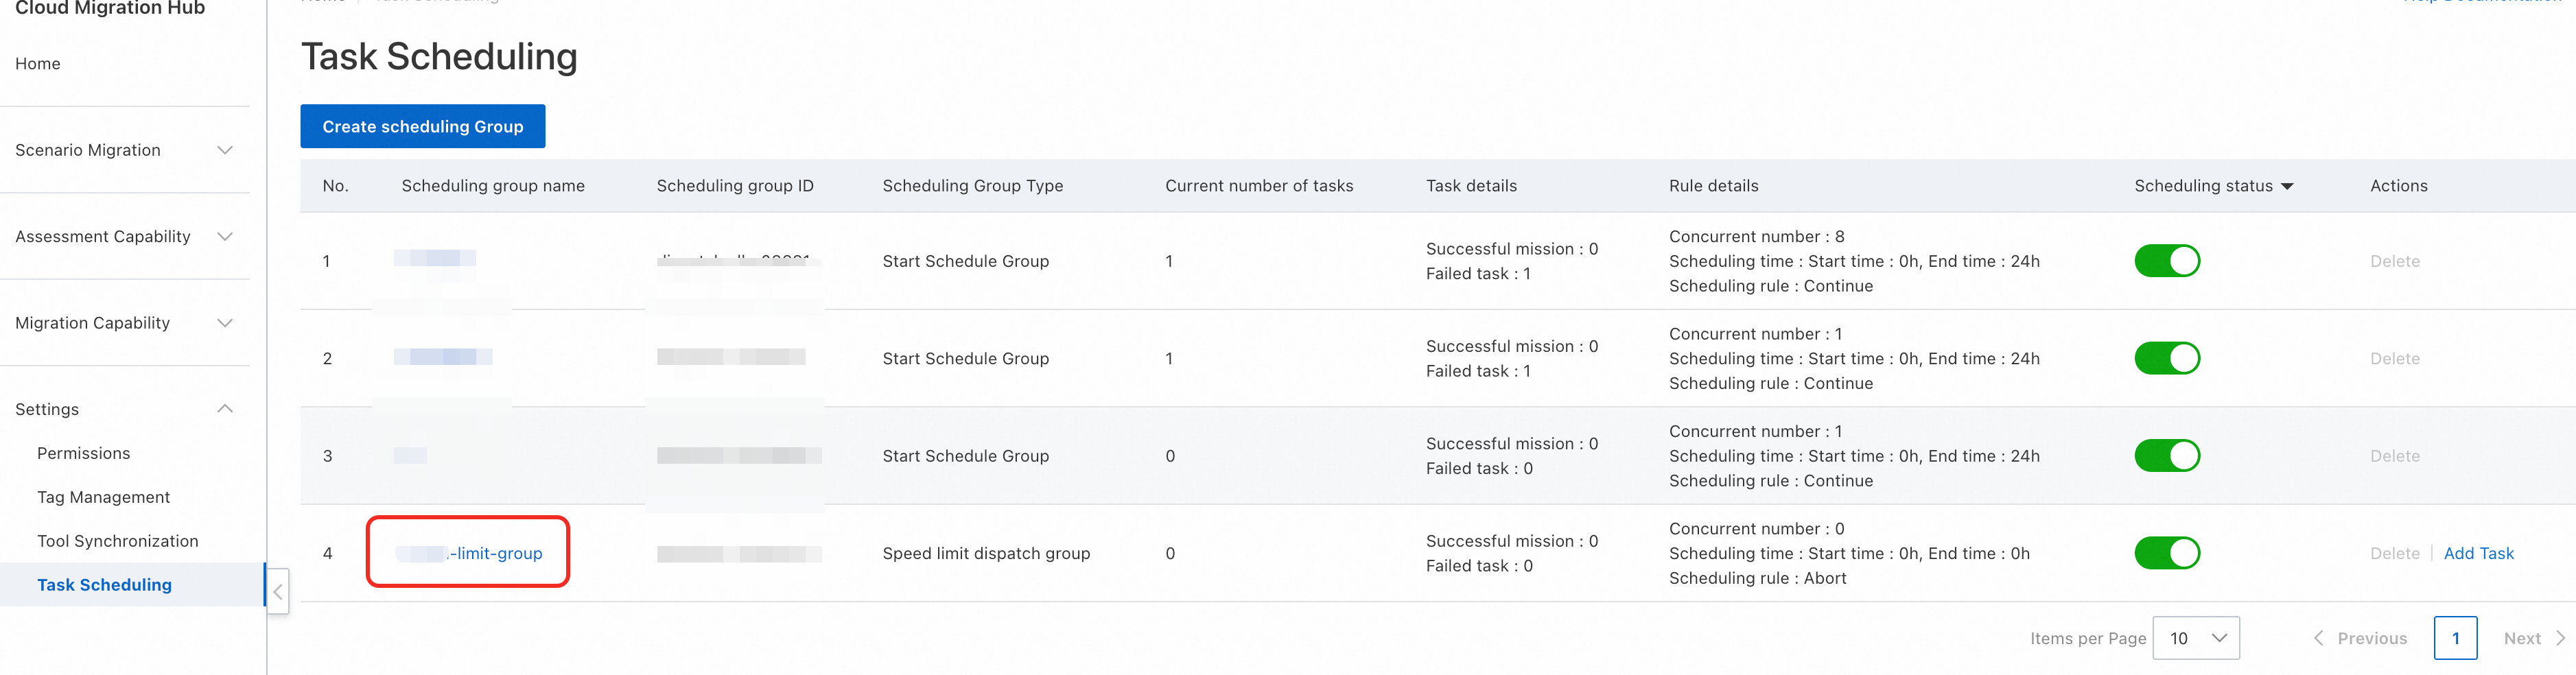
View scheduling groups
After creation, you can view the current Scheduling Group List on the Scheduling Center page. For details on field parsing, see Scheduling Center Field Description.
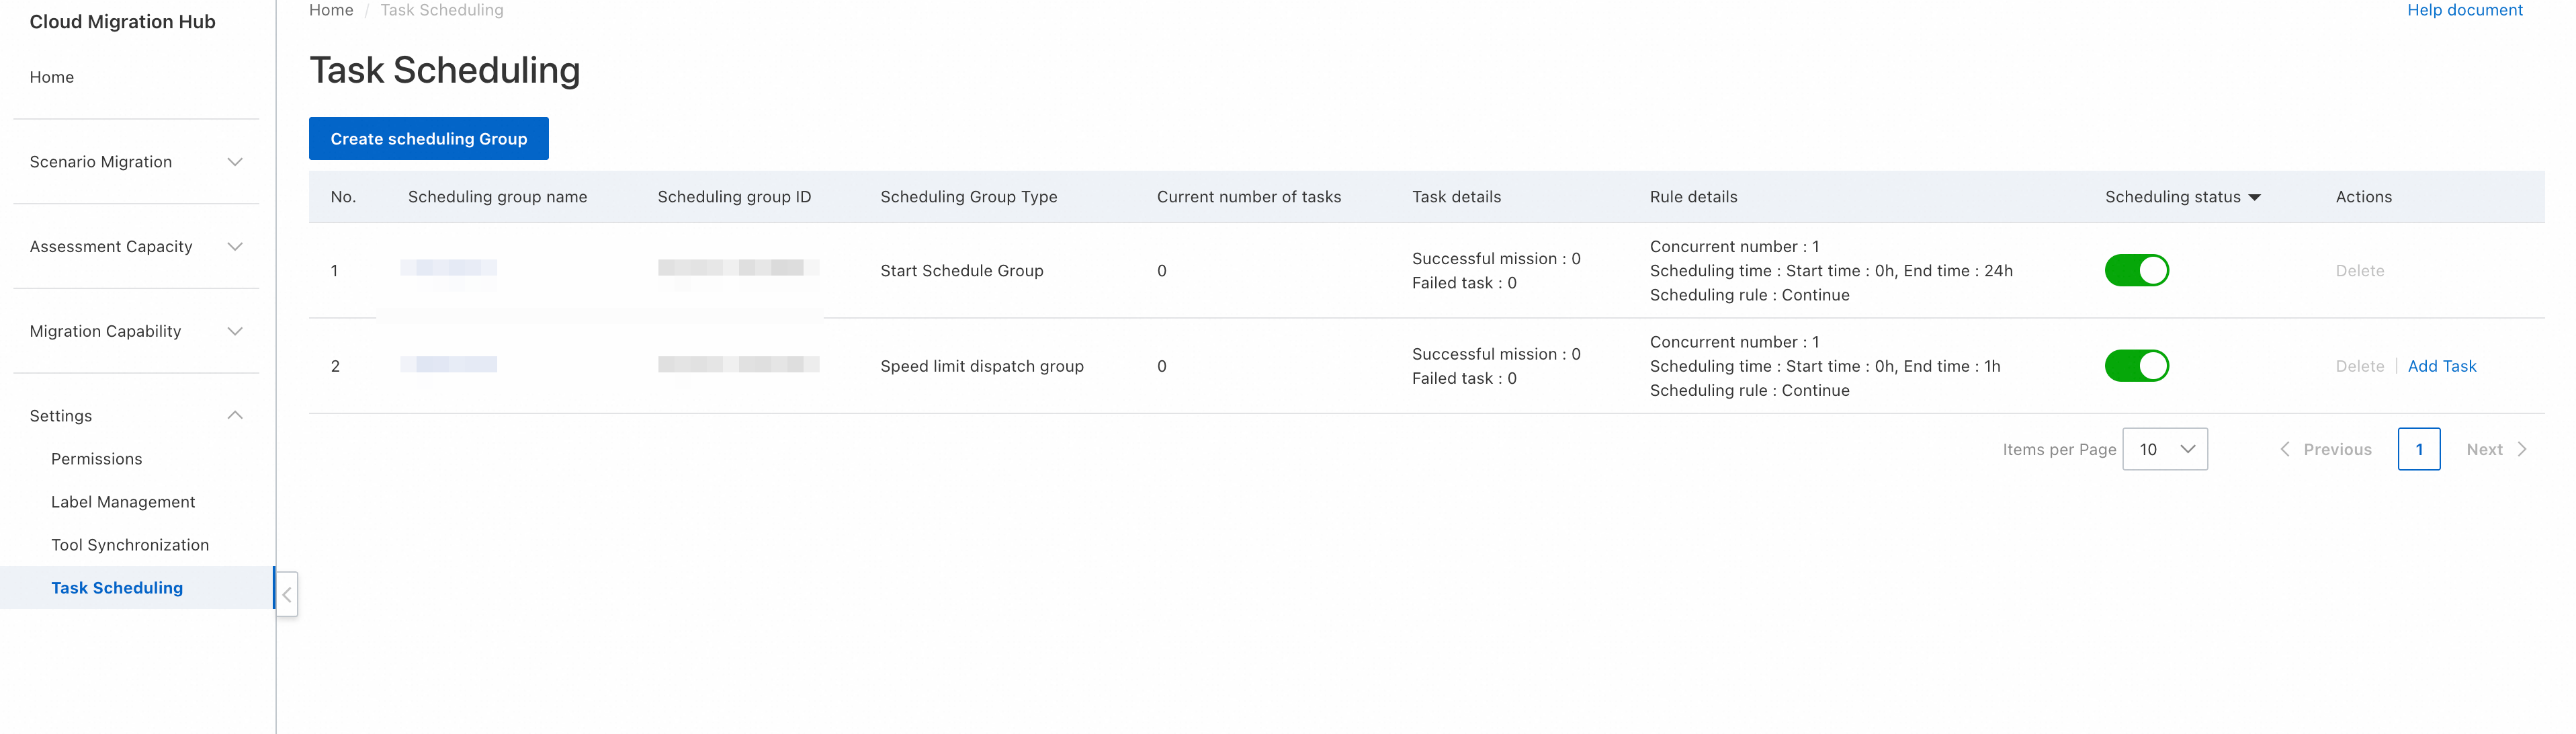
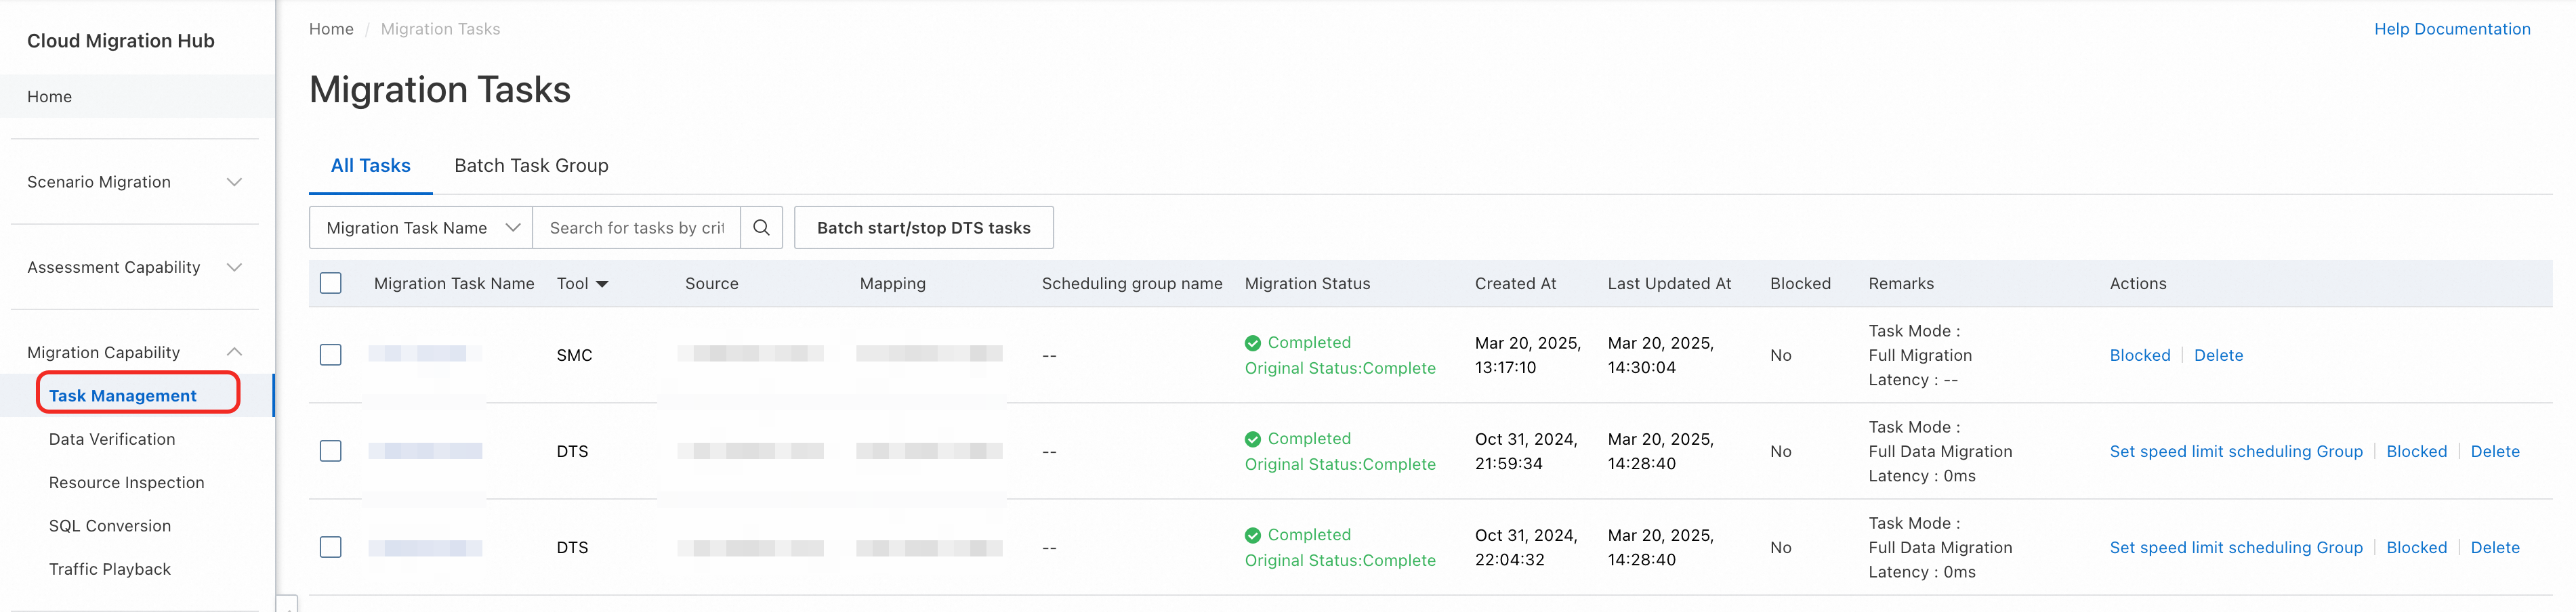
After adding migration tasks to a scheduling group, you can monitor the execution status of tasks within the group through the Task Details in the scheduling group list. You can also click the scheduling group name for an overview of tasks within the group.