KServe (formerly known as KFServing) is a model server and inference engine in the cloud-native environment. It can support automatic scaling, zero scaling, and canary deployment. This article describes how to use Alibaba Cloud Service Mesh (ASM) and Alibaba Cloud Container Service for Kubernetes (ACK)for deployment.
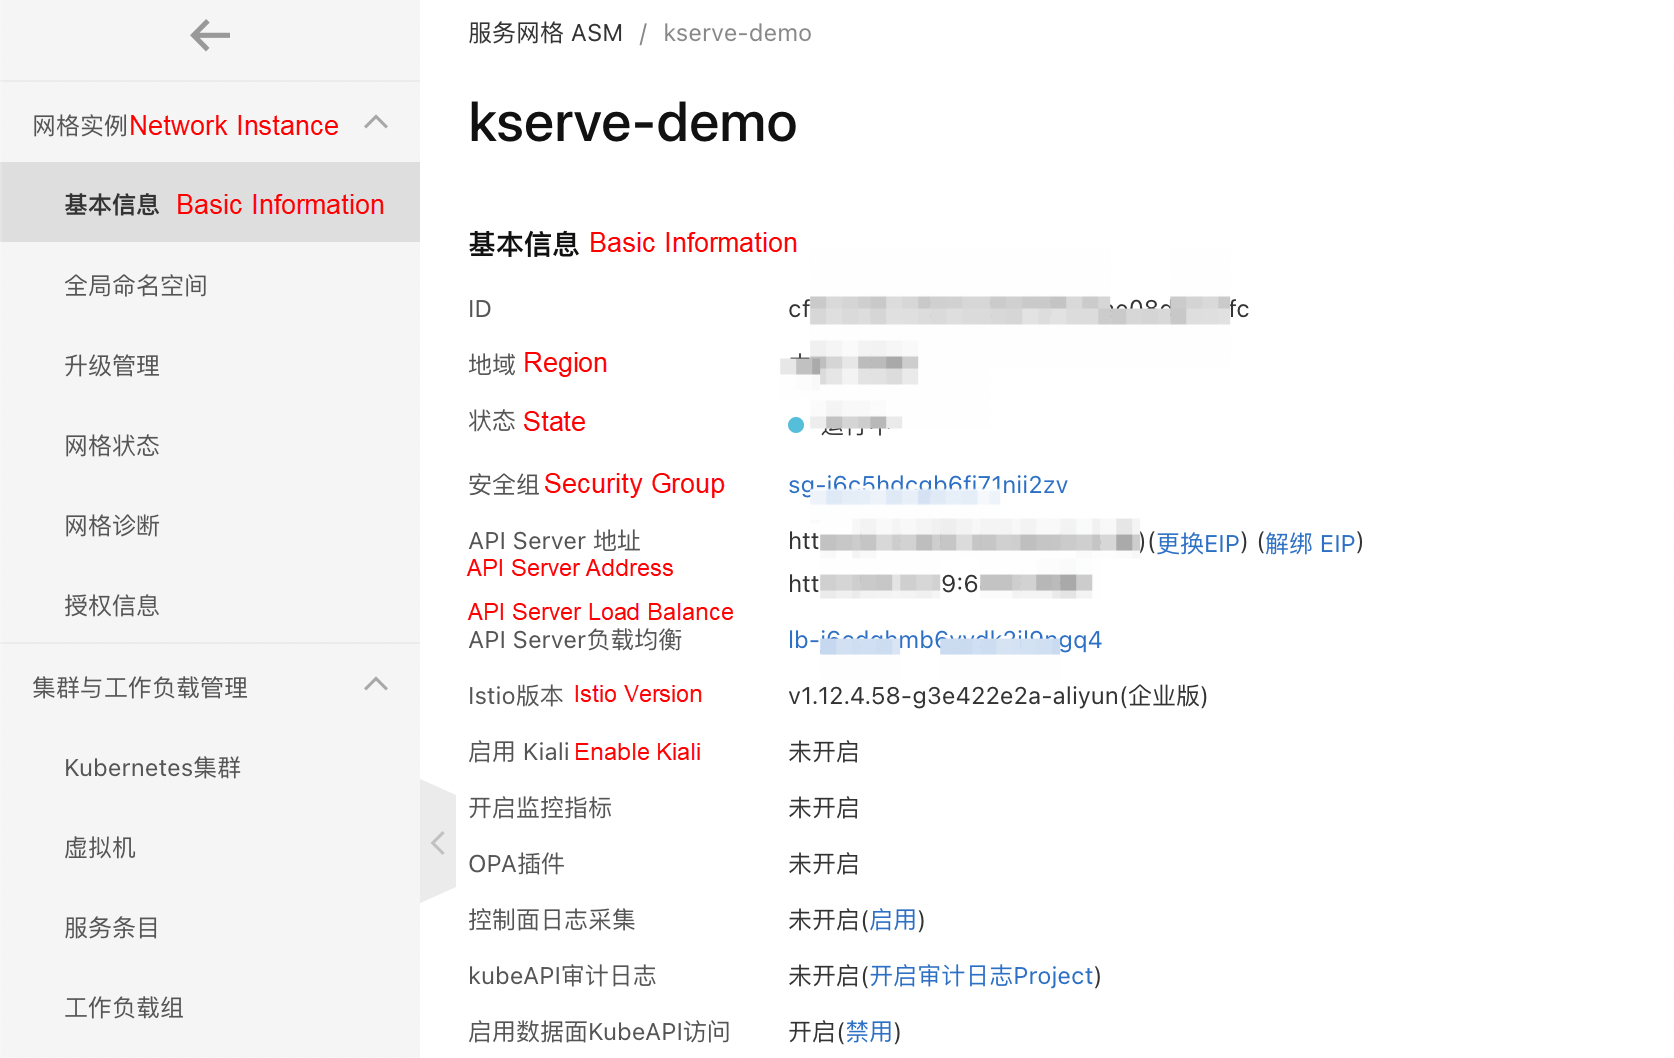
In Cluster and Workload Management → Kubernetes Cluster, transfer the data plane cluster to ASM management:

On the Basic Information page, click Enable KubeAPI Access:

If KServe has been installed in the data plane cluster, skip this step.
Here, Knative Serving v0.7 is used as an example. Kubernetes version>=v1.17 is required.
1. Install the custom components of Knative Serving by running the following command:
kubectl apply -f https://raw.githubusercontent.com/AliyunContainerService/asm-labs/kserve/kserve-0.7/serving-crds.yaml2. Install the Knative Serving core component:
kubectl apply -f https://raw.githubusercontent.com/AliyunContainerService/asm-labs/kserve/kserve-0.7/serving-core.yaml3. Install the Knative Istio controller:
In KServe, you can use Istio as the call entry and provide the blue/green and canary deployment capabilities of the model.
Run the following command to install the Knative ingress controller used by Istio net-istio-controller, istio Gateway, and PeerAuthentication resources. The PeerAuthentication is used to set up PERMISSIVE for knative webhook in the service mesh environment to avoid mTLS authentication problems. Since the KubeAPI access capability of the data plane is enabled, you can directly use the kubeconfig of the data plane to create it:
kubectl apply -f https://raw.githubusercontent.com/AliyunContainerService/asm-labs/kserve/kserve-0.7/net-istio.yamlKServe depends on the Cert Manager component. The minimum version requirement for this component is v1.3.0.
Let's use the example of v1.3.0 and run the following command to install it:
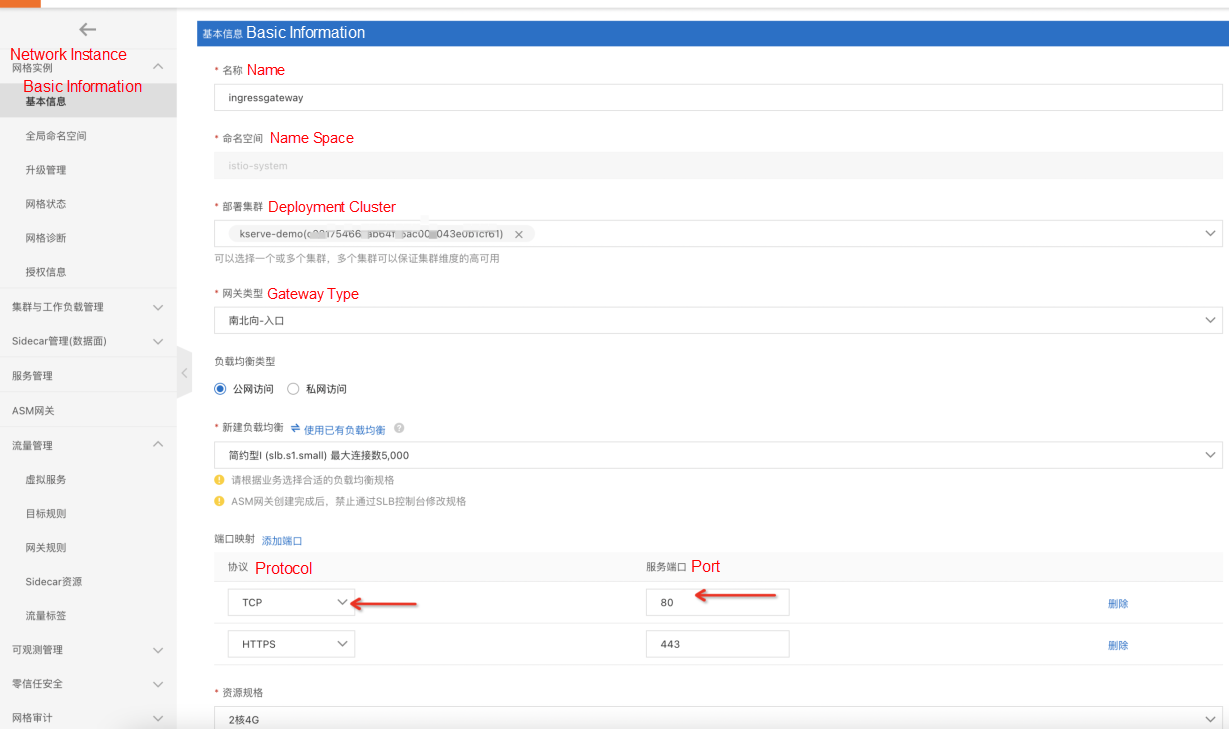
kubectl apply -f https://raw.githubusercontent.com/AliyunContainerService/asm-labs/kserve/kserve-0.7/cert-manager.yamlhttps://github.com/cert-manager/cert-manager/releases/download/v1.3.0/cert-manager.yamlkubectl apply -f https://raw.githubusercontent.com/AliyunContainerService/asm-labs/kserve/kserve-0.7/kserve.yamlOn the ASM Gateway page, click Create
Note: You need to select TCP in the protocol and set the port to 80:

Use the scikit-learn training model for testing.
First, create a namespace for deploying KServe resources.
kubectl create namespace kserve-testkubectl apply -n kserve-test -f - <
apiVersion: "serving.kserve.io/v1beta1"
kind: "InferenceService"
metadata:
name: "sklearn-iris"
spec:
predictor:
model:
modelFormat:
name: sklearn
storageUri: "gs://kfserving-examples/models/sklearn/1.0/model"
EOFCheck the creation status
Use Kubeconfig of the data plane and run the following command to query the installation status of the inferenceservices sklearn-iris.
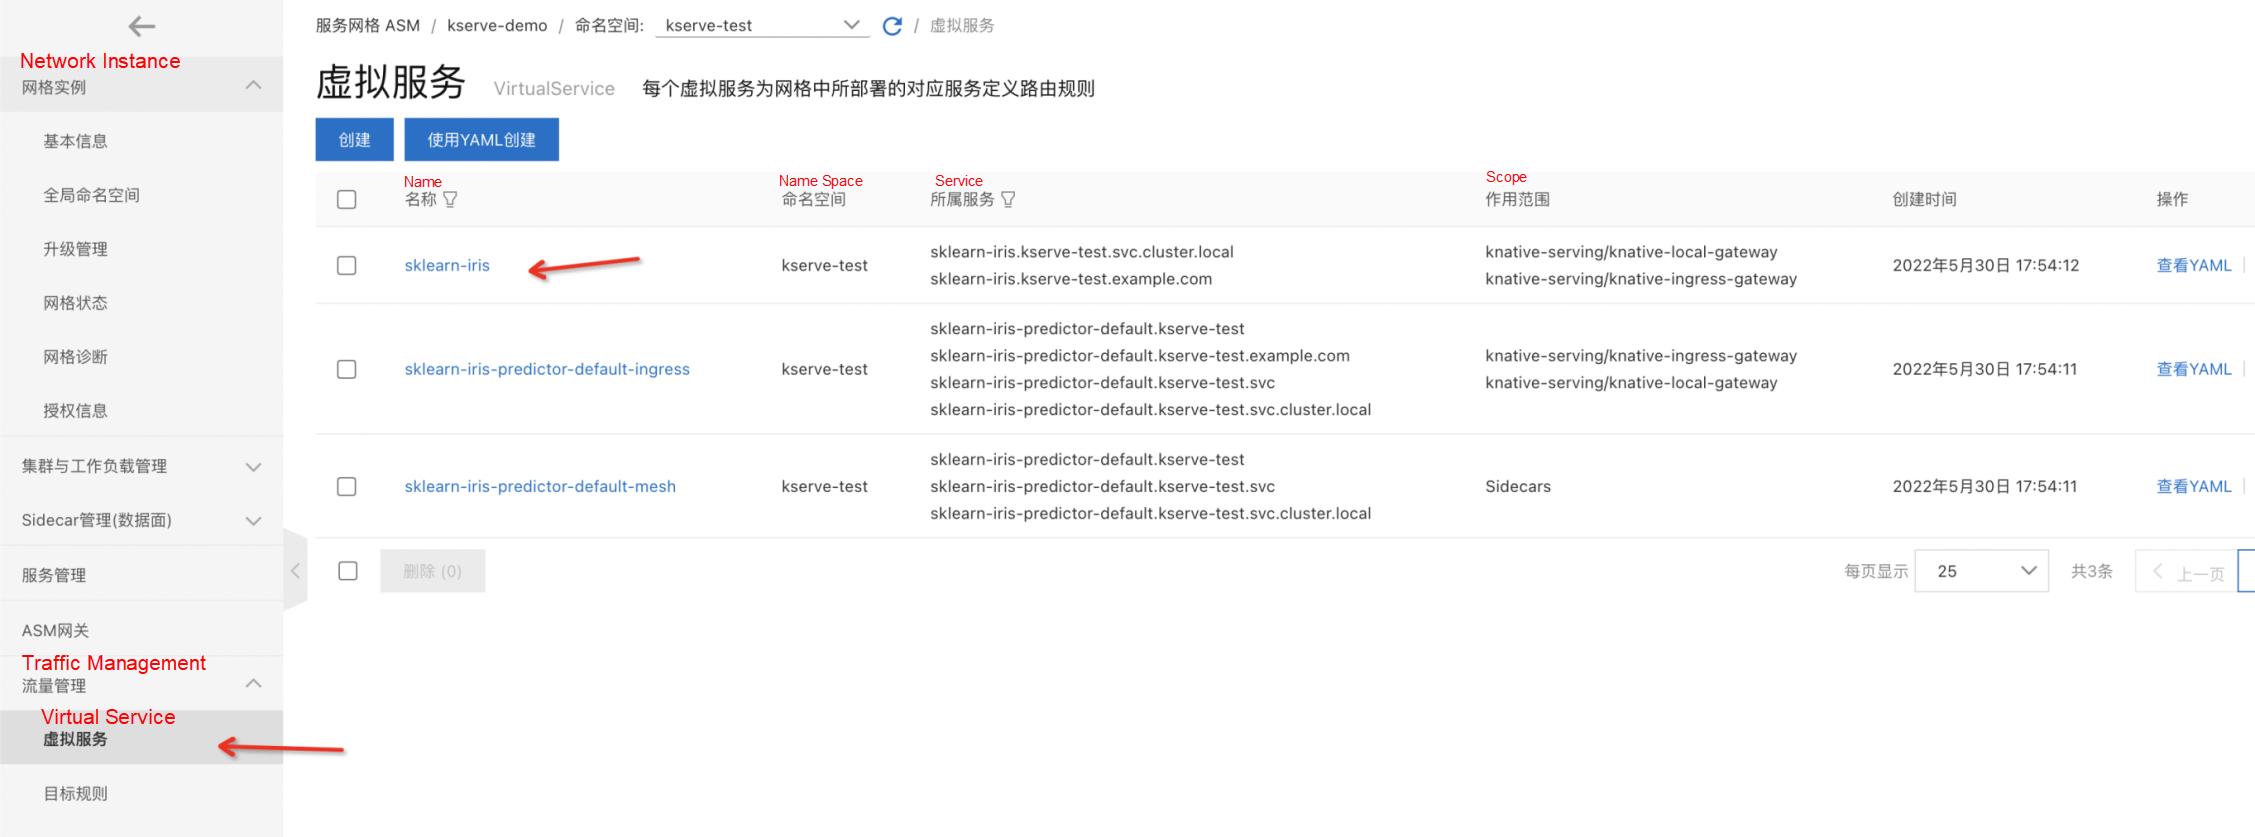
kubectl get inferenceservices sklearn-iris -n kserve-testAfter the installation is complete, the virtual service and gateway rules that correspond to the model configuration are created automatically.


cat < "./iris-input.json"
{
 "instances": [
   [6.8,  2.8,  4.8,  1.4],
   [6.0,  3.4,  4.5,  1.6]
 ]
}
EOFObtain the SERVICE_HOSTNAME:
SERVICE_HOSTNAME=$(kubectl get inferenceservice sklearn-iris -n kserve-test -o jsonpath='{.status.url}' | cut -d "/" -f 3)
Test the HOST to sklearn-iris.kserve-test.example.com
Use the ASM gateway address created earlier:
curl -H "Host: ${SERVICE_HOSTNAME}" http://{ASM gateway address}:80/v1/models/sklearn-iris:predict -d @./iris-input.json 
ASM is the industry's first fully managed Istio-compatible product, maintaining consistency with the community and industry trends from the beginning. The components of the control plane are managed on the Alibaba Cloud side and are independent of the user clusters on the data side. ASM is customized and implemented based on community Istio. They provide component capabilities to support refined traffic management and security management on the managed control panel side. The managed mode decouples the lifecycle management of Istio components from the managed Kubernetes clusters, making the architecture flexible and improving system scalability.
Please see the product introduction below for more information: https://www.alibabacloud.com/product/servicemesh
Cloud Forward: Cloud-Native Container Platform Episode 4 | ACK • Observability

212 posts | 13 followers
FollowAlibaba Cloud Native - November 3, 2022
Alibaba Container Service - August 30, 2024
Alibaba Container Service - September 14, 2022
Xi Ning Wang(王夕宁) - July 21, 2023
Alibaba Cloud Native Community - September 20, 2023
Alibaba Cloud Native Community - December 18, 2023

212 posts | 13 followers
Follow Bastionhost
A unified, efficient, and secure platform that provides cloud-based O&M, access control, and operation audit.
Learn More Managed Service for Grafana
Managed Service for Grafana displays a large amount of data in real time to provide an overview of business and O&M monitoring.
Learn More Cloud-Native Applications Management Solution
Accelerate and secure the development, deployment, and management of containerized applications cost-effectively.
Learn More Function Compute
Alibaba Cloud Function Compute is a fully-managed event-driven compute service. It allows you to focus on writing and uploading code without the need to manage infrastructure such as servers.
Learn MoreMore Posts by Alibaba Cloud Native