By Arslan Ud Din Shafiq, Alibaba Cloud Tech Share Author. Tech Share is Alibaba Cloud's incentive program to encourage the sharing of technical knowledge and best practices within the cloud community.
This is second part of my tutorial about how to install Pagekit CMS on CentOS 7.4.
In the previous tutorial, we have set up a LAMP stack and other required packages for Pagekit. In the second part of the tutorial, we will install Pagekit on our Alibaba Cloud Elastic Compute Service (ECS) instance.
But before doing that, we will need to configure our domain. We will also secure the domain with Let's Encrypt (SSL). After that, we will create a database and then finally install Pagekit CMS on our ECS instance.
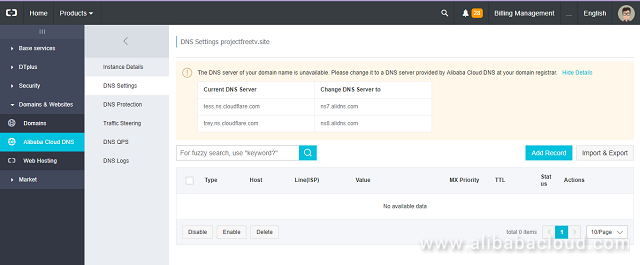
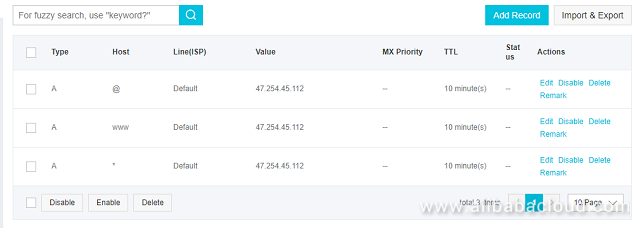
If you bought your domain from Alibaba Cloud, it will automatically setup DNS records. You will only require to add domain to Alibaba Cloud DNS. In case, if you have already registered domain from any other registrar, you will need to add that domain in Alibaba Cloud DNS and update its nameserver records on your registrar account. Once your DNS records are propagated, check them from intodns.com.
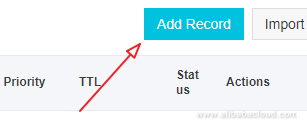
To setup domain name bought from a third party, follow the steps below:
# sudo nano /etc/httpd/conf.d/imarslan.com.conf
<VirtualHost *:80>
  # Admin email, Server Name (domain name), and any aliases
  ServerAdmin itsaareez@example.com
  ServerName  imarslan.com
  ServerAlias www.imarslan.com

  # Index file and Document Root (where the public files are located)
  DirectoryIndex index.html index.php
  DocumentRoot /var/www/html/
  # Log file locations
  LogLevel warn
  ErrorLog  /var/www/html/error.log
  CustomLog /var/www/html/access.log combined
</VirtualHost>
After adding the text, use Ctrl + X, then press 'Y', then hit Enter key to save the file.
# sudo systemctl restart httpd
Note: The above configurations of virtual host are for HTTP protocol. To setup HTTPS protocol, you will have to install SSL. To install SSL and allow HTTPS to provide a secured experience to your users, you will need to install Let's Encrypt. Let's Encrypt will provide you free SSL for your domain.
# sudo yum install git
# sudo systemctl stop httpd
# sudo git clone https://github.com/letsencrypt/letsencrypt /opt/letsencrypt
# cd /opt/letsencrypt
# sudo -H ./letsencrypt-auto certonly --standalone -d imarslan.com -d www.imarslan.com
Note: Remember to replace imarslan.com with your own domain name.
# sudo nano /etc/httpd/conf.d/imarslan.com.conf
<IfModule mod_ssl.c>
    <VirtualHost *:443>

        ServerName imarslan.com
        ServerAdmin itsaareez@example.com
        ServerAlias www.imarslan.com


        SSLEngine on
        SSLCertificateFile /etc/letsencrypt/live/imarslan.com/cert.pem
        SSLCertificateKeyFile /etc/letsencrypt/live/imarslan.com/privkey.pem
        SSLCertificateChainFile /etc/letsencrypt/live/imarslan.com/chain.pem


        DirectoryIndex index.html index.php
         DocumentRoot /var/www/html/
         # Log file locations
        LogLevel warn
         ErrorLog  /var/www/html/error.log
        CustomLog /var/www/html/access.log combined

    </VirtualHost>
</IfModule>

<VirtualHost *:80>
  # Admin email, Server Name (domain name), and any aliases
  ServerAdmin itsaareez@example.com
  ServerName  imarslan.com
  ServerAlias www.imarslan.com

  Redirect permanent / https://www.imarslan.com/
  # Log file locations
  LogLevel warn
  ErrorLog  /var/www/html/error.log
  CustomLog /var/www/html/access.log combined
</VirtualHost>
Replace imarslan.com with your domain name. This above code will force SSL and all of the traffic will be redirected to HTTPS version of the website.
# sudo mysql -u root -p
CREATE DATABASE pk_db CHARACTER SET utf8 COLLATE utf8_general_ci;
CREATE USER 'pk_db'@'localhost' IDENTIFIED BY 'SecurePassword';
GRANT ALL PRIVILEGES ON pk_db.* TO 'pk_db'@'localhost';
FLUSH PRIVILEGES;
EXIT;
where pk_db can be changed to your desired name.
Note: In case, if you get any error like 'No such directory or file', then create html directory. To do so, navigate to cd /var/www and execute the following command to create html directory and type cd html and hit enter.
# sudo mkdir html
# sudo wget http://pagekit.com/api/download/latest -O pagekit.zip
# ls -li

# sudo unzip pagekit.zip
# sudo chown -R apache:apache /var/www/html
# sudo systemctl restart httpd
Congratulations! Now it's time to access your Pagekit CMS. Just open website in your browser. In my case, I will open www.imarslan.com. Now we will proceed towards completion of installation of Pagekit CMS which will involve different settings.

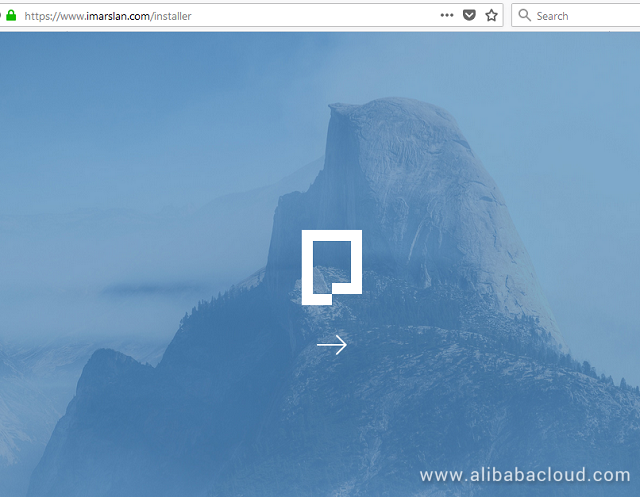
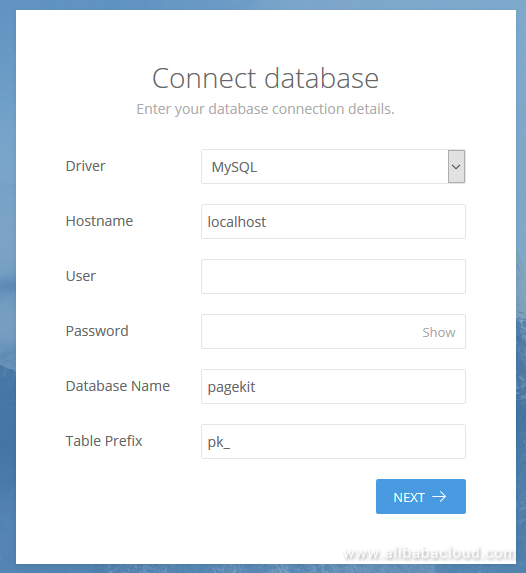
| Host | localhost |
|---|---|
| Database Name | pk_db |
| Username | pk_db |
| Password | SecurePassword |
Then hit Next.
That's it! You have successfully installed Pagekit CMS on Alibaba Cloud ECS.
You can access your admin panel by using the admin panel URL you have configured.. To view your website, you can simply access it through https://www.yourdomain.com.
How to Install Pagekit CMS on CentOS 7.4 – Part 1 LAMP Stack Setup
ATTN Tech Affiliates - Get a Sweet Bounty for Every Sale a Click Creates

2,598 posts | 769 followers
FollowAlibaba Clouder - April 1, 2019
Alibaba Clouder - May 21, 2018
Alibaba Clouder - April 12, 2019
Alibaba Clouder - May 15, 2019
Alibaba Clouder - April 12, 2019
Alibaba Clouder - April 12, 2019

2,598 posts | 769 followers
Follow ECS(Elastic Compute Service)
Elastic and secure virtual cloud servers to cater all your cloud hosting needs.
Learn More OSS(Object Storage Service)
An encrypted and secure cloud storage service which stores, processes and accesses massive amounts of data from anywhere in the world
Learn MoreLearn More
More Posts by Alibaba Clouder