By Arslan Ud Din Shafiq, Alibaba Cloud Tech Share Author. Tech Share is Alibaba Cloud's incentive program to encourage the sharing of technical knowledge and best practices within the cloud community.
Akaunting is an open source software related to online accounting for businesses. It is free to use, and you can access it from any device. You can run your business, check your finance reports, and even get information about your cash flow at any time through its various tools. Akaunting is developed in Laravel (PHP framework), Bootstrap (CSS framework), jQuery and some RESTful APIs. It is available on GitHub and is available in 28 languages.
In this tutorial, we will be installing Akaunting on an Alibaba Cloud Elastic Compute Service (ECS) with Linux. I will be showing the steps for both Ubuntu 16.04 and CentOS 7 as they are quite similar.
Before proceeding with installation of any kind of package, use the following command to update your system. To execute this command, remember to login from non-root user with sudo privileges.
For Ubuntu
# sudo apt update && sudo apt upgradeFor CentOS
# sudo yum update -yYou will be required to unzip the compressed zip folder of Akaunting, for this purpose, you will have to install unzip.
For Ubuntu
# sudo apt-get install unzipFor CentOS
# sudo yum install unzip -ySome essentials are required for installing and setting up Akaunting. Follow the steps below for build-essential.
For Ubuntu
# sudo apt install build-essentialTo install EPEL repository, execute the following command.
For CentOS
# sudo rpm -Uvh https://dl.fedoraproject.org/pub/epel/epel-release-latest-7.noarch.rpm To install webstatic YUM repository, execute the following command.
For CentOS
# sudo rpm -Uvh https://mirror.webtatic.com/yum/el7/webtatic-release.rpmPHP is a server-side scripting language. To install PHP, execute the following command.
For Ubuntu
# sudo apt install -y php7.0For CentOS
# sudo yum install -y php72wFor installation of Akaunting, some PHP extensions are required. The required extensions include php-cli, php-fpm, php-mbstring, php-mysql, php-common, php-zip, php-curl and php-xml. To install these extensions, execute the following command.
For Ubuntu
# sudo apt install -y php7.0-cli php7.0-fpm php7.0-mbstring php7.0-mysql php7.0-common php7.0-zip php7.0-curl php7.0-xmlFor CentOS
# sudo yum install -y php72w-cli php72w-fpm php72w-common php72w-mbstring php72w-xml php72w-mysql php72w-pgsql php72w-sqlite3 php72w-zip php72w-curlTo check PHP version and installation of PHP, execute the command below.
# php -v
Akaunting requires MySQL database. To install MySQL, execute the command below.
For Ubuntu
# sudo apt install -y mysql-serverSet a password for your MySQL server and secure the installation with the following command.
# sudo mysql_secure_installationFor Ubuntu
# sudo yum install -y mariadb-serverNow start and enable MariaDB server, so that on reboot, MariaDB can restart automatically.
# sudo systemctl enable mariadb
# sudo systemctl start mariadb
Set password for your MySQL server and secure the installation with the following command.
# sudo mysql_secure_installationIn this section, you will have to create a database, add a user, setup its credentials and assign database to user. To do so, login to MySQL shell.
# mysql -u root -pNow execute the following query to create database, username and assign database.
CREATE DATABASE ak;
GRANT ALL ON ak.* TO 'ak' IDENTIFIED BY '654321Ab';
FLUSH PRIVILEGES;
EXIT;You will be required to install an Nginx server. For this purpose, you will need to follow the steps below.
For Ubuntu
To install, execute the command
# sudo apt-get install nginxAfter successful installation, you will see the screen below.
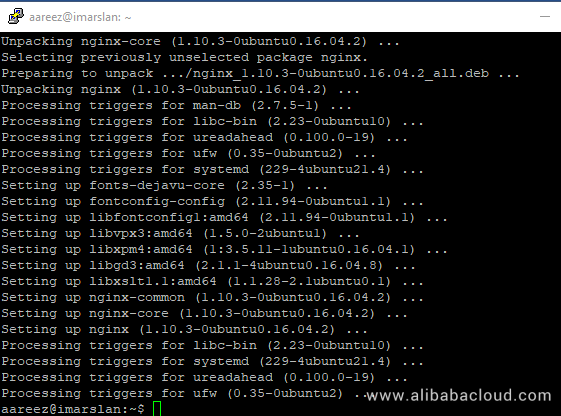
For CentOS
To install execute the command
# sudo yum -y install nginxAfter successful installation, you will see the screen below.
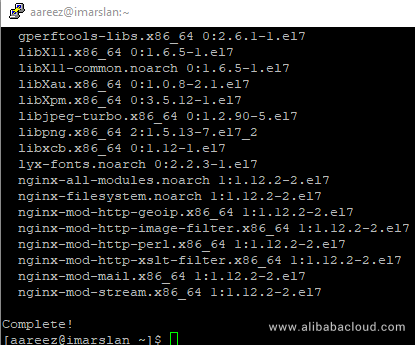
For Ubuntu and CentOS
Now you will need to start Nginx server by executing command below.
# sudo systemctl start nginxTo check status of Nginx server, execute the command below.
# sudo systemctl status nginxTo check the installation, access IP address of your Alibaba Cloud ECS or your domain name that you have pointed to your IP address. In my case, I have accessed via domain name and the following screen loaded.
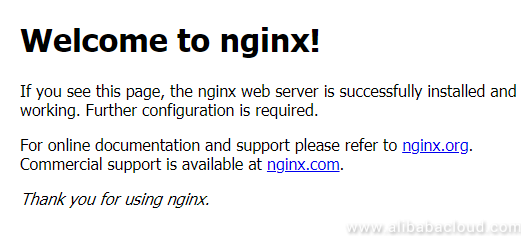
To check current version of nginx, execute the command below.
# sudo nginx -vCreate configuration file in available sites for Akaunting. To do so, execute the command below.
For Ubuntu
# sudo nano /etc/nginx/sites-available/akaunting.confNow add the following text to the opened file.
server {
    listen 80;
    listen [::]:80;

    server_name softpedia.xyz;
    root /var/www/akaunting;
    index index.php index.html;

    location / {
        try_files $uri $uri/ /index.php?$query_string;
    }

    location ~ \.php$ {
        fastcgi_index index.php;
        try_files $uri =404;
        include fastcgi_params;
        fastcgi_param SCRIPT_FILENAME $document_root$fastcgi_script_name;
        fastcgi_pass unix:/run/php/php7.0-fpm.sock;
    }
}
Now activate the newly configured akaunting.conf file by adding file to sites-enabled directory.
# sudo ln -s /etc/nginx/sites-available/akaunting.conf /etc/nginx/sites-enabled/For CentOS
In case of CentOS, please run the command below.
# sudo yum -y install nano
# sudo nano /etc/nginx/conf.d/akaunting.conf
Now add the following text to opened file.
server {

  listen 80;
  listen [::]:80;

  server_name softpedia.xyz;

  root /var/www/akaunting;

  index index.php index.html;

  location / {
    try_files $uri $uri/ /index.php?$query_string;
  }

  location ~ \.php$ {
    fastcgi_index index.php;
    try_files $uri =404;
    include fastcgi_params;
    fastcgi_param SCRIPT_FILENAME $document_root$fastcgi_script_name;
    fastcgi_pass 127.0.0.1:9000;
  }

}
For CentOS and Ubuntu
To test Nginx configuration, execute the following command.
# sudo nginx -t
Now reload nginx server by executing the command below.
# sudo systemctl reload nginx.serviceCreate a folder for placing files of Akaunting and then assign necessary permissions.
Create root folder for Akaunting in /var/www directory.
# sudo mkdir -p /var/www/akauntingNow change the ownership of /var/www/akaunting directory to aareez. In my case, username is aareez. You can replace it with your username.
# sudo chown -R aareez:aareez /var/www/akauntingNavigate to /var/www/akaunting directory by executing command below.
# cd /var/www/akauntingThe following command will fetch the copy of Akaunting.
# curl -O -J -L https://akaunting.com/download.php?version=latestExecute the command below to extract files from compressed zip folder.
# unzip Akaunting_1.2.12-Stable.zipNow remove the downloaded zip folder by executing command below.
# rm Akaunting_1.2.12-Stable.zipNow add the ownership of /var/www/akaunting directory to www-data.
For Ubuntu
# sudo chown -R www:www-data /var/www/akauntingFor CentOS
# sudo chown -R nginx:nginx /var/www/akauntingOpen the file by executing command below, to configure and find the user and group name in opened file. The current user and group are apache. Change apache to nginx and save the file.
# sudo nano /etc/php-fpm.d/www.conf
Now restart php-fpm by the command below.
# sudo systemctl restart php-fpm.serviceReload the Nginx server by executing the command below.
# sudo systemctl reload nginx.serviceNow you can access Akaunting installer via your Alibaba Cloud ECS IP address. If you have pointed a domain to your IP address, you can also use it. In my case, I have pointed domain to my ECS IP address: http://softpedia.xyz/. After accessing, the following screen appears.
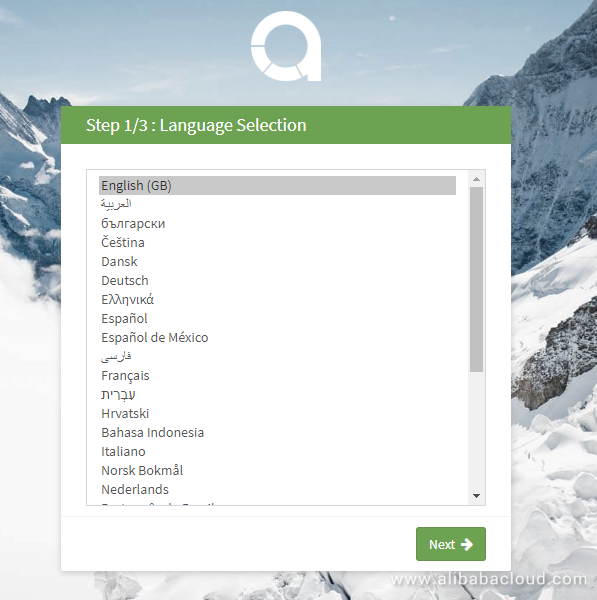
Hit the Next button, the following screen will appear. You will be asked to add details for your database. I have added details according the above procedure. Now hit Next.
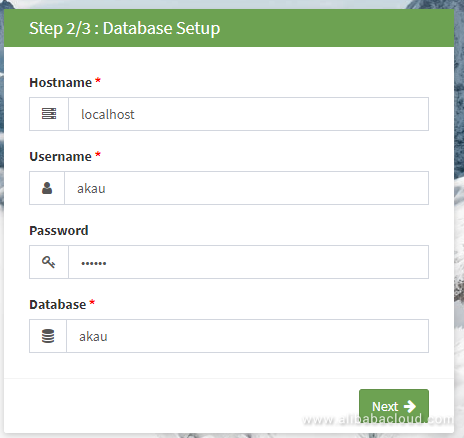
Add the required details as shown below. Setup admin details, this will be used later to log in to the admin panel.
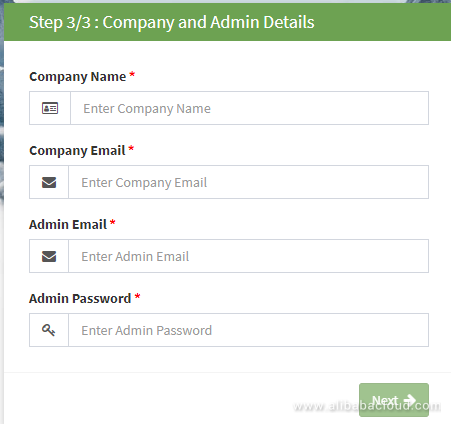
Hit Next and you will be redirected to login page as shown below.
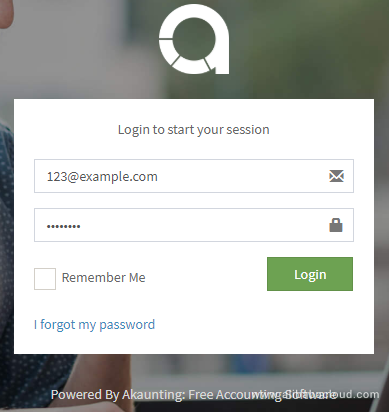
After login, you will be redirected to the Akaunting dashboard.
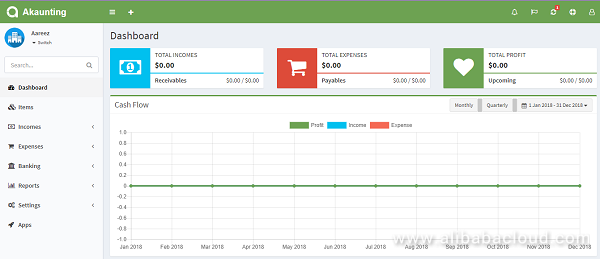
Akaunting is now ready to use.
Processing OSS Data Files in Different Formats Using Data Lake Analytics
Alibaba Underlines "Intelligent Collaboration of Vehicle to Road" in New Automotive Strategy

2,598 posts | 769 followers
FollowAlibaba Clouder - November 18, 2019
Alibaba Clouder - June 13, 2019
Alibaba Clouder - August 28, 2020
Alibaba Clouder - May 13, 2019
Alibaba Clouder - September 21, 2018
Alibaba Clouder - May 8, 2019

2,598 posts | 769 followers
Follow ECS(Elastic Compute Service)
Elastic and secure virtual cloud servers to cater all your cloud hosting needs.
Learn More OSS(Object Storage Service)
An encrypted and secure cloud storage service which stores, processes and accesses massive amounts of data from anywhere in the world
Learn MoreLearn More
More Posts by Alibaba Clouder
5892547131028633 January 10, 2019 at 2:41 pm
Hi, I just followe the tutorial and found that in my web browser just show the nginx welcome page.Thanks in advance.N.O
Arslan ud Din Shafiq January 17, 2019 at 11:15 am
My pleasure! Keep visiting and giving your feedback.