By Joon Park, Solutions Architect
Alibaba Cloud Content Delivery Network (CDN) is a scalable and high-performance content delivery service for accelerated distribution of content to users across the globe. CDN is commonly used with Alibaba Cloud's Object Storage Service (OSS) to accelerate large files and other static content for websites.
However, CDN is not limited to OSS; CDN can be used to accelerate files hosted on third party platforms, such as in a multi-cloud scenario. In this scenario, traffic flows from Clients to Alibaba Cloud CDN, which will then be forwarded to AWS S3. Both HTTP and HTTPS protocols are supported in this solution. For this solution to work, the AWS S3 bucket is assumed to be properly configured with access policy with HTTP referer.
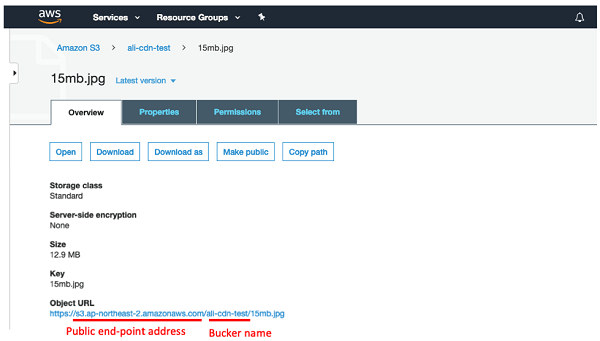
1. Take note of your S3 public end-point address and bucket name as your origin site.
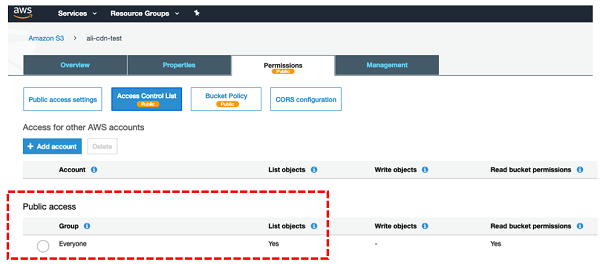
2. Make sure your S3 bucket has "Public Access" permission. At the end of this guide, we will apply HTTP referer policy on S3 bucket to protect unauthorized access from any IP or Address.
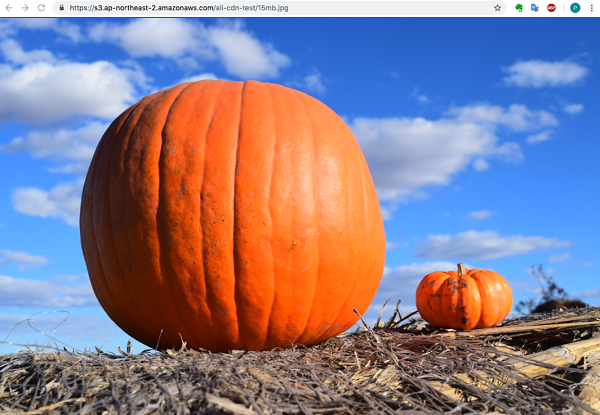
3. Perform a pre-test on your S3 bucket through your browser with S3 public end-point address.
1. Go to the CDN console on Alibaba Cloud
2. Add and configure your service domain
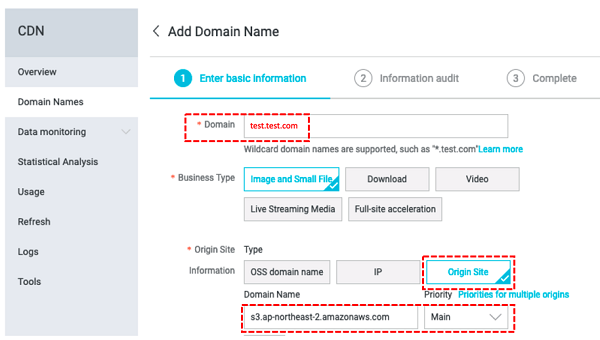
3. Additional configure for AWS S3 as origin site
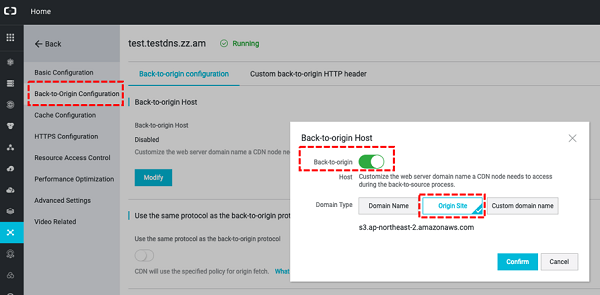
1. Take a note CNAME record from CDN console on Alibaba Cloud. In this guide, I will use "test.test.com.w.kunlunsl.com"
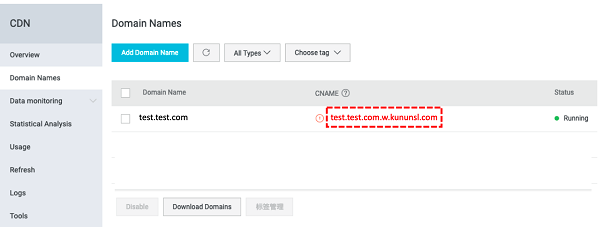
2. Update CNAME record of your service domain on DNS
3. Verify CNAME record is working correctly

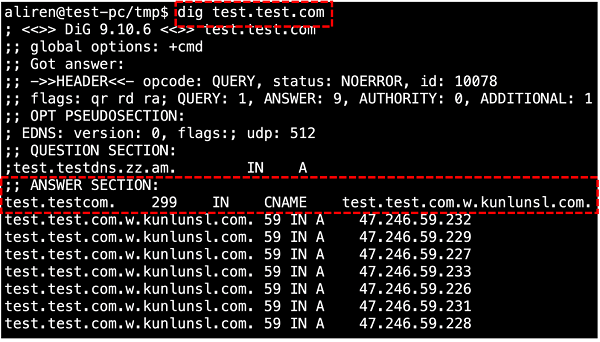
1. Input your service domain with S3 bucket name, http://service-domain/s3-bucket-name/filename
http://test.test.com/ali-dns-test/15mb.jpg

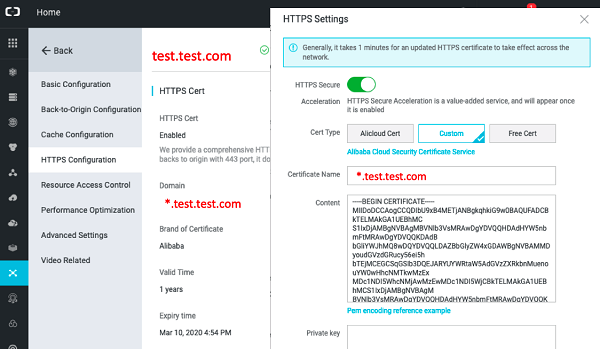
1. Apply SSL certification and enable HTTPS protocol on Alibaba Cloud CDN
2. Configure ACL (Access Control List) policy on S3 Public Bucket
In case of AWS S3 with Alibaba CDN, this is a mandatory security hardening task, not optional. Please make sure your S3 bucket must be accessed from limited service domain, not from any public address.
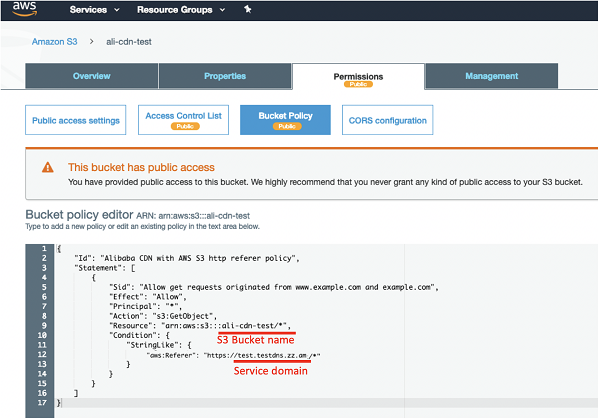
{
    "Id": "Alibaba CDN with AWS S3 http referer policy",
    "Statement": [
        {
            "Sid": "Allow get requests originated from www.example.com and example.com",
            "Effect": "Allow",
            "Principal": "*",
            "Action": "s3:GetObject",
            "Resource": "arn:aws:s3:::ali-cdn-test/*",
            "Condition": {
                "StringLike": {
                    "aws:Referer": "https://test.test.com/*"
                }
            }
        }
    ]
} 
Docker Container Resource Management: CPU, RAM and IO: Part 1

2,593 posts | 792 followers
FollowAlibaba Clouder - February 7, 2018
Cheng - February 7, 2022
Alibaba Cloud Native Community - August 25, 2022
Alibaba Clouder - November 10, 2020
Alibaba Clouder - December 30, 2020
Alibaba Cloud Community - September 24, 2021
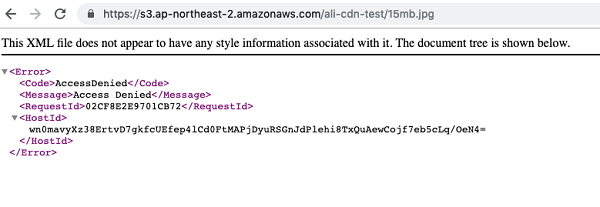
I just tested it again and again, I am able to point CND to S3, and enable the bucket to be public, also, I can visit objects via my own domain, but I cannot deny access visitings via S3 object URLs, can you please test and give an exact guideline about this requirement? Thank you for sharing

2,593 posts | 792 followers
Follow CDN(Alibaba Cloud CDN)
A scalable and high-performance content delivery service for accelerated distribution of content to users across the globe
Learn More OSS(Object Storage Service)
An encrypted and secure cloud storage service which stores, processes and accesses massive amounts of data from anywhere in the world
Learn More DNS
DNS
Alibaba Cloud DNS is an authoritative high-availability and secure domain name resolution and management service.
Learn MoreMore Posts by Alibaba Clouder
Guna December 22, 2021 at 6:04 am
Here are some of the steps that I have come across in the AWS Course (https://www.edureka.co/aws-certification-training) -1. Go to the AWS Console2. Create an Amazon S3 bucket3. Create an Amazon CloudFront distribution4. Specify your distribution settings5. Configure your origin6. Configure Origin Access Identity7. Configure default cache behavior8. Configure your TTLs9. Configure additional features10. Test your CloudFront distribution