By Alain Francois
The MySQL server listened to incoming connection requests on one or all configured network interfaces by default. It could be useful to allocate more than one network interface for specific use. This way, it can allow specifying bind-addresses for several network interfaces.
The following step-by-step guide explains how to run your MySQL server from the Alibaba Cloud console.
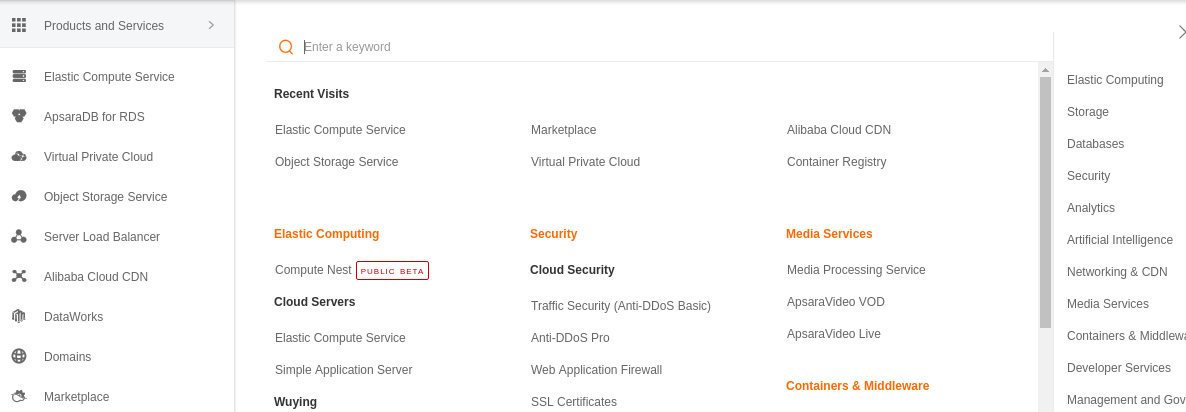
Log in to your Alibaba Cloud account and go to Elastic Compute Service (ECS):
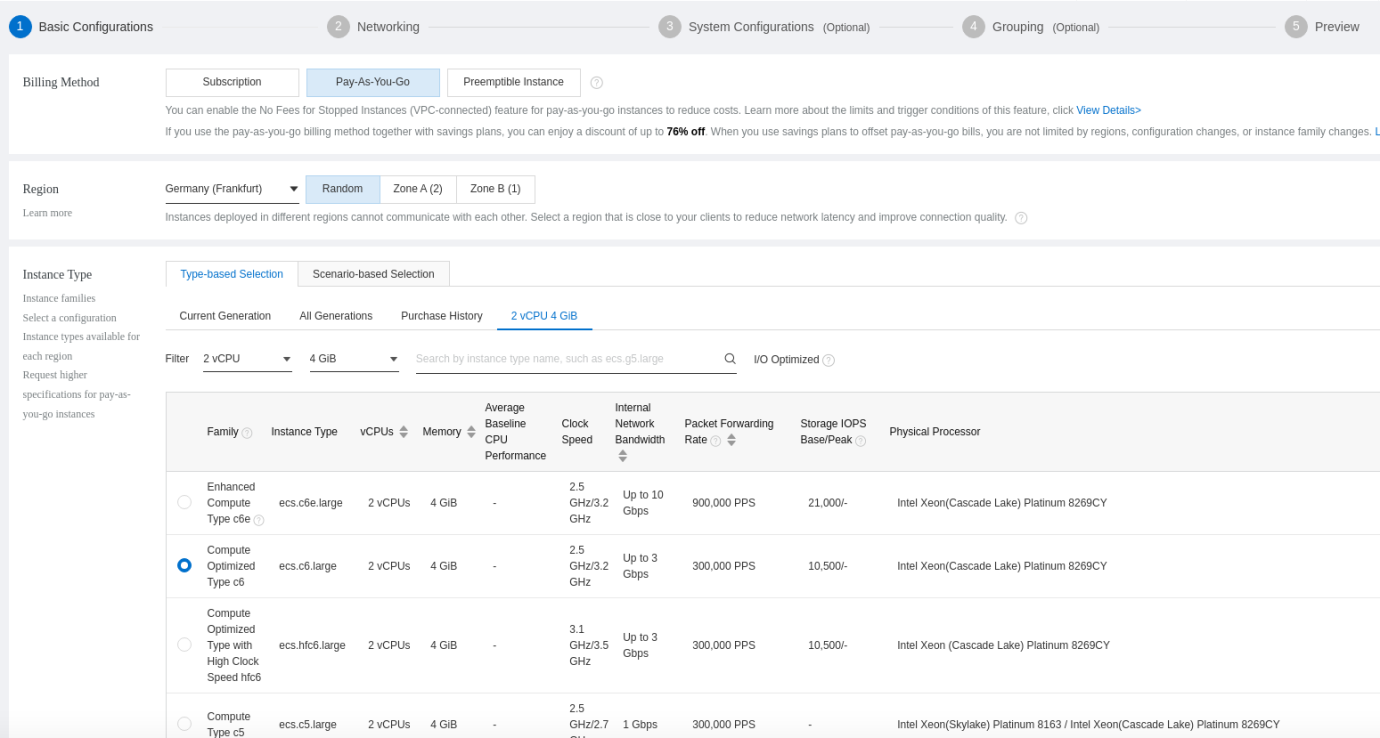
Create a new instance. We will choose a Pay-As-You-Go instance:
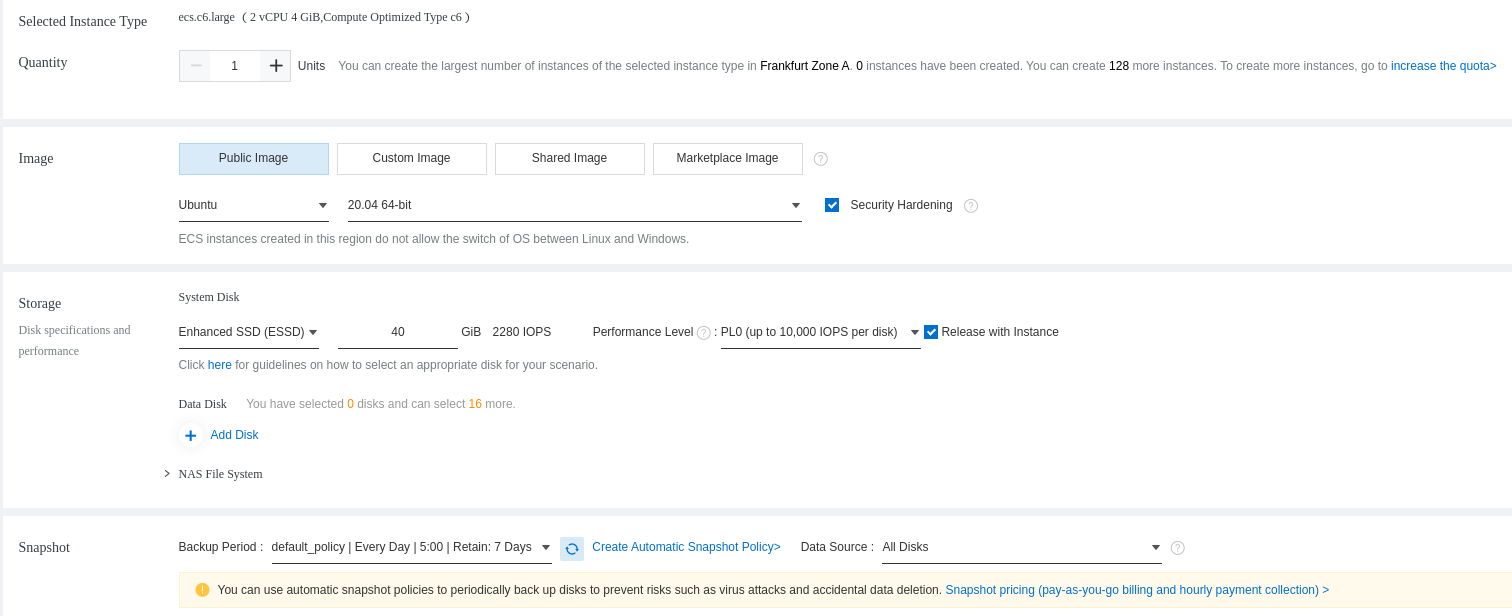
Choose the image Ubuntu 20.04:
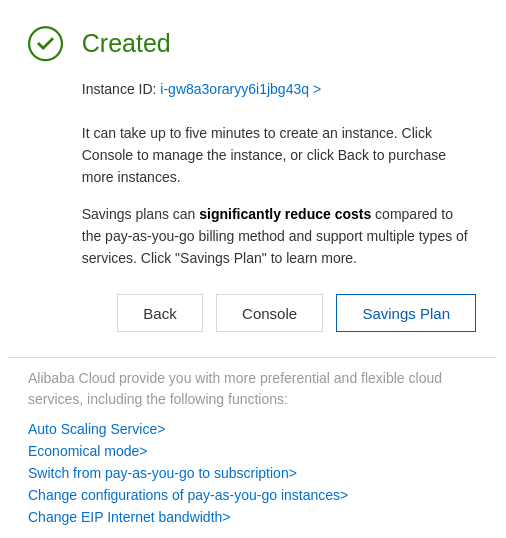
Continue with the configuration of your instance until the end:
Before binding your IP addresses to MySQL, it is important to check your IP so you will not make a misconfiguration afterward:
$ ip a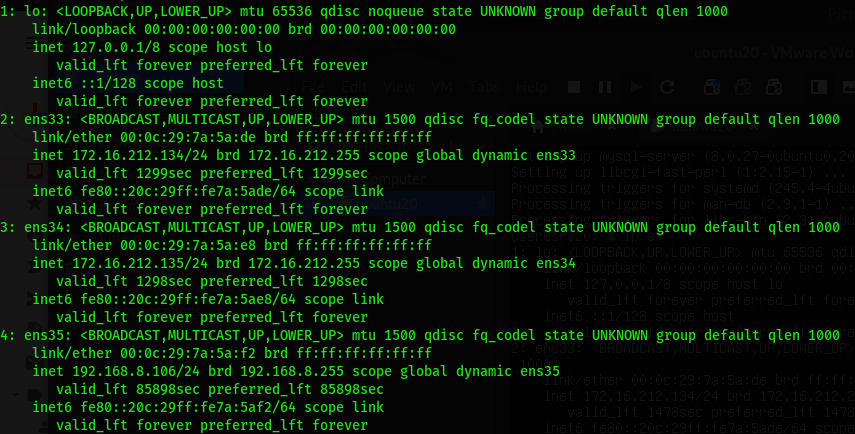
You can see that our server has the following IP addresses:
Now, you can configure the binding.
If you want to configure MySQL and bind the IP addresses, you should edit the configuration file /etc/mysql/mysql.conf.d/mysqld.cnf and change the default IP address value by separating each address with a comma. The directive to edit is the bind-address.
$ sudo vim /etc/mysql/mysql.conf.d/mysqld.cnf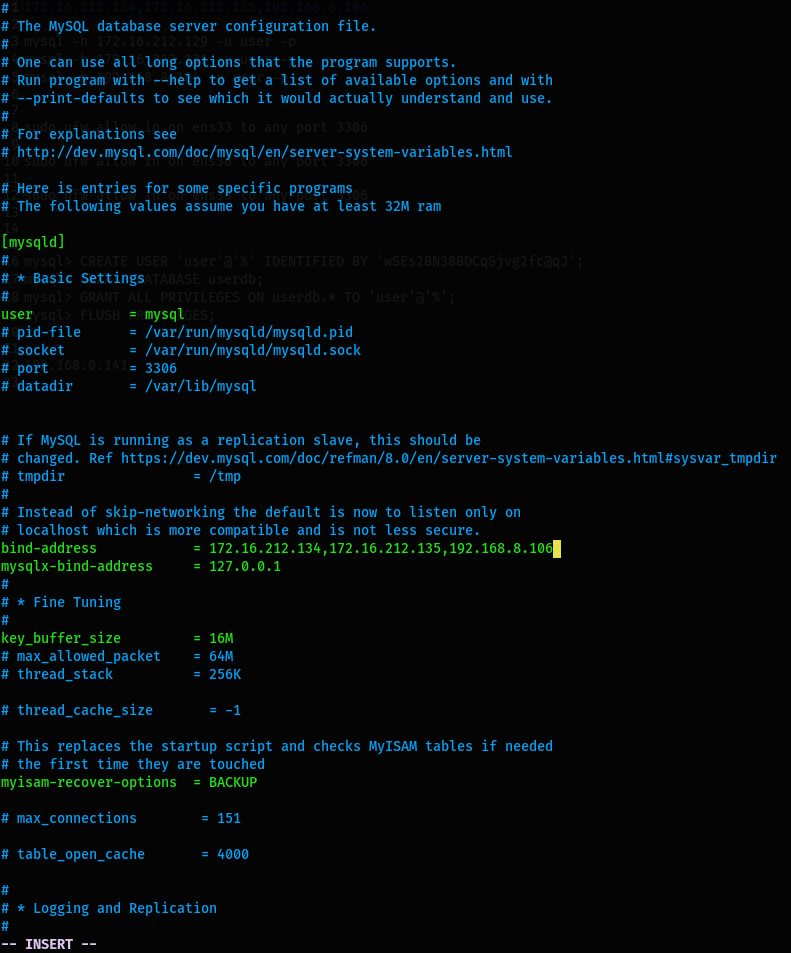
Restart the MySQL service to save the modifications:
$ sudo systemctl restart mysqlNB: The mysqlx-bind-address directive is for the X plugin, which is the interface between the MySQL server and the clients.
Make sure you have your remote database user:
You should make sure the database user you are using is allowed remote access to your database. You can connect to MySQL and allow remote access. We will create the database and the user below to show you the process:
mysql> CREATE USER 'user'@'%' IDENTIFIED BY 'your_db_password';
mysql> CREATE DATABASE userdb;
mysql> GRANT ALL PRIVILEGES ON userdb.* TO 'user'@'%';
mysql> FLUSH PRIVILEGES;
mysql> exit;Now that you have configured MySQL and the user for the remote database access, you need to allow the MySQL protocol within your firewall. We will only allow MySQL port 3306 to the specified IP address (interfaces) that we have checked before for additional security.
Instead of using the IP address, we will use the interface name corresponding to each IP address:
$ sudo ufw allow in on ens33 to any port 3306$ sudo ufw allow in on ens34 to any port 3306$ sudo ufw allow in on ens35 to any port 3306Then, restart the firewall service:
$ sudo ufw disable && sudo ufw enableMySQL tried to bring more facilities by allowing multiple addresses to listen, but there is a side effect. Every created server socket counts against the limit specified by the –open-files-limit option. Theoretically, if too many interfaces were specified by the –bind-address option, it could result in the “Too many open files” error if the MySQL server configuration had already opened a large number of files.
The related article above explains how to bind a MySQL server to an IP address. When configuring a MySQL database server, it is important to bind it to an IP address by respecting some security strategies.

1,319 posts | 463 followers
FollowAlibaba Cloud Community - December 27, 2021
Alibaba Clouder - September 10, 2018
Alibaba Clouder - February 13, 2019
Alibaba Clouder - June 3, 2019
Alibaba Clouder - February 26, 2018
Alibaba Clouder - August 24, 2020

1,319 posts | 463 followers
Follow Elastic IP Address (EIP)
An independent public IP resource that decouples ECS and public IP resources, allowing you to flexibly manage public IP resources.
Learn More Alibaba Cloud Linux
Alibaba Cloud Linux is a free-to-use, native operating system that provides a stable, reliable, and high-performance environment for your applications.
Learn More PolarDB for MySQL
Alibaba Cloud PolarDB for MySQL is a cloud-native relational database service 100% compatible with MySQL.
Learn More Bring Your Own IP Addresses Solution (BYOIP)
Migrate to the cloud with your own IP addresses.
Learn MoreMore Posts by Alibaba Cloud Community