By Luo Yuxia
This article shows how to use Flink CDC to build a real-time database and handle database and table shard merge synchronization.
In OLTP systems, to solve the problem of a large amount of data in a single table, the large table is split in the database to improve the system throughput.
However, to facilitate data analysis, you usually need to merge the tables that are split from database and table shards into a large table when they are synchronized to the data warehouse and database.
This article will show how to use Flink CDC to build a real-time database to deal with this scenario. Based on Docker, the demo of this article involves only SQL and does not require Java/Scala code and IDE. You can complete the entire content on your computer.
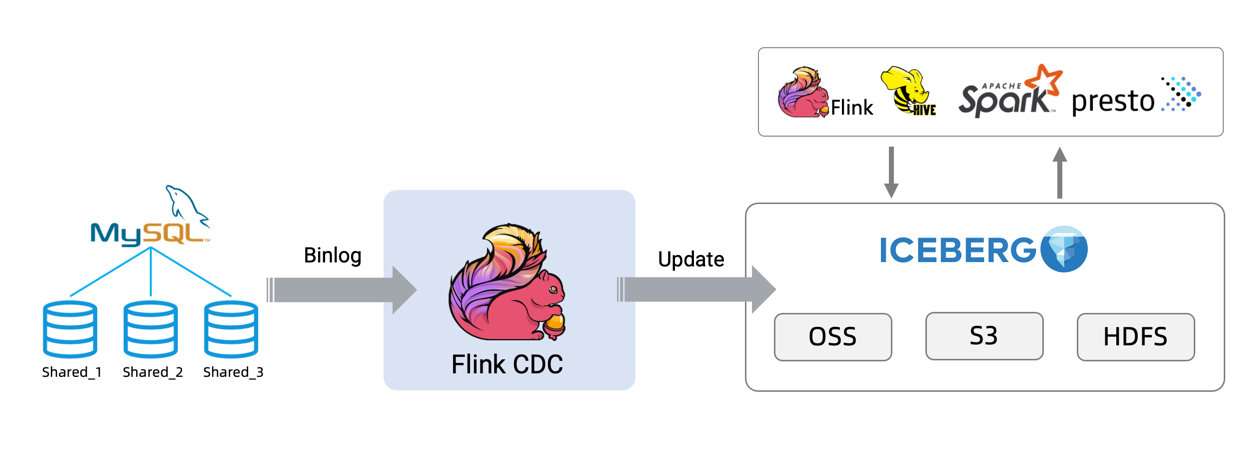
The following example shows the entire process of synchronizing data from MySQL to Iceberg [1]. The following is the architecture diagram:

Prepare a Linux or MacOS computer with Docker installed.
The following tutorial will prepare the required components using docker-compose.
Create the docker-compose.yml file using the following contents:
version: '2.1'
services:
  sql-client:
    user: flink:flink
    image: yuxialuo/flink-sql-client:1.13.2.v1
    depends_on:
      - jobmanager
      - mysql
    environment:
      FLINK_JOBMANAGER_HOST: jobmanager
      MYSQL_HOST: mysql
    volumes:
      - shared-tmpfs:/tmp/iceberg
  jobmanager:
    user: flink:flink
    image: flink:1.13.2-scala_2.11
    ports:
      - "8081:8081"
    command: jobmanager
    environment:
      - |
        FLINK_PROPERTIES=
        jobmanager.rpc.address: jobmanager
    volumes:
      - shared-tmpfs:/tmp/iceberg
  taskmanager:
    user: flink:flink
    image: flink:1.13.2-scala_2.11
    depends_on:
      - jobmanager
    command: taskmanager
    environment:
      - |
        FLINK_PROPERTIES=
        jobmanager.rpc.address: jobmanager
        taskmanager.numberOfTaskSlots: 2
    volumes:
      - shared-tmpfs:/tmp/iceberg
  mysql:
    image: debezium/example-mysql:1.1
    ports:
      - "3306:3306"
    environment:
      - MYSQL_ROOT_PASSWORD=123456
      - MYSQL_USER=mysqluser
      - MYSQL_PASSWORD=mysqlpw

volumes:
  shared-tmpfs:
    driver: local
    driver_opts:
      type: "tmpfs"
      device: "tmpfs"
Containers contained in the Docker Compose include:
user tables in this article.Run the following command in the directory where the file docker-compose.yml is located to start the components required in this tutorial:
docker-compose up -dThis command automatically starts all the containers defined in the Docker Compose configuration in a detached mode. You can use docker ps to check whether these containers start normally or click http://localhost:8081/ to check whether Flink is running normally.

Notes:
docker-compose.yml is located.If you want to run this article in your Flink environment, you need to download the packages listed below and place them in FLINK_HOME/lib/ (the lib directory where Flink is located).
Up to now, iceberg-flink-runtime jar packages supporting Flink 1.13 have not been released, so we have provided an iceberg-flink-runtime jar package supporting Flink 1.13. This jar package is packaged based on Iceberg's master branch.
After Iceberg version 0.13.0 is released, you can download the iceberg-flink-runtime jar package that supports Flink 1.13 on the apache official repository [3].
1. Enter the MySQL container:
docker-compose exec mysql mysql -uroot -p1234562. Create data and tables and populate the data
Create two different databases and create two tables in each database as the tables split under user table shards:
CREATE DATABASE db_1;
 USE db_1;
 CREATE TABLE user_1 (
   id INTEGER NOT NULL PRIMARY KEY,
   name VARCHAR(255) NOT NULL DEFAULT 'flink',
   address VARCHAR(1024),
   phone_number VARCHAR(512),
   email VARCHAR(255)
 );
 INSERT INTO user_1 VALUES (110,"user_110","Shanghai","123567891234","user_110@foo.com");

 CREATE TABLE user_2 (
   id INTEGER NOT NULL PRIMARY KEY,
   name VARCHAR(255) NOT NULL DEFAULT 'flink',
   address VARCHAR(1024),
   phone_number VARCHAR(512),
   email VARCHAR(255)
 );
INSERT INTO user_2 VALUES (120,"user_120","Shanghai","123567891234","user_120@foo.com");
CREATE DATABASE db_2;
USE db_2;
CREATE TABLE user_1 (
  id INTEGER NOT NULL PRIMARY KEY,
  name VARCHAR(255) NOT NULL DEFAULT 'flink',
  address VARCHAR(1024),
  phone_number VARCHAR(512),
  email VARCHAR(255)
);
INSERT INTO user_1 VALUES (110,"user_110","Shanghai","123567891234", NULL);

CREATE TABLE user_2 (
  id INTEGER NOT NULL PRIMARY KEY,
  name VARCHAR(255) NOT NULL DEFAULT 'flink',
  address VARCHAR(1024),
  phone_number VARCHAR(512),
  email VARCHAR(255)
);
INSERT INTO user_2 VALUES (220,"user_220","Shanghai","123567891234","user_220@foo.com");First, run the following command to enter the Flink SQL CLI container:
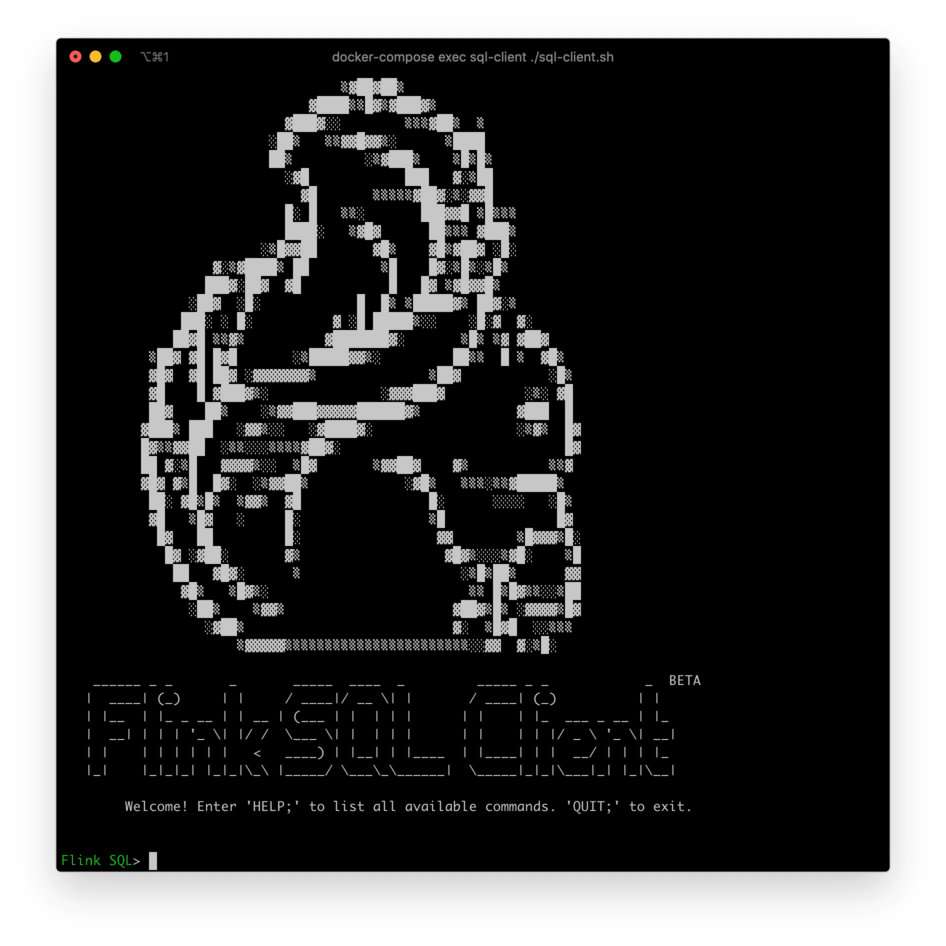
docker-compose exec sql-client ./sql-clientWe can see the following interface:

Perform the following steps:
1. Enable a Checkpoint
Checkpoint is disabled by default. You need to enable Checkpoint so Iceberg can commit transactions.
mysql-cdc wait for a complete checkpoint before the binlog reading phase starts to avoid the disorder of binlog records:
-- Flink SQL
-- Enable checkpoint every 3 seconds
Flink SQL> SET execution.checkpointing.interval =3s;
2. Create source tables of MySQL database shard
Create a user_source table to capture the data of all user tables in MySQL. In the configuration items of tables, database-name and table-name, use regular expressions to match these tables.
Also, the user_source table defines the metadata column to distinguish which database and table the data comes from.
-- Flink SQL
Flink SQL> CREATE TABLE user_source (
    database_name STRING METADATA VIRTUAL,
    table_name STRING METADATA VIRTUAL,
    `id` DECIMAL(20, 0) NOT NULL,
    name STRING,
    address STRING,
    phone_number STRING,
    email STRING,
    PRIMARY KEY (`id`) NOT ENFORCED
  ) WITH (
    'connector' = 'mysql-cdc',
    'hostname' = 'mysql',
    'port' = '3306',
    'username' = 'root',
    'password' = '123456',
    'database-name' = 'db_[0-9]+',
    'table-name' = 'user_[0-9]+'
  );
3. Create Iceberg sink tables
Create all_users_sink in a sink table to load data to Iceberg. In this sink table, we define a compound primary key (database_name, table_name, id ), considering that the values of id fields in different MySQL database tables may be the same.
-- Flink SQL
Flink SQL> CREATE TABLE all_users_sink (
    database_name STRING,
    table_name    STRING,
    `id`          DECIMAL(20, 0) NOT NULL,
    name          STRING,
    address       STRING,
    phone_number  STRING,
    email         STRING,
    PRIMARY KEY (database_name, table_name, `id`) NOT ENFORCED
  ) WITH (
    'connector'='iceberg',
    'catalog-name'='iceberg_catalog',
    'catalog-type'='hadoop',
    'warehouse'='file:///tmp/iceberg/warehouse',
    'format-version'='2'
);1. Use the following Flink SQL statement to write data from MySQL to Iceberg:
-- Flink SQL
Flink SQL> INSERT INTO all_users_sink select * from user_source;
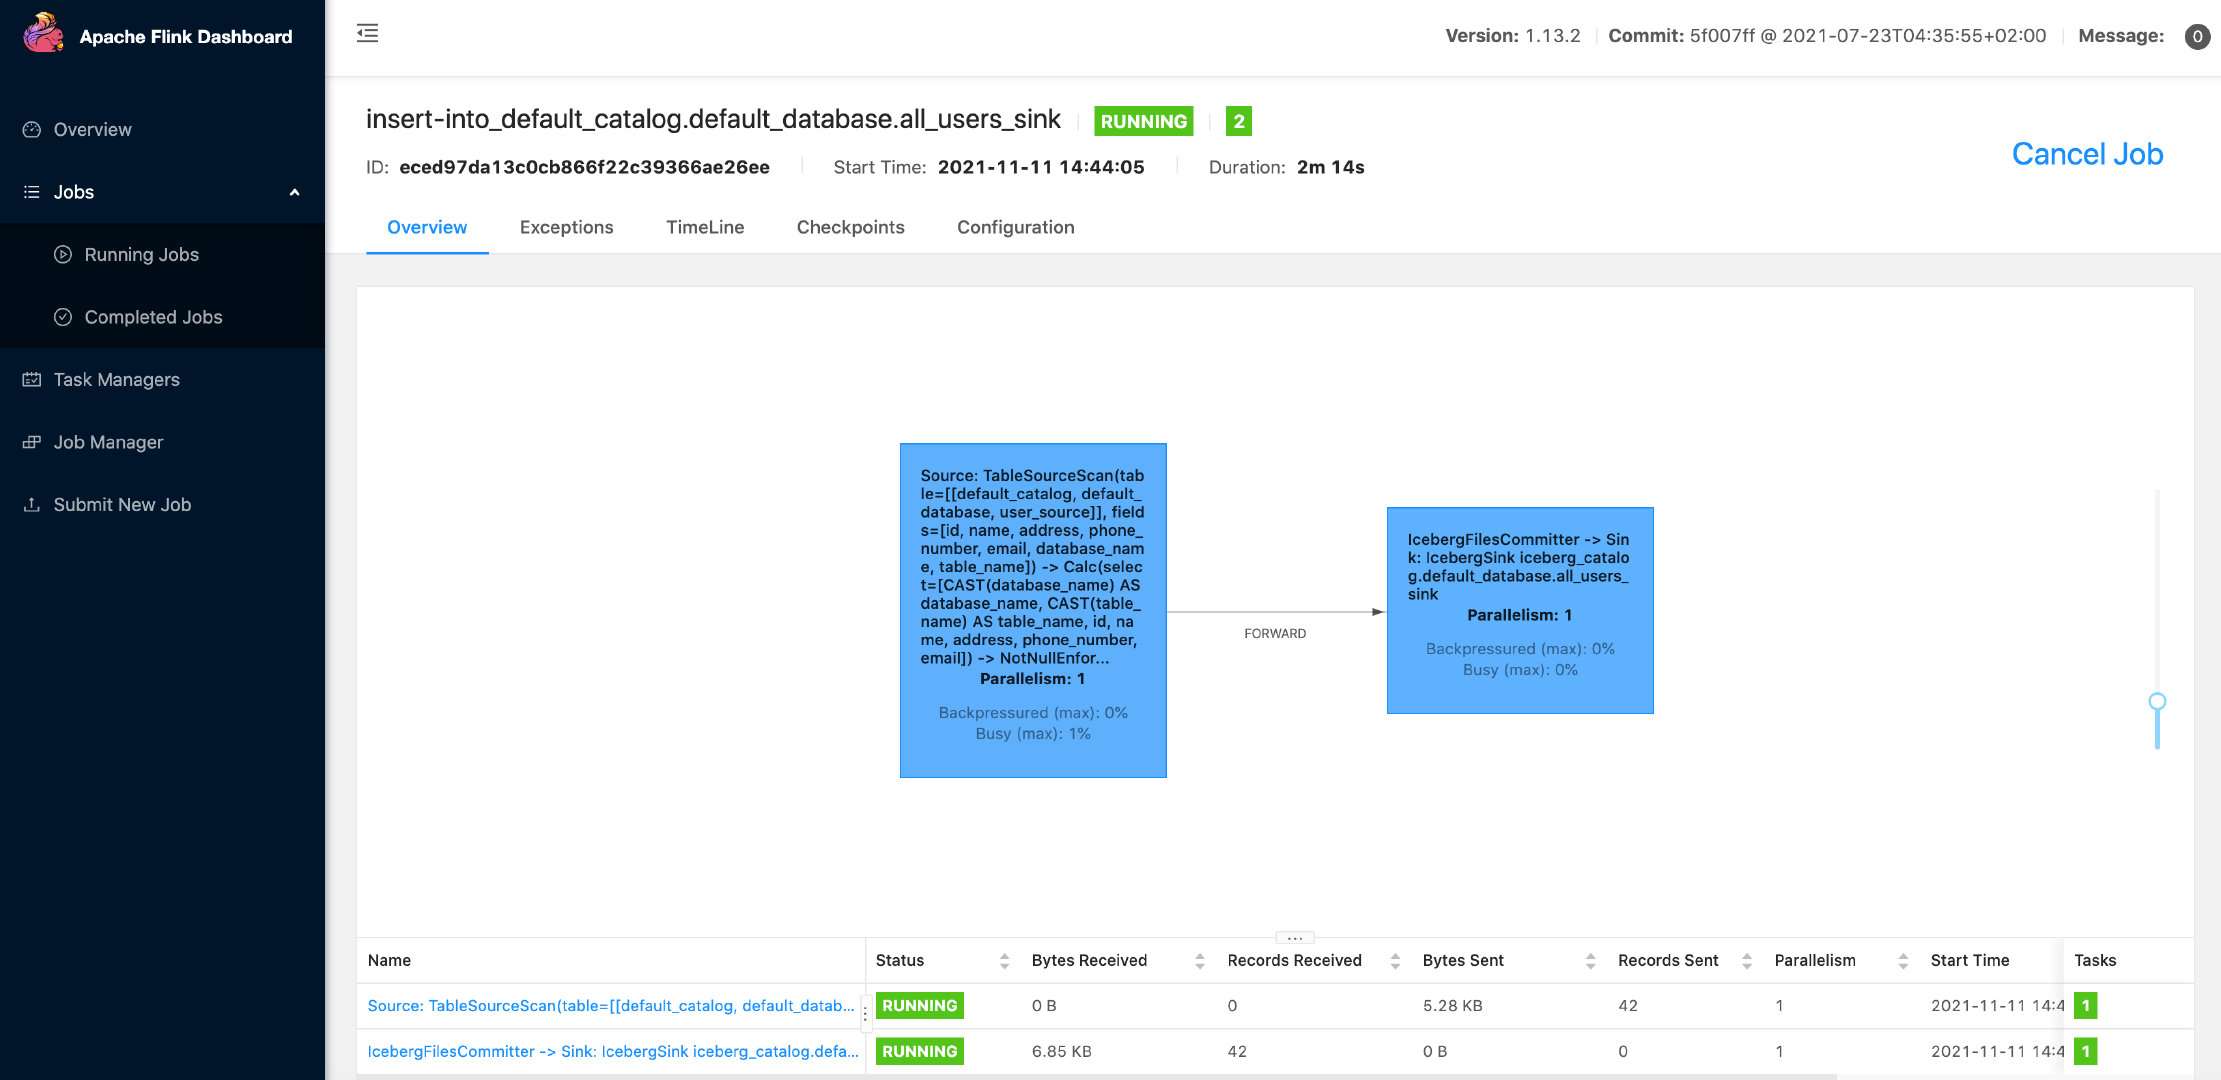
The preceding command starts a streaming job to synchronize full and incremental data from the MySQL database to Iceberg.
You can see this running job on the Flink UI: http://localhost:8081/#/job/running [4]:

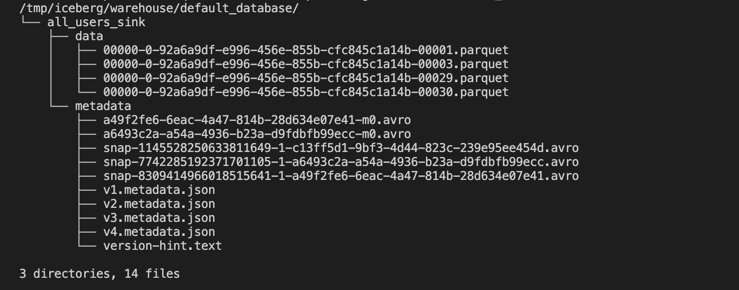
The following command can show the written file in Iceberg:
docker-compose exec sql-client tree /tmp/iceberg/warehouse/default_database/As shown in the following code:

In your running environment, the actual files may not be the same as the screenshot, but the overall directory structure should be similar.
2. Use the following Flink SQL statement to query data in a table all_users_sink:
-- Flink SQLFlink SQL> SELECT * FROM all_users_sink;We can see the following query results in the Flink SQL CLI:

If you modify the data of a table in MySQL, the data in the table all_users_sink in Iceberg will also be updated in real-time:
(3.1) Insert a new row into the db_1.user_1 table:
--- db_1
INSERT INTO db_1.user_1 VALUES (111,"user_111","Shanghai","123567891234","user_111@foo.com");
(3.2) Update the data of the db_1.user_2 table:
--- db_1
UPDATE db_1.user_2 SET address='Beijing' WHERE id=120;
(3.3) Delete a row from the db_2.user_2 table:
--- db_2
DELETE FROM db_2.user_2 WHERE id=220;
With each step, we can use the SELECT * FROM all_users_sink to query table all_users_sink in the Flink Client CLI to see the data changes.
The following is the query result:

From Iceberg's latest results, we can see that (db_1, user_1, 111) records have been added, the (db_1, user_2, 120) address has been updated to Beijing, and the (db_2, user_2, 220) records have been deleted, which is the same as the data update we did in MySQL.
Run the following command in the directory where the docker-compose.yml file is located to stop all containers:
docker-compose downThis article explains how to use Flink CDC to synchronize data from MySQL database shards to build an Iceberg real-time database. You can synchronize data from other databases (Postgres/Oracle) to databases such as Hudi. I hope this article can help you get started with Flink CDC quickly.
[1] https://iceberg.apache.org/
[2] https://github.com/luoyuxia/flink-cdc-tutorial/tree/main/flink-cdc-iceberg-demo/sql-client
[3] https://repo.maven.apache.org/maven2/org/apache/iceberg/iceberg-flink-runtime/
Flink CDC Series – Part 2: Flink MongoDB CDC Production Practices in XTransfer
Flink CDC Series – Part 4: Real-Time Extraction of Oracle Data, Demining, and Tuning Practices

151 posts | 43 followers
FollowApache Flink Community China - May 18, 2022
Apache Flink Community - May 30, 2024
Apache Flink Community China - June 2, 2022
Apache Flink Community China - June 15, 2021
ApsaraDB - February 29, 2024
Alibaba Cloud Indonesia - March 23, 2023

151 posts | 43 followers
Follow Big Data Consulting for Data Technology Solution
Alibaba Cloud provides big data consulting services to help enterprises leverage advanced data technology.
Learn More Big Data Consulting Services for Retail Solution
Alibaba Cloud experts provide retailers with a lightweight and customized big data consulting service to help you assess your big data maturity and plan your big data journey.
Learn More ApsaraDB for HBase
ApsaraDB for HBase is a NoSQL database engine that is highly optimized and 100% compatible with the community edition of HBase.
Learn More Tair
Tair
Tair is a Redis-compatible in-memory database service that provides a variety of data structures and enterprise-level capabilities.
Learn MoreMore Posts by Apache Flink Community