In this tutorial, we'll show you how to create an Alibaba Cloud Container Service application environment running on Docker containers managed by a Swarm cluster built up on Alibaba Cloud Elastic Compute Service (ECS) instances that we have already set up in a previous tutorial.
In the past, developers had to install, run, and monitor their development and production system environments on racks of physical machines in gigantic server rooms. Nowadays, new containerization technology with virtual management tools, such as Docker Swarm and Kubernetes, allows developers to manage and monitor their production and development environments running collections of Docker application containers directly through Alibaba Cloud's Container Service, using its console web-based user interface.
Alibaba Cloud's Container Service is a scalable, high-performance, container management product that allows you to orchestrate and manage containerized application lifecycles with either Docker Swarm or Kubernetes. Container Service comes with an automatic built in Server Load Balancer that is installed Pay-As-You-Go.
Alibaba Cloud's Container Service offers multiple application release methods, including continuous integration, and also supports a microservices architecture. By offering a simplified user interface console setup for a container cluster, which integrates with Alibaba Cloud's virtualization, storage, network, and security services, Alibaba Cloud's Container Service is the perfect cloud environment for running, managing, and monitoring containerized application environments.
Docker is an open source, virtualization management tool that allows you to develop, deploy, manage, and monitor applications and collections of applications that run within containers. This process is known as containerization. Docker Swarm is a clustering, scheduling, and orchestration tool for such systems and environments that are running on multiple and scalable Docker containers.
A Docker container is launched by running a Docker image which is an executable package that includes everything needed for running an entire application: code, runtime, libraries, environment variables, and configuration files. A container is a runtime instance of a Docker image.
You can run multiple containers at the same time on the same instance, or on a Docker Swarm cluster of instances. The running containers are managed by Docker instead of an operating system's hypervisor; and Docker, unlike a hypervisor, provides redundancy and failover if one or more of the cluster nodes experience any problems.
Docker is lightweight and efficient and can manage complex systems built up of multiple application images. You can build Docker containers locally, or deploy them to the cloud, and you can run them anywhere; scaling up and down wherever necessary.
Docker is easy to set up, install, and run on a single Alibaba Cloud ECS instance. A large-scale containerized environment running industry level applications and systems needs a reliable and scalable orchestration and monitoring system. Alibaba Cloud's Container Service provides system administrators and DevOps teams with the vast clustered architectures they need to manage extensive containerized environments.
Before we can install a suite of running Docker containers with Alibaba Cloud's Container Service Docker Swarm option, we need to have an Alibaba Cloud Container Service Docker Swarm cluster ready and available for implementing our containerized systems.
In a previous tutorial, we showed you how easy it is to set up a Docker Swarm cluster for running a containerized environment with Alibaba Cloud's Container Service. We will use the same running cluster in this tutorial to build out an application environment. We will build an environment with a web server built from an image, and a web application built from an orchestration template, both coming as part of the Alibaba Cloud's Container Service product offerings.
You will need an Alibaba Cloud account. If you don't already have one, head over to the Free Trial page to access $300 worth of Alibaba Cloud products in the Alibaba Cloud New User Free Trial.
Let's get started.
Let's first make sure our Docker Swarm cluster is running. Head over to the Container Service console page in your Alibaba Cloud account.
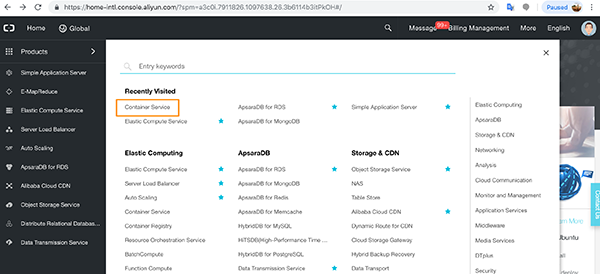
You will arrive at the Container Service console page.
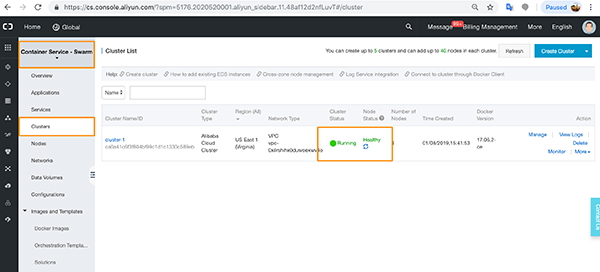
Make sure the Container Service – Swarm option is selected before clicking the Cluster option on the left side menu.
If all's well, you should see a Running cluster in a Healthy state.
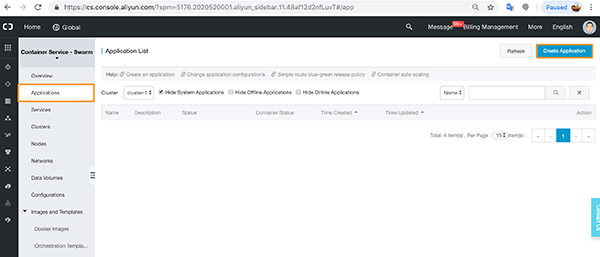
Go to the Applications menu option and click Create Application.
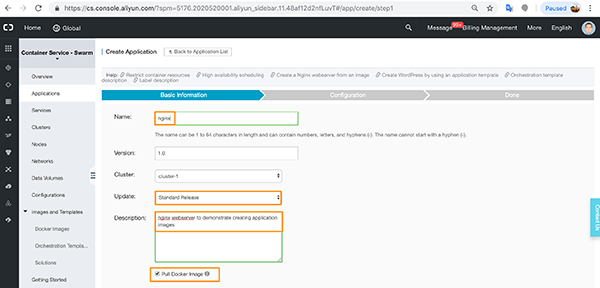
In the Basic Options, add a name for the application, a version number (default is 1.0), select the cluster you wish to use for the application (we only have one running cluster, so this is defaulted), and select your release strategy:
Standard release deletes any earlier versions of your application before deploying the new version. This is sufficient for our tutorial. Blue-green release is an active-standby option for applications which need to continue to run without interruption when updating.
Add a description of your application and select the Pull Docker Image option.
Now click Create with Image.

You will move forward to the Configuration options. In General Settings, click Select Image.

Select the nginx option and click OK.
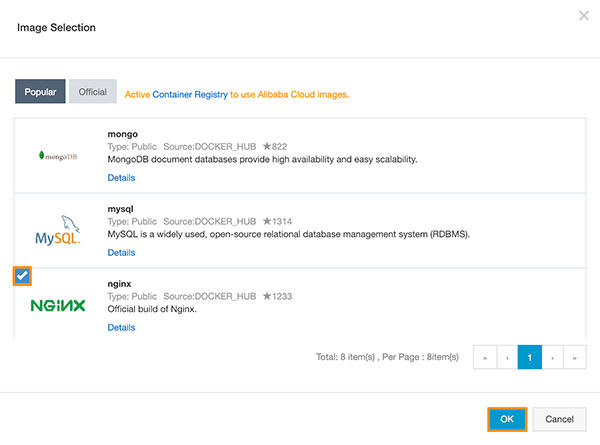
The latest Docker image version is pulled from remote Docker repositories by default.
You can now click Create on the right-hand side.

You will see a confirmation that the application is being created.

Now you will see your nginx application in both the Applications and Services menus.


In the Applications menu, click the nginx running application.

Click Update.
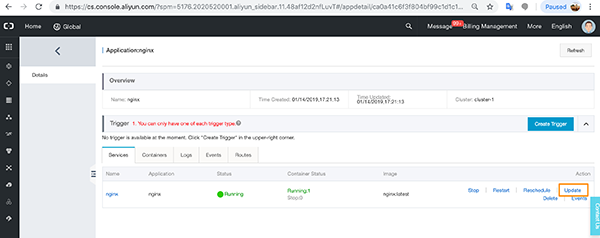
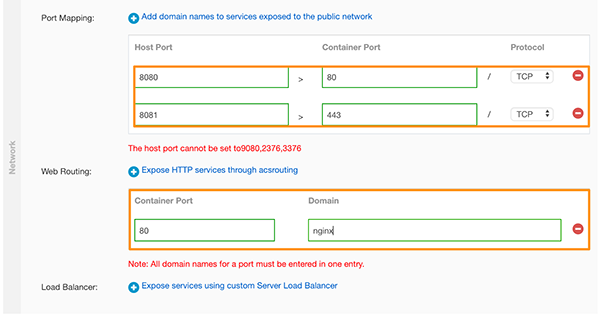
Now, we can configure the networking.
Add the Port Mapping details for HTTP/HTTPS 80 and 443, and the Container Port.
Now click Update.
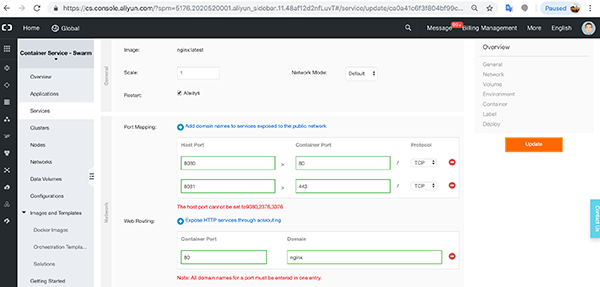
You will see the application creating and then eventually settle into a Running state.
Click the Applications menu option.

Click through to the application details.

In this view, you will see a number of tabs. The Services tab shows the state of the application.
Click the Containers tab. In this view, you will see all the VPC network port settings, the container IP, and the node IP. You also have the option to monitor the container.
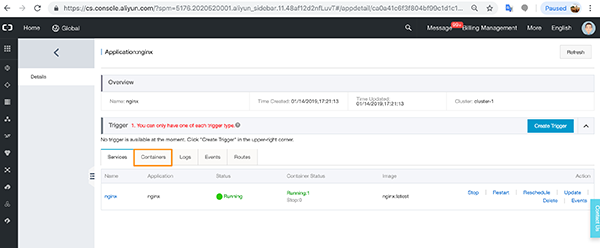
Click the name link.
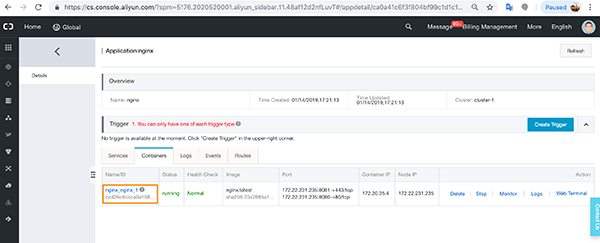
You will see a number of graphs, including the container's CPU, memory, IO, and process utilizations over time.
Now click the Logs tab.
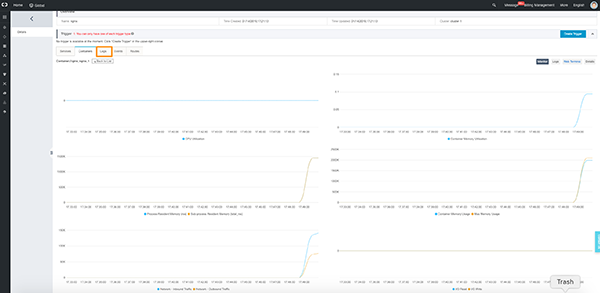
Here you will see the logs for the container. Now click Events.
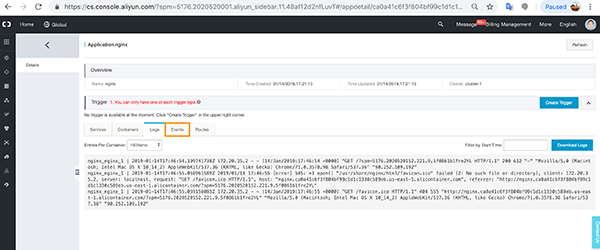
This option will show you a list of events on the container. Now click the Routes tab.
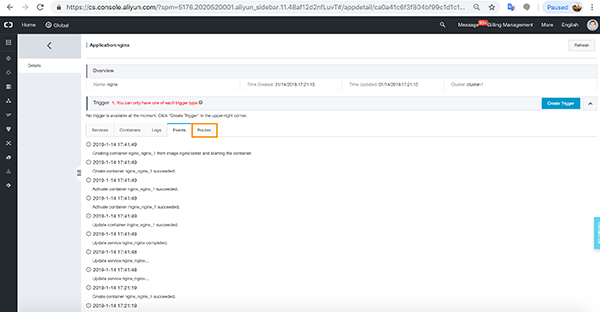
Here you will see the container's endpoint. Go ahead and click the link.

You should see confirmation that you have set up the nginx container correctly and it is running.

Now let's integrate WordPress with nginx on the same cluster.
This time, we will use an orchestration template. Go back to the Container Service console and click Applications. Check you're on the correct cluster (we still have just the one) and click Create Application.

The procedures are exactly the same as before but instead of clicking Create with Image, we will click Create with Orchestration Template. We can leave the Docker Image option unselected in this case.
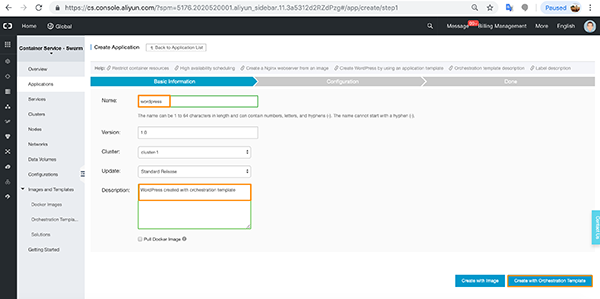
For those familiar with the Docker ecosphere, you can run your Docker compose files here. We will click Use Existing Orchestration Template.
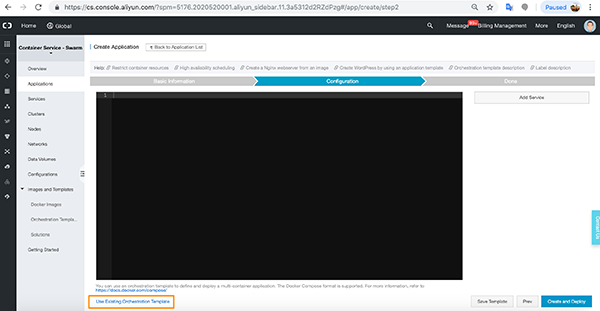
Let's select WordPress.
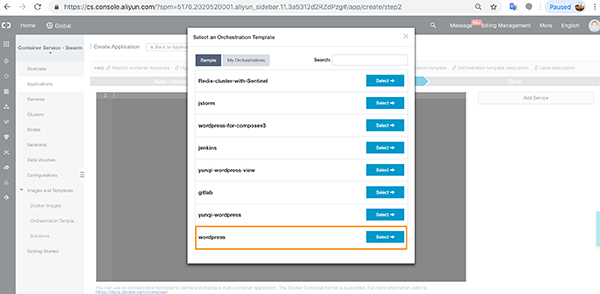
As you can see, the console populates with the relevant Docker compose commands and configuration.
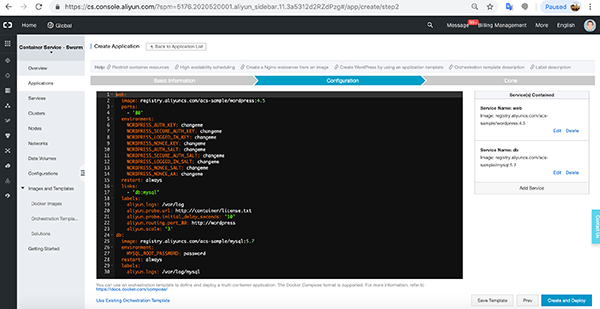
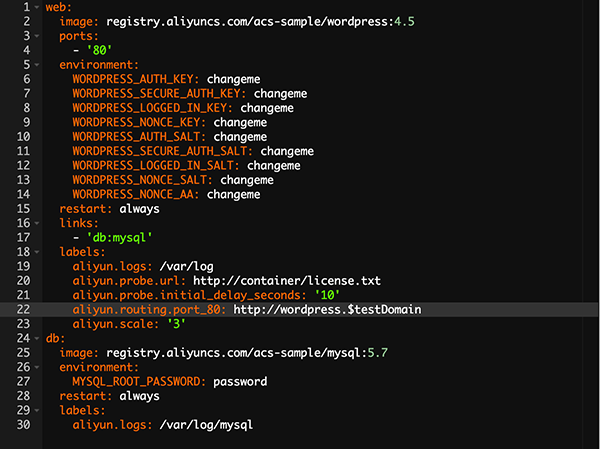
We need to edit one of the configurations now.

This configuration change should mean that any requests to aliyun port 80 from the test domain URL should route to WordPress.
Now click Create and Destroy.
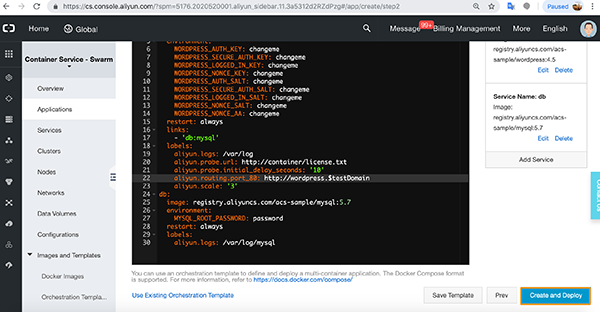
You will see your application running. Click the Applications menu and you will see WordPress creating.
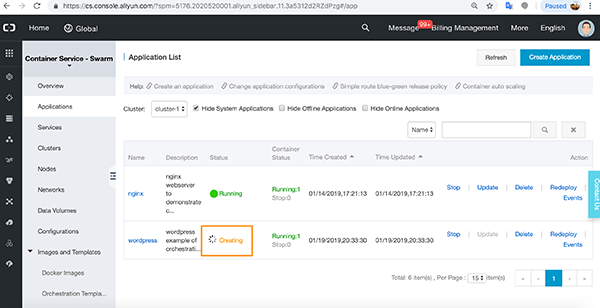
Once the application is created, you will see it in the running state. Click through to the application.
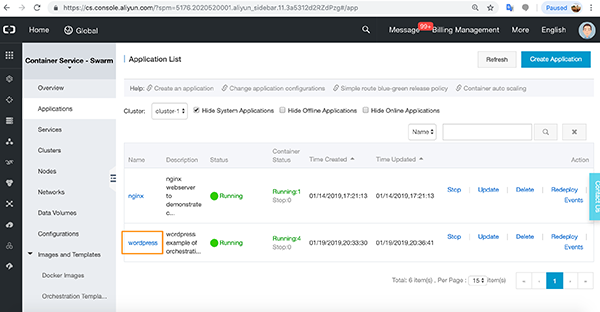
As before, you will see a number of tabs. WordPress has two tabs as it needs a database and a web application in order to run. Click the Containers tab.
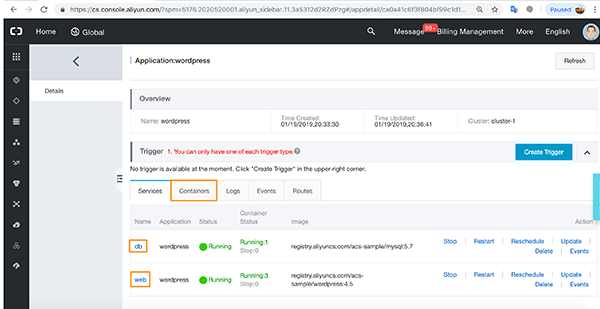
The Containers tab shows details of all the different running Docker containers the application requires.
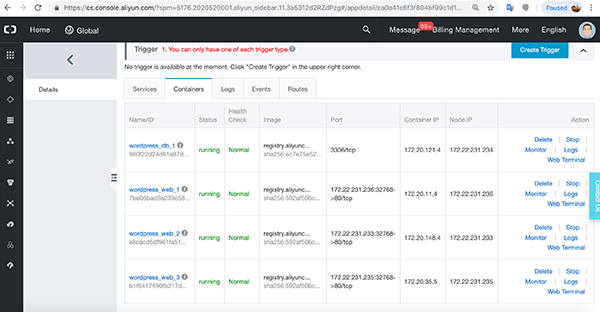
Logs and Events tabs show details as we saw before. If you click Routes, you get the WordPress endpoint URL which you will need to set up your application.
Go ahead and click the endpoint.
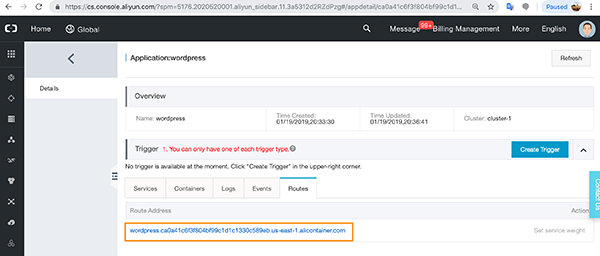
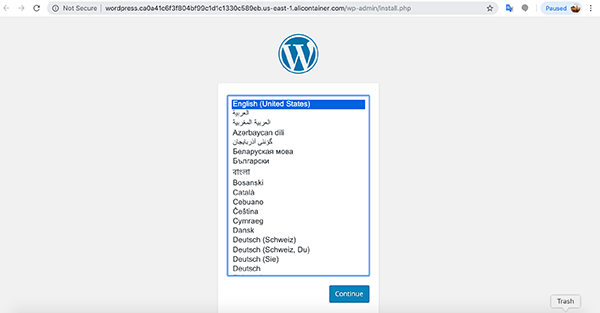
You can now set up your WordPress site running on the nginx webserver we set up previously.
First, we explained how we had already built an Alibaba Cloud Container Service Docker Swarm cluster in preparation for building out a containerized environment and we checked it was running correctly.
Next, we explained about the Alibaba Cloud Container Service product and how you can use it with both Swarm and Kubernetes containerized environments. We also explained how these products need clusters to run on and how Alibaba Cloud will auto set up clusters built from Elastic Compute Services (ECS) and even include a Server Load Balancer as part of the auto set up.
We then showed you how to build an Alibaba Cloud Docker Swarm Containerize Service of applications starting by pulling a nginx webserver Docker image down remotely from Docker. We then used an Orchestration Template to pull down a WordPress image which allows for much more developer flexibility.
Thanks for reading and don't forget to check out the other products and services Alibaba Cloud offers.
https://www.alibabacloud.com/contact-sales

2,598 posts | 769 followers
FollowAlibaba Clouder - January 24, 2019
Alibaba Clouder - June 11, 2020
Alibaba Clouder - November 20, 2017
Alibaba Clouder - July 24, 2020
Alibaba Clouder - February 27, 2019
Alibaba Clouder - April 20, 2018

2,598 posts | 769 followers
FollowLearn More
 ECS(Elastic Compute Service)
Elastic and secure virtual cloud servers to cater all your cloud hosting needs.
Learn More VPC
VPC
A virtual private cloud service that provides an isolated cloud network to operate resources in a secure environment.
Learn MoreMore Posts by Alibaba Clouder