
Due to the portability, flexibility, and maintainability of containers, it's no surprise that Docker is a favorite amongst DevOps practitioners. Nearly every tech company—and a not-insignificant number of non-tech companies—use Docker in some fashion or another.
There are many different ways to run Docker. But if you’re looking for an easy solution for getting up and running with Docker containers without having to do much setup and management yourself, Alibaba Container Service is a good solution. This article shows how to get started using Alibaba Container Service.
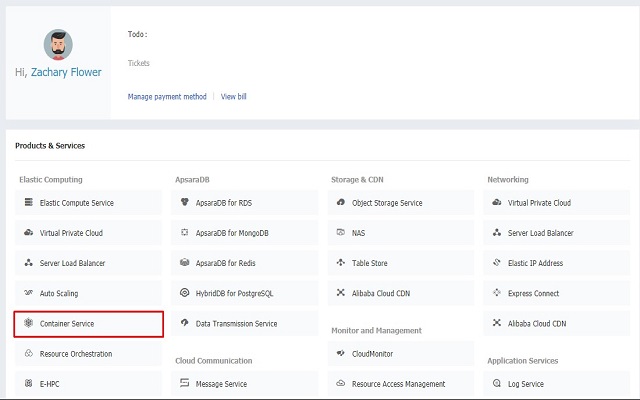
Alibaba Cloud Console
Thanks to the growing ubiquity of Docker, I took a look at how to spin up a production-ready Docker environment with Alibaba Container Service. To get started with the Alibaba Container Service, the first thing we must do is create a new Docker Cluster. To do this, head on over to the Alibaba Container Service dashboard by clicking on the Container Service button within your Alibaba Cloud Console. I should note here that, if this is your first time accessing the Alibaba Container Service, you will be asked to activate it. All this step does is ask you to agree to the terms and conditions of the service, and does not incur any charges to your account.
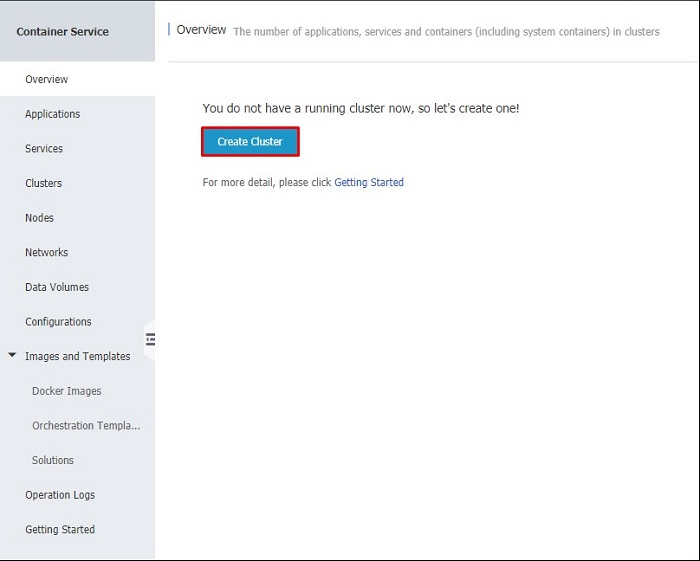
Alibaba Container Service Overview
Once you've activated the service, you will be taken to the Container Service Overview. This page will present you with the option to create a cluster using a button helpfully labeled "Create Cluster." Clicking on it will take you to a page that allows you to select all of the information required to spin up a new container cluster.
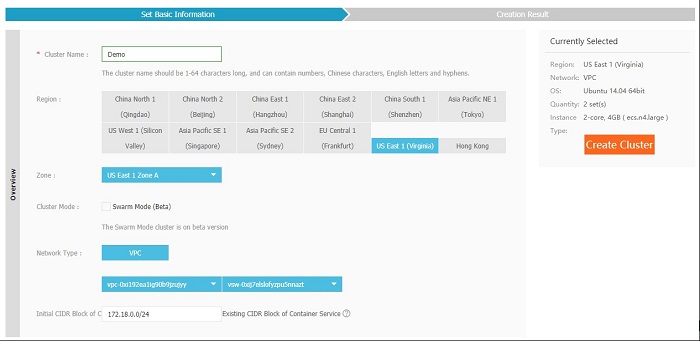
New Container Cluster Checkout
At a high level, the information on this page should be pretty self-explanatory. As with all Alibaba Cloud products, you will have to select a region and zone for your instance to live on. One thing that stands out from the typical setup is that there is only one Network Type, which is the VPC (Virtual Private Cloud) network. This network allows you to create a private network within the Alibaba Cloud, keeping your application infrastructure isolated from the rest of Alibaba Cloud.
Another configuration option worth pointing out is the Swarm Mode Cluster Mode option. Swarm mode is a feature of Docker 1.12 that "integrates the cluster management and container orchestration functions of the Docker engine and Swarm, and adds the service concept and LVS-based L4 load balancing (RoutingMesh)." At the time of this writing, the Swarm Mode cluster is currently in beta.
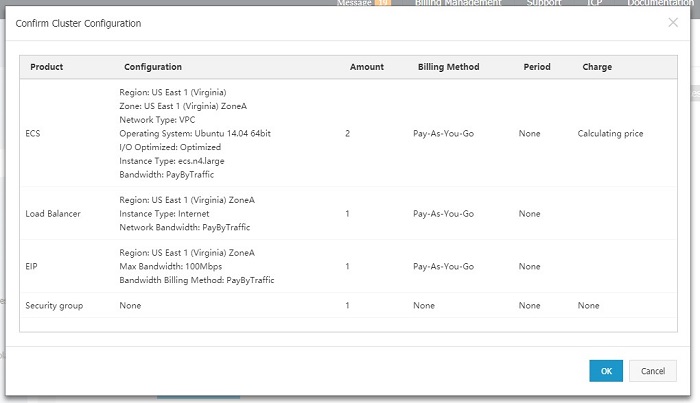
Cluster Configuration Confirmation
After checking out, you will be presented with a confirmation of all of the services that will be spun up with your new cluster. This is generally a few ECS instances, an EIP instance, a load balancer, and a security group. It is also important to know that if this is your first time setting up a cluster on the Container Service, you will be asked to activate the Resource Access Management service as well, which is a similar process to activating the Container Service, and is a required step.

Alibaba Container Service Applications
With our shiny new cluster in hand, we can now deploy a Docker container to it, and expose it to the Internet. To do this, head on over to the Application List within the Alibaba Container Service dashboard and click on the "Create Application" button. This will bring you to a new application wizard, which will allow you to select everything from the container and cluster to individual container settings prior to launching the application.
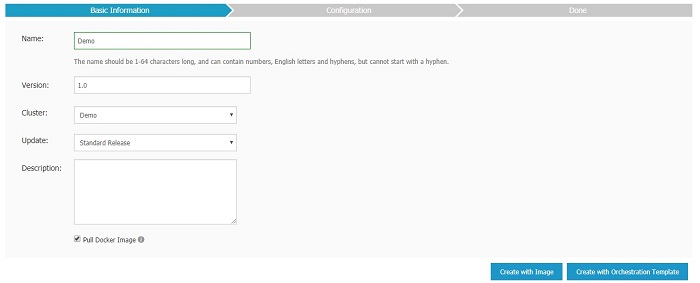
New Application Basic Information
For the purposes of this demo, I've chosen to launch a simple WordPress application. If we select the "Create with Image" button while creating our application, we will be given the option to select any image that is publicly available on Docker Hub.
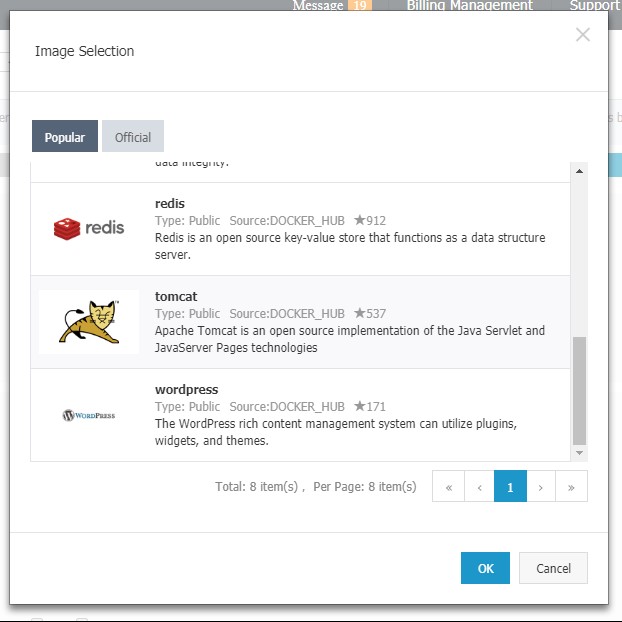
Image Selection Modal
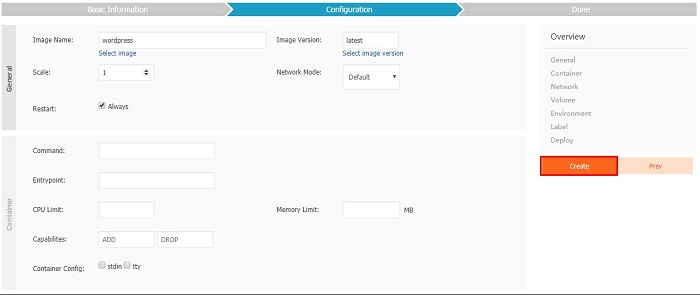
Application Configuration
Before we can launch our new application, we must first provide some basic configuration. If you selected one of the pre-configured images from Docker Hub, then a lot of this process is already done for you. That said, there are a few steps that must be taken to allow your application to be accessed from the Internet.
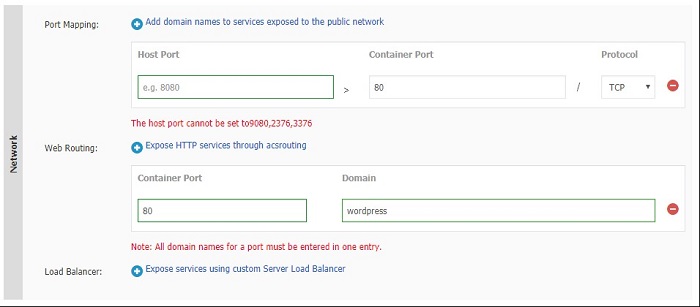
Network Configuration
The most important piece of your new Docker application to configure is network access. Since most web applications are generally available on port 80, we need to expose port 80 within our container to the public network, and then we also have to define a domain name for said port. For the purposes of this demonstration, I'm using a pre-generated domain name provided by Alibaba Cloud. This can be done by entering a slug within the Domain configuration (shown above), which will create a publicly accessible URL of the form
http://<slug>.<id>.<region>.alicontainer.com.

Deployment Configuration
Another great feature of the Alibaba Container Service is the deployment configuration, which can be set up prior to launching your new application as well. While there are a few options here, the most important is Auto Scaling, which allows you to automatically scale the resources devoted to your application up or down, depending on the current load.

Application Details
Once we've launched our application, all we need to do is access it. To find the URL we generated, open up the Application Details and take a look at the Access Endpoint setting. Opening it up in a new browser window or tab should take you directly to the homepage of your new application (which, in our case, is the WordPress setup wizard).
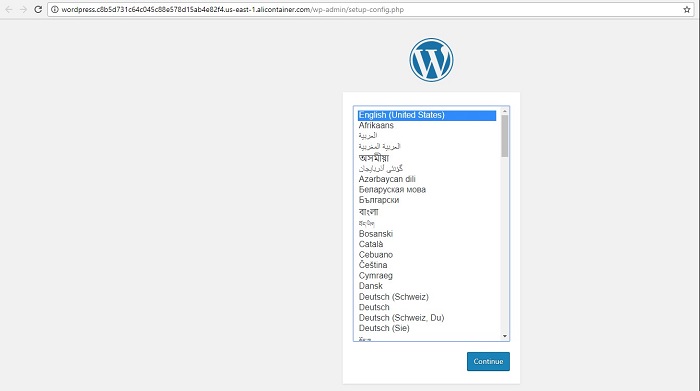
WordPress Setup Wizard
Launching a simple web application is a great way to get your feet wet with the Alibaba Container Service, but thanks to features like Auto Scaling and the ability to automatically launch new services directly from Docker Hub images, it is easy to see how a complex, service-oriented application could be launched with minimal effort. While the nuances of managing and securing any container service are out of the scope of this article, spinning up the infrastructure required to run any application can be done in an afternoon thanks to the ease-of-use of the Alibaba Container Service.
Bio

Zachary Flower (@zachflower) is a freelance writer and lead developer at Emerson Stone, a Boulder-based design and branding agency. He has an eye for simplicity and usability, and strives to build products with both the end user and business goals in mind. From building projects for the NSA to creating features for companies like Name.com and Buffer, Zach has always taken a strong stand against needlessly reinventing the wheel, often advocating for the use of well established third-party and open source services and solutions to improve the efficiency and reliability of a development project.
SSH Keys: Secure Web & Mobile Apps for Industry-Leading Entreprises

2,599 posts | 769 followers
FollowAlibaba Clouder - October 3, 2018
JDP - July 31, 2020
Alibaba Clouder - September 26, 2019
Alibaba Clouder - July 24, 2020
Alibaba Clouder - February 21, 2020
Alibaba Clouder - October 11, 2018

2,599 posts | 769 followers
Follow Container Service for Kubernetes
Alibaba Cloud Container Service for Kubernetes is a fully managed cloud container management service that supports native Kubernetes and integrates with other Alibaba Cloud products.
Learn More ACK One
Provides a control plane to allow users to manage Kubernetes clusters that run based on different infrastructure resources
Learn More Container Registry
A secure image hosting platform providing containerized image lifecycle management
Learn More Elastic Container Instance
An agile and secure serverless container instance service.
Learn MoreMore Posts by Alibaba Clouder