By Partha Sarathy, Alibaba Cloud Tech Share Author. Tech Share is Alibaba Cloud’s incentive program to encourage the sharing of technical knowledge and best practices within the cloud community.
Are you ready to start your own web hosting business? If your answer is yes, then you will find this tutorial useful! In this article, we will be teaching you how to set up your own shared web hosting service for your businesses on Alibaba Cloud.
We need three Elastic Compute Service (ECS) instances, one ApsaraDB for RDS MySQL instance, and two domain names for this project. I will be using the domain sarathy.info as my primary domain and sarathy.site as my secondary domain.
The two ECS instances shown on the left-hand side of the following architecture diagram will host our main website. One ECS instance is used for deploying WHMCS and the other one for deploying WordPress. Both WordPress and WHMCS require MySQL. So we will also deploy an ApsaraDB for RDS instance.
ECS instance shown on the right-hand side of the below diagram will be used to host our customers' sites. We will automate everything using a very popular software called WHM (Web Hosting Manager).
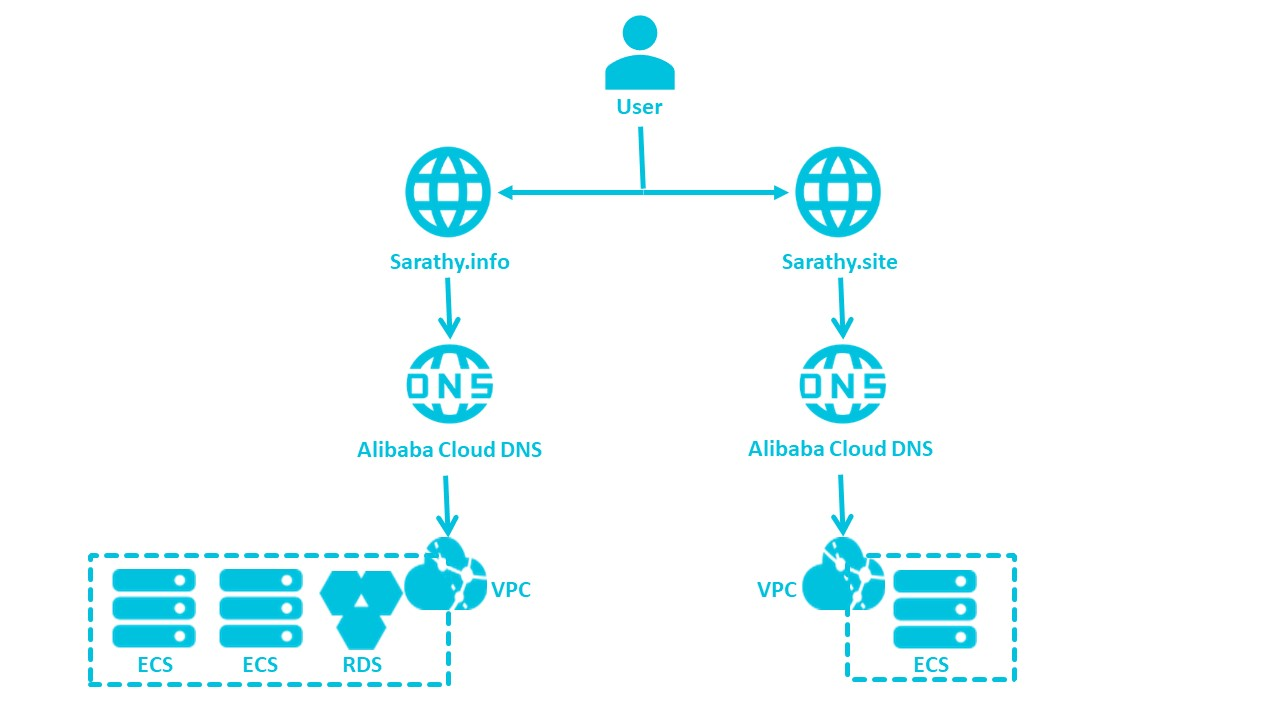
Architecture Diagram
DNS configuration for our primary domain
| Record Type | Host | Value |
| A | @ | ECS Instance's IP (running WordPress) |
| A | www | ECS Instance's IP (running WordPress) |
| A | portal | ECS Instance's IP (running WHMCS) |
DNS configuration for our secondary domain
| Record Type | Host | Value |
| NS | ns1 | ECS Instance's IP (running WHM) |
| NS | ns2 | ECS Instance's IP (running WHM) |
First of all, you need to download WHMCS from their official website
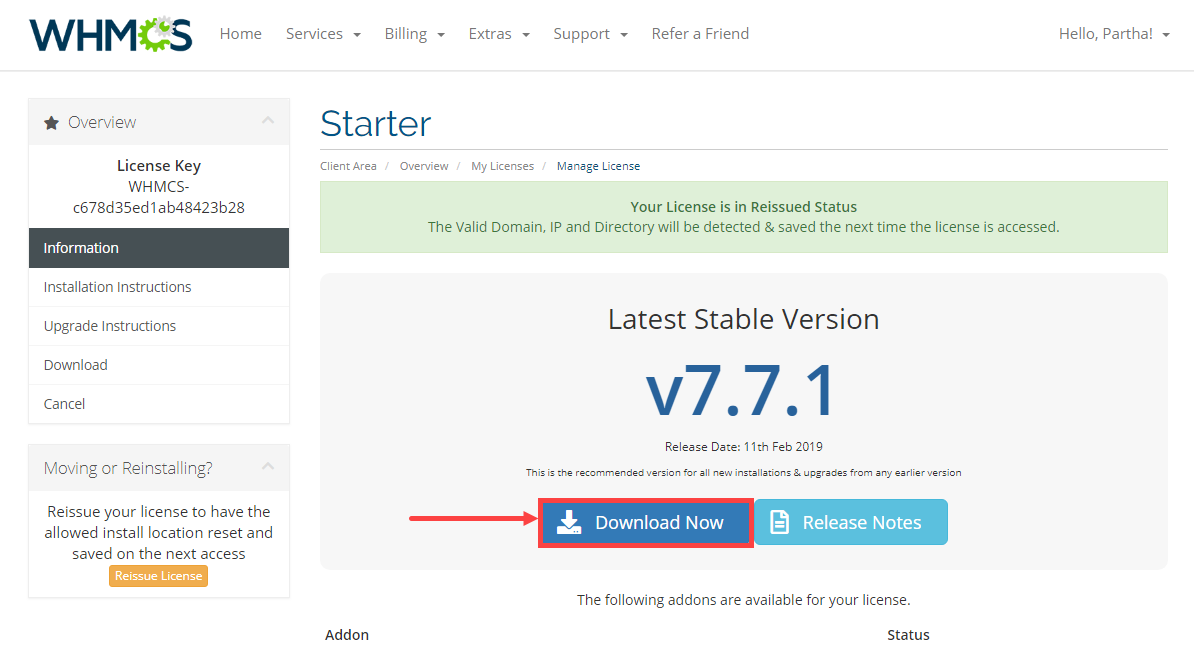
Next, we have to copy the downloaded file to our server via SCP( Secure Copy) protocol
scp -i path-to-ssh-key.pem path-to-whmccs.zip root@instance-ip:/root Now the WHMCS installation file will be copied to the root user's home directory ( /root) of our server.
Let’s log in to our ECS instance for installing WHMCS
ssh -i path-to-ssh-key.pem root@ecs-instance-ipYou will be logged into the ECS instance as shown as follows
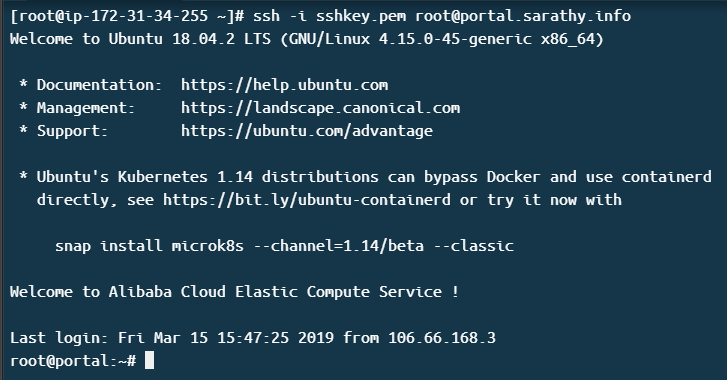
Verify whether we have successfully transferred the WHMCS installation file to into our ECS instance or not.
ls /rootIf you get the following output, you are ready to go!

Update the system
apt updateUpgrade the system
apt full-upgrade -yRemove unnecessary packages
apt auoremove -yInstall the required components
apt install unzip sendmail software-properties-common wget -yInstall Apache web server
apt install apache2 -yVerify Apache server’s installation by accessing the ECS instance's IP address in your web browser
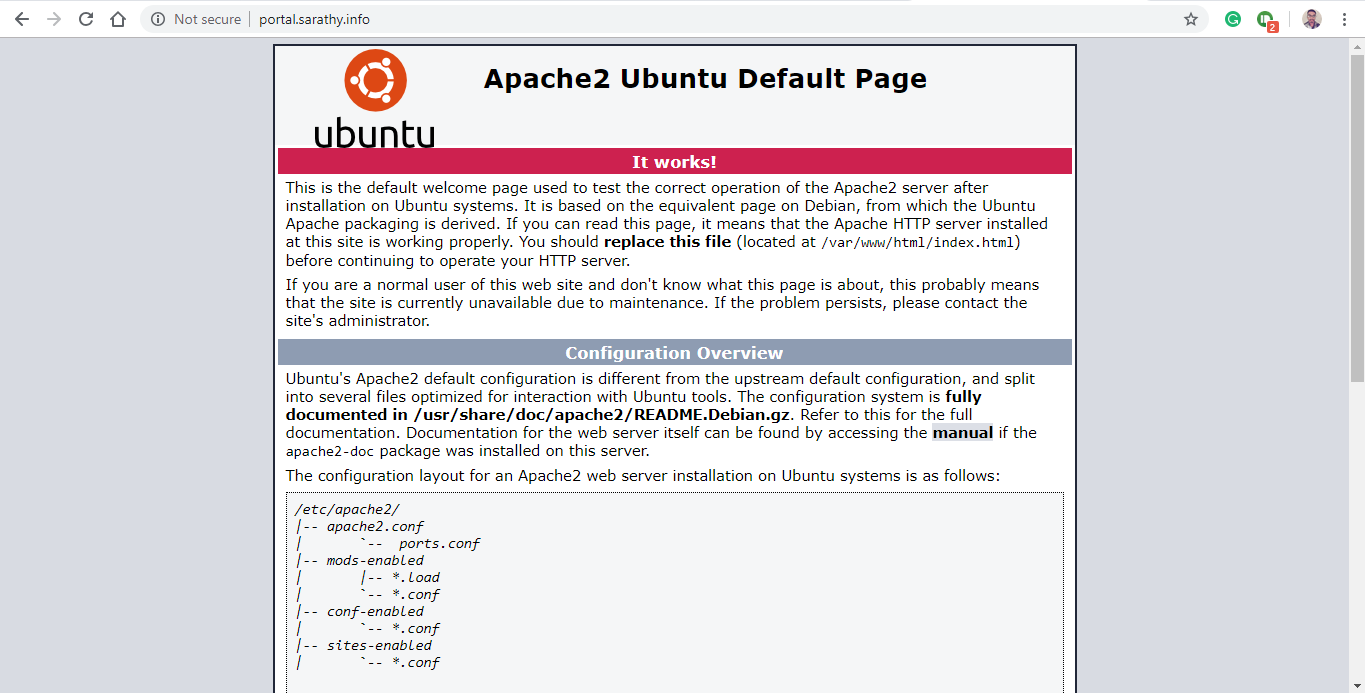
Start Apache during boot
systemctl enable apache2Install PHP
apt install php-fpm -yInstall the PHP extensions required by WHMCS
apt install php-curl php-gd php-json php-mbstring php-imap php-iconv php-dev php-mysql -yInstall Ioncube loader
cd /root
Wget http://downloads3.ioncube.com/loader_downloads/ioncube_loaders_lin_x86-64.tar.gz
tar -xf ioncube*
cp ioncube/ioncube_loader_lin_7.2.so /use/lib/php/20170718/
Create a custom PHP configuration file
nano /etc/php/7.2/apache2/conf.d/10-custom.iniPaste the following lines
zend_extension="/usr/lib/php/20170718/ioncube_loader_lin_7.2.so"
max_execution_time = 60
max_input_time =60
memory_limit = 512M
max_input_vars = 6000
upload_max_filesize = 512M
post_max_size = 512M
Restart PHP and Apache web server
systemctl restart php7.2-fpm
systemctl restart apache2
Remove the default web page
rm -rf /var/www/htm/index.htmlModify Apache's configuration file
vim /etc/apache2/sites-available/000-default.confAdd the following line
ServerName your-primary-domain.tldRestart Apache web server
systemctl restart apache2Unzip the WHMCS installation package
cd /root
unzip whmcs_v771_full.zip
Move the installation files to web server’s root directory
mv whmcs/* /var/www/htmlCreate a new WHMCS configuration file
cd /var/www/html
mv configuration.php.new configuration.php
Change ownership of the web server's root directory
chown -R www-data:www-data /var/www/htmlHTTPS protocol provides a secured encrypted connection between our servers and clients. We will install an SSL certificate from Let's Encrypt Certificate Authority. We will use a program called certbot for automating the process of issuing SSL certificates
Add certbot PPA
apt-add-repository ppa:certbot/certbotUpdate the packages
apt updateInstall certbot for Apache web server
apt install python-certbot-apache -yIssue an SSL certificate
certbot --apache -d portal.your-primary-domaindomain.tldEnter your email and agree to the terms and conditions by entering A.
Once the certificate is issued, certbot will show you two options. Choose Redirect all requests to secure HTTPS access

Once you select the above option, HTTPS will be deployed successfully.
Certificates provided by Let's Encrypt CA are valid for only 90 days.
So you have to log in to your server every 3 months and enter the following command to renew the certificate
certbot renewSo far, we have completed all the necessary steps to install WHMCS. Now its time to start the installation process
Go to https://portal.your-rimarydomain.tld/install/install.php from your web browser
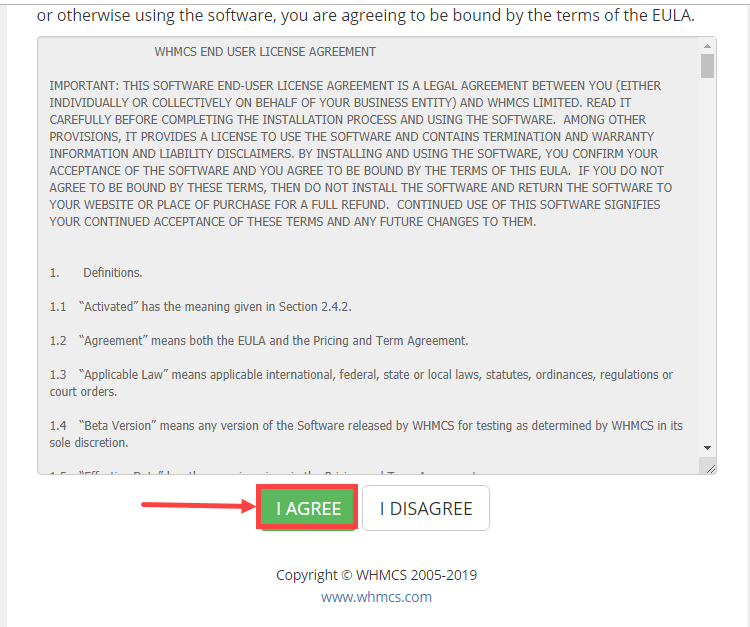
After reading the Terms & Conditions, click Agree
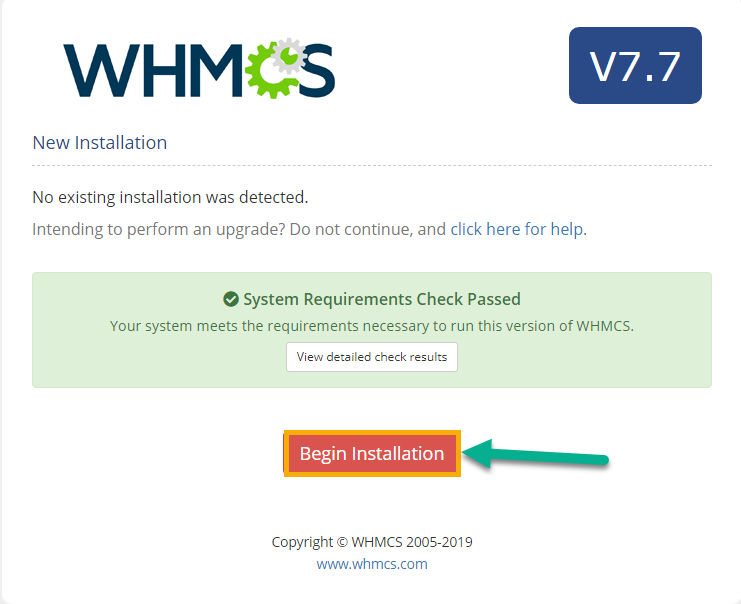
WHMCS will check for all the basic requirements. If the requirements are satisfied, you can proceed with the installation. Otherwise, WHMCS will let you know the missing requirement
Click Begin Installation
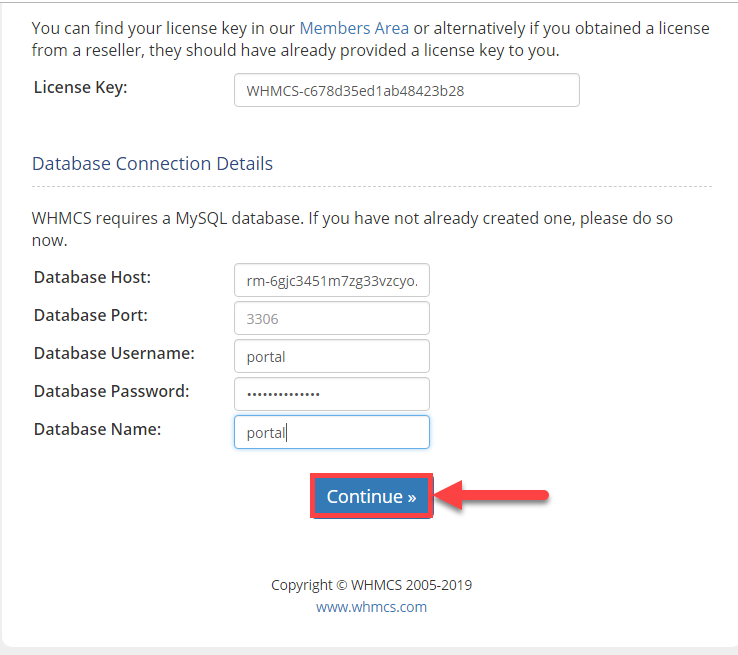
You will be asked to enter your Licence key and Database details. You can get your licence key from your WHMCS dashboard. For database details, enter your RDS instance details. After entering the details, click Continue
The installation is almost is complete. We have to just add a cronjob and delete the installation folder
Login into the ECS instance & run the following commands
crontab -eAdd the following line
*/5 * * * * /usr/bin/php -q /var/www/html/crons/cron.phpDelete the installation directory
rm -rf /var/www/html/installGo to https://portal.your-primary-domain.tld/admin to log in to WHMCS
Login to the another ECS instance which is running on Ubuntu 18.04 via SSH
ssh -i path-to-public-key.pem root@ecs-instance-ipInstall EasyEngine
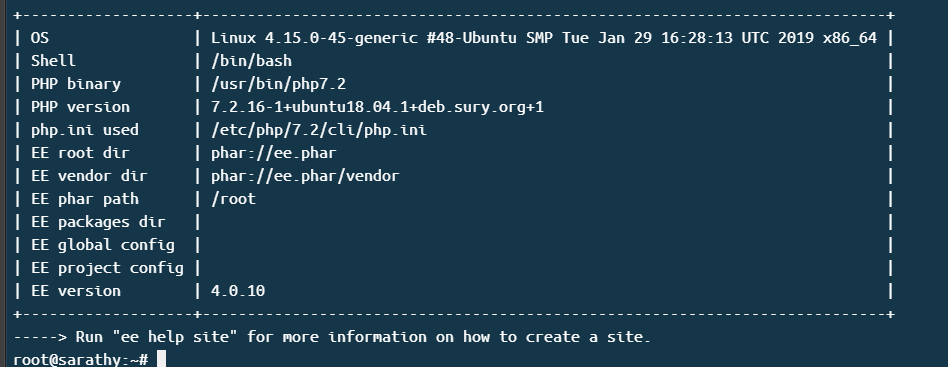
wget -qO ee rt.cx/ee4 && bash eeWhen the installation is completed, you will get the summary of the installation similar to the following image
Let's deploy our WordPress site
ee site create YOUR-PRIMARY-DOMAIN.TLD \
--cache \
--type=wp \
--admin-user=YOUR-WORDPRESS-USERNAME \
--admin-pass=YOUR-WORDPRESS_PASSWORD \
--admin-email=YOUR WORDPRESS EMAIL \
--dbname=YOUR DB NAME \
--dbuser=YOUR DB USERNAME \
--dbhost=YOUR RDS INSTANCE HOSTNAME \
--ssl=le
Once the site is deployed, you will get the summary of the deployed website similar to the following image
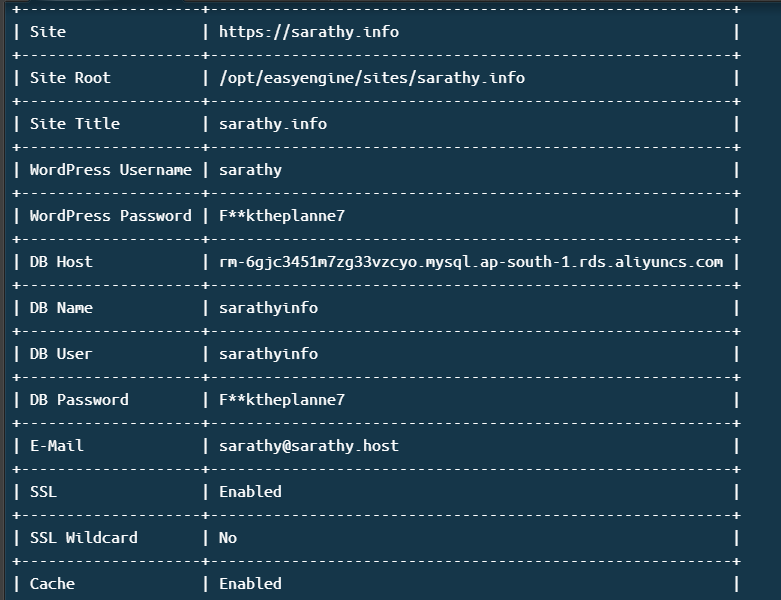
Now go to https://your-primary-domain.tld/wp-admin
Login to the ECS which is running on CentOS 7 via SSH
ssh -i path-to-public-key.pem root@ecs-instance-ipUpdate the system
yum updateSet the Fully Qualified Damion Name(FQDN)
echo "server.your-primary-domain.tld" > /etc/hostname
hostname -F /etc/hostname
Disable Firewall
iptables.save > ~/firewall.rules
systemctl stop firewalld.service
systemctl disable firewalld.service
Disable Network Manger
systemctl stop NetworkManager.service
systemctl disable NetworkManager.service
Download and install WHM
cd /home
curl -o latest -L https://securedownloads.cpanel.net/latest
sh latest
The installation will take up to 45 minutes to complete. Once the installation is over, get the WHM login URL using the following command.
Whmlogin
Go to the displayed login URL & complete the installation
Login to WordPress
Go to Plugins >> Add New
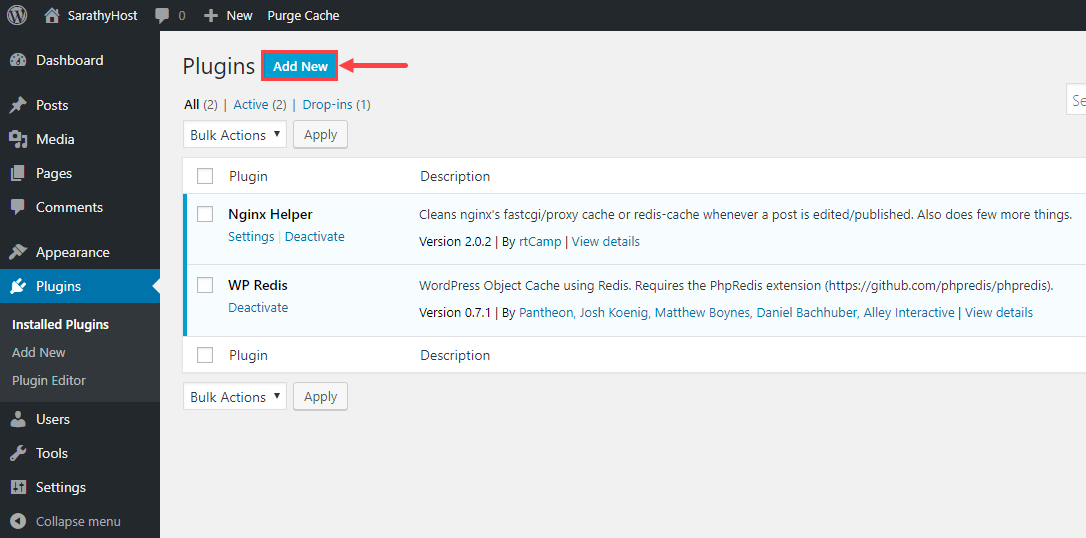
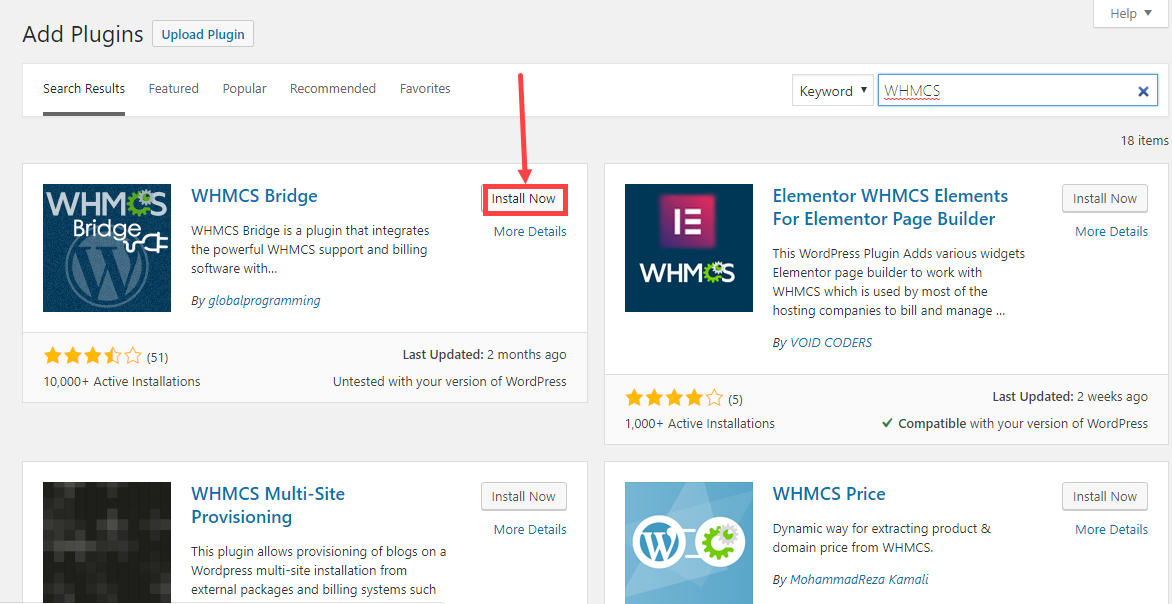
Search for WHMCS Bridge
Click Install Now once you find it
Click the Activate button to activate the plugin
Go to Settings >> WHMCS Bridge
Enter your WHMCS URL
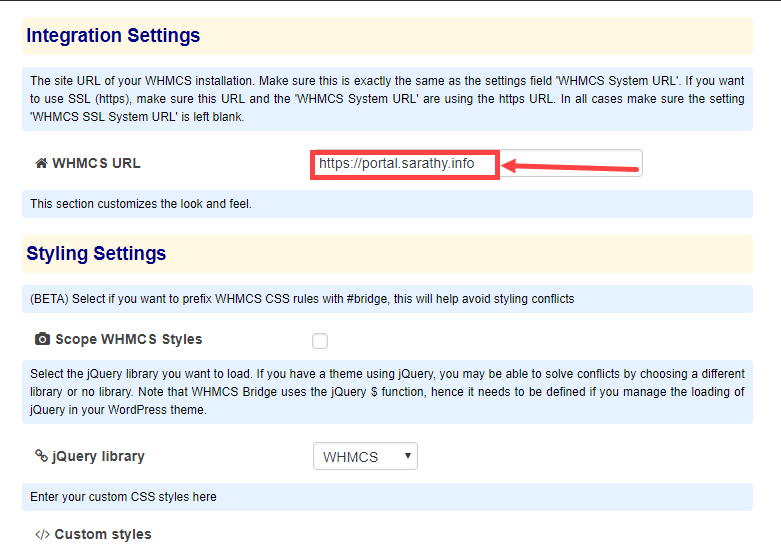
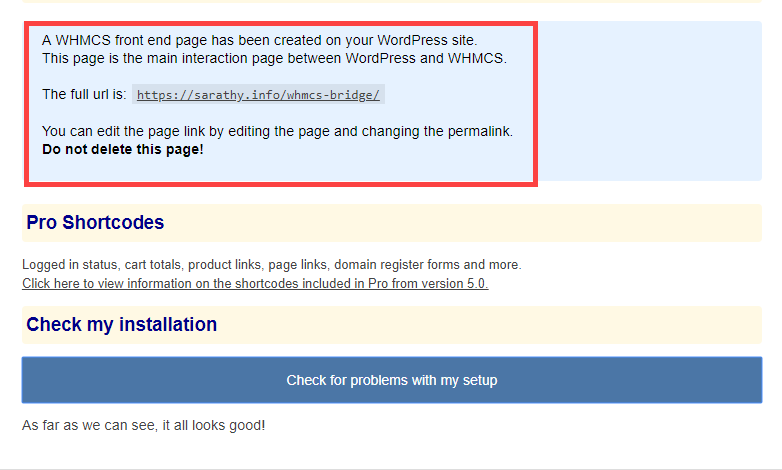
Click Check My Installation
If the integration is successful, a success message will be shown as follows
That's it!
Login to WHMCS
Go to Setup >> Products/Services >> Servers
Click Add New Server

Enter the Server name, IP address, network hostname, etc
Then, log in to WHM
Go to Development >> Manage API Tokens
Click Generate Token
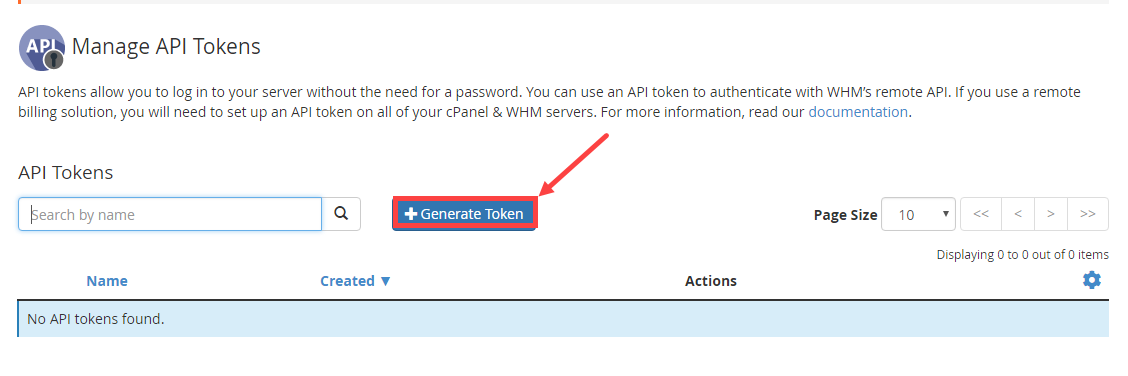
Check the following permissions & click Save

Copy the generated API token

Go back to WHMCS. Fill the following details
Click Save Changes
Now we have successfully integrated WHMCS and WHM
We will use PayPal to receive payments from our customers.
Go to PayPal.Com & SignUp for a Business account. If you already have a PayPal personal account,you have the option to upgrade it to a Business account as shown below
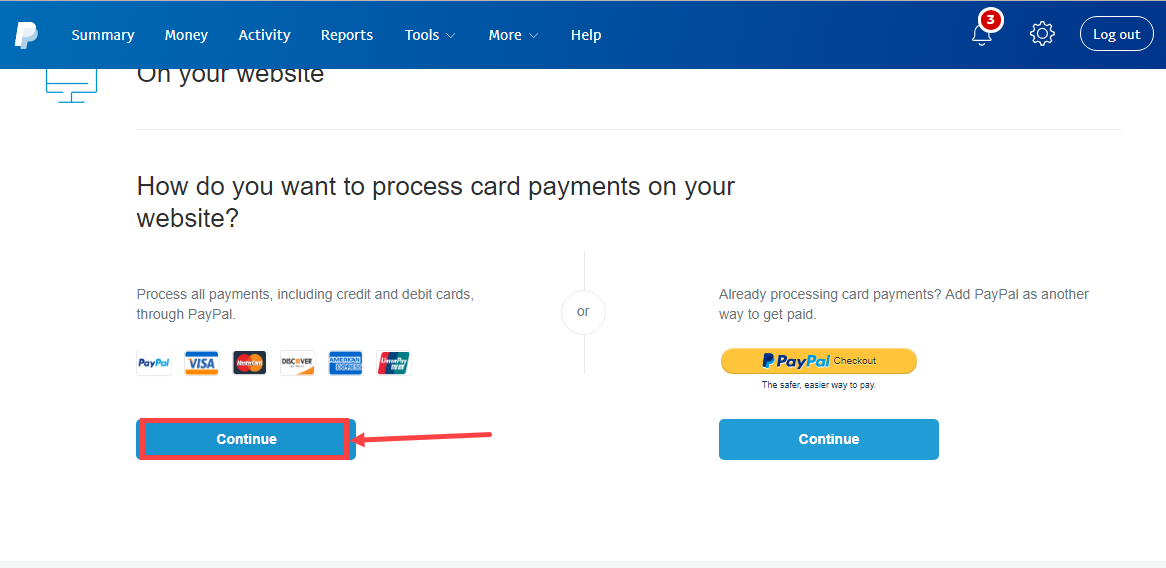
Once you have done creating a business account, go to Tools >> Business Setup >> Payment Setup >> On Your Website
Click the Continue button under Process all payments including credit and debit cards through PayPal
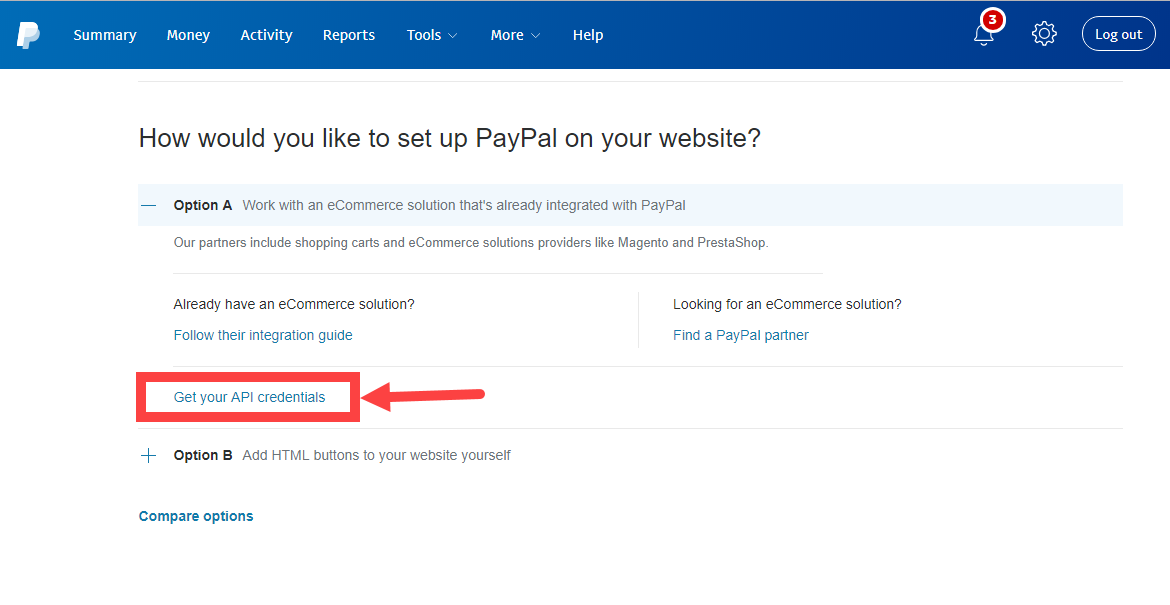
Click Get Your API credentials
Choose Request API Signature & click Agree and Submit
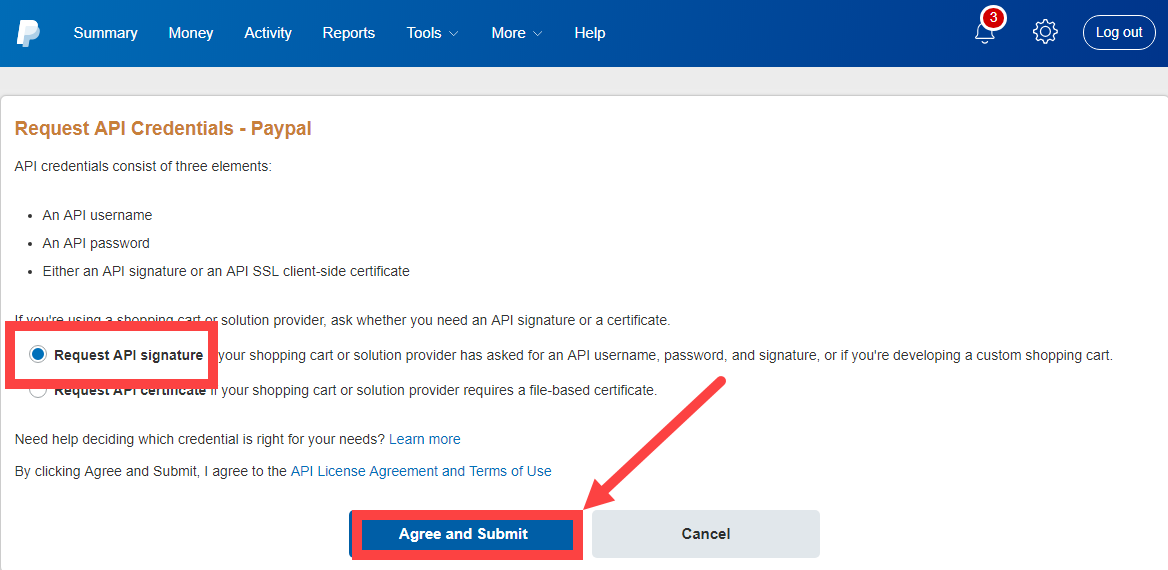
Copy the API Username, API Password, API Signature
Login to WHMCS
Go to Setup >> Payments >> Payment Gateways >> PayPal Express Checkout
Paste the copied API Username, API Password & API Signature.
Then click Save Changes
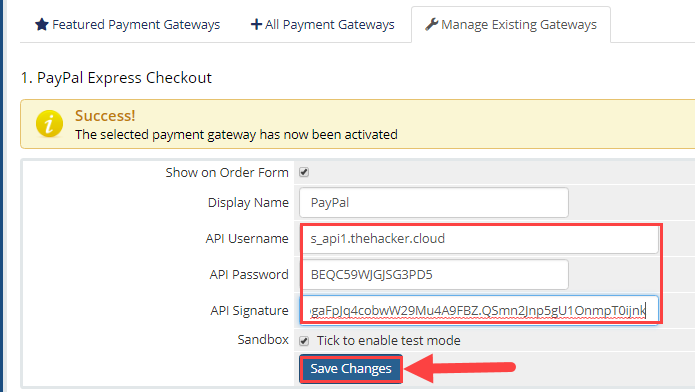
We have now successfully integrated PayPal with WHMCS!
We have successfully installed and configured WHMCS, WHM & WordPress for our web hosting company. Now it is time to create your own hosting packages and start selling. If you have any questions, feel free to ask in the comment section
How to Upload Files to Alibaba Cloud Object Storage with Node.js

2,598 posts | 769 followers
FollowAlibaba Clouder - December 16, 2020
Alibaba Clouder - August 14, 2019
Alibaba Clouder - August 26, 2020
Alibaba Clouder - February 25, 2020
Hiteshjethva - October 2, 2020
Alibaba Cloud Community - March 11, 2022

2,598 posts | 769 followers
Follow ECS(Elastic Compute Service)
Elastic and secure virtual cloud servers to cater all your cloud hosting needs.
Learn More Simple Application Server
Cloud-based and lightweight servers that are easy to set up and manage
Learn More OSS(Object Storage Service)
An encrypted and secure cloud storage service which stores, processes and accesses massive amounts of data from anywhere in the world
Learn MoreMore Posts by Alibaba Clouder
5980169036806800 April 15, 2020 at 12:00 pm
how about the package that we offer?