By Ankit Mehta, Alibaba Cloud Tech Share Author. Tech Share is Alibaba Cloud's incentive program to encourage the sharing of technical knowledge and best practices within the cloud community.
Before the evolution of cloud technology, the biggest challenge was the stability of the server hardware. Since the growth of cloud technology, the focus from the stable hardware is moved to the stable application. Customers require application features to be developed and deployed quickly to beat the competitors. To achieve this it is important to implement Continuous Integration (CI) and Continuous Deployment (CD) for any organization.
There are plenty of tools available to manage the CI and CD, but this blog will focus on PHP Deployer. The intended audience for this blog post is from beginner to intermediate users with experience in basic Linux system administration and programming skills.
PHP Deployer (Deployer) is a handy tool to deploy any PHP based applications effortlessly. Deployer is an open source application and it is free to use. Some of the known supported MVC/CMS is, Laravel, CakePHP, Codeigniter, WordPress, Drupal and many more.
Deployer comes with very easy setup process and it requires a very small learning curve. Anyone with some programming and coding skill can easily start developing scripts with PHP Deployer. Apart from that Deployer has a large community support that provides plenty of the ready to use scripts (Deployer recipes) to start working with.
Deployer also provides the following features:
Deployer tasks are divided into the following steps
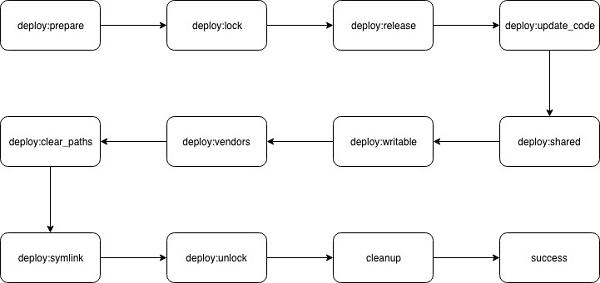
The first step is to install the Deployer. Before you begin, make sure that the system contains PHP. If you are using an Ubuntu-based system, you can meet the dependencies by supplying following commands
sudo apt-get update
sudo apt-get upgrade -y
sudo apt-get install php
Once the above commands are supplied, the next step is to set up the Deployer
curl -LO https://Deployer.org/Deployer.phar
sudo mv Deployer.phar /usr/local/bin/dep
sudo chmod +x /usr/local/bin/dep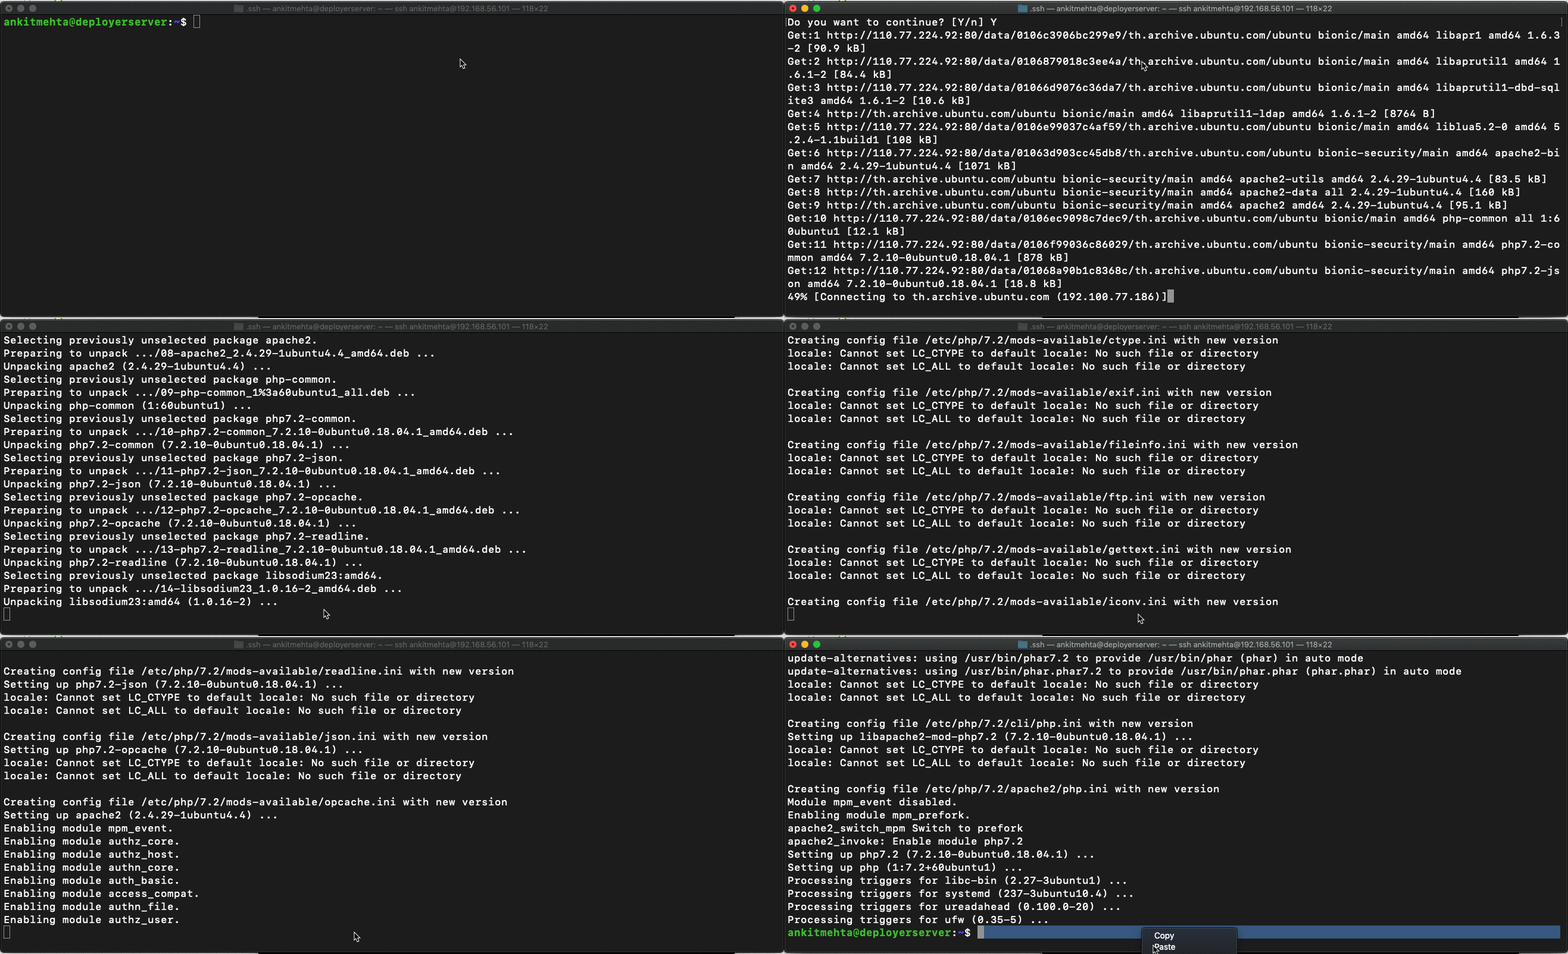
After successful installation, it is time to develop our first PHP Deployer script. As a best practice, it is recommended to create a separate folder for the deployment scripts. For this demo, we are using a folder named Deployer.
mkdir Deployer
cd Deployer
dep init 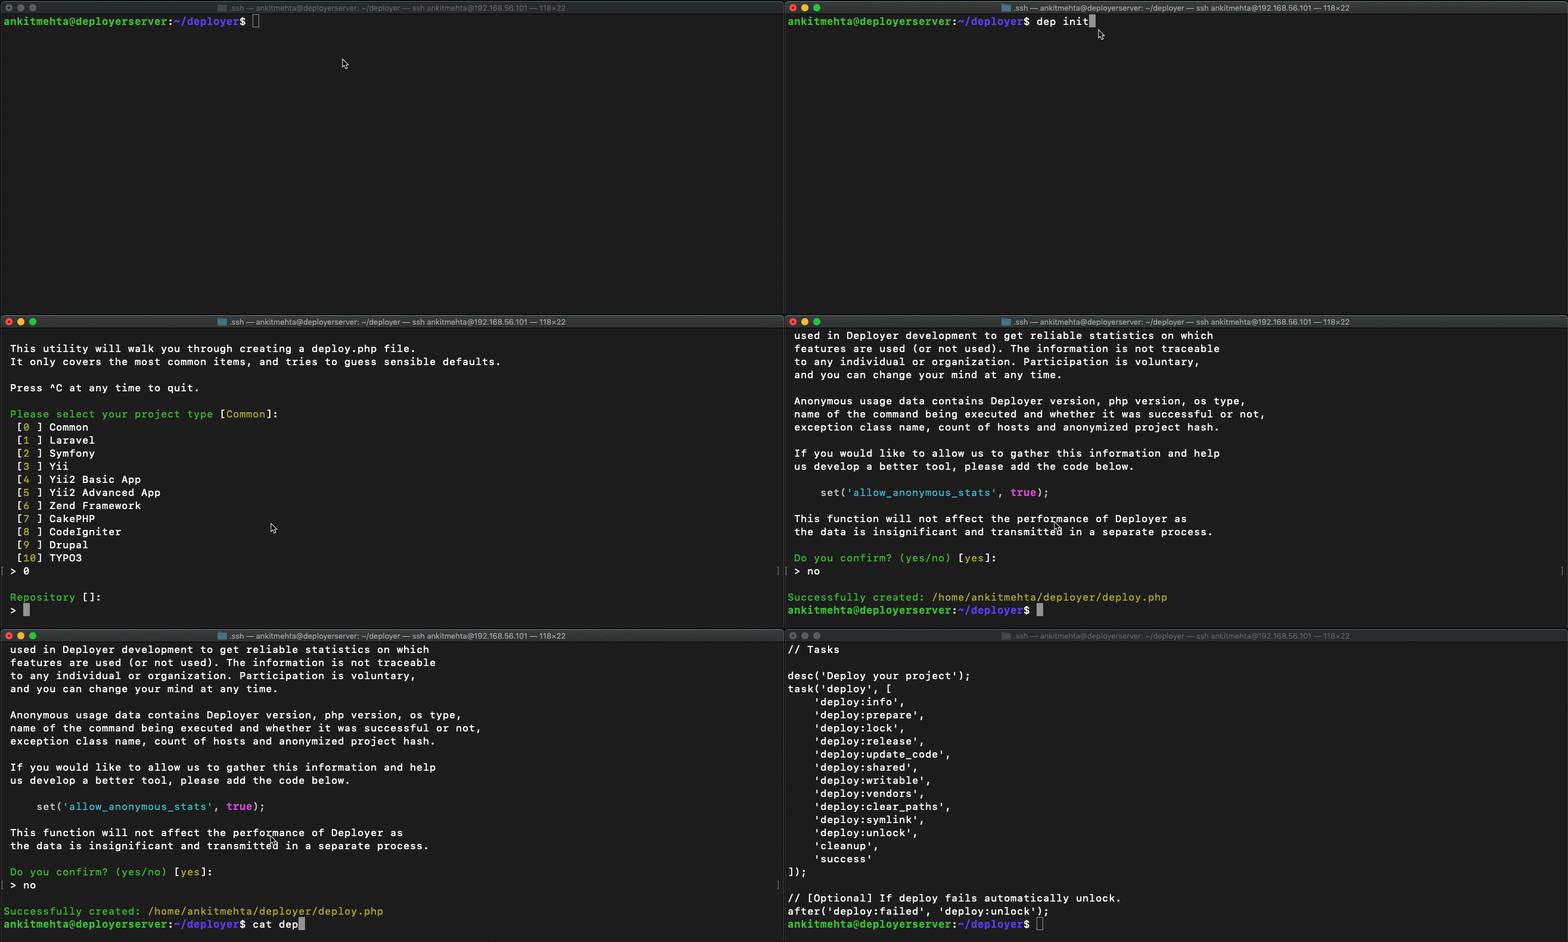
On running the deploy init command, some basic details need to be provided to generate a basic install script. For the beginning, we can choose 0 - Common.
In the next step provide your Git repository details. This step is optional, so in case you do not have any repository details, you can skip the step.
In the next step, you can choose to submit the anonymous usage information to the php-Deployer community. In case you do not want to send the information, you can supply no.
On completion, the Deployer will create a deploy.php file in the folder and it will look like as follows
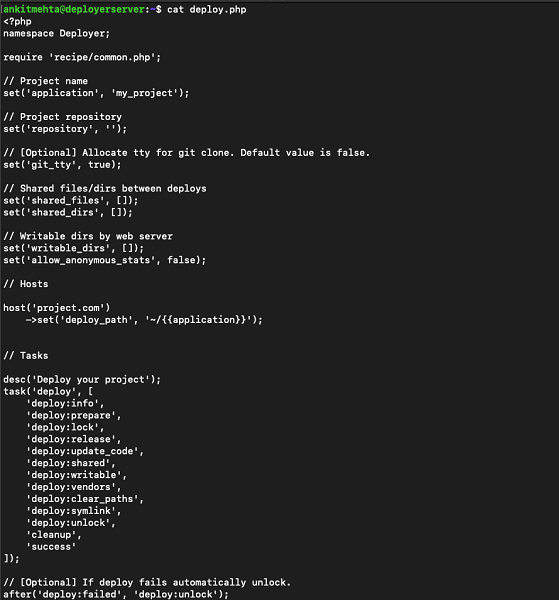
Important parameters from the file,
set('application', 'my_project');Here you can set up the application/project name. Note that this is just an identifier, it has no impact on the script.
set('repository', 'git@github.com:ankyit/Deployer-test-application.git');You can set up the git hub repository path here. Make sure to set up the git deploy key on the server.
host('project.com')
    ->set('deploy_path', '~/{{application}}');
You can use the domain name or IP addresses separated by a comma in the host section. The deploy_path contains the deployment path on the server.
Following is the updated configuration for the server. As a best practice, it is good to use the least privilege user for the deployment.
For the following script, deployment is the user with rights to restart the nginx, and php-fpm.
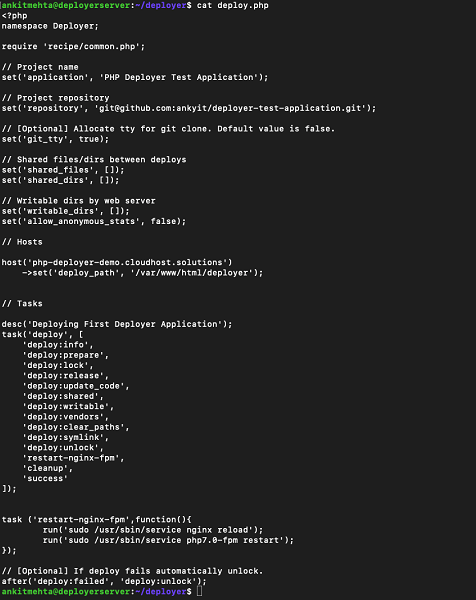
task ('restart-nginx-fpm',function(){
    run('sudo /usr/sbin/service nginx reload');
    run('sudo /usr/sbin/service php7.0-fpm restart');
});
Above command creates a function for the script named "restart-nginx-fpm', Usually, we reload/restart Nginx and php-fpm after completion of the deployment, so the function is added after the deploy:unlock in the task list.
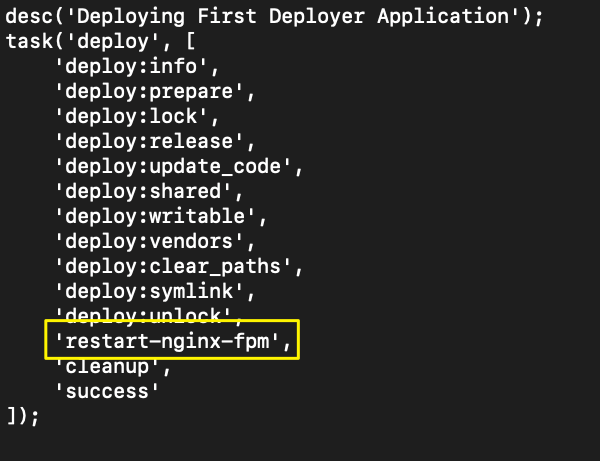
The run section can run any commands on the remote server. for this example, it will reload the nginx and php7.0-fpm service.
To run the install supply the following command
dep deploy if the scripts throw any errors, you can run the script in verbose mode to get more details
dep deploy -v , provides default installation view with the least information
dep deploy -vv, provides some more details as compared with the default mode
dep deploy -vvv, provides detailed view of the installation output
As a default parameter, the Deployer deploys master branch. To deploy any other branch "branch" parameter can be supplied with the deployment script.
dep deploy --branch=uat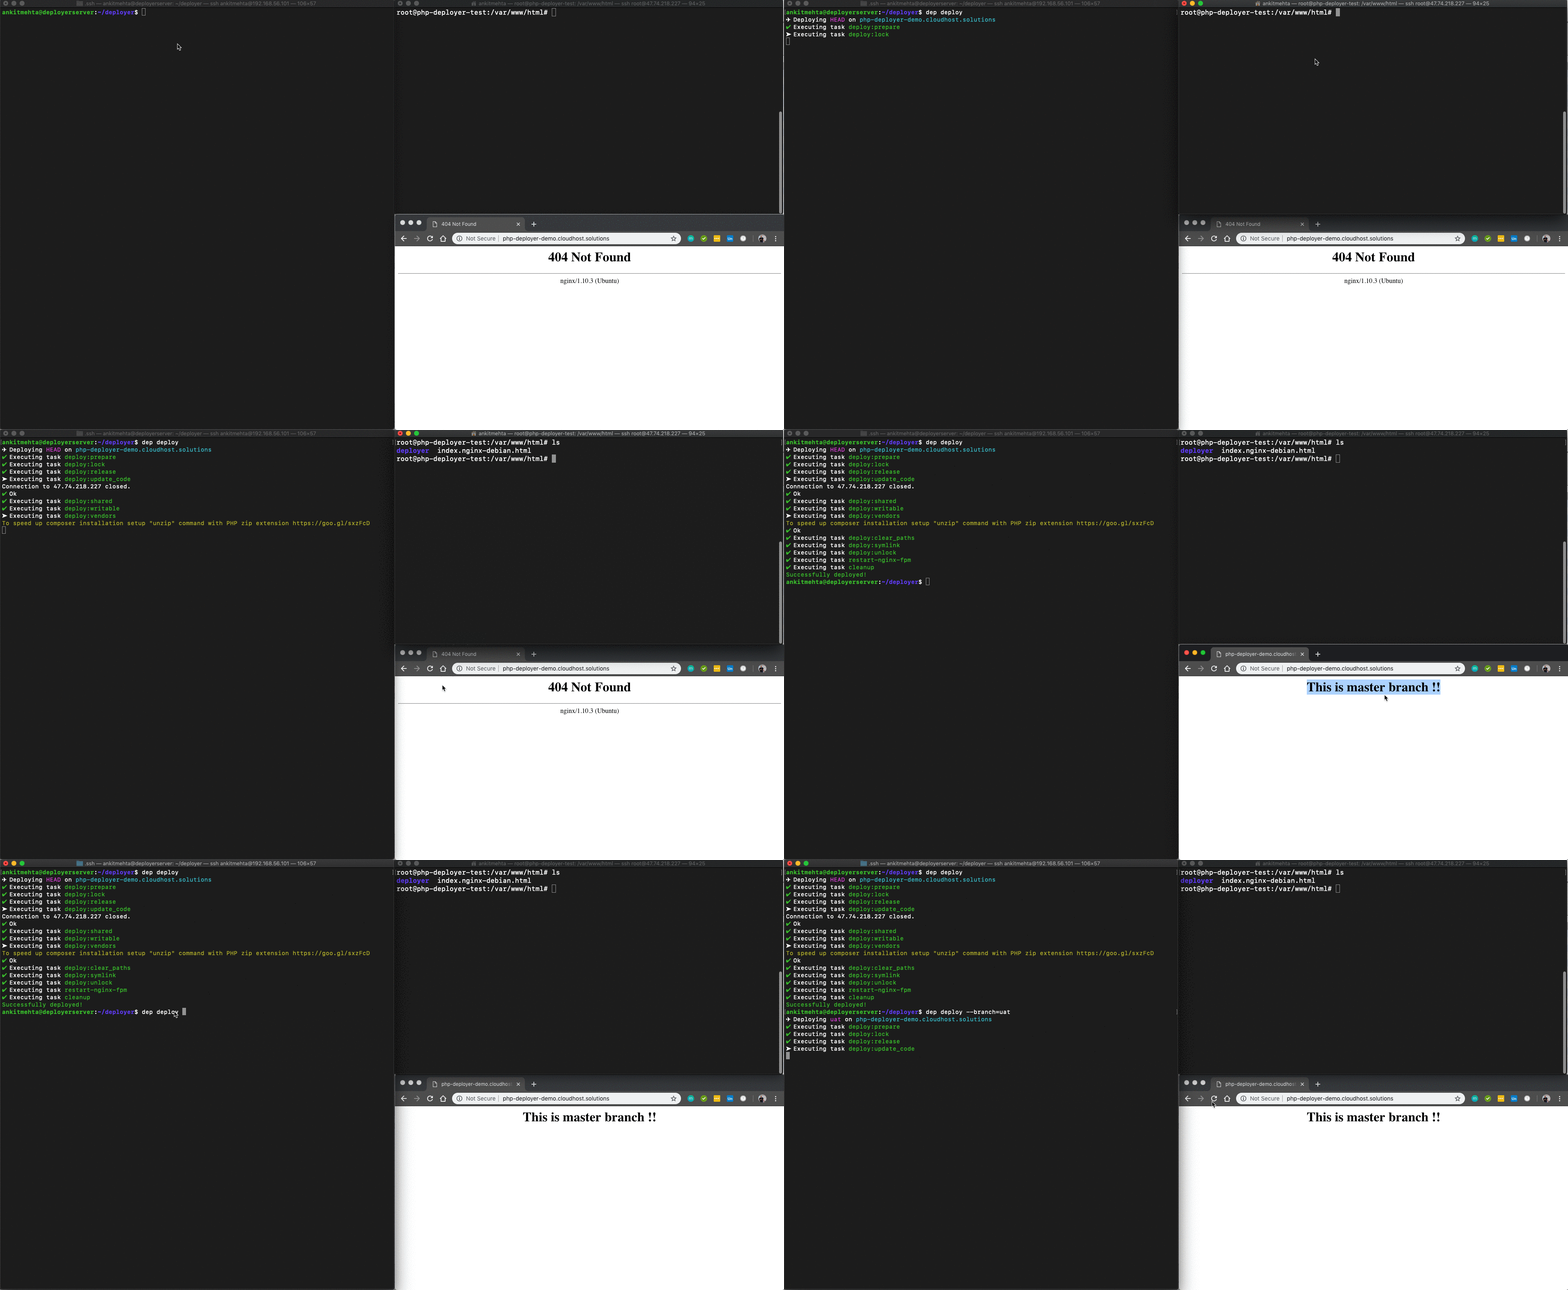
Sometimes we get multiple deployment scripts, to use any specific file "filename" parameter can be supplied
dep --filename=<filename> deploy Multiple parameters can be supplied with one command
dep --filename=<filename> deploy --branch=<branchname> -vvFor the following example, we are switching between three different branches and applications.
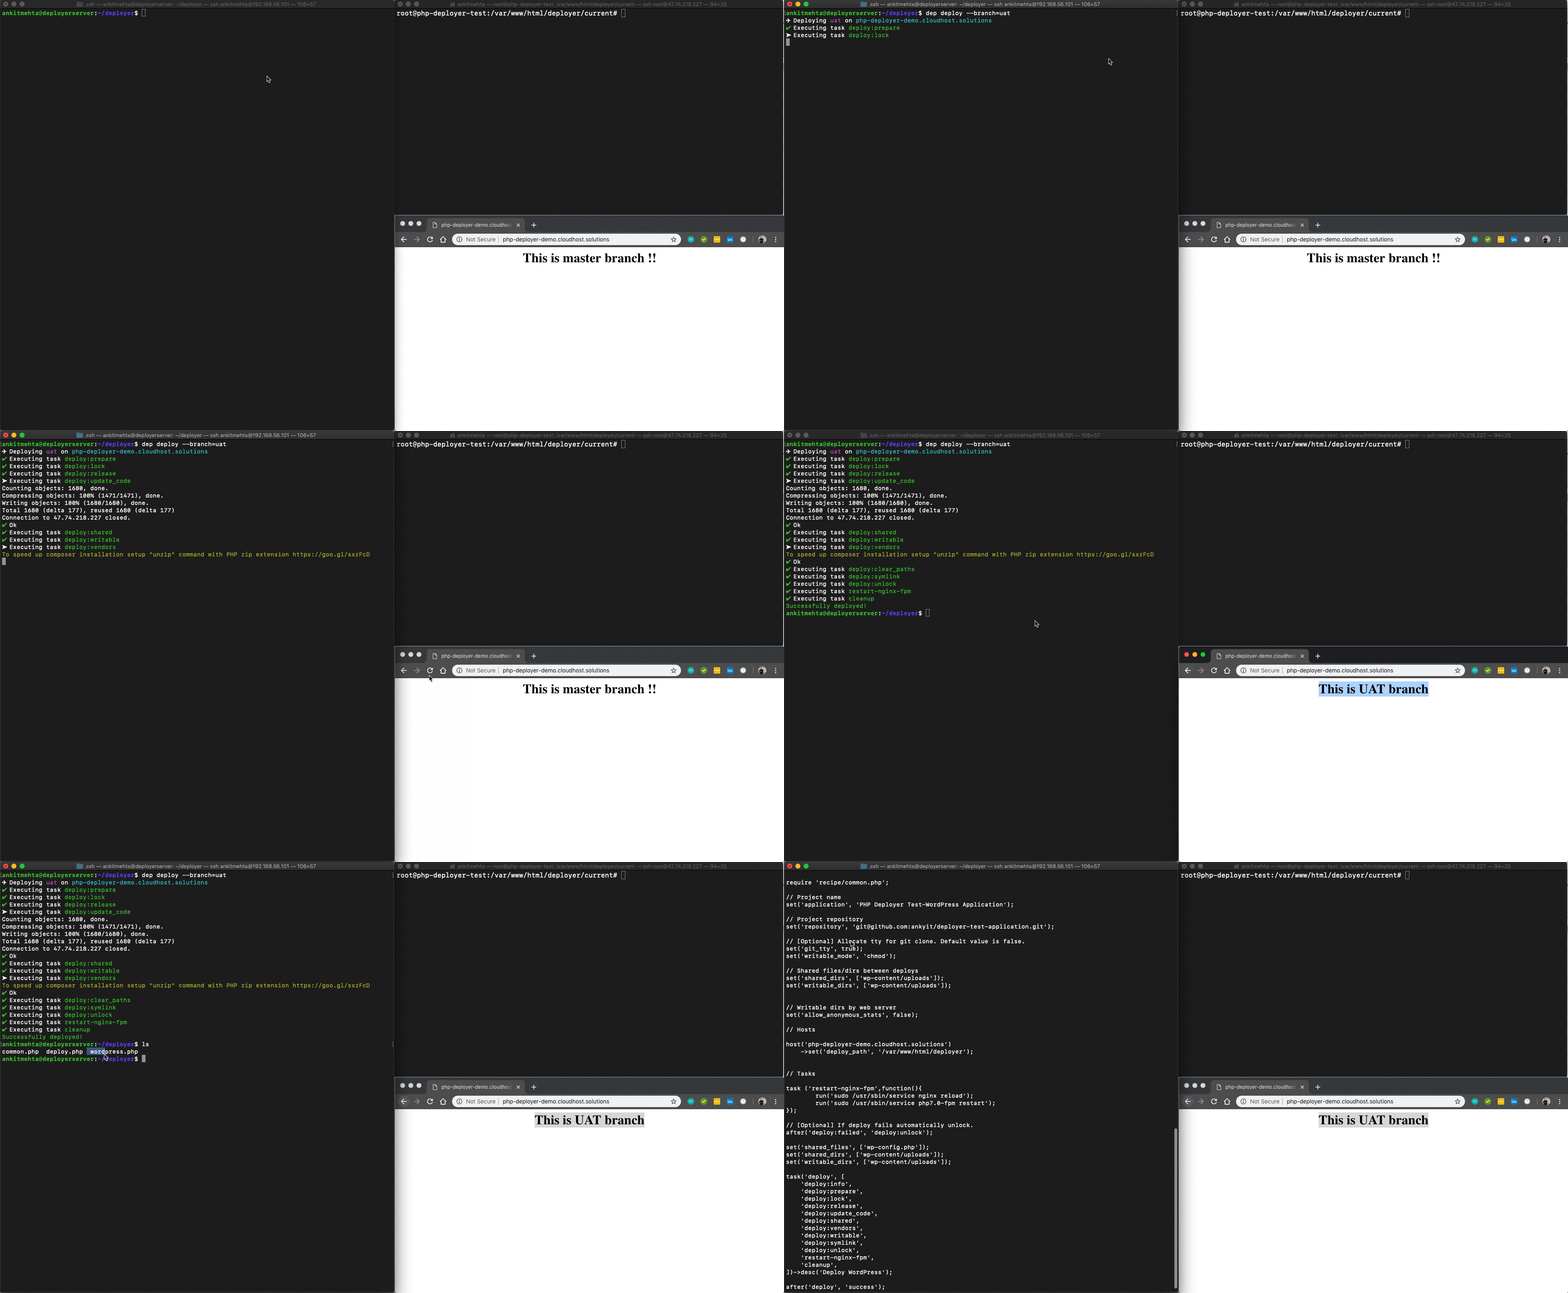
Following is the sample WordPress script for php-Deployer.
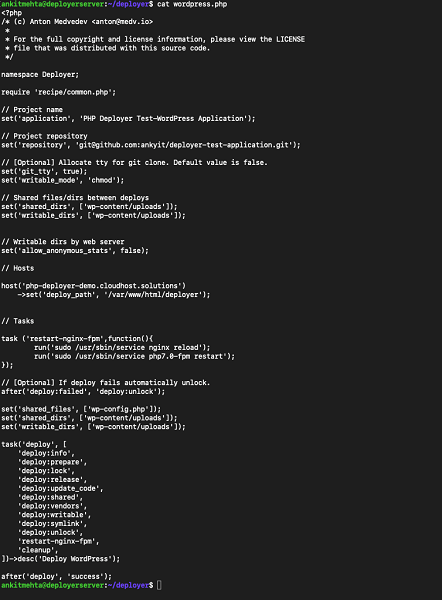
Apart from the basic site deployment, the following are new variables for the script
set('writable_mode', 'chmod');
set('shared_files', ['wp-config.php']);
set('shared_dirs', ['wp-content/uploads']);
set('writable_dirs', ['wp-content/uploads']);
This script is using chmod as the writable mode for the wp-content directory. For each WordPress deployment, the wp-content directory and wp-config.php files are almost consistent. We can define them as shared_files so it can be shared between different releases.
At any step, if the deployment is failed then running the following command will seamlessly rollback the application to the previous release.
dep rollback If you are using the file method then supply the following command
dep --filename=<filename> rollback Deployer keeps all the revision of the application as default parameter. However, you can override this setting by adding the following command in the deployment script.
set('keep_releases', 5);The Deployer will check keep_releases parameter at the end of the script execution and remove any releases more than the specified number during the cleanup step.
To update the minor version of the Deployer run,
dep-selfupdateTo update the Deployer to major release version run,
dep-selfupdate --upgradeVisit Deployer.org to get more information about the Deployer. To get the latest Deployer recipe visit Deployer-github
Preparing a LEMP Ubuntu 18 Server with WordPress using Ansible

2,593 posts | 793 followers
FollowShevy - May 8, 2025
Alibaba Clouder - November 18, 2019
Alibaba Clouder - September 20, 2019
francisndungu - October 26, 2018
iilness - March 17, 2020
Alibaba Clouder - May 6, 2019

2,593 posts | 793 followers
Follow ECS(Elastic Compute Service)
Elastic and secure virtual cloud servers to cater all your cloud hosting needs.
Learn More OSS(Object Storage Service)
An encrypted and secure cloud storage service which stores, processes and accesses massive amounts of data from anywhere in the world
Learn MoreLearn More
More Posts by Alibaba Clouder