By Jeff Cleverley, Alibaba Cloud Tech Share Author. Tech Share is Alibaba Cloud's incentive program to encourage the sharing of technical knowledge and best practices within the cloud community.
WordPress is the most popular content management system used to develop websites with dynamic content on the web. Much of WordPress's popularity has been gained due to the ease of use that it provides by it's Graphical User Interface (GUI). WordPress has always provided a full feature set in a package that is easy for beginners to get started.
Since its early days as a blogging platform it has evolved into a much more widely used resource, often being used for large e-commerce sites, enterprise sites, social networks, and more. Part of its progress into a platform used by more serious developers, was the introduction of WP-CLI - the official WordPress Command Line Interface.
The Command Line Interface (CLI) has long been popular with developers due to the speed and efficiency with which you can perform tasks on your machine. Using a wide variety of tools, developers have boosted their productivity and sped up their development process. The WP-CLI affords WordPress developers and site maintainers the same benefits and efficiencies.
WP-CLI is now an officially supported project of the WordPress foundation and has it's own site and developers handbook, you can find a full list of all it's commands and tools here.
This is the first in a 3-part series that will take a deep dive into the advanced WordPress management abilities provided by WP-CLI. In this tutorial we will look at installing WP-CLI on your instance, and preparing the correct permissions and user roles for it to work properly, after that we will see how it can be used to manage your WordPress content. In the following tutorials, we will dive deeper into more advanced functionality, such as managing your themes and plugins, media, users and database. Before finally showing you how it can be leveraged to manage hundreds of sites across all of your Instances, speed up development of custom plugins and themes, and even extended to provide custom functionality by creating your own commands.
Through effective use of WP-CLI you will see how you can even reduce bloat of your WordPress sites through the removal of the need for several widely used plugins.
This tutorial assumes you already have an Alibaba Cloud ECS Instance provisioned and with one (or several) WordPress sites running on it.
Throughout the series, I will be using my superuser 'new_user' and will be issuing 'root' commands using the sudo command. When you follow the commands please remember to replace my user with your own.
I will also be using my test domains 'an-example-domain.com' and 'another-example-domain.com' in the code examples, remember to replace my site domains with your own when you issue the commands.
Login to your server by SSH:
# ssh new_user@an-example-domain.com
Download the 'wp-cli.phar' PHP archive file:
$ curl -O https://raw.githubusercontent.com/wp-cli/builds/gh-pages/phar/wp-cli.phar
Now check to ensure the file is working:
$ php wp-cli.phar --info
Your terminal should present you information about your PHP version, configuration file, and some information about the WP-CLI installation.
We want to be able to use WP-CLI by just typing 'wp' instead of 'php wp-cli.phar', to do that we need to make the PHP archive file executable. We also want to have access to the 'wp' command from anywhere so we need to move it into our PATH.
To do both of these, execute the following commands:
$ chmod +x wp-cli.phar
$ sudo mv wp-cli.phar /usr/local/bin/wp
Your terminal should look something like this:
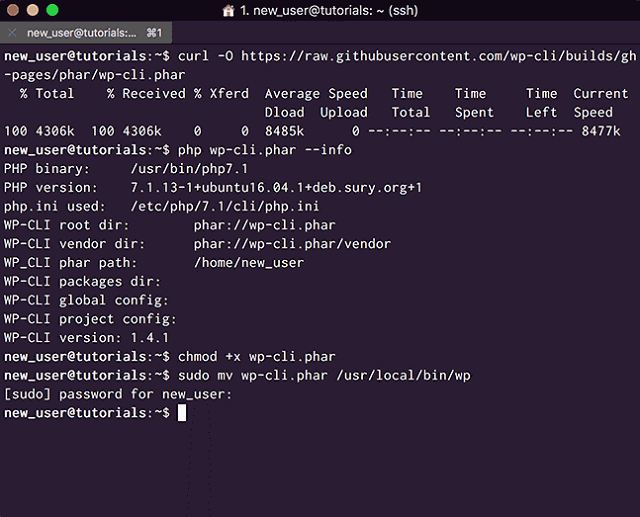
<Download the WP-CLI PHP archive file and test it>
Now you can check to make sure that this is working by issuing the same WP-CLI '--info' command but this time just using 'wp':
$ wp --info
If you want to check WP-CLI for updates, you can use:
$ wp cli update
Your terminal should now look similar to:
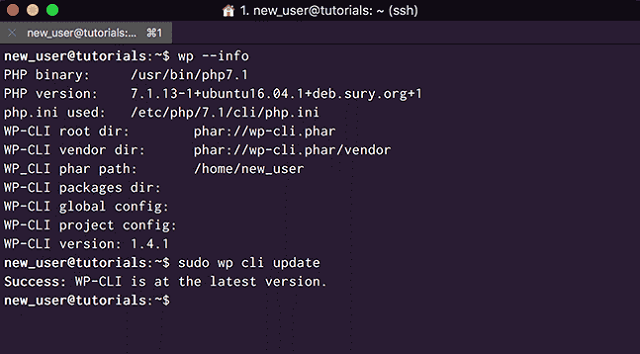
<Make the Archive executable to use the WP command >
All WP-CLI Commands
You can get a full list of all the available WP-CLI commands and Global Parameters, by entering:
$ wp
or
$ wp help
We will be issuing WP-CLI commands as our user, in my case 'new_user'. We might run into problems with command that need to write to our website directories if we don't prepare directory and user groups accordingly.
Change directory into your '/var/www' directory, or whichever directory contains your WordPress installations, and list the directories and their ownerships and permissions:
$ cd /var/www
$ ls -l
You should see that your Website root directory belongs to the 'www-data' user and group. This is the user that the web server runs under.
The directory permissions you may also be 'drwxr-xr-x' or something similar, this is 0755, and only grants the owner (www-data) write permissions.
We want to change this to 'drwxrwxr-x' / 775 so that the members of the 'www-data' group also have write permissions:
Do that and then list out the directories again, with the following commands:
$ sudo chmod -R 775 /var/www/an-example-domain.com
$ ls -l
You should now see that the directory permissions have been changed accordingly:
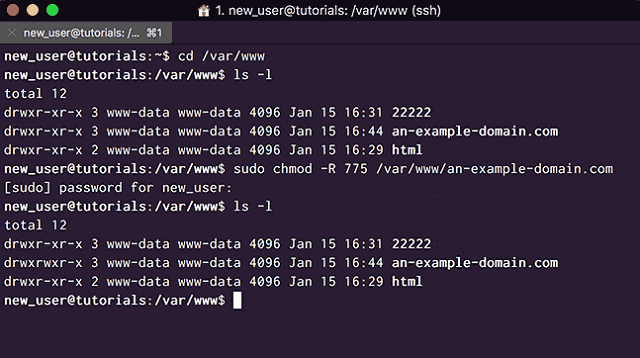
<Change WordPress directory permissions to 775>
Now we just need to make sure that our user is a member of the 'www-data' group so that we can write to these directories using WP-CLI commands:
$ sudo usermod -a -G www-data new_user
You can check which groups your user belongs to with the 'groups' command:
$ groups
Your terminal should look like this:

<Make sure your user is in the www-data group>
Installing WordPress Core
WP-CLI offers a set of powerful tools for managing the installation and updating of WordPress core, these are the 'core' commands.
Before doing this, you need to your WordPress site domain configured, alongside virtual host and site root folder, as well as the having created and empty database for WordPress to use.
I go over everything in detail in another tutorial here.
They include the ability to download different versions and localizations of WordPress using the '--version' and '--locale' parameters.
For example:
$ wp core download --version=4.8.4 --local=en_GB
Would download WordPress v.4.8.4 with the correct (British) English localization.
You can also do things like create a 'wp-config.php' file using 'core config':
$ wp core config --dbname=tutorial --dbuser=new_user --dbpass=new_users_password --dbhost=localhost --dbprefix=tut_
And we can install WordPress using the 'core install' command:
$ wp core install --url=an-example-domain.com --title=“WP-CLI Tutorials” --admin_user=new_user --admin_password=new_user_admin_password
Now your WordPress site will be up and running, without the need to go through the usual installation process. As you can see installing with WP-CLI it is far quicker than WordPress' 'famous' (if they do say so themselves) 5-minute installation procedure.
Updating WordPress Core
Keeping your WordPress installations up to date is incredibly important from a security standpoint.
To check your WordPress version, change directory into the directory that contains your WordPress files and directories and issue the following command:
$ wp core version
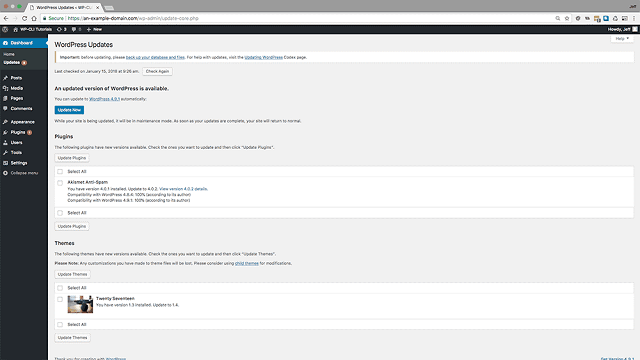
As you can see, my 'an-example-domain.com' WordPress site is out of date, it is only running WordPress 4.8.4 and not the latest 4.9.1 version, that is poor security practice on my part:
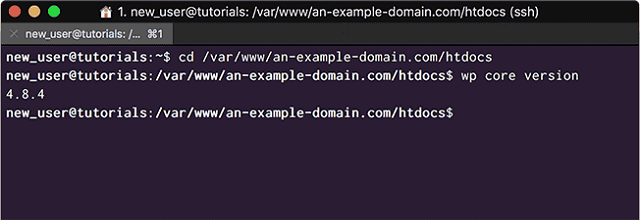
<Check WP Core version – 4.8.4 is not the newest version>
<WordPress needs updating>
Before you update your WordPress Core, you are always warned to back up your Database.
Many people don't perform this important step because it goes out of their workflow and usually requires logging into some sort of Database management tool, either desktop based, in their hosting control panel, or some sort of web based tool.
With WP-CLI it is incredibly easy and fast, so now there is no excuse:
$ wp db export backup.sql
If you have ever used a third party GUI based tool to export a database you will be surprised by just how quickly this command is executed and completed.
In no time you will see a 'Success' message:

<Backing up your Database prior to Core updates has never been easier>
Now we are ready to update core, and check the version again:
$ wp core update
$ wp core version
In your terminal you should see:
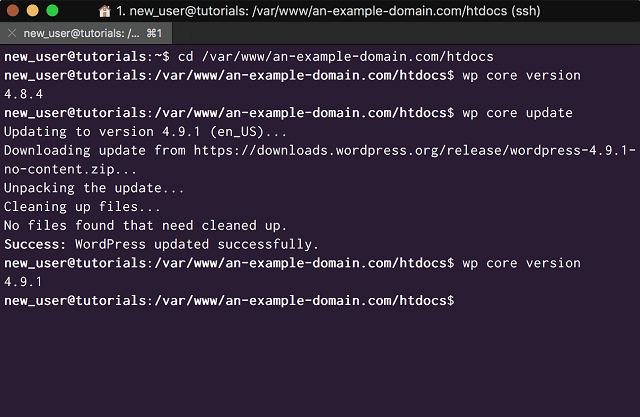
<Use WPCLI to update WordPress core WordPress Core quickly>
We can also update our Database with ease:
$ wp core update db

<Update your WordPress Database>
If you are having problems following a Core update, don't worry…
It's also incredibly easy to walk WordPress back to any of the previous versions. Just add the '--version' and '--force' parameters.
$ wp core update —version=4.9 --force
Listing, Creating, Deleting, and Editing Posts and Pages
You can manage all of your posts and pages, and their content directly from the terminal. Perhaps not the optimal content creation method, but still incredibly useful.
These commands have a parameter '--post_type' this defaults to '--post_type=post' but all commands can be used to manipulate pages with the use of '--post_type=page'. For the sake of brevity I will just be demonstrating 'post' commands as '--post_type=post'.
To list all post types you can use:
$ wp post list
Since I have a new installation, there is only the “Hello World” post with the ID of 1, let's delete that:
$ wp post delete 1
Then when we list out the posts again we can see it has gone:
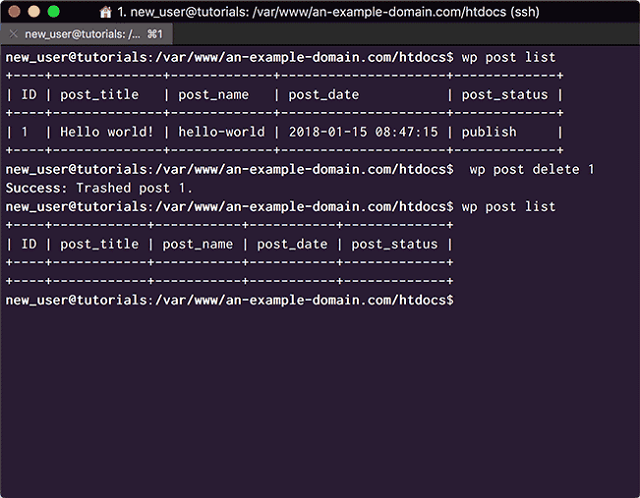
<List the posts then delete the “Hello World!” post>
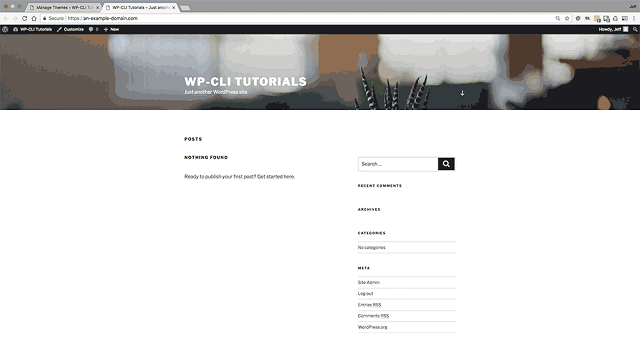
<Tutorial Site with no post>
We can create posts and their content with a command, using parameters for the title, content, and status:
$ wp post create --post_title='Your title' --post_content=“Your most interesting post content” --post_status='publish;
List the posts again:
$ wp post list
Now we can see our new post in the list:
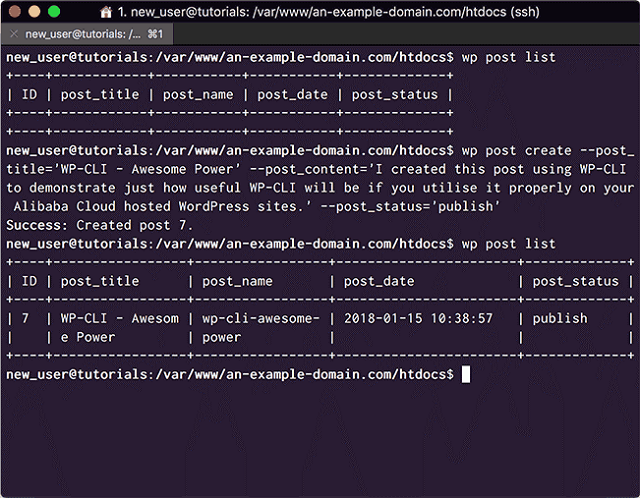
<WP-CLI created post listed in the terminal>
Often, when developing WordPress themes or plugins, we often need to create a whole bunch of posts, just to test things out. It is a slow process using the browser and GUI, but WP-CLI has the answer with the 'post generate' command:
$ wp post generate --count=4
And in an instant we have 4 new posts:
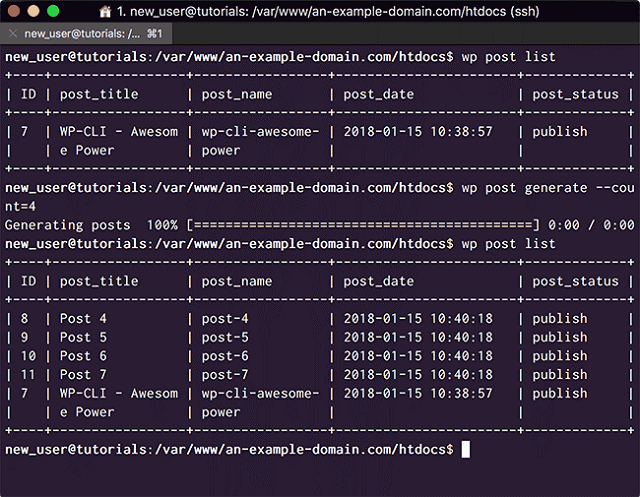
<Generate dummy posts using WP-CLI - view them in the terminal>
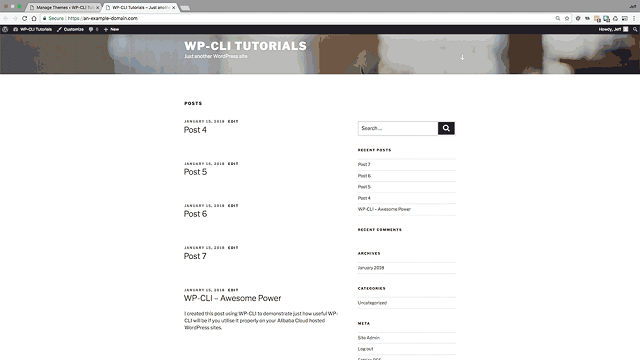
<Generate dummy posts using WP-CLI - view them in the browser>
Deleting them is just as easy, we can delete batches just by listing their ID's:
$ wp post delete 8 9 10 11
Easy come, easy go:
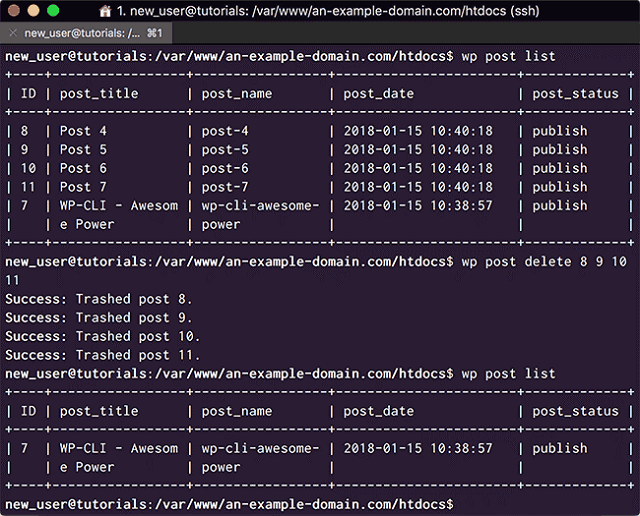
<Batch Deleting Posts with WP-CLI>
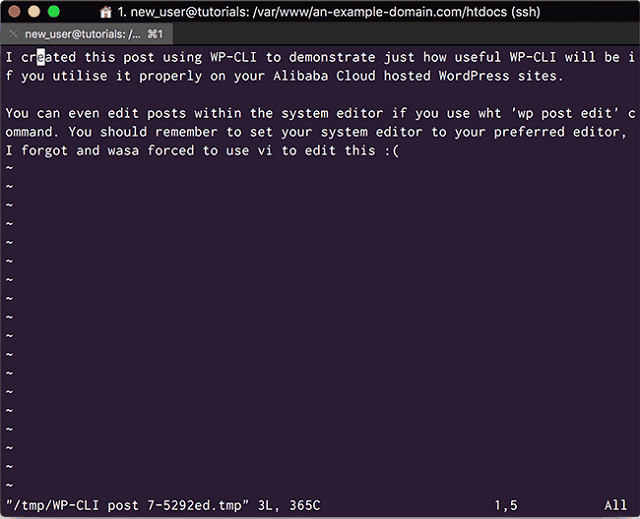
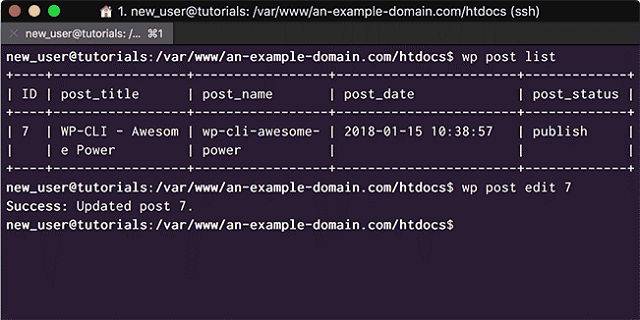
We can also edit posts with WP-CLI using your system editor. Let's edit the post we created earlier and add some new content:
$ wp post edit 7
<Edit your posts using WP-CLI and the System Editor>
Your terminal should now look like this:
<Post successfully edited>
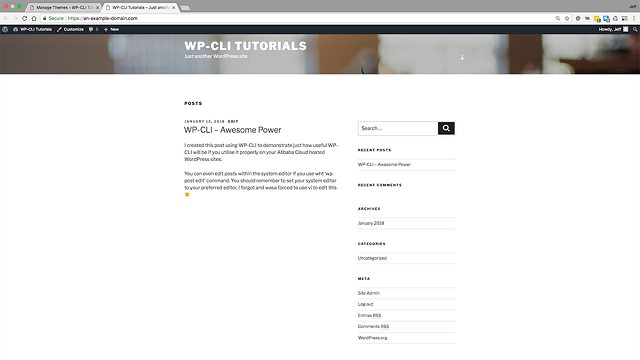
View your edited post it in your browser:
<A WP-CLI created and edited post>
Managing Post Meta
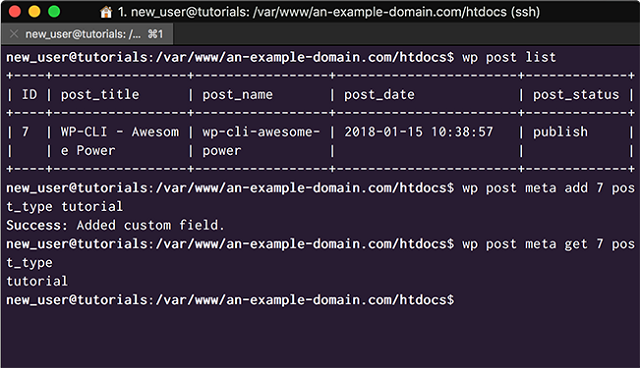
We can also use WP-CLI 'post meta' commands to 'add' meta data including custom fields.
Let's add a new Custom Meta Field called 'post_type' and give it the value of 'tutorial':
$ wp post meta add 7 post_type tutorial
Then we can 'get' the 'post_type' value with:
$ wp post meta get 7 post_type
<Setting and Getting Post Meta with WP-CLI>
We can also add, or 'set', terms:
$ wp post term set 7 category wpcli
And 'remove' them:
$ wp post term remove 7 category wpcli
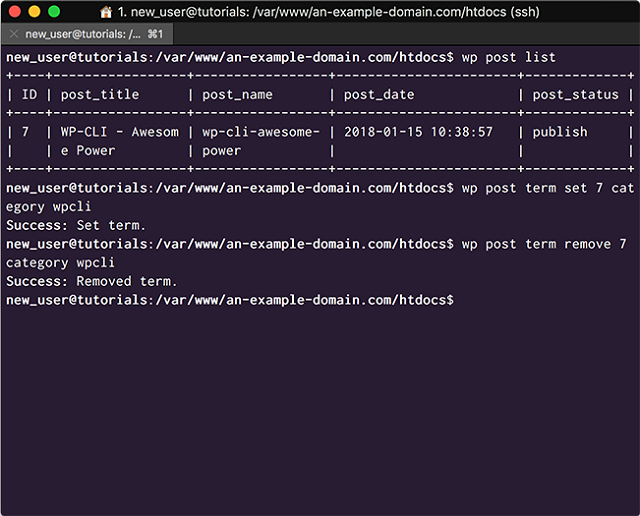
<Create and remove Terms with WP-CLI>
Managing Revisions
WordPress stores every revision of a post as a post in the Posts table. This can lead to a huge amount of Database bloat, there are a lot of useful plugins that help you manage these revisions.
But, with WP-CLI it is even easier! Why add another plugin to your WordPress site, if you can do it more quickly and easily with WP-CLI?
One of the beauty of WP-CLI is it's extensibility, other developers are developing command cookbooks and plugins to extend its functionality all the time. One of these plugins is the WP Revisions CLI plugin. At the very end of this series we will even create our own custom commands in such a plugin.
Install the plugin as a wp-cli package:
$ wp package install trepmal/wp-revisions-cli
It will be installed and use composter to install any dependencies it needs:
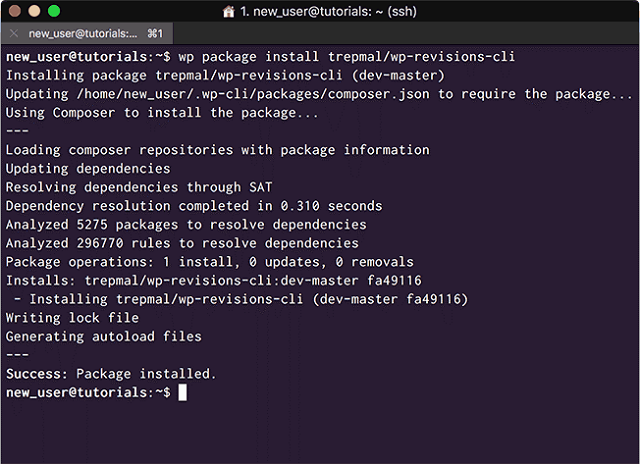
<Install WP Revisions CLI as a WP-CLI package>
Now, we can list all the WordPress post revisions with:
$ wp revisions list
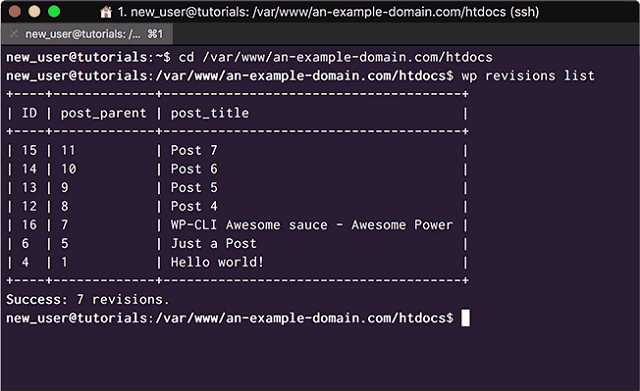
<List your WordPress revisions using the WP Revisions CLI>
As we can see in my case there are 7 revisions. I don't think I need them, so I am going to delete them with the clean command. I am using '-1' to delete all revisions, and specify only '--post_type=post' post revisions:
$ wp revisions clean -1 --post_type=post
$ wp revisions list
Now we can see, I no longer have any revisions bloating my database:
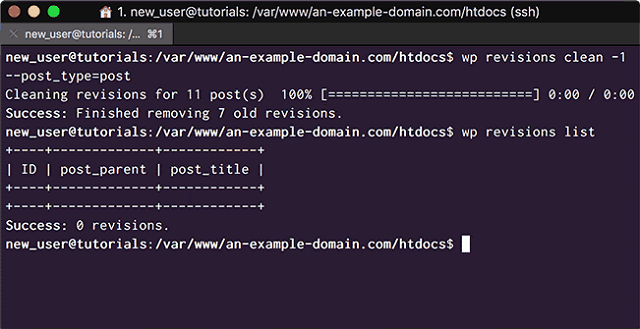
<Clean all Post revisions>
I can also check the value of my 'WP_POST_REVISIONS' option using:
$ wp revisions status

<Check the value of WP_POST_REVISIONS>
WP Revisions CLI also includes a 'wp revisions dump' command, that is faster than the clean command as it doesn't query each post before deleting the revisions. You can see the full list of commands and their parameters here.
That is the end of this tutorial, in the next part of the series we will delve deeper into useful commands for managing your WordPress installation, it's users, plugins and database, and more advanced configurations to manage many sites on an Instance at once.
In the Final tutorial in the series we will then reconfigure these commands to allow us to manage hundreds of WordPress sites across any number of Alibaba Cloud ECS Instances, all with a few commands on our local machine. We will also learn how to use WP-CLI in our WordPress development and deployment workflow to speed development, before we finally extend it with Custom Commands.
How to Synchronize RDS Data to a Local User-Defined Database

2,593 posts | 793 followers
FollowAlibaba Clouder - May 9, 2018
Alibaba Clouder - July 8, 2020
Alibaba Clouder - July 4, 2018
Alibaba Clouder - December 12, 2017
Alibaba Clouder - April 24, 2018
Alibaba Clouder - August 15, 2018

2,593 posts | 793 followers
Follow Livestreaming for E-Commerce Solution
Set up an all-in-one live shopping platform quickly and simply and bring the in-person shopping experience to online audiences through a fast and reliable global network
Learn More E-Commerce Solution
Alibaba Cloud e-commerce solutions offer a suite of cloud computing and big data services.
Learn More Black Friday Cloud Services Sale
Get started on cloud with $1. Start your cloud innovation journey here and now.
Learn MoreMore Posts by Alibaba Clouder
5273218197980812 April 12, 2021 at 3:27 am
Very good 3-part series, thanks a million!