This topic describes how to send messages in batches to the Chinese mainland using the Broadcast feature in the Short Message Service (SMS) console.
Due to policy restrictions, Go China is not available for new users. For accounts that already have this feature enabled, your SMS signatures must undergo identity verification. Unverified signatures may be forcibly deactivated, causing service disruptions. The requirements and procedures for identity verification have been sent to your Alibaba Cloud Message Center and associated email address.
Before you begin
Before sending messages, complete the following preparations:
Create an account and complete enterprise identity verification: SMS is available only to enterprise accounts. You must complete enterprise identity verification.
Activate SMS: Log on to the SMS console and follow the prompts to activate the service.
Purchase a resource package: By default, SMS is billed via prepaid resource packages. Purchase a resource package before you use the service.
Ensure that a credit card or PayPal account is added to your Alibaba Cloud account.
Purchase a suitable package based on the destinations and package specifications. If you prefer the pay-as-you-go model, contact sales to enable it.
Carrier compliance requirements for sending messages vary by country and region. To ensure deliverability, create an SMS signature and message template. They must be approved before use.
Procedure
Log on to the SMS console. In the left navigation pane, choose Go China.
On the Go China page, click the Broadcast tab.
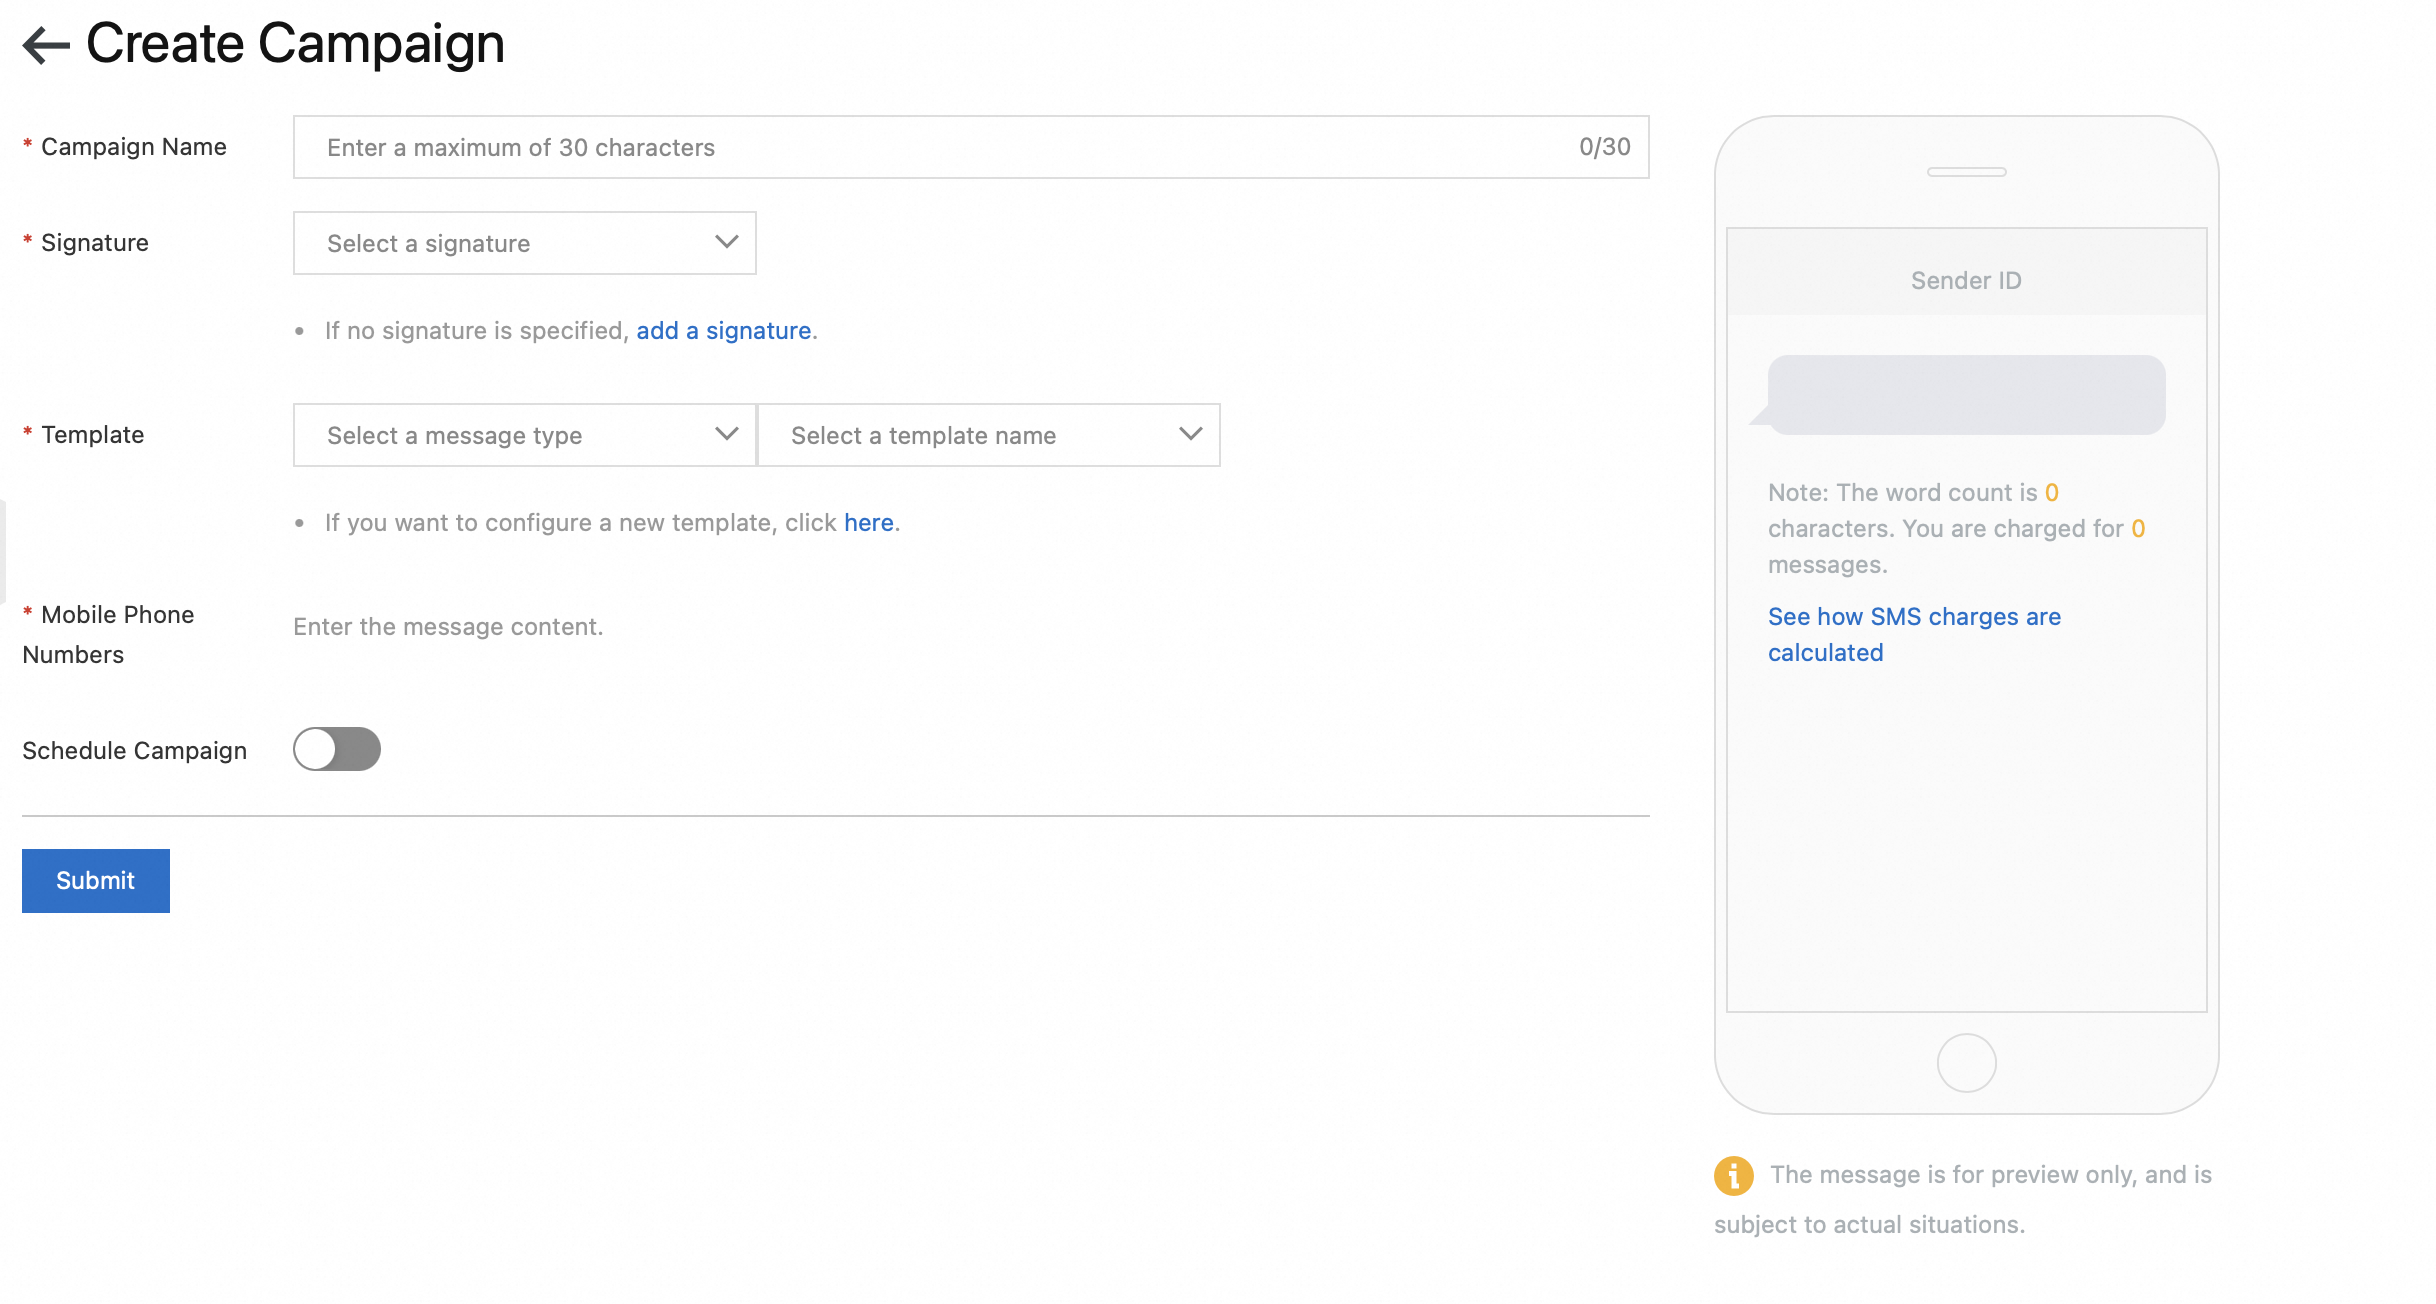
Click Create Campaign.
Fill in the campaign information as prompted on the page.

Parameter
Description
Campaign Name
The name of the campaign. It can be up to 30 characters.
Signature
Select a signature for the message.
Template
Select a message type and template.
Mobile Phone Numbers
You can add recipient numbers by either importing a file or entering them manually.
Import Data
Download a template and fill in the recipient numbers.
Click Import Mobile Phone Numbers.
Manual Input (Variables Unsupported)
Enter the recipient numbers manually.
NoteTo include variables in your message template, add by importing a file.
Manual input supports entering up to 100 recipient numbers. For larger batches, import a file.
Schedule Campaign
Enable Schedule Campaign to specify the time zone, date, and time for sending the message.
NoteTo cancel a scheduled campaign, return to the Broadcast page and click Cancel in the Actions column at least 5 minutes before the scheduled time.
If you have configured scheduled sending, click Schedule Campaign. Otherwise, click Submit.
Check sending details
Check campaign results
Log on to the SMS console. In the left navigation pane, choose .
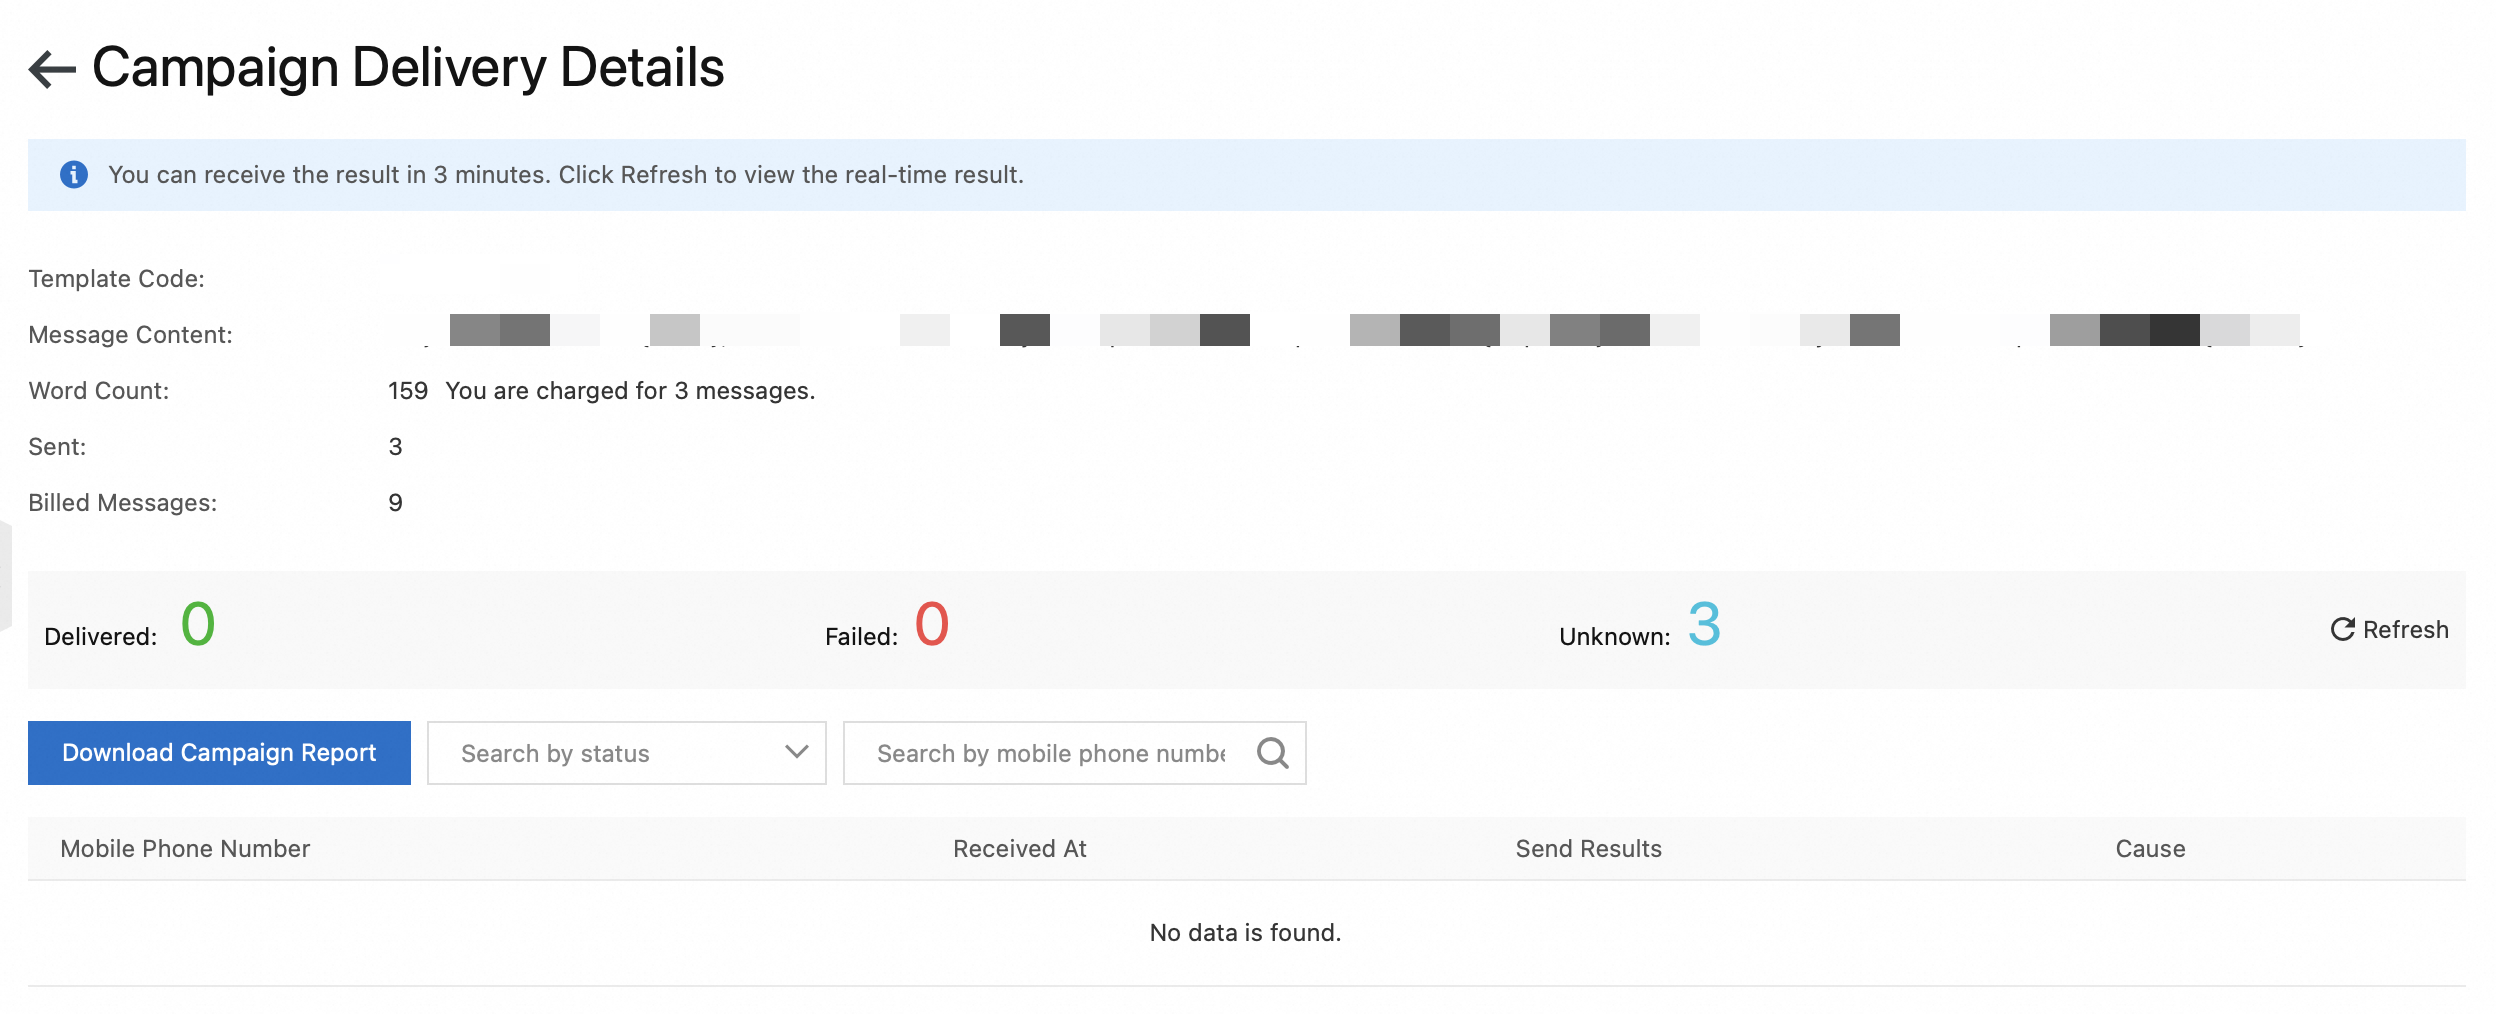
Click the tab. Find your campaign and click Details in the Actions column.
View the details of message sending, including reception time and result.

Check delivery reports
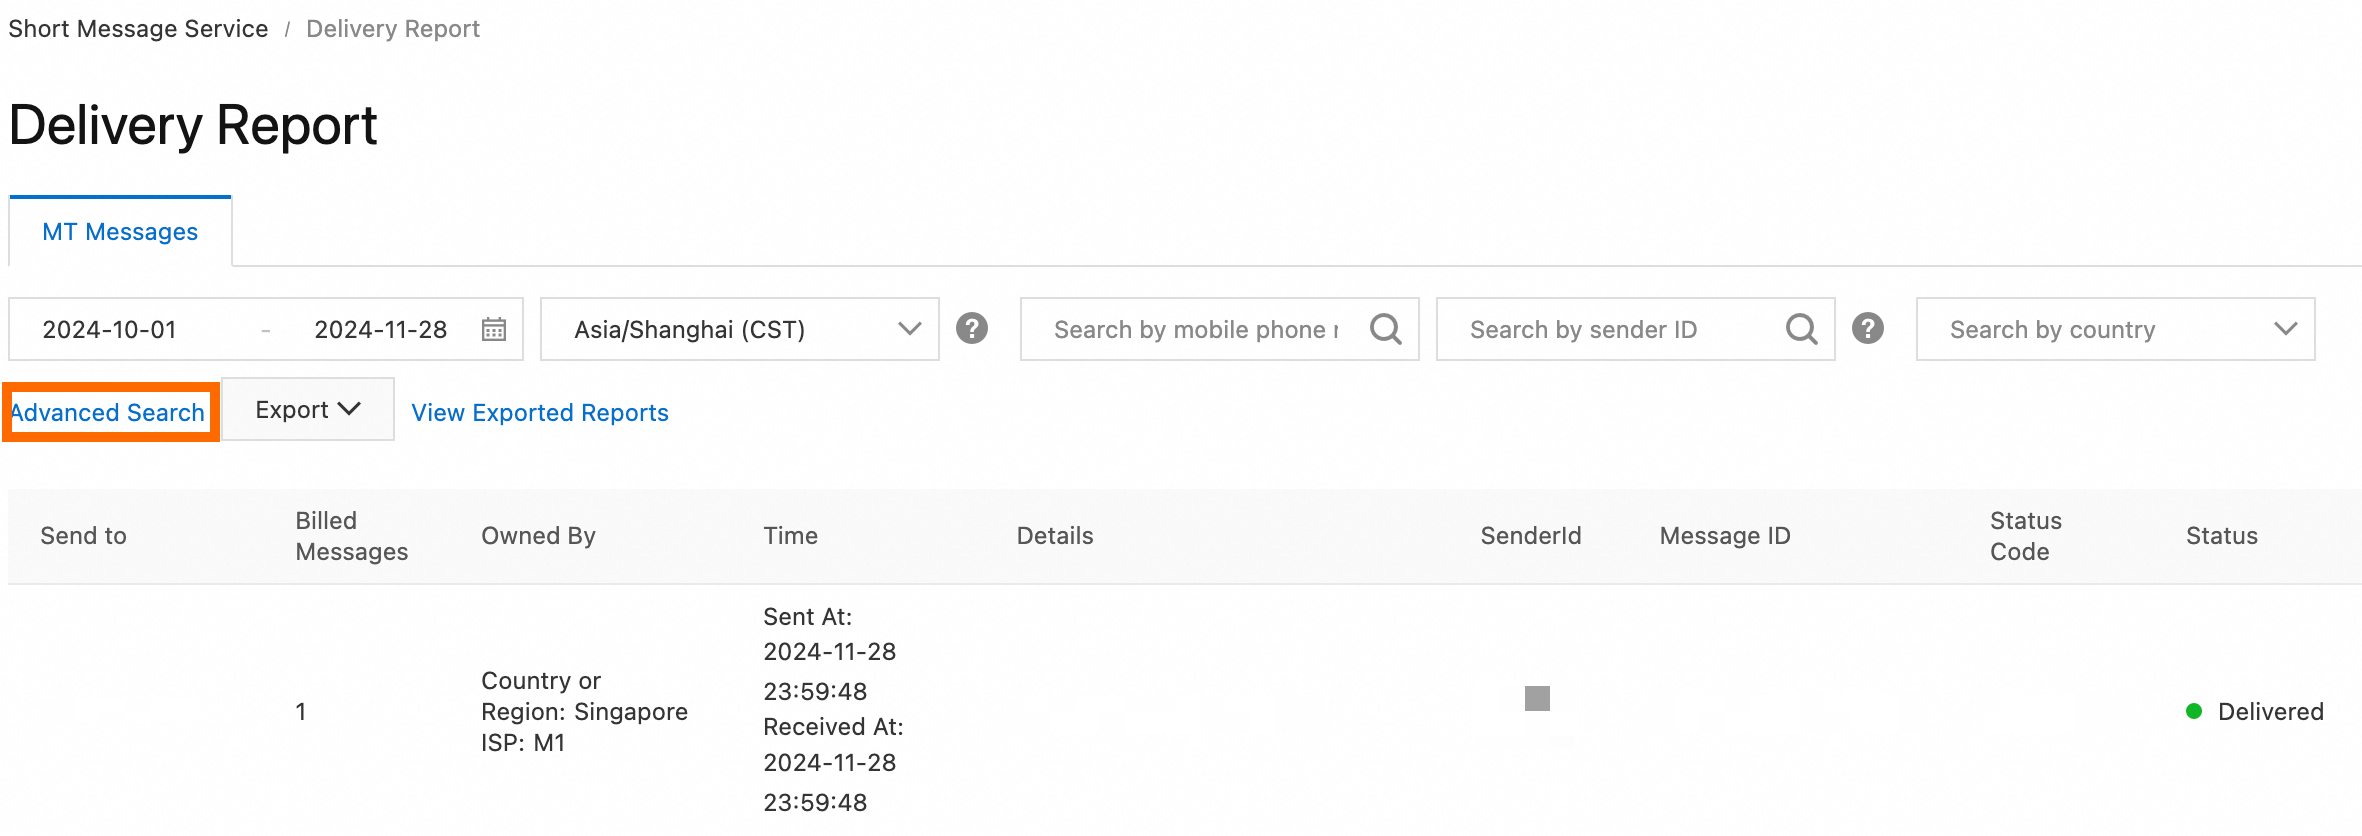
In the SMS console, choose .
You can filter records by various conditions. Click Advanced Search to view all available filters:
Basic search: Filter by send date, time zone, mobile phone numbers, sender ID, and destination country/region.
Advanced search: Filter by Message Content, Carrier MCC & MNC, Delivery Status, Status Code, and Billed Messages.
 Note
NoteDefault time zone: UTC+8.
Available data range: Data from the past 180 days.
You can export the delivery report. For more information, see Query delivery reports.
References
Billing: View the prices of resource packages and the supported destinations. If you have enabled the pay-as-you-go billing model, check the per-message rates for your destinations.
Dashboard: Monitor SMS sending statistics and trends of the Go Globe and Go China services and filter your data for detailed analysis.
Error codes: Find the cause of a failure and troubleshoot it using the corresponding error code.
Send messages: Learn how to send messages to regions outside the Chinese mainland, including Hong Kong (China), Macao (China), and Taiwan (China).
Call the SMS API: Integrate the SMS SDK and call APIs to use core features, such as sending and querying messages.