Application Load Balancer (ALB) supports the HTTP, HTTPS, and Quick UDP Internet Connections (QUIC) protocols and is designed to balance the loads of applications at Layer 7. This topic describes how to create an ALB instance that supports IPv4 to forward requests from IPv4 clients to backend servers.
Prerequisites
A virtual private cloud (VPC) is deployed in the China (Shanghai) region. The VPC is named VPC1. A vSwitch (VSW1) is deployed in Zone E and another vSwitch (VSW2) is deployed in Zone G. For more information, see Create a VPC and a vSwitch.
To deploy ALB within VSW1 and VSW2, pay attention to this: Each upgraded ALB instance is allocated with three IP addresses from VSW1 and VSW2, respectively: One acts as a VIP to provide load balancing services, and the other two as local IP addresses to communicate with backend servers and perform health checks. If VSW1 or VSW2 does not have enough available IP addresses, an error is reported and ALB instances cannot be created. This does not apply to non-upgraded ALB instances.
NoteTo ensure upgraded ALB instances auto-scale resources as expected, we recommend that each vSwitch you specify for them has at least eight available IP addresses.
To ensure upgraded ALB instances properly communicate with backend servers, if any security policies such as iptables rules and third-party security policy software, are configured on your backend servers, we recommend that you configure your backend servers to allow the CIDR block of the vSwitch to which the upgraded ALB instance is connected.
An Elastic Compute Service (ECS) instance (ECS01) is deployed in VSW1 and another ECS instance (ECS02) is deployed in VSW2.
For more information about how to create an ECS instance, see Create an instance by using the wizard.
The following code blocks show how to deploy applications on ECS01 and ECS02:
A domain name is registered, and an Internet content provider (ICP) number is obtained for the domain name. For more information, see Register a domain name and ICP filing process.
The following table describes the configurations of VPC1. The configurations are for reference only.
The following table describes the configurations of ECS01 and ECS02. The configurations are for reference only.
Step 1: Create an ALB instance
Log on to the ALB console.
On the Instances page, click Create ALB.
On the Application Load Balancer buy page, configure the parameters that are described in the following table.
The following table describes only some of the parameters. Use the default values for other parameters. For more information about the parameters, see Create an ECS instance.
Parameter
Description
Region
The region in which you want to create the ALB instance. In this example, China (Shanghai) is selected.
Network Type
Select a network type for the ALB instance. The system assigns public or private IP addresses to the ALB instance based on the selected network type. In this example, Internet is selected.
VPC
Select the VPC where you want to deploy the ALB instance.
Zone
Select at least two zones. In this example, Shanghai Zone E and Shanghai Zone G are selected, and VSW1 in Zone E and VSW2 in Zone G are selected.
IP Version
Select an IP version for the ALB instance. In this example, IPv4 is selected.
Edition
Select an edition for the ALB instance. In this example, Standard is selected.
Instance Name
Enter a name for the ALB instance.
Service-linked Role
The first time you create an ALB instance, click Create Service-linked Role to create the AliyunServiceRoleForAlb role. The policy AliyunServiceRolePolicyForAlb is attached to the service-linked role to allow the ALB instance to access other cloud services. For more information, see System policies for ALB.
Click Buy Now and complete the payment.
Return to the Instances page and select the region where the ALB instance is deployed to view the ALB instance.
Step 2: Create a server group
In the left-side navigation pane, choose .
On the Server Groups page, click Create Server Group.
In the Create Server Group dialog box, configure the parameters and click Create.
The following table describes only some of the parameters. Keep the default values for other parameters. For more information, see Create and manage a server group.
Parameter
Description
Server Group Type
Select a server group type. In this example, Server is selected.
Server Group Name
Enter a name for the server group.
VPC
Select the VPC in which the ECS instances are deployed.
NoteSelect the VPC in which the ALB instance is deployed.
Backend Server Protocol
Select a backend protocol. In this example, HTTP is selected.
Scheduling Algorithm
Select a scheduling algorithm. In this example, Weighted Round-robin is selected.
Session Persistence
Enable or disable session persistence. In this example, the default value is used. Session persistence is enabled.
Backend Persistent Connection
Specify whether to enable the persistent connection feature. In this example, the persistent TCP connection feature is disabled.
Health Check
Specifies whether to enable the health check feature. In this example, the health check feature is enabled.
Health Check Settings
After you enable the health check feature, click Modify to configure the health check settings.
In the The server group is created. message, click Add Backend Server.
On the Backend Servers tab of the page that appears, click Add Backend Server.
In the Add Backend Server panel, select ECS01 and ECS02 and click Next.
In the Ports/Weights step, specify a port and a weight for the ECS instances and click OK.
In this example, both ECS instances use the port number 80 and the default weight 100.
Step 3: Configure a listener
In the left-side navigation pane, choose . On the Instances page, click the ID of the ALB instance that you want to manage.
Click the Listener tab and then click Create Listener.
In the Configure Listener step, configure the parameters and click Next.
The following table describes only some of the parameters. Keep the default values for other parameters. For more information, see Add an HTTP listener.
Parameter
Description
Select Listener Protocol
Select a listener protocol. In this example, HTTP is selected.
Listener Port
Specify the listener port to receive and forward requests to backend servers. In this example, port 80 is specified.
Listener Name
Enter a name for the listener.
Advanced Settings
In this example, the default settings are used. You can click Modify to modify the settings.
In the Server Group step, configure the Server Type parameter, select a server group based on the specified Server Type, confirm the backend servers, and then click Next.
In the Configuration Review step, confirm the configurations and click Submit.
Click OK to return to the Listener tab. If the listener status in the Health Check Status column is Healthy, ECS01 and ECS02 can process requests forwarded by the ALB instance.
Step 4: Create a CNAME record
In actual business scenarios, we recommend that you use CNAME records to map custom domain names to the domain name of your ALB instance.
ALB domain names have been upgraded. You can no longer acess ALB instances using their domain names.
In the left-side navigation pane, choose .
On the Instances page, copy the domain name of the ALB instance.
Perform the following steps to create a CNAME record:
NoteIf your domain name is not registered by using Alibaba Cloud Domains, you must add your domain name to Alibaba Cloud DNS before you can configure a DNS record. For more information, see Manage domain names.
Log on to the Alibaba Cloud DNS console.
On the Public Zone page, find your domain name and click Settings in the Actions column.
On the Settings tab of the domain name details page, click Add Record.
In the Add Record panel, configure the parameters and click OK. The following table describes the parameters.
Parameter
Description
Record Type
Select CNAME from the drop-down list.
Hostname
Enter the prefix of the domain name. In this example, @ is entered.
NoteIf you use a root domain name, enter
@.Query Source
Select Default.
Record Value
Enter the CNAME, which is the domain name of the ALB instance.
TTL
Select a time-to-live (TTL) value for the CNAME record to be cached on the DNS server. In this example, the default value is used.
Step 5: Test network connectivity
Test the connectivity between a client, ECS01, and ECS02. In this example, a random client that has access to the Internet is used. Enter the domain name in the address bar of a browser, for example, http://<domain name>. Refresh your browser multiple times. The results show that the requests are distributed between ECS01 and ECS02.
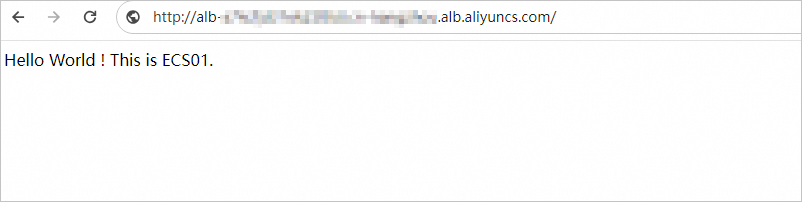
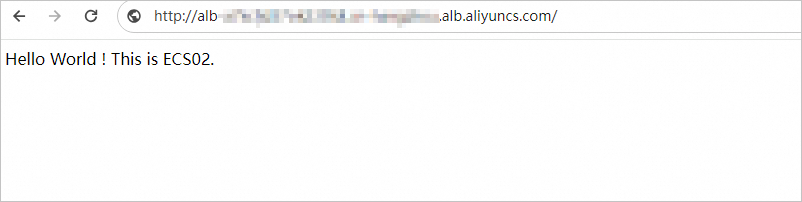
The preceding results indicate that the client can access the backend servers, and the ALB instance distributes requests to the backend servers based on the round-robin algorithm.
Release resources
Release the ECS instances and the security groups.
Delete ECS01 and its security group:
Log on to the ECS console. In the top navigation bar, select the region in which ECS01 instance resides, and click the
 icon on the right side of ECS01. In the dialog box that appears, select Release to immediately release the instance.
 Log on to the ECS console. In the top navigation bar, select the region in which ECS01 resides, select the security group of ECS01, and then click Delete to delete the security group.
Repeat the preceding steps to delete ECS02 and its security group.
Delete the DNS record
For more information, see Delete a DNS record.
Release ALB resources:
Log on to the ALB console. In the top navigation bar, select the region of the ALB instance. Find the ALB instance that you want to release, click the
icon in the Actions column, and then click Release. In the Release Instance message, click Confirm. For more information about how to remove backend servers, see Remove a backend server.
For more information about how to delete a server group, see Delete a server group.
Release VPC resources:
Log on to the VPC console. In the top navigation bar, select the region where the VPC resides.
Click Delete in the Actions column. The system checks for any associated cloud resources or relevant configurations. If associated resources are found, you must release them completely before the VPC and vSwitch can be deleted.
References
For more information about the use scenarios and components of ALB, see What is ALB?
For more information about the features of ALB, see Features.
For more information about the regions in which ALB is available, see Regions and zones.
For more information about ALB quotas and quota increases, see Limits.
For more information about the billing of ALB, see ALB billing.